Tag Archives: cooking

About Cox Honeyland found at Smith and Edwards

Brand Spotlight: Cox Honeyland – Why We LOVE Honey

- posted by Jerica Parker

The Cox family has been in the honey business for over 100 years.

Henderson and Marion Cox started in the bee industry in St. George, Utah. Since then, the family has carried the tradition of bee keeping and honey production, and in 1989, Cox Honeyland opened for business. Now, the fourth generation of family is running the business in Logan, Utah, with more things than just honey, including lotions and other food items.

Here at Smith & Edwards, we have proudly carried Cox Honeyland for the past 20 years.

Honey has so many benefits!

Besides being all natural, healthy, yummy and sweet, it makes a great food storage item!

On top of that, there are other cosmetic uses that not many know about.

What’s even better? Finding honey that is harvested locally!

Cox Honeyland 12-ounce Honey Bear

Why is local honey better?

We love the local Cache County honey from Cox Honeyland.

Have you ever had honey that tastes or looks a little different than other jars? Honey bees fly as much as 55,000 miles within a 5 mile radius, all the while collecting nectar from flowers. The nectar gathered from a specific region will give the honey produced a slightly different taste and color. Cox Honeyland honey has three different honey varieties: Clover-alfalfa (lighter color and mild taste), Cache Valley (darker with more flavor), and Mountain Snowberry (mountain wildflower flavor).

So wherever you get your honey from, it will be slightly different than honey from another place.

Fight those allergies!

A benefit of getting local honey is that it is said to help boost immunity for seasonal allergies. Naturally made, honey is healthy for you.

Tip: Have a sore throat? Mix honey with a spoonful of lemon juice in a mug filled with steaming hot water to soothe your throat and relieve congestion.

Pure and Healthy

You can tell honey is pure when it crystalizes. That means that there are no preservatives added to the honey. The great thing is that honey never expires! (Which makes it great as a food storage item!) When it does crystalize, simply place the jar in a pan of warmed water and it will soften back to its smooth texture.

What else?

Honey is great for various different uses, some can be surprising! As a natural sweetener, honey makes a great substitute in recipes for sugar. Using this replacement in some recipes reduces up to half of the sugar a recipHoney massage bars made by Cox Honeyville e calls for.

Cox Honeyland has recipes using honey – View them here!

Honey also has cosmetic benefits. “My dad would have us wash our faces with crystalized honey as kids. When honey crystalizes, it makes a great natural exfoliator”, Maleesa with Cox Honeyland told me. You can also use the beeswax to make your own lip balms, lotions, massage bars, and more.

Now that you know why we love honey so much, it’s time to get your own! Whether it’s for your food storage, cosmetic benefits, or just to enjoy now, local honey is the best!

Shop Local Honey on SmithandEdwards.com

Six Steps to Home-Canned Applesauce!

How to Can Applesauce in 6 Easy Steps!

- posted by Jerica Parker

Fall is here! The leaves are falling, the wind is cooler, and it’s time to get ready for winter. One of my favorite ways is by storing all the delicious food we have enjoyed in the summer, so we can have it in the winter as well.

Vickie Maughan, our canning and housewares department manager, shared with us her great recipe for making canned applesauce at home. And we want to share it with you!

The perk of this recipe, is you can eat it right away, storing leftovers in the fridge – and you can also can the applesauce to enjoy in the winter. Her tips and tricks are right here in 6 easy steps:

How to Can Applesauce

  1. Start by washing your apples. Peel them, and then slice them. Vickie used a peeler machine to take off the peel and slice them. Get your own peeler here!
    IMG_2032
  2. Cook the apples in 3/4 cup of water on medium heat. When they reach a boil, lower the heat and steam them until the apples are tender.
    IMG_2036
    IMG_2039
  3. Then, using an immersion blender, blend up the apples until it reaches your desired consistency of applesauce.
    IMG_2042

If you want to enjoy it right away, finish up by sweetening and seasoning however you like it. If you would like to continue to can and store for food storage, continue with the next steps.

  1. When you have reached desired consistency, sweeten and season to how you like.
  2. Next, fill the jars. Using a funnel is so helpful for easy cleanup! Wipe clean to avoid problems with sealing the lids.
    IMG_0436.JPG
  3. Tighten lids and place jars in pot with water just above the level of the jars. Bring to a boil for 20 minutes. Careful! When you take out the jars, they will be very hot. Use a good jar lifter to protect your hands.
    IMG_0440.JPG
    IMG_0444.JPG

And voilà! Delicious applesauce to enjoy and share with your family and friends.

But you better hurry! You have just under 2 weeks left in apple season to get your apples for delicious applesauce. Stop at Pettingill’s and get your apples soon! They are closing for the season on Halloween, October 31.

Make sure to like Pettingill’s Fruit Farm on Facebook, and then take a peek at when we stopped in to Pettingill’s in August.

Explore Canning & Dehydrating supplies at Smith & Edwards!

How to Freeze Corn

How to Freeze Corn – Plus Easy Corn-Cutting Method!

- posted by Jerica Parker

What do you do with all that left-over corn you made for dinner? Throw it out? Stick it in the fridge, forget about it, and then throw it out? Not anymore!

With this easy video & guide, you don’t need to let the words “canning” or “food storage” intimidate you. Melissa in our Housewares department will walk you through the steps.

Easy Frozen Corn Storage: Watch How!

Now, this is something I have done with my family since I was a little girl. We have our own garden and we love corn. So when it is corn season, we all get together to freeze our own corn for storage. It’s so simple and the corn comes out with that same fresh-from-the-garden taste.

How To Freeze Corn in 6 Steps

Here are some quick and easy steps for freezing your corn:

  1. Shuck the corn.
    • Shucking means to take off the husk and the silk hairs. As Melissa shows in the video, one easy method is to hold the corn between your knees and pull the husk toward your body.
      Shucked corn
  2. Wash the ears of corn and remove any remaining silk.
    Washing corn before boiling
  3. Blanch (or boil) the corn in boiling water for about 6 minutes.
    • The reason behind blanching the corn, is to stop the enzymes that can make the corn taste bad later. Cooking it first helps preserve the flavor when you want to eat it later on.
  4. Place the corn in ice water (using a pair of tongs to protect your hands) to slightly cool them off, just until they’re cool enough to handle.Resting the corn in an ice bath
  5. Cut the corn off the cob.
    • This part is optional. If you like, you can freeze them whole, on-the-cob. After step 4, you would wrap them in plastic wrap and then put those in freezer bags to freeze. If you prefer cut corn then you can take a knife and cut the kernels off the cob to freeze. In my family, we have always cut the corn off. It’s your choice!
    • Editor’s Tip: To cut the corn off the cob, you can put them in the center of a Bundt pan. This will hold them as you cut off the corn and it will fall right into the pan. Or a simple board with nails pounded through (about 5″ apart) can hold the cob steady while you cut.
      To make a nailboard, simply take an extra shelf or spare board. Paint it, then hammer a 4" nail through it. Then you can simply set each ear of corn on the nail, and safely cut the corn.

      To make a nailboard, simply take an extra shelf or spare board. Paint it, then hammer a 4″ nail through it. Then you can simply set each ear of corn on the nail, and safely cut the corn.

  6. Now, simply scoop the kernels you just cut off into freezer bags.
    • You can put 1 1/2 to 2 cups in a bag, depending on how big you want your portion sizes to be when you eat them. When the bags are flattened to about 1/2 – 1 inch thick, you can stack them nicely in your freezer to make the best use of freezer space.

More Tips on the Freezing Process

How to freeze corn in 6 easy steps!

  • 11 1/2 dozen large ears of corn should give you about 58 cups of corn to freeze.
  • Vickie, Kitchen Dept. Manager at Smith and Edwards, says to lay the bag with corn flat as you zip it up. When you have about an inch left to zip, squeeze the air out. “If it has air in it in the freezer, it is more likely to get freezer burn,” she says.
  • Melissa has another idea on how to get the air out. She says when you have the full bag, you can slowly lower it into a lot of water, just until it reaches the zipper line. The water on the outside of the bag helps push the water out and you can seal it while still partly in the water.
  • Don’t put too many bags in the freezer at once! If you put a lot of warm things in the freezer, it may begin to thaw out your other frozen foods. But if you put in just a few at a time until they’re frozen, they will freeze faster and won’t thaw any of your other food.

Now you have corn to eat for the next few months! It’s a great and easy way to start up your own food storage without the complicated recipes or big pressure cookers.

We would love to hear back from you! If this worked for you, or if you have any other tips or secrets to help others in starting their canning & food preserving, please leave a comment below.

If you liked this, you will LOVE our other frozen food storage tips! Make sure you check out How to Freeze Beets and How to Freeze Cherries.

How to use a Pickling Crock

How to use a Pickling Crock: the Art & Science

- posted by Rose Marion
Teresa with USU Extension service

Teresa with USU Extension service helped answer some common fermenting & pickling questions for us!

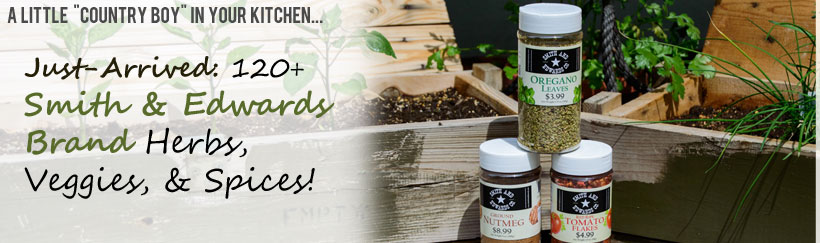
When people think of pickles, large quart jars of olive-colored pickles come to mind. But there’s another way to make pickles that takes a lot less heat, a lot more time, and some say, yields a lot tastier results:

Fermenting Pickles and Vegetables

When you make pickles in a traditional pickling crock, in some ways it’s much less work: simply prepare your pickles, load them in the crock according to the recipe, and give them a few weeks.

This yields crisp, crunchy, delicious pickles!

And you can make sauerkraut and more fermented dishes the same way.

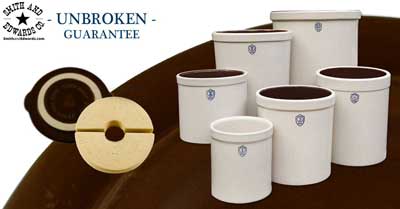
Our favorite brand of stoneware pickling crocks are the Ohio Stoneware line (click to shop), which is make in the USA in Zanesville, Ohio. And when you order yours from Smith & Edwards, we guarantee they arrive in perfect condition!

We carry lids, weights and pickling crocks in a huge range of sizes, as well as the very-popular 3-gallon fermentation set.

What size Pickling Crock do I need?

The US Department of Agriculture recommends a 1 gallon container for each 5 pounds of fresh vegetables. So a 5-gallon stone crock is an ideal size for fermenting about 25 pounds of fresh cabbage or cucumbers, according to the USDA Complete Guide to Home Canning.

Cucumbers and cabbage must be kept 1-2 inches under brine while fermenting, so weights can be instrumental.

Make sure to wash your crock, weights, and lid with hot soapy water, and rinse them well with very hot water, before adding your vegetables.

Ohio Stoneware crocks at Smith & Edwards

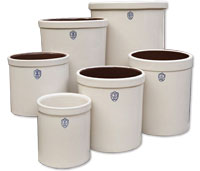
You can get a pickling crock for any size project – from one to five gallons – and the weights & lids to match.

Why & How to use a Pickling Crock

We were lucky to have Teresa Hunsaker from the USU Extension Service here at Smith & Edwards this summer to check pressure canner lids, as well as give tips on the fermenting process. Fermenting is only growing in popularity as people return to the traditional method, as well as gain interest in probiotics and the health benefits of fermented foods for the digestive system.

Read on for common fermenting mistakes, how to process your vegetables after fermenting them, and a fermented Dill Pickle Recipe!

Pickling Crock Common Mistakes

One of the common problems Teresa sees has to do with salt: especially people not using enough salt.

Salt is hugely important with shredded vegetables and pickles: otherwise, the brine goes scummy and your lovely batch of pickles or sauerkraut is lost. It’s so important to use the right salt ratio!

Use your standard pickling salt: you can use both iodized and noniodized table salt. Noncaking materials added to table salts may make your brine cloudy. USDA advises against flake salt because it varies in density. Reduced-sodium salts may be used in quick pickle recipes; this may give your pickles a slightly different taste than expected. But, reduced-sodium salt is not recommended for fermented pickles.

Layer your vegetables, then salt, then vegetables, then salt: this is especially important with cabbage.

Another mistake Teresa sees is not having your crock at the right temperature. Some people will store their pickles in the basement as they ferment, or in a room that gets too hot.

The temperature should be between 68-74 degrees. That’s because if it’s too hot, it will process too fast and produce scummy brine. Too cold, and the process will take too long.

The traditional way to make kimchi is actually to bury the fermentation pot in the ground, to keep the temperature constant!

Fermenting is both an art and a science!

How Long does Fermenting Take?

The length of time needed for your batch of pickles or sauerkraut depends on your recipe. It takes about 3 weeks for sauerkraut, and there’s a good recipe out there for 21-day pickles.

Follow your recipe exactly, including changing out the brine: with the 21-day pickles, you need to change the brine every few days.

OK, they’re done… Now what?

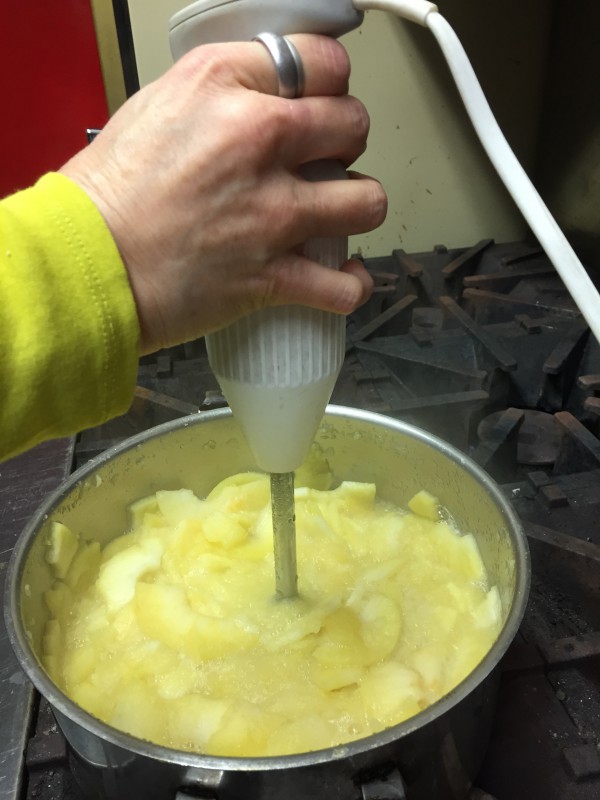
You can can your sauerkraut or pickles after they’re done: just process them. For sweet pickles, it just takes 15 minutes; for whole dills, about 25 minutes does the trick at this altitude.
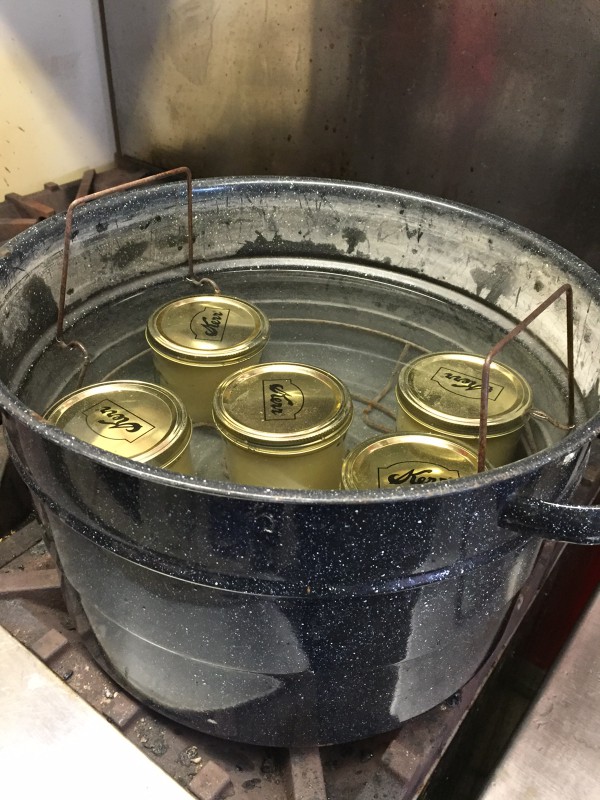
Or, you can waterbath them – check your local recommendations and keep them under 185°.

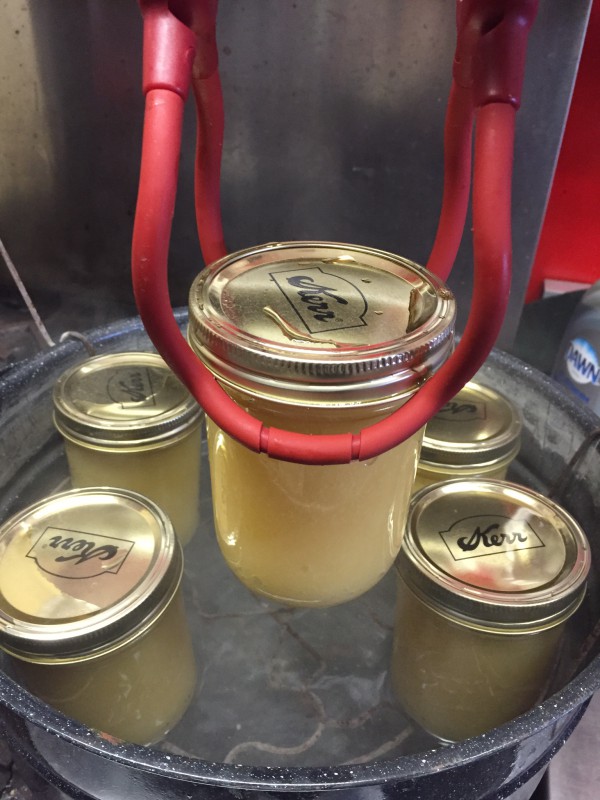
But you don’t HAVE to can them at all. Your crock pickles can hold in the fridge for weeks!

Ohio Stoneware Fermentation Crock

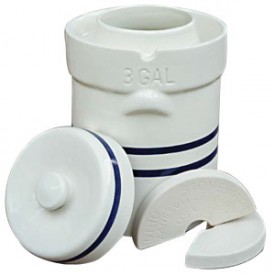
This 3-gallon fermentation crock features a channel for the lid to rest in, and comes with matching weights.

What’s the difference between pickling crocks and fermentation crocks?

Either style works well.

The fermentation style is designed for keeping the vegetables down better, and it features vents. You do want some air circulation to temper the temperature.

Dill Pickles Recipe for Pickling Crocks

Use the following quantities for each gallon capacity of your container.

  • 4 lbs of 4-inch pickling cucumbers
  • 2 tbsp dill seed or 4 to 5 heads fresh or dry dill weed
  • 1/2 cup salt
  • 1/4 cup vinegar (5%)
  • 8 cups water and one of more of the following ingredients:
    • 2 cloves garlic (optional)
    • 2 dried red peppers (optional)
    • 2 tsp whole mixed pickling spices (optional)

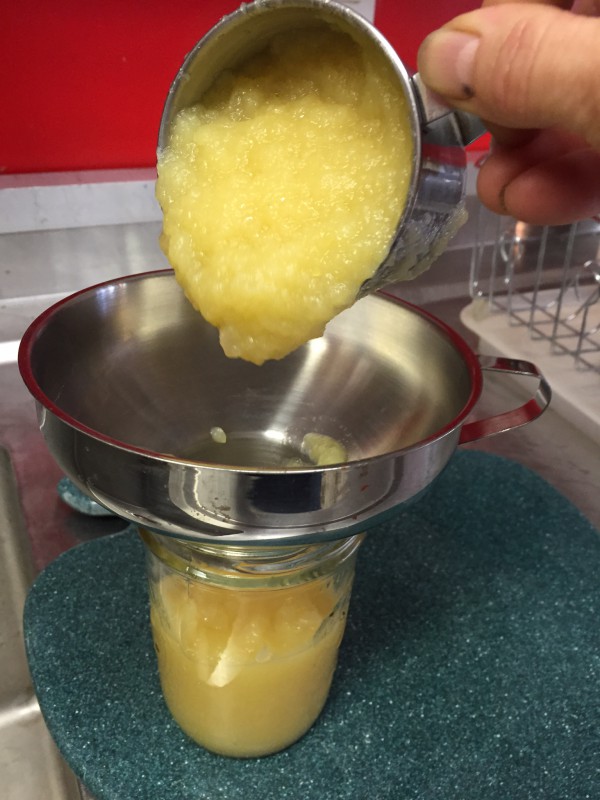
Procedure: Wash cucumbers. Cut 1/16 inch slice off blossom end and discard. Leave 1/4-inch of stem attached. Place half of dill and spices on bottom of a clean, suitable container. Add cucumbers, remaining dill, and spices. Dissolve salt in vinegar and water and pour over cucumbers. Add suitable cover and weight. Store where temperature is between 70° and 75° F for about 3 to 4 weeks while fermenting. Temperatures of 55° to 65° F are acceptable, but the fermentation will take 5 to 6 weeks. Avoid temperatures above 80° F, or pickles will become too soft during fermentation. Fermenting pickles cure slowly. Check the container several times a week and promptly remove surface scum or mold. Caution: If the pickles become soft, slimy, or develop a disagreeable odor, discard them. Fully fermented pickles may be stored in the original container for about 4 to 6 months, provided they are refrigerated and surface scum and molds are removed regularly. Canning fully fermented pickles is a better way to store them. To can them, pour the brine into a pan, heat slowly to a boil, and simmer 5 minutes. Filter brine through paper coffee filters to reduce cloudiness, if desired. Fill hot jar with pickles and hot brine, leaving 1/2 inch headspace. Remove air bubbles and adjust headspace if needed. Wipe rims of jars with a dampened clean paper towel. Adjust lids and process as below, or use the low temperature pasteurization treatment.

– recipe from USDA’s Complete Guide to Home Canning, Guide 6: Fermented Foods and Pickled Vegetables

Want to learn how to make sauerkraut in a fermentation crock? Enter your email address to get access to a free printable Fermented Sauerkraut recipe!

Explore Pickling Crocks…

Smith & Edwards Pickling Crocks

Over 120 Brand Name Smith and Edwards Spices!

- posted by Rebecca Adams

Smith and Edwards has everything you need, if we can find it. Why not have our own line of affordable spices, seasonings, rubs, herbs, and air dried vegetables?

From the freshest ingredients comes over 120 spices that are must haves for your kitchen.

A few of the Smith and Edwards line up. Oregano, nutmeg, and tomato flakes!

A few of the Smith and Edwards line up. Oregano, nutmeg, and tomato flakes!


You’ll find new ways to use these spices following our Pinterest board, For Your Kitchen. New recipes are added weekly!


Nutmeg Spice and Tomato Flakes

Nutmeg Spice and Tomato Flakes


You’ll find all the spices by clicking this link here. You’ll find more ideas for your kitchen by visiting our kitchen and housewares section on our website!

I love my raised garden! Click to find these vintage ammo boxes and make them your own too!

Doughy Maker samples

Make Sweet Campfire Treats with the Doughy Maker

- posted by Rose Marion

Last Saturday, Erik from DoughyMaker was generous enough to stand at the entrance of Smith & Edwards, celebrating our 67th Anniversary and handing out campfire treats!

Erik and his family have a lot of experience feeding Scout Camp and Girls Camps full of hungry mouths out in the woods here in Utah.

If you’ve been out with hungry campers, you know time is of the essence! Erik and his family came up with this amazing way to cook some sweet treats in a quick amount of time to keep the campers happy – and your family will love it, too.

A single Doughy Maker will make 10 biscuits, donut holes, or treats at a time.

Erik recommends Pillsbury dough to make campfire doughies: the baking powder in them will mean a faster cooking time and a lighter treat than others, like Rhodes.
Use Pillsbury biscuit dough to make Doughies

Simply pop the biscuits in:

Putting biscuits in the Doughy Maker

Then clamp the muffin tins together, and heat ’em up.

Erik’s perfected method is over a flame, 3-4 minutes, flipping from one side to the other every 5 seconds.

Heat the Doughies on one side, then the other!Heat the Doughies on one side, then the other!

The DoughyMaker is designed for a campfire, and you can also use it on your gas grill, barbecue, or Camp Chef. (These summer days in Utah, you could probably use the hood of a hot car, too!)

Ok, check ’em! When the biscuits are a golden brown, they’re ready:

Checking the Doughies

Here’s our favorite recipe: Cinnamon & Sugar Doughies.

Drop the hot doughies in melted butter:
Melted butter for DoughiesMelted butter for Doughies
Then roll them around in cinnamon & sugar:
Roll in Cinnamon and Sugar
Rolling a doughie in cinnamon and sugar

Mmmmm! What a perfect camping treat!

Enjoying Doughies!

Enjoying Doughies!Can you imagine what your family can come up with? Marshmallow s’mores, jalepeno doughies, cheese-stuffed doughies, carmel pecan, blueberry biscuits…. YUM!

Get a DoughyMaker of your very own here:

Doughy Maker

Doughy Maker at Smith & Edwards – available online and in-store!

Check out Canning and Cooking supplies online!