Author Archives: Jerica Parker

About Jerica Parker

Jerica's been active her whole life, from dance to hiking trips with her family. Her most recent adventure was a year in Peru. Jerica's part of Smith & Edwards' web team and writes about ways for you to plan your next adventure.

Snap to Vent by Zigguraut

Brand Spotlight: Snap-to-Vent Dryer Connectors

- posted by Jerica Parker

What is the most frustrating thing about installing your dryer? For me, it’s all the hoses and attachments, and then, getting them to fit in the laundry room without crushing them.

Even more frustrating is how awkward it is to try to lean over your dryer with the hose clamp and screwdriver to install or clean the ventilation hose.

Luckily for you, and for me, Ziggurat Products came up with a solution to our problem. Snap-to-Vent connectors make this job quick and easy!

How the Snap-to-Vent system Works

When pushing your dryer back against the wall, sometimes the hose can be crushed and this prevents necessary ventilation. Both Snap-to-Vent’s products prevent against crushed dryer hoses and are super easy to install.

The best part about Ziggurat Products company is that it’s local, right here in Kaysville, Utah! Check out the Snap-to-Vent 90-Degree and Snap-to-Vent Straight connections on SmithandEdwards.com.

If your Clothes Dryer vents straight to the duct: Straight Connector

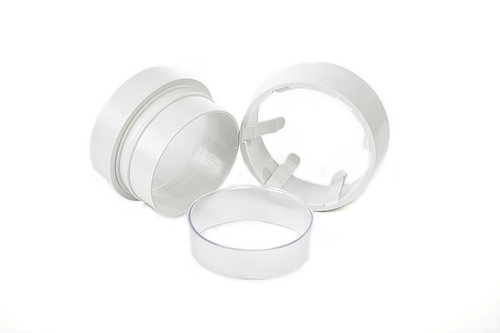
If your dryer duct and wall duct are relatively close together, you will want the Snap-to-Vent Straight design connector. This is an easy connection for installing your dryer, and if you ever need to take it back apart for maintenance or cleaning. Simply pre-connect Snap-to-Vent Straight before you go behind your dryer for installation. Place the snap connector over dryer hose with tines on the inside of the hose. Take the straight and place it so that the tines push against the hose holding the connector tight to the dryer hose. Take the seal ring and either put it around the duct or in the straight and press into the duct until it creates an air tight seal. Easy enough!
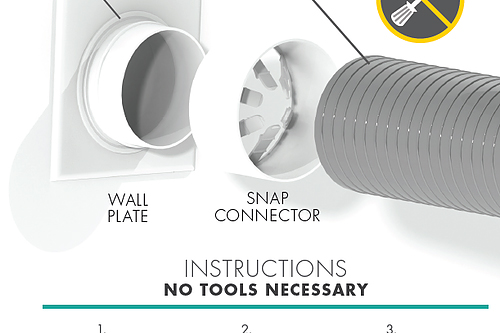
If your Clothes Dryer hose has to vent on another wall, use the 90° Elbow

The Snap-to-Vent 90-degree Elbow connection helps to avoid smashing your hose by connecting the hose at a 90-degree angle to your dryer. It comes with easy instructions: Pre-assemble the hose to the snap connector and the snap connector into the 90-degree elbow and snap together. Take the seal ring and pre install onto dryer or wall duct and press the 90 elbow into the dryer duct or wall duct. And voila! The elbow connector can push right up against the wall and still keep your hose protected and working how it should.
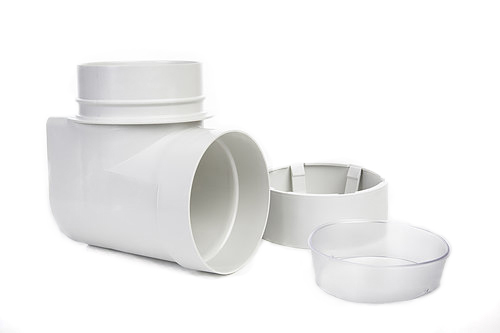
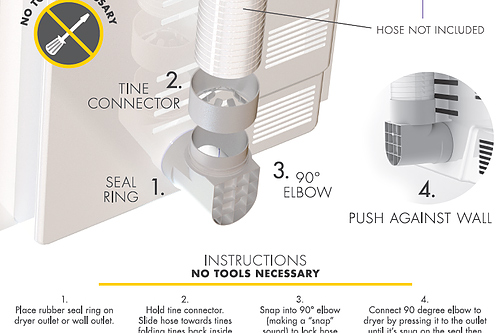
Having a clean and clear vent reduces the risk of fires and improves the efficiency of your dryer. With no tools necessary and less time and confusion during installation, how could you not love Snap-to-Vent!

John's leaf blower tips for spring troubleshooting

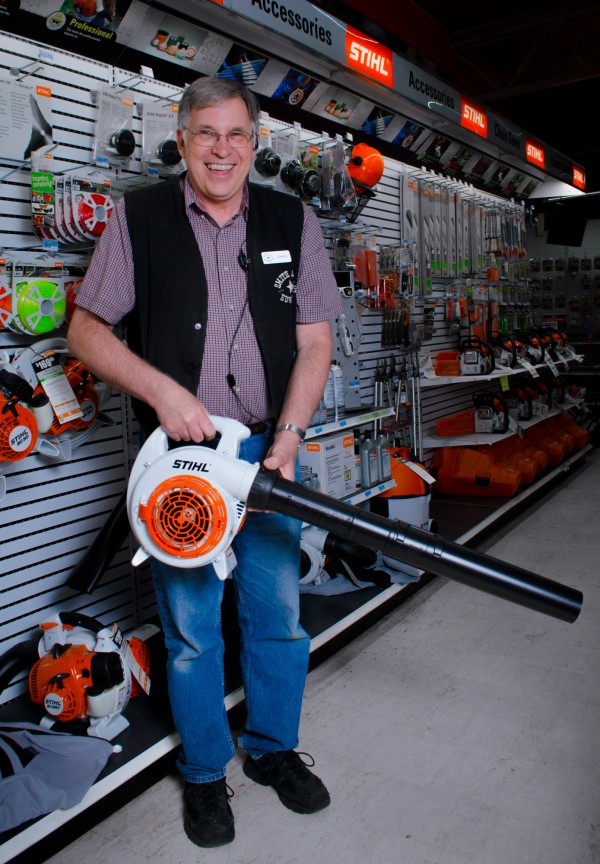
John’s 4 Stihl Leaf Blower Tips

- posted by Jerica Parker

After a long, cold winter, it’s time to clean up. Planting new flowers, mowing the lawn – all the little things to make your yard beautiful again. It’s the time of year to break out all our lawn care equipment again.

As people are preparing for the summer, we often get questions about troubles getting all the tools tools to start up after long, cold winter storage.

Tool Troubleshooting: 4 Leaf Blower Tips

Many people are ready to use their gas powered leaf blowers, but it can be hard to get them started after winter. John, part of our team in the Lawn & Garden department, has thought of 4 possible solutions for this:

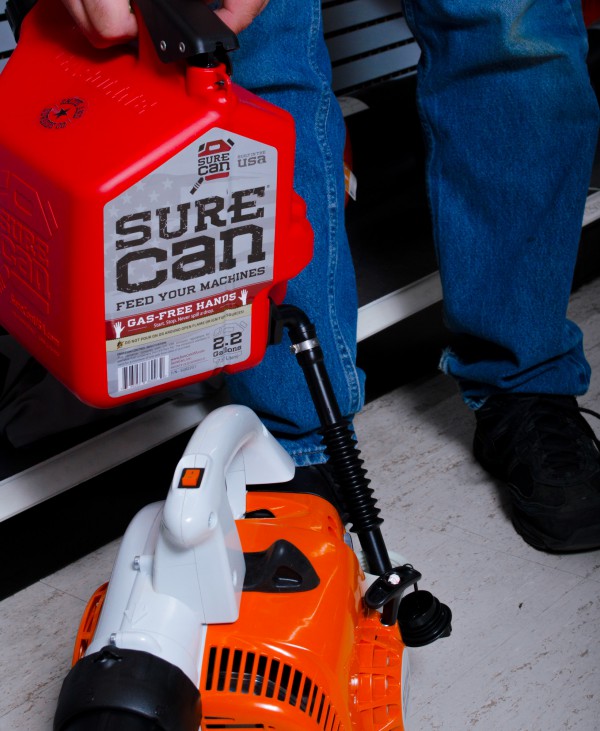
  1. Stale fuel. Fuel doesn’t last forever. If it doesn’t get used, it can get old and stop functioning how it’s supposed to. Try refilling with clean, fresh fuel. Check out the best EPA-compliant fuel cans we’ve found.
    Try adding fresh fuel to your blower!
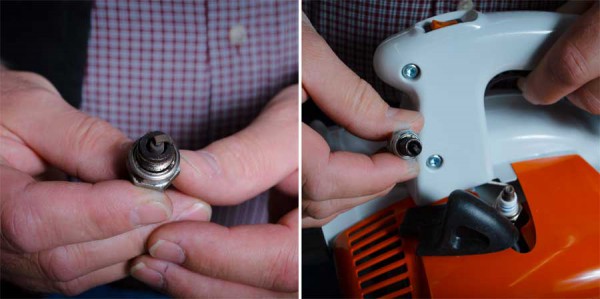
  2. Spark plugs. This is a very common solution for blowers not starting. Check your spark plugs, and if any of them have build-up, it’s time for a replacement.
    Check your spark plugs on your leaf blower!
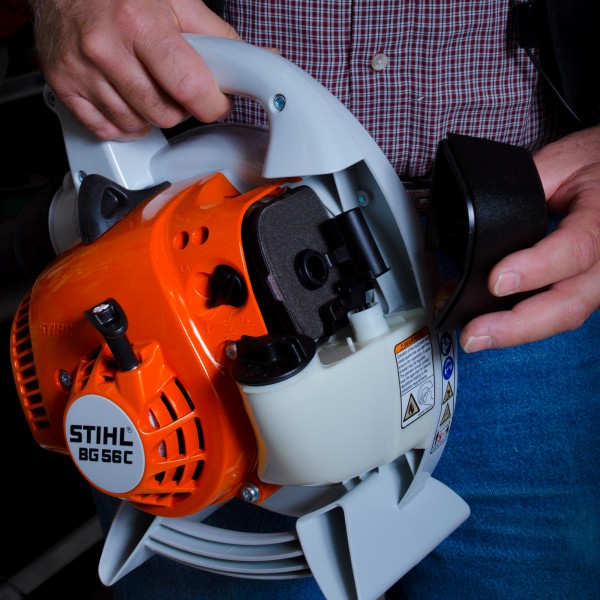
  3. Air filter. Check that your air filter is clean and not plugged up. If not, you know it’s time for a change.
    Check your leaf blower's air filter
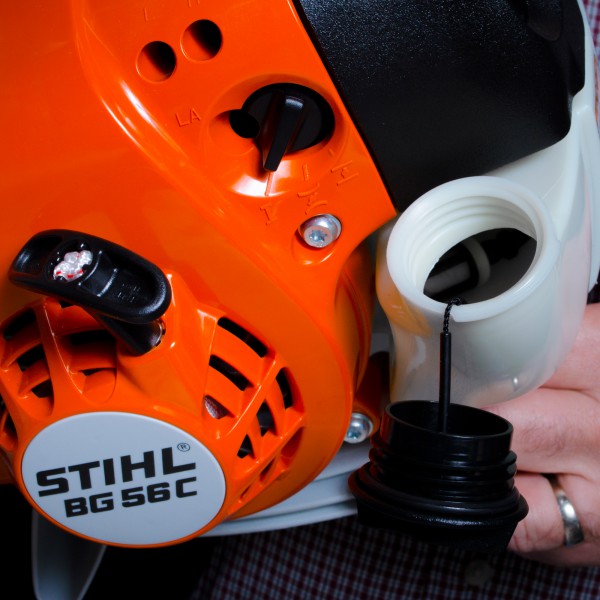
  4. Fuel filter. Not as common, but equally a potential solution. Check that your fuel filter isn’t clogged up. If that’s the case, replace it with a new filter.
    Check that your leaf blower's fuel filter isn't clogged!

Note: Not all models of Stihl Gas Powered Leaf Blowers are the same. Check for your Stihl® model manual here.

John and the Stihl leaf blowers at Smith & Edwards

Thanks for the leaf blower tips, John!

Thanks John! These are his best tips, and if these don’t work, you can consult your blower model’s manual for more advice here at stihlusa.com.

Photos by Rose Marion.

About Cox Honeyland found at Smith and Edwards

Brand Spotlight: Cox Honeyland – Why We LOVE Honey

- posted by Jerica Parker

The Cox family has been in the honey business for over 100 years.

Henderson and Marion Cox started in the bee industry in St. George, Utah. Since then, the family has carried the tradition of bee keeping and honey production, and in 1989, Cox Honeyland opened for business. Now, the fourth generation of family is running the business in Logan, Utah, with more things than just honey, including lotions and other food items.

Here at Smith & Edwards, we have proudly carried Cox Honeyland for the past 20 years.

Honey has so many benefits!

Besides being all natural, healthy, yummy and sweet, it makes a great food storage item!

On top of that, there are other cosmetic uses that not many know about.

What’s even better? Finding honey that is harvested locally!

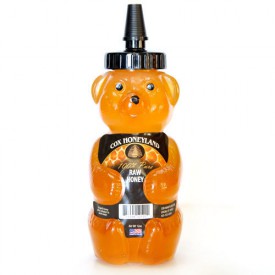
Cox Honeyland 12-ounce Honey Bear

Why is local honey better?

We love the local Cache County honey from Cox Honeyland.

Have you ever had honey that tastes or looks a little different than other jars? Honey bees fly as much as 55,000 miles within a 5 mile radius, all the while collecting nectar from flowers. The nectar gathered from a specific region will give the honey produced a slightly different taste and color. Cox Honeyland honey has three different honey varieties: Clover-alfalfa (lighter color and mild taste), Cache Valley (darker with more flavor), and Mountain Snowberry (mountain wildflower flavor).

So wherever you get your honey from, it will be slightly different than honey from another place.

Fight those allergies!

A benefit of getting local honey is that it is said to help boost immunity for seasonal allergies. Naturally made, honey is healthy for you.

Tip: Have a sore throat? Mix honey with a spoonful of lemon juice in a mug filled with steaming hot water to soothe your throat and relieve congestion.

Pure and Healthy

You can tell honey is pure when it crystalizes. That means that there are no preservatives added to the honey. The great thing is that honey never expires! (Which makes it great as a food storage item!) When it does crystalize, simply place the jar in a pan of warmed water and it will soften back to its smooth texture.

What else?

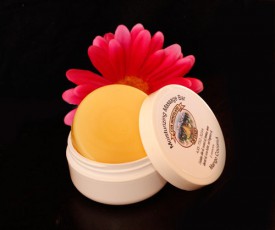
Honey is great for various different uses, some can be surprising! As a natural sweetener, honey makes a great substitute in recipes for sugar. Using this replacement in some recipes reduces up to half of the sugar a recipHoney massage bars made by Cox Honeyville e calls for.
Cox Honeyland has recipes using honey – View them here!

Honey also has cosmetic benefits. “My dad would have us wash our faces with crystalized honey as kids. When honey crystalizes, it makes a great natural exfoliator”, Maleesa with Cox Honeyland told me. You can also use the beeswax to make your own lip balms, lotions, massage bars, and more.

Now that you know why we love honey so much, it’s time to get your own! Whether it’s for your food storage, cosmetic benefits, or just to enjoy now, local honey is the best!

Shop Local Honey on SmithandEdwards.com

Six Steps to Home-Canned Applesauce!

How to Can Applesauce in 6 Easy Steps!

- posted by Jerica Parker

Fall is here! The leaves are falling, the wind is cooler, and it’s time to get ready for winter. One of my favorite ways is by storing all the delicious food we have enjoyed in the summer, so we can have it in the winter as well.
Vickie Maughan, our canning and housewares department manager, shared with us her great recipe for making canned applesauce at home. And we want to share it with you!

The perk of this recipe, is you can eat it right away, storing leftovers in the fridge – and you can also can the applesauce to enjoy in the winter. Her tips and tricks are right here in 6 easy steps:

How to Can Applesauce

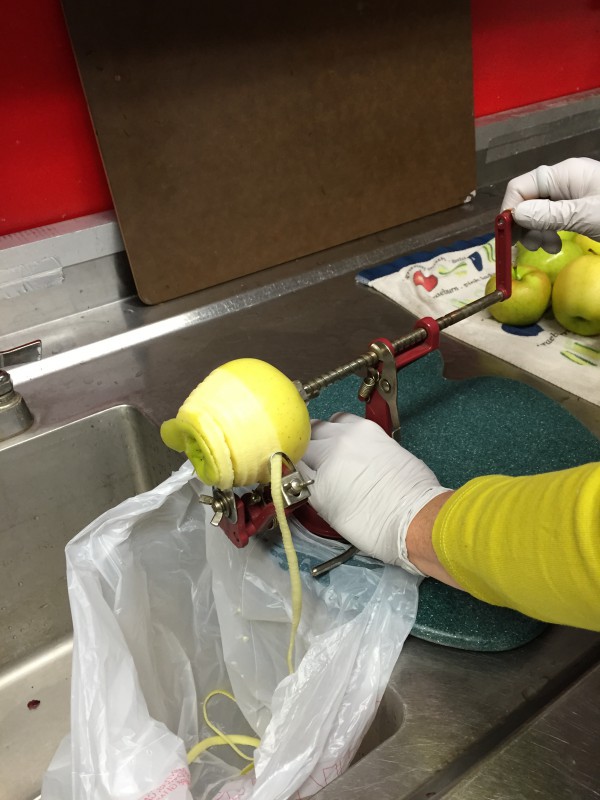
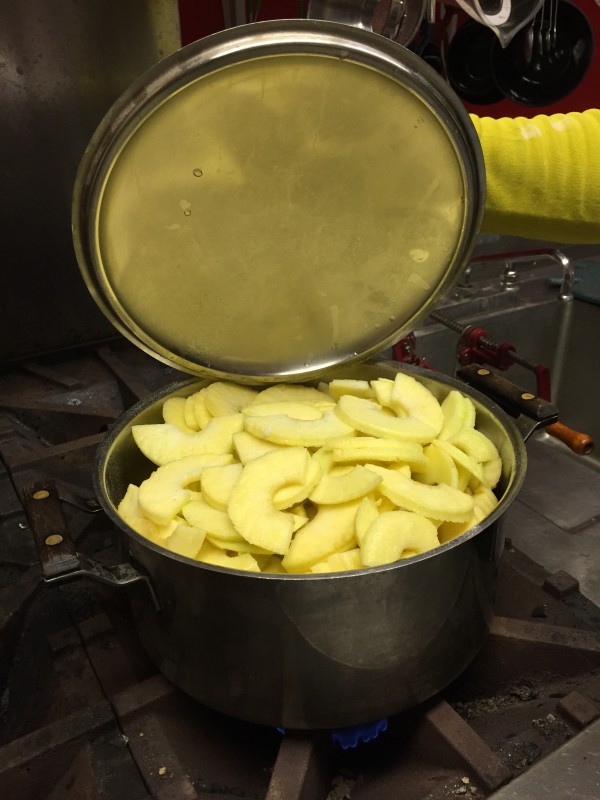
  1. Start by washing your apples. Peel them, and then slice them. Vickie used a peeler machine to take off the peel and slice them. Get your own peeler here!
    IMG_2032
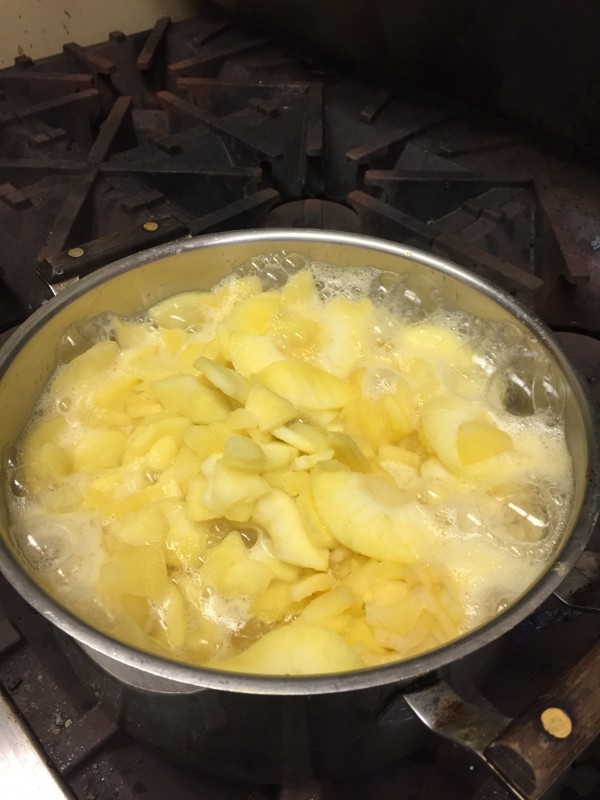
  2. Cook the apples in 3/4 cup of water on medium heat. When they reach a boil, lower the heat and steam them until the apples are tender.
    IMG_2036
    IMG_2039
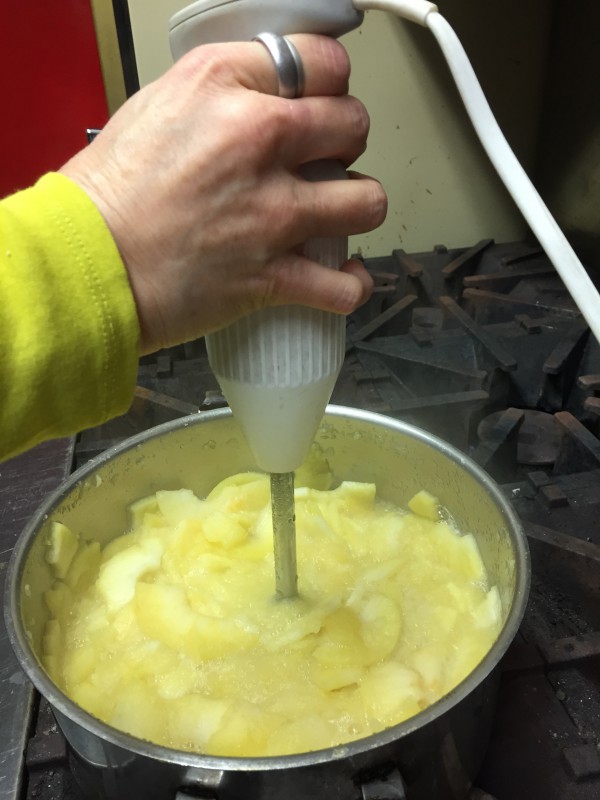
  3. Then, using an immersion blender, blend up the apples until it reaches your desired consistency of applesauce.
    IMG_2042

If you want to enjoy it right away, finish up by sweetening and seasoning however you like it. If you would like to continue to can and store for food storage, continue with the next steps.

  1. When you have reached desired consistency, sweeten and season to how you like.
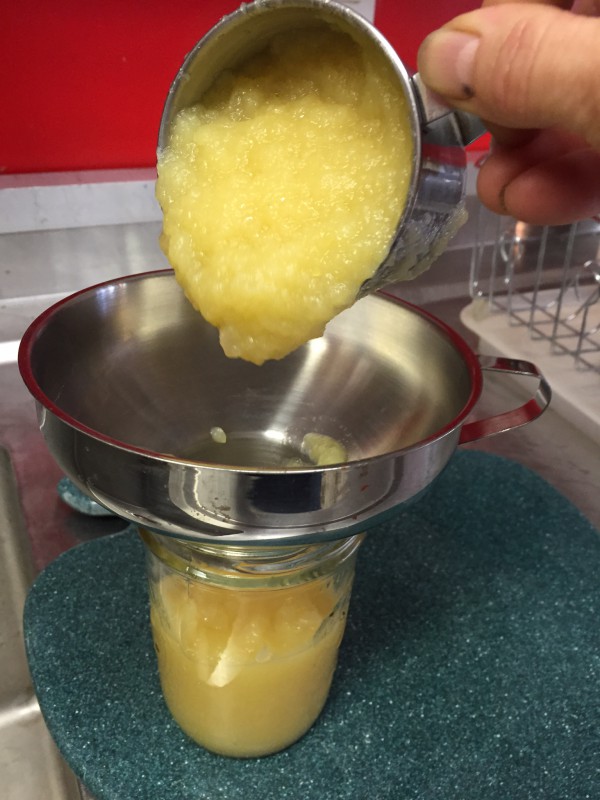
  2. Next, fill the jars. Using a funnel is so helpful for easy cleanup! Wipe clean to avoid problems with sealing the lids.
    IMG_0436.JPG
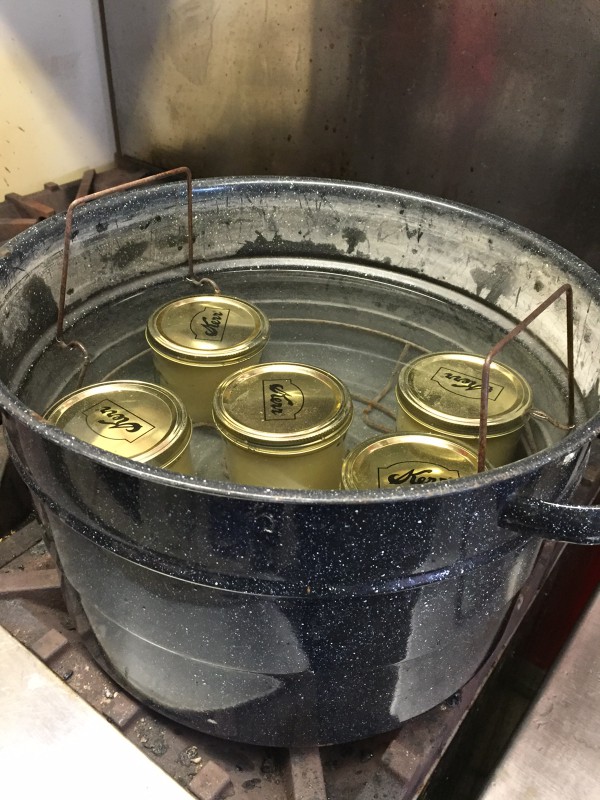
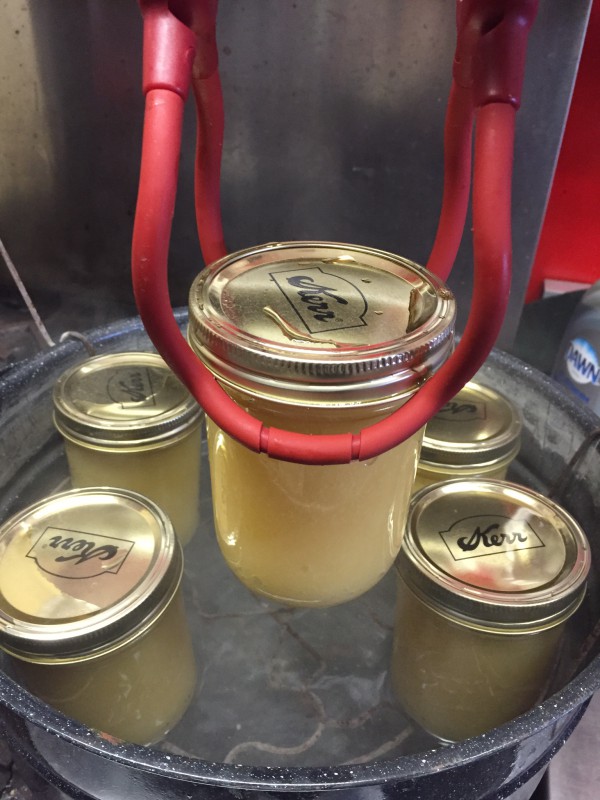
  3. Tighten lids and place jars in pot with water just above the level of the jars. Bring to a boil for 20 minutes. Careful! When you take out the jars, they will be very hot. Use a good jar lifter to protect your hands.
    IMG_0440.JPG
    IMG_0444.JPG

And voilà! Delicious applesauce to enjoy and share with your family and friends.

But you better hurry! You have just under 2 weeks left in apple season to get your apples for delicious applesauce. Stop at Pettingill’s and get your apples soon! They are closing for the season on Halloween, October 31.

Make sure to like Pettingill’s Fruit Farm on Facebook, and then take a peek at when we stopped in to Pettingill’s in August.

Explore Canning & Dehydrating supplies at Smith & Edwards!

Dyeing Rodeo Queen Gear with Rodeo Ink

Right on HUE: Dyeing Rodeo Outfits for Queens with Rodeo Ink

- posted by Jerica Parker

I have always looked at Rodeo Queen contestants and wondered how they got all their outfits to match so perfectly. It’s incredible! From their hats, to their boots, and even their horse tack, it is all the same shade.

A frequent question we get asked is, How do I dye my own rodeo queen outfits? So, we asked around to give you the answers.

If you’ve ever tried to dye your own rodeo outfits, you’ve experienced just how hard it really is. Sometimes they can turn out, and other times the whole batch is botched.

So we talked to Ron Hansen, owner of the Rodeo Ink Company. We got the chance to sit down with him and talk to him a little bit about his business Rodeo Ink and dyeing rodeo outfits.

Dyeing Rodeo Outfits Q&A

S&E: How did you get started?

Ron: Ever since my little girl started doing rodeo queen contests, I’ve started dyeing her outfits. Pretty soon, word got out, and I began sending out dye orders for rodeo queens all over the states. It’s been 5 years now since I’ve started, and since Rodeo Ink opened for business.

S&E: What are some common mistakes people will make when dyeing on their own?

Ron: Well, dyeing is kind of a tricky thing. Many times, people don’t take into account all the different materials and dyes you have to use to get the same shade on everything. People can very easily can ruin a pair of jeans when dyeing. I hear a lot of “Help me fix this!” and a lot of times, stripping the dye out again is nearly impossible.

So I help people start over. Some good jeans to start with when dyeing are white Wranglers, style 13 or 14, and blank white boots. That way the dye goes on in its pure color, and you’re not overlapping and getting strange colors in the end.

S&E: What does a rodeo queen need dyed?

Ron: Just about everything! That includes shirt, jeans, boots, etc. Even reins, saddle pads, and custom tack. I can dye all those all the same color to match the outfit. Also, I have a contact with someone who does custom jewelry, airbrushing, and more.

S&E: What other events do you do dyeing for?

Ron: I do stuff for high school rodeo queen contestants, horse shows, Western pleasure, Texas stock shows, and even youth competitions – not just high schoolers. Also, I have worked with State Queens and Miss Rodeo America contestants.

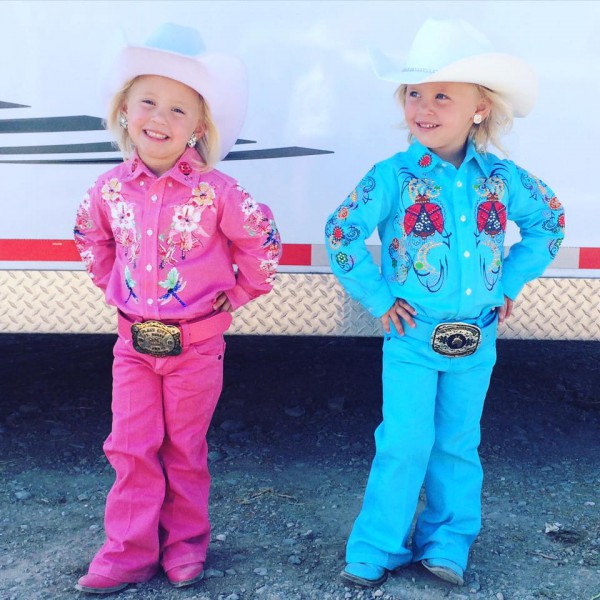
Pearl and Perri Douglas for Box Elder County Minnie Princess

Pearl and Perri Douglas for Box Elder County Minnie Princess

Ron Hansen with Rodeo Ink

S&E: What’s rodeo queening’s effect on families?

Ron: Rodeo Queening is a great program for families. I have been involved in rodeo for more than 30 years and I was a rodeo clown & bull fighter for about 13 years. My whole family has been involved in rodeo for 10 years now and we have learned a lot, and not only about rodeo.

Being involved in rodeo queen pageants teaches kids about responsibility and self-worth, which is something that can help these kids out a lot when growing up.

Now We Know!

Thank you Ron! He gave us some awesome tips and ideas and we hope that those were able to help you as well. He’s got a knack for dyeing and says that he can match any color you send him. He recently added a new gal to help him out during the peak season, where they send out about 10-12 pairs in a week to orders from all across the United States and Canada.

If you would like to get into contact with Ron, or would like to look at some of his work, here you can check out his Rodeo Ink Instagram or his Rodeo Ink Facebook page.

Or, if you are interested in dyeing or other gear, come visit us in Ogden, UT, off I-15 at exit 351 – or, click here for Women’s Jeans, Girls’ Jeans, Paracord, and Tack.

Explore Country Clothing, Camo, Cowboy Boots & more at Smith & Edwards!

Can SureCan…? This gas can sure can!

- posted by Jerica Parker

Now, I know what you’re thinking… another gas can?? Yes!

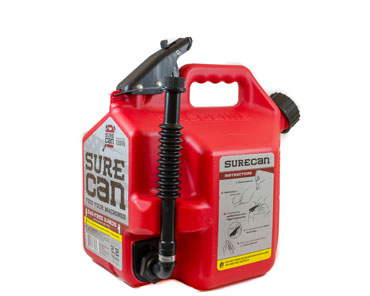
SureCan is a new and renovated gas can that is becoming popular in various local businesses, including here at Smith and Edwards. The SureCan is made in the USA and the company is local here in Ogden, Utah. The Standard Examiner just recently featured Brad Ouderkirk, owner of the SureCan, in an article as well. Read the article here.

Watch the SureCan in Action

We know and understand the typical issues with gas cans… they tip over and spill gas all over, they are hard to aim when pouring into your machine, and they can leak. The frustration is discouraging and totally not worth it.

That is why I wanted to tell you about this awesome, brand new product we are carrying! The SureCan gas can is guaranteed no spill, no leak, and gas-free hands after using it. But what makes it different from other gas cans? I asked Randy, our Lawn and Garden department manager, exactly what makes it unique.

“The features speak for themselves,” Randy told me as he showed me the flexible, rotating nozzle and the thumb-release trigger. No more messy tipping and aiming! After using this can, we have had people tell us just how easy it is to use.

“Lifting a 5 gallon gas can and tipping is not easy,” Randy says. But this new, renovated gas can solves that problem. So yes… SureCan sure can!

SureCan: Feed Your Machines

Get it now!

SureCan 5 gallon gas can SureCan 2.2 gallon gas can
Get your 5 gallon SureCan Gas Can here! Get your 2.2 gallon SureCan Gas Can here!

Also available in store at Smith and Edwards! Exit 351 off I-15 in Ogden, Uah – Find it in the Lawn and Garden department in the front of the store.

Emission Control Information:

This container complies with U.S. EPA emission regulations for portable fuel containers (40 CFR Part 59). The emissions warranty is valid for a minimum of one year from date of purchase.

Check out Sporting Goods!

See all Boating accessories, Camping, Hiking, Hunting, Fishing, and more.

Shop Sporting Goods on SmithandEdwards.com

Take your Kid's Halloween Costume to the Next Level

A Fun Way to Take Your Kids’ Halloween Costume to the Next Level

- posted by Jerica Parker

BANG! PEW PEW!! ARRGG!

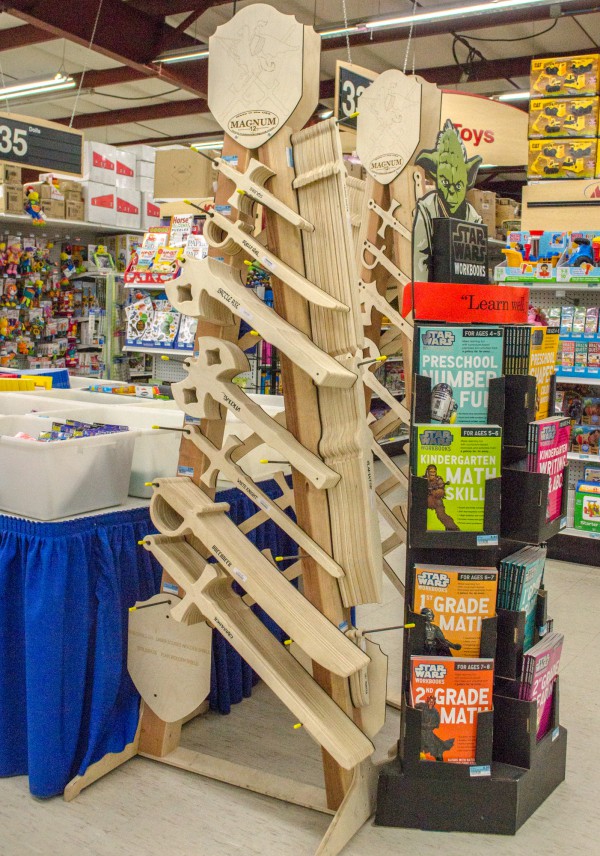
Yep… it’s that time of year again. Kids running around dressed up, pretending they’re pirates or cowboys with their imaginary swords and guns. Well, let’s make their game of pretend a reality! No… not with REAL swords or guns… but here at Smith and Edwards we have Wooden Toy Swords and Rubber Band Guns that your kids will just love!

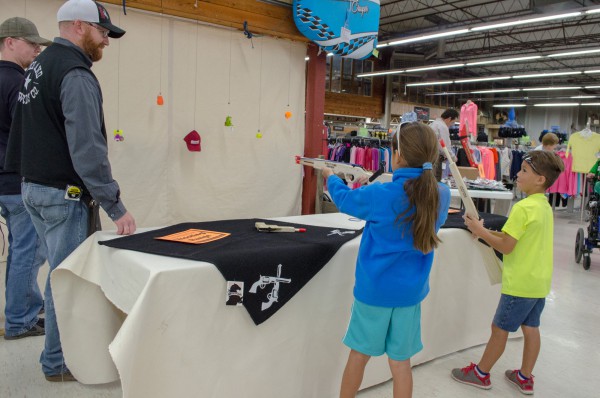
Some kids enjoying the rubber band shooting gallery at our Fall Kickoff

Kolt and Tynisha enjoying the rubber band shooting gallery at our Fall Kickoff

Kids dream of having their own gun or sword as a part of their Halloween get-up: from pirates to soldiers to their favorite comic book character. Yes – all the wooden guns feature the orange plastic safety tip!

The best part is that you can decorate these wooden toys however you like! It’s all part of the fun to let your kids paint, color, and design their own personalized swords or shields. And when you do, send us in photos of your creations! We would love to see them :)

Check out all our different models of Wooden Swords, Shields, and Rubber Band Guns.

Playing with wooden guns

The jeep in the surplus department has seen some serious fights!


So make your child’s Halloween costume complete this year with cute additions such as these wooden toys. Even if it’s not Halloween, these are great gifts for your child to play their heart out anytime.

Smith and Edwards employees Chris and Kevin show us that you are never too old for pretend.

Smith and Edwards employees Chris and Kevin show us that you are never too old for pretend

Looking for more creative ideas for this Halloween? Melissa and Ashley, part of the team here at Smith and Edwards, has awesome ideas on Halloween Mason Jar Decorations.

Click here to explore all our wooden toy swords and rubber band guns

Explore all our wooden toy swords and rubber band guns!

Colton Egger - Cutest Cowboy in Texas

The Littlest Cowboy in Texas and his Wild Rag

- posted by Jerica Parker

Whether you’re working out on the ranch, or goin’ out on the town, a young cowboy or a timeless one, some things just never change. Just how Wranglers have been around for what seems like forever and they have never lost their style.

As for the Egger family, passing on these timeless traditions to their kids, as well as adding some of their own, is a must.

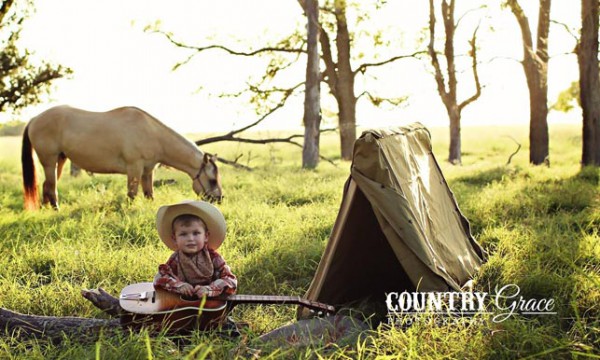
Colton and his guitar

We recently had this cute little family buy some of the 100% silk Wild Rags we sell here in our store. Afterwards, they sent us some beautiful photos they had taken of their young son, Colton, by Sallie Scott with Country Grace Photography.

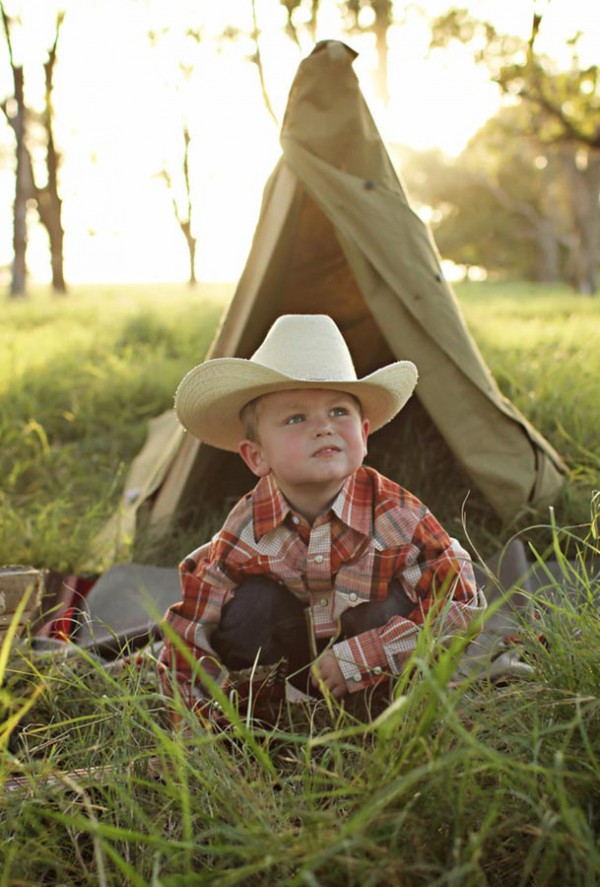
Colton Egger posing with his wild rag!

Colton’s set up camp and he’s ready to play!

The photos turned out so cute! This little cowboy is a natural. And he’s got on a Wild Rag! If that doesn’t convince you they’re good looking, I don’t know what will.

The Eggers aren’t the only family loving these scarves. Marty Thompson, our Western Tack manager here at Smith and Edwards, and his family also love them. His cute kids know a couple different ways tie a Wild Rag to be the slickest lookin’ cowboy around. Click here to see Marty’s son Wells show you How to Tie Wild Rags.

Besides being good looking, Wild Rags are really very practical. They can keep you warm in the cold, and wick away the moisture in the heat. Use them to filter out dust in their air and breathe through it, or to filter out dirty water to drink. And those are just some of their many uses!

They come in many different designs and colors, you can choose whichever fits you best. Here at Smith and Edwards, we happen to have a wide selection of Wild Rags to choose from. Click here to see Wild Rags.

Colton at the river

So enjoy your own! Just like the Egger family, you can send us photos of how you use your Wild Rags! Just send us an email at info@smithandedwards.com. And just like Colton, you can be toughest and most handsome cowboy out there.

Colton in his straw cowboy hat

Special thanks to Colton Egger, his dad Clint, and photographer Sallie Scott of Country Grace Photography!

How to Freeze Corn

How to Freeze Corn – Plus Easy Corn-Cutting Method!

- posted by Jerica Parker

What do you do with all that left-over corn you made for dinner? Throw it out? Stick it in the fridge, forget about it, and then throw it out? Not anymore!

With this easy video & guide, you don’t need to let the words “canning” or “food storage” intimidate you. Melissa in our Housewares department will walk you through the steps.

Easy Frozen Corn Storage: Watch How!

Now, this is something I have done with my family since I was a little girl. We have our own garden and we love corn. So when it is corn season, we all get together to freeze our own corn for storage. It’s so simple and the corn comes out with that same fresh-from-the-garden taste.

How To Freeze Corn in 6 Steps

Here are some quick and easy steps for freezing your corn:

  1. Shuck the corn.
    • Shucking means to take off the husk and the silk hairs. As Melissa shows in the video, one easy method is to hold the corn between your knees and pull the husk toward your body.
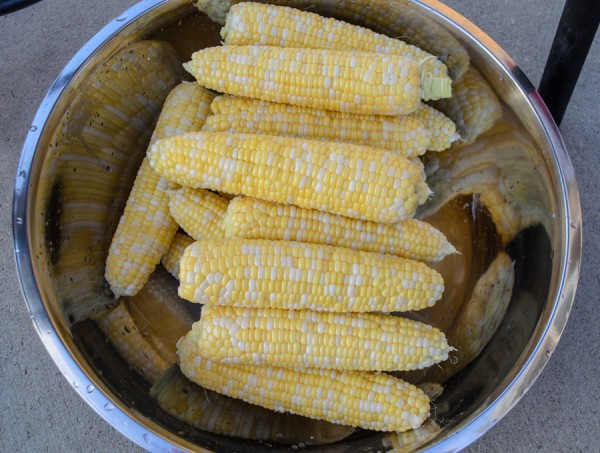
      Shucked corn
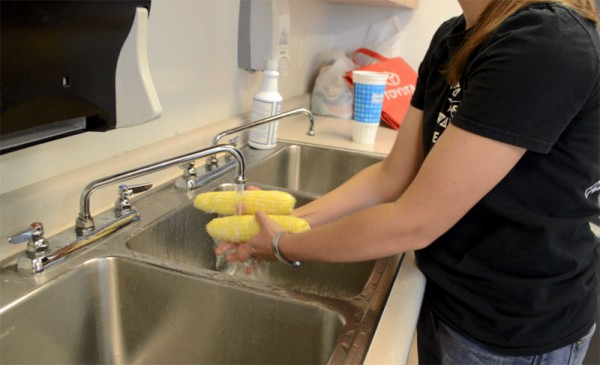
  2. Wash the ears of corn and remove any remaining silk.
    Washing corn before boiling
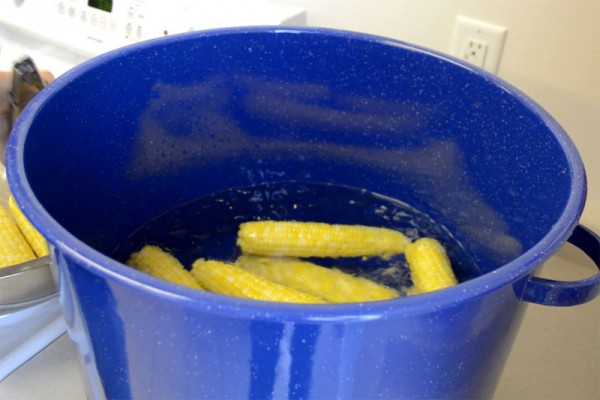
  3. Blanch (or boil) the corn in boiling water for about 6 minutes.
    • The reason behind blanching the corn, is to stop the enzymes that can make the corn taste bad later. Cooking it first helps preserve the flavor when you want to eat it later on.
  4. Place the corn in ice water (using a pair of tongs to protect your hands) to slightly cool them off, just until they’re cool enough to handle.Resting the corn in an ice bath
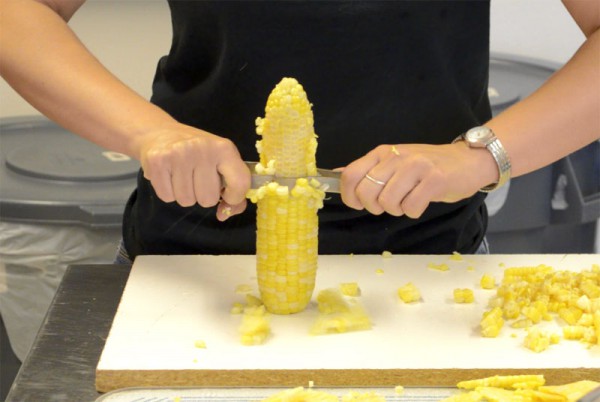
  5. Cut the corn off the cob.
    • This part is optional. If you like, you can freeze them whole, on-the-cob. After step 4, you would wrap them in plastic wrap and then put those in freezer bags to freeze. If you prefer cut corn then you can take a knife and cut the kernels off the cob to freeze. In my family, we have always cut the corn off. It’s your choice!
    • Editor’s Tip: To cut the corn off the cob, you can put them in the center of a Bundt pan. This will hold them as you cut off the corn and it will fall right into the pan. Or a simple board with nails pounded through (about 5″ apart) can hold the cob steady while you cut.
      To make a nailboard, simply take an extra shelf or spare board. Paint it, then hammer a 4" nail through it. Then you can simply set each ear of corn on the nail, and safely cut the corn.

      To make a nailboard, simply take an extra shelf or spare board. Paint it, then hammer a 4″ nail through it. Then you can simply set each ear of corn on the nail, and safely cut the corn.

  6. Now, simply scoop the kernels you just cut off into freezer bags.
    • You can put 1 1/2 to 2 cups in a bag, depending on how big you want your portion sizes to be when you eat them. When the bags are flattened to about 1/2 – 1 inch thick, you can stack them nicely in your freezer to make the best use of freezer space.

More Tips on the Freezing Process

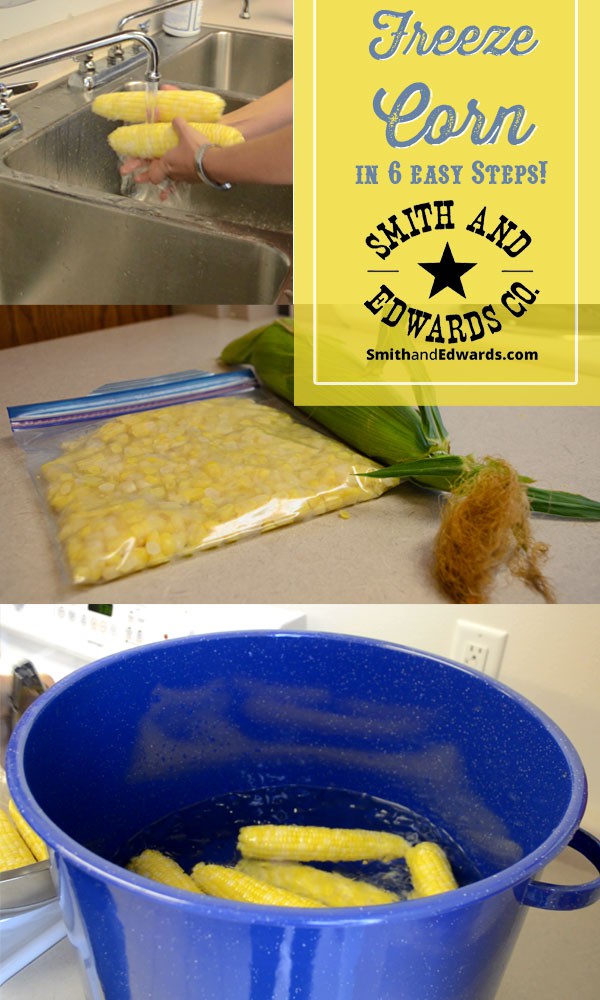
How to freeze corn in 6 easy steps!

  • 11 1/2 dozen large ears of corn should give you about 58 cups of corn to freeze.
  • Vickie, Kitchen Dept. Manager at Smith and Edwards, says to lay the bag with corn flat as you zip it up. When you have about an inch left to zip, squeeze the air out. “If it has air in it in the freezer, it is more likely to get freezer burn,” she says.
  • Melissa has another idea on how to get the air out. She says when you have the full bag, you can slowly lower it into a lot of water, just until it reaches the zipper line. The water on the outside of the bag helps push the water out and you can seal it while still partly in the water.
  • Don’t put too many bags in the freezer at once! If you put a lot of warm things in the freezer, it may begin to thaw out your other frozen foods. But if you put in just a few at a time until they’re frozen, they will freeze faster and won’t thaw any of your other food.

Now you have corn to eat for the next few months! It’s a great and easy way to start up your own food storage without the complicated recipes or big pressure cookers.

We would love to hear back from you! If this worked for you, or if you have any other tips or secrets to help others in starting their canning & food preserving, please leave a comment below.

If you liked this, you will LOVE our other frozen food storage tips! Make sure you check out How to Freeze Beets and How to Freeze Cherries.

Get pain relief on your Uinta hike - the Uintas are the most beautiful place in all of Utah!

How to Save Your Legs & Back When Hiking the Uintas

- posted by Jerica Parker
Mike Vause in the Uintas

If Mike didn’t have a department to manage, he’d be in the Uintas the entire summer. This meadow’s about 6 miles in, at the fork between Ostler Lake and Amethyst Lake.

With summer at its peak, there’s still time to get your hiking trip in. The Uinta Mountains are the best Utah has to offer with all its water sources, beautiful skies, breathtaking views, and amazing stars at night.

When you’re out on the tree line taking in the beauty of the mountains, streams, and landscape, you want to be in your best shape – not wincing as you step, rubbing your back, or counting the steps back to camp. You want to enjoy your hiking or backpacking trip – every step of the way!

Not everyone is as avid of a hiker as Mike Vause, Smith and Edwards camping manager. But if you are looking into picking it up, here are some great places and helpful tips that can help you get started.

Uinta Hiking Tips & Must-See Trails

Only a couple hours from Ogden, the Uinta Mountains are great because they have trails for the beginner as well as the experienced hikers.

Some good ones to get started are any of the lower trails near the highways. But if you are looking for longer hikes, maybe a bit tougher, Mike says his favorite is the Henry’s Fork trailhead. He says, that’s the best approach to reach the highest peak in Utah: King’s Peak.

King's Peak, the highest point in Utah

King’s Peak, the highest point in Utah

But in either case, be prepared for a change in weather. “Always expect rain, even if you don’t expect it,” Mike says.

How about a family adventure? Any of the trailheads from Mirror Lake Highway could be great for the family. The Bald Mountain trail is good, too. Although it can be a bit tough for the little ones, Mike said his 10-year-old son made it.

Stay Pain-Free on your Hike

Now, as a new hiker, or any hiker in general, getting ambitious and overdoing it happens. Here are some good things to take on your trip, whichever hiker you are.

Bring the medicine that works for you

When getting too ambitious, you may pay for it with aching legs and back. In relation to an experience he had, Mike says that there is nothing like Advil during the day and Tylenol PM at night.

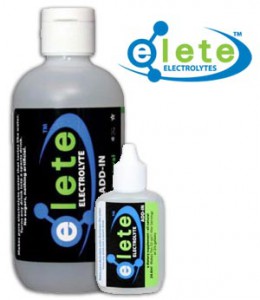
Elete Electrolytes save your legs

Elete Electrolytes add electolytes to your water or your drink, to help you replenish & hydrate!

One of the other products recently put to the test is Elete. On his last hike, Mike took it along to try it. Before his hike, he mixed it with his drink as an electrolyte replacement. As well as after exerting himself at higher altitudes, he said it helped him to sleep better that night instead of losing sleep over aching legs.

A big reason legs hurt on a hiking trip is you may be drinking water, but the hydration doesn’t reach every muscle needing it. Elete rehydrates better than water alone – even better than Gatorade! Mike mentioned how it saved his legs on that trip.

Amish Origins – USA-made joint & muscle relief

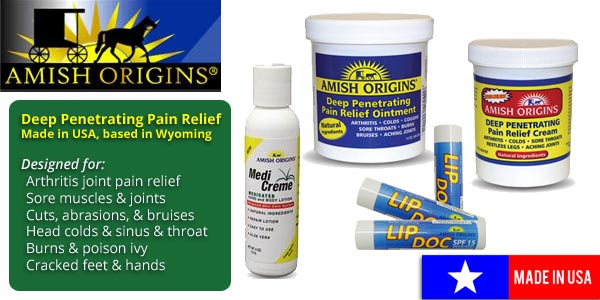
The last tip we have is about a handy pain relief cream called Amish Origins. This cream helps tremendously when sore.

Whether you’re an athlete or a hiker, it gives that much needed jump start when suffering from sore legs or back. Mike tried it after a vacation and it worked wonders and took away the soreness so he could get back to work!

Amish Origins combines four essential oils for pain relief for all types of aches & soreness!

Plan Your Uinta Trip

Ready to get out there? Check out the Forest Service’s guides for ideas and trails. AllTrails also has great information and reviews & tips from hikers!

And, make sure to check out Mike’s must-have gear for the Uintas, which includes some breathtaking shots of the Uintas! (We’d love to see your pictures, too!)

More about Amish Origins!

The Amish Origins recipe combines 4 essential oils (Pine, Wintergreen, Camphor, and Eucalyptus) was discovered by a member of the Amish community in Ohio.

This product stays true to the original recipe and has expanded to many products to help sore muscles, joints, and even rashes & dry skin – and it’s still made in USA.