Tag Archives: how to

How to tie a Honda Knot

How to Tie a Honda

- posted by Amy Griffiths
Did you hear about our first ever in-store Dummy Ropin’ contest? We had so much fun we’re already thinking about the next one! Check out what happened and see who won. Sign up for our emails just for horse enthusiasts so you don’t miss out on the next one!


Our western department has western rock stars as far as I’m concerned. Not only do they carry a great selection of quality products, they are also so knowledgeable, friendly, and genuinely good people. They live the lifestyle they are talking about and have first hand experience.

The people of Smith & Edwards' Western department

Tom, Dave, Sam, Marty, Jess, Dani, Steve, Kyle, Shaun, Kris, and Sherm


Often they are asked how to do certain things, and how to tie a honda is a common request. Tom, one of our fabulous craftsmen from our manufacturing department (yes, they design and manufacture a lot of the tack they sell, and they do it right here in Smith and Edwards!) agreed to show us how to tie a honda. It must be effective because people keep coming back for more! (click here to skip to a written step-by-step how-to)


Watch How to Tie a Honda

Step by Step Tutorial on How to Tie a Honda

Tying a sturdy honda is really a two step process, but it really is quick and easy. First you make a stopper knot, then you can make your honda.

Begin by untying the strands in your rope about 6″ down and separate them. For our tutorial we’re using a 3 strand rope but you can easily do the same action with a 4 strand rope.

Separate the rope strands


Take the middle back red strand and curve it to the left.

Curve to middle back strand to the left


Take the blue strand on the left and go over and then under the middle red strand you just curved to the left.

Over and under left strand


Now take the right white strand and do the same over and under action you as you just did on the previous blue strand.

Next over & under - part 1
2nd Over & Under - part 2


Grab the tip from this same white strand and insert it in the top loop you created with the first red middle strand.

Up through the loop


Pull the end of each strand, making a tight knot at the bottom. Cut and burn the ends to seal it.

Pull strands up
Tighten strands
Cut strands
Burn strands


Now you’ve got your stopper knot ready for the next step. Look how great it turned out!

Finished Stopper Knot


Time to tie your Honda

With about 18″ of rope, take the end that has your newly tied stopper knot. Working towards the right of your rope, loop it towards you til the knot faces away.

Loop end toward you til it faces away


Grab the knot, take it to the left of the loop, then under and up, making an overhand knot.

Make an overhand knot


It kind of looks like a pretzel now. Take your knot back behind the top of the loop and tuck it in the top loop of the overhand knot.

Tuck in top loop
Tuck in top loop - part 2


Make sure the upper loop you just made is the size you want and pull the bottom rope tight. Push the stopper knot up as you do this to keep it out of the way.

Pull bottom rope tight


Now you’ve learned how to tie a honda like a pro, just like Tom and the rest of the crew.

Finished Honda Knot
Honda with Rope


Hope you enjoyed the tutorial and feel confident in tying your own hondas. If you have a question or there is something you’d like to know more about, let us know. Tom, Marty, Dani and others are happy to share their skills with us!

Be the first to find out about newly added Western products, special offers just for our online friends, and more helpful tips of the trade by signing up for our emails today. Join your email list here!

How to Clean your Saddle

How to Clean a Western Saddle

- posted by Rose Marion

It’s so easy to put your saddle on the stand and walk away when snow starts to fly in the fall. But that leaves a lot of dust & residue on your saddle so when you take it out in the spring, it’s WORK lookin’ you right in the face!

When you’ve put that much into a good Western saddle, you want to make sure your saddle stays clean and conditioned! Marty Thompson, our Western Saddlery guy, will take you through the most important parts of cleaning a saddle, whether you’re putting it away or taking it out in the spring.

Plus, if you have leather cowboy boots, scabbards, or headstalls that need a good cleaning, you can use these same steps to condition your leather.

How to Clean a Saddle Q & A

How to Clean a Western Saddle…. Before & After

Here’s a customer’s saddle. For some reason they were happy to volunteer when we asked around who wanted their saddle cleaned for free!

Cleaning a Western Saddle

This saddle has some beautiful tooling and design, but it’s been buried deep under dirt & muck. Here’s what it’s going to look like when we’re done:

Cleaned Leather Saddle

Leather Care Products you want to use

Everyone has their own preferences. Marty’s not only sold tack for 20 years here at Smith & Edwards – he does leatherworking & builds saddles in his spare time. So here’s what he recommends, based on his experience.

Saddle Cleaning Products

There are lots of products for cleaning your saddle, from Fiebing’s, Skidmore’s, and Ray Holes. A wool pad or scrap of sheepskin will help you gently rub the leather cleaner & conditioner into your saddle & gear without scratching.

Before Marty started with products, he took a bristle brush to the saddle to get off most of the dirt before coming in with the liquid. An air compressor works good too, if you have one – especially under the skirts and jockeys!

Bristle Brush for cleaning Western tack

If you have a REALLY dirty piece of leather, you can use some dish soap on it. Then, you need to come back and condition it afterwards.

Marty likes using Fiebing’s Liquid Saddle Soap. This spray seems to cover better than paste, and you get less residue in the cracks of the leather. You can use a paste with a wet cloth, but if the paste gets too thick it might be hard to work out of your leather’s creases and details.

Fiebing's Saddle Soap

The Liquid Saddle Soap cleans it out really well, and it also lightly conditions it at the same time. Plus, it’s great to be able to spray in the spots you want.

Spraying Dusty Saddle

That first spray on the dusty leather is pretty satisfying…

If a saddle has a lot drier feel to it after going over it with saddle soap, you could go over it with some neatsfoot oil to condition it deeper.

A soft cotton cloth is good to use for rubbing the liquid into the saddle. You can also use a soft sponge or a piece of sheepskin. You want something that is soft and won’t scratch the leather, and also holds the cleaner and conditioner well.

Sheepskin Pad for cleaning Leather

If you have an older saddle, or maybe a saddle that hasn’t seen enough care, the Skidmore’s Leather Cream is a great way to deeply condition your leather.

Skidmore's Leather Cream

Skidmore’s Leather Cream

You don’t have to wear gloves. Marty likes to wear gloves because that way he’s not running to the sink to get oil off his hands!

Parts of the Saddle to Clean

You want to clean your leather and get all the sand, dust, and dirt out of there. That helps your leather last longer and brings the beauty back into that leather.

It’s really important to do more than a surface clean when you care for you saddle.

When you’ve got sand and dust trapped in the fenders and parts of the saddle, it acts like sandpaper and wears out the leather.

Make sure and clean your saddle fenders and the jockey

You want to get in the fenders, the saddle strings, stirrup leathers.

Cleaning Saddle Strings with Fiebings Saddle Soap

And the cinch and back billet are really going to want cleaning.

Dusty mohair cinch

Make sure and finger-clean all the hair, sticks, and dirt out of your cinch.

Make sure and get your rosettes and conchos shined up while you’re at it!

Cantle, before and after

Halfway through! Marty’s cleaned the left side of the saddle, and he’s only brushed the right side so far.

If your silver conchos are really tarnished, go ahead and take them off your saddle, then take some silver polish to them. That’s because some silver polishes can turn your leather white, so you want to be sure and take the silver off the leather before you introduce the chemicals.

A lot of dirt and hair will build up where the stirrup hangs, so scrape and break up the dirt. You can scrape off the mud with a pocketknife on your stirrup leathers, and then you’ll be able to get the conditioner in the leather.

Scraping the Stirrup Leathers off

You’re not digging into the leather with your blade – just prying off the caked dirt.

If you have a rough-out or suede seat, you’ll want to use Bickmore’s Bick 4 instead of an oily conditioner, so the oil doesn’t come out on the seat of your pants! This type of product is also good for leather couches and car seats.

What about cleaning Rawhide?

If you have some nice rawhide-covered stirrups, a rawhide bosal, or rawhide reins like these romal reins, Marty recommends Ray Hole’s Rawhide Cream (click to shop).

Dusty Rawhide ReinsRay Holes Rawhide Cream at Smith & Edwards

Same idea on cleaning rawhide: brush off any dust & dirt, then take a piece of sheepskin and work the rawhide cream into your gear.

Waterproofing Leather

Skidmore's Beeswax Waterproofing

Skidmore’s Beeswax Waterproofing

Ray Holes’ Saddle Butter conditions the leather well, AND has a waterproofing component in it. Ray Holes also makes Chap Wax, which is specifically designed for waterproofing. Skidmore’s also makes a waterproofing from beeswax. Each of these penetrates into the leather well and helps the moisture bead up and roll off instead of soaking into your saddle!

How do you waterproof your leather? Same process: clean your leather off with a brush and then a conditioner. Then, put on a coat of waterproofing.

Make sure and let your saddle dry on its own, at room temperature – this may take a half hour.

Finishing touches

To finish your leather, put a coat of Tan-Kote on your gear.

Tan-Kote, by Fiebing’s, gives your leather a bit of shine and also helps repel dust and dirt. Plus, it’s a softer product with a water base, that won’t cause your leather to crack.

After

Shiny conchos and leather on your freshly-cleaned saddle!

Beautiful!

Get more tips like this in your email!

Enter your email address & Marty will send you more tack tips plus let you know when he puts his Western tack & gear on sale.


Get the Basics with this Leather Care Kit

Marty put this kit together so you can get everything you need in 1 place to clean and waterproof your leather. Skidmore’s leather products are made in the USA – which we love – and they’ll work great on your saddle & tack.

Clean your saddle with Marty's leather care kit!Plus, you save money by buying these products in the kit – AND you get a sheepskin piece to work it in! We don’t sell these sheepskin scraps on the website, so Marty’s kit is the only way for you to get your hands on one of these! Click here to check it out.

How do you care for YOUR saddle & gear? Let us know!

Easy Valentine Sweetheart Ornament

Easy Valentine’s Craft Idea

- posted by Amy Griffiths

Finished Valentine Photo OrnamentFebruary is right around the corner and you know what that means….Valentine’s Day! I’m a sucker for Valentine’s Day. It’s not so much the presents as it is the colors, decorating, and celebrating those I love.

To share my love for the season I’m going to share an easy Valentine’s craft idea. It’s made with one of my favorite supplies to use…..tulle! It’s so versatile, never loses its shape, and the colors are so vibrant! Adults and kids alike will have fun making these. They are fabulous for 4-H craft projects as well as many other youth groups activities.

Back in December I gave you a peek at this tulle project idea, but in honor of those sweet ones in our lives you now get a step-by-step tutorial. This one is designed for Valentines but it’s a terrific project anytime of year by just mixing up the colors.

Supplies you need:

Supplies for Valentine Craft Project


To begin this project you need to cut:
Eight 6″ pieces of Silver Gray, Flamingo Pink, Pink, and White
Six 6″ pieces of Fuchsia
One 12″ piece of Fuchsia

Measuring the tulle


Let’s get started!

The first thing you’ll want to do is make a loop with one of your 6″ pieces of tulle. Place it outside the ring and thread your ends over the ring, through the loop, and pull. This knot is also known as a Larks Head Knot.

Making a loop

Pulling Ends Through the Loop

Finished Knot


Continue making knots in the pattern of colors you want to use.

Pattern of Finished Knots


I like to make the hanging loop after I’ve tied about half of the knots on the ring. You make this by tying both ends in double knots over the ring. The knot will look different than the others but it blends in beautifully when it’s all done.
Tying the Hanging Loop
Finished Hook Loop


Tie more lark head knots in between your double knots, just like you were doing in the beginning. Continue to follow your original color pattern.

Continuing the color pattern


Finish tying until all your tulle is used and your ring is completely covered. They should fit nice and snug so you can no longer see the ring.

Ring is full of knots


Now is the time that I cut out my picture to place in the ornament. It needs to be about 2.5″ in diameter. You can fasten the photo to the center of your lid with a scrapbooking adhesive, but I prefer without.

Before I insert my picture I like to pull all the knots forward, towards the top of the ring. Then I insert the picture from the back end, pushing the lid in behind it for a nice backing. Not a big deal, but I like the look better when it’s done.

How to Cut Your Picture


You’re almost done! Now all you need to do is “fluff” your tulle. For each knot I pull the ends of the tulle in opposite directions til you are happy with the overall look.

Fluffing Your Ornament


Now that’s a Valentine to be proud of!

Finished Picture of Valentine Craft Project


Now what?

Now that you’ve found a source of inspiration for a project of your own, check out our tulle here for a bigger selection of regular and glitter tulle that will make your projects pop with color. Then send us pictures of your finished projects to info@smithandedwards.com so we can show them off!

Come play with us on Pinterest! Follow us to get more creative ideas and be sure to pin this image so your friends can get inspired too. Share the love this Valentine’s Day!
Valentine's Sweetheart Tulle Ornament

Hugs & Kisses!

How to tie a Wild Rag

How to Tie a Wild Rag (Video)

- posted by Rose Marion

Brands Silk Scarf wild rag

You found the gorgeous silk scarves called wild rags and now you want to wear one all the time!

Cowboys, ranch hands, and buckaroos wear these silk scarves because they wick away sweat in the summer, keeping them cool. They also keep heat in, in the winter!

And they can be used for just about anything on the back of a horse: mend a stirrup leather, tie a hat down, or even filter water in a pinch. No wonder a cowboy always has a silk scarf around his neck!

Well how the heck do you tie it? Well, there are 2 great ways to tie a Western wild rag or cowboy scarf. Our Western guy Marty and his sons Wells and Pace will show you how to do it.

Tying a Buckaroo Knot

First, you can tie a wild rag in a buckaroo knot, also called a square knot:

Wells Thompson shows us how to tie a wild rag

Here’s how to do that: (See the video below for a detailed explanation.)

To start, fold your scarf in half diagonally, so it’s a long triangle. Put the scarf around the back of your neck, holding the ends of the scarf out in your hands.

Hold 2 fingers of your left hand out. Take your right hand and wrap the wild rag around your left fingers once. Then, with your other fingers, hold it there.

Reach back under and grab the other side of the scarf. Come over the front and split the wrap, right over the top of your fingers.

Then come up underneath by your chin and reach back through to grab that tail of the wild rag.

Now that you have that end, go through the loop that’s over your fingers, going through the same direction your fingers are going. Reach through and pull that tail tight.

Straighten the square out by pulling each end. There you have your square knot!

Thanks Wells and Marty for showing us how to tie a wild rag in a square knot!

Tying a Simple Knot

Pace Thompson with his knotted wild rag

Pace looking sharp in his silk scarf decorated with different brands

Or, if you want a snugger fit with less fiddling, here’s how to tie a silk scarf in a basic knot.

  1. Take your silk scarf and fold it in half, into a triangle.
  2. Put the scarf around your neck, with the big edge of the triangle going around your neck and the middle point on your chest.
  3. Cross the two points that are lying on your back behind your neck, and then bring them back over your shoulders.
  4. To finish, just tie the two ends under your chin in a granny knot. To tie a granny knot, simply tie an overhand knot, then tie an overhand knot again.

There you are!

Do you have another way of tying your wild rag, or want us to do more videos? Leave a comment below and let us know!

Click the scarves below to explore the wild rags for sale at Smith & Edwards:

And know that you know how to tie a wild rag, send us a picture of you wearing yours to info@smithandedwards.com or post it to our Facebook page!

Wild Rags and Silk Cowboy Scarves

How to clean your rifle - Smith and Edwards Demo

How to Clean your Rifle

- posted by Rose Marion

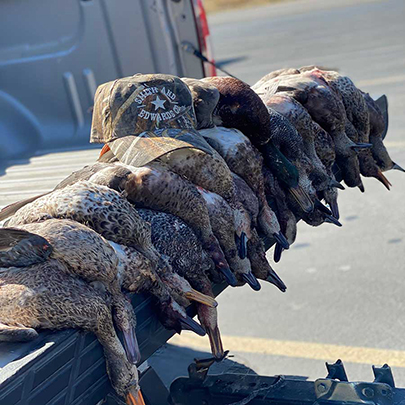
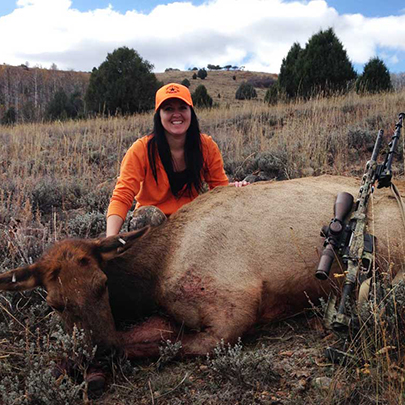
Did you get a gun for Christmas? Looking to get a good deal at our Gun Auction? Or maybe you’re a hunter who needs extreme accuracy for shooting an elk 350 yards away.

Did you know?
You can see part of our hunting department on SmithandEdwards.com! (click here) We’ve got a selection of our most popular hunting and range accessories for you online. There’s way more in-store!

Eric from Smith and Edwards demonstrating how to clean your gun

You may know how to keep your gun dry and safe, you also want to know how to clean your rifle to keep it accurate and firing properly. Every gun needs a good cleaning to keep it functioning the way you need it to in an emergency, on a hunting trip, or just going out to the range for practice.

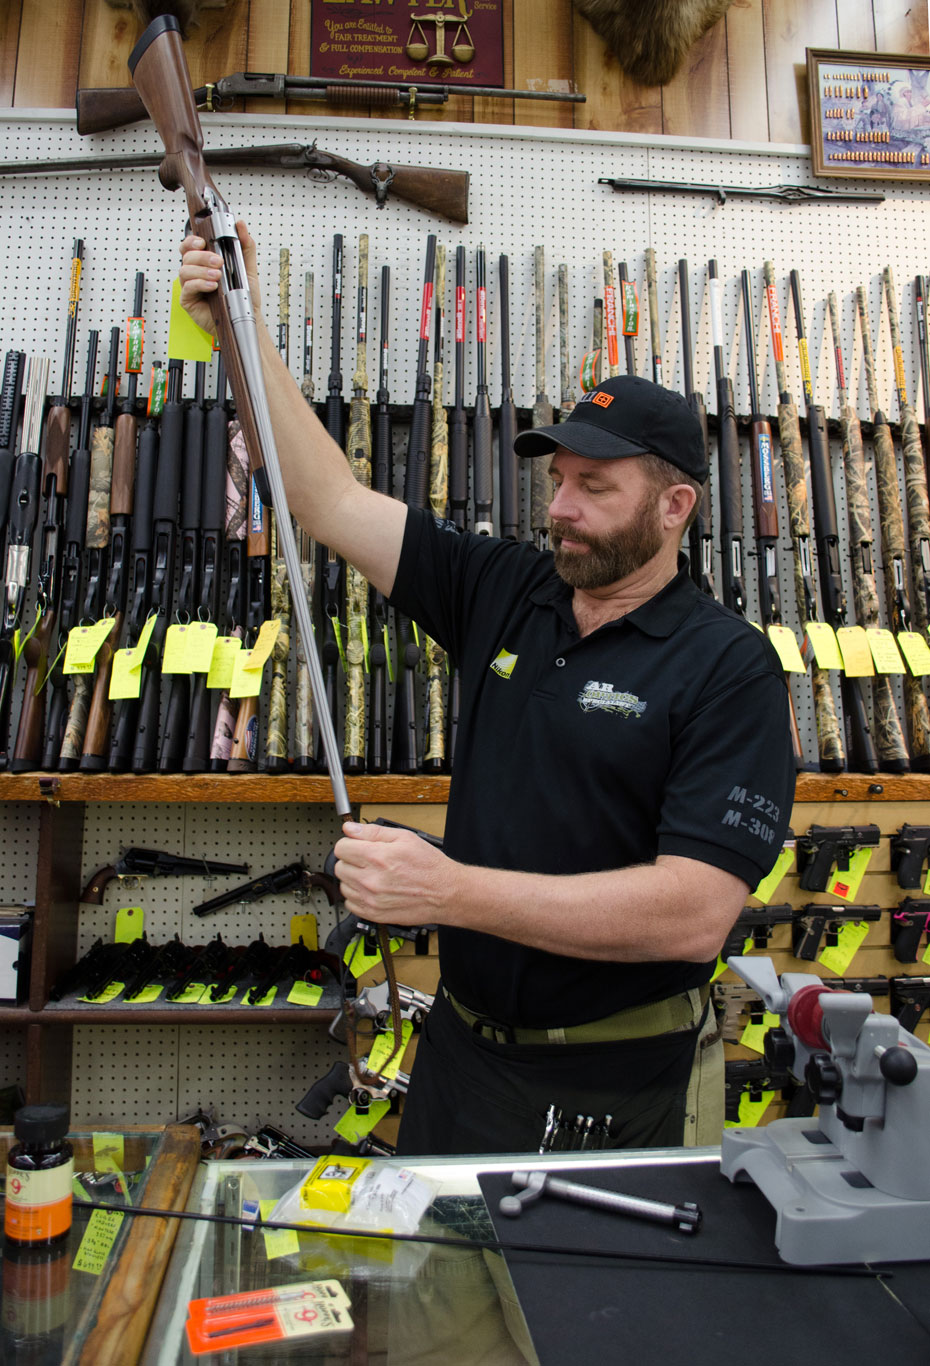
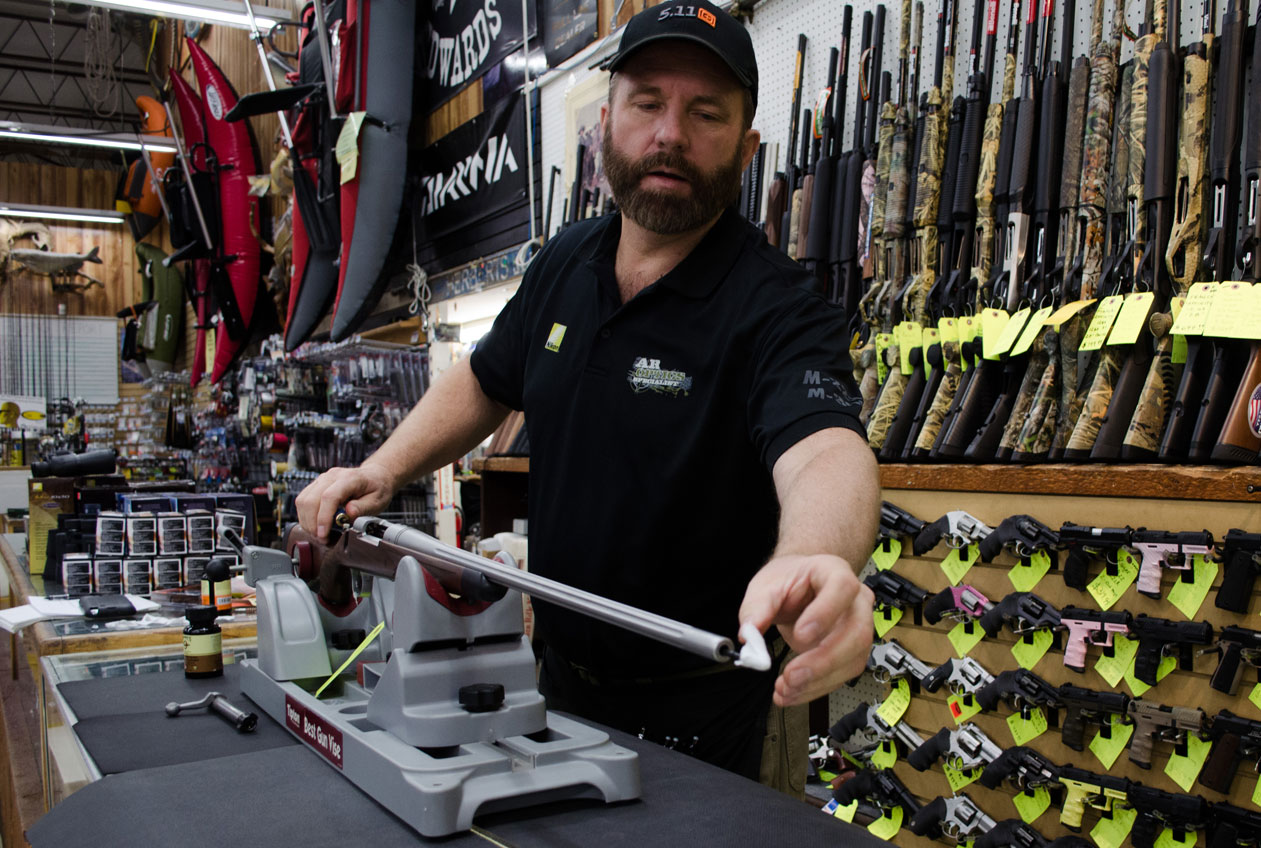
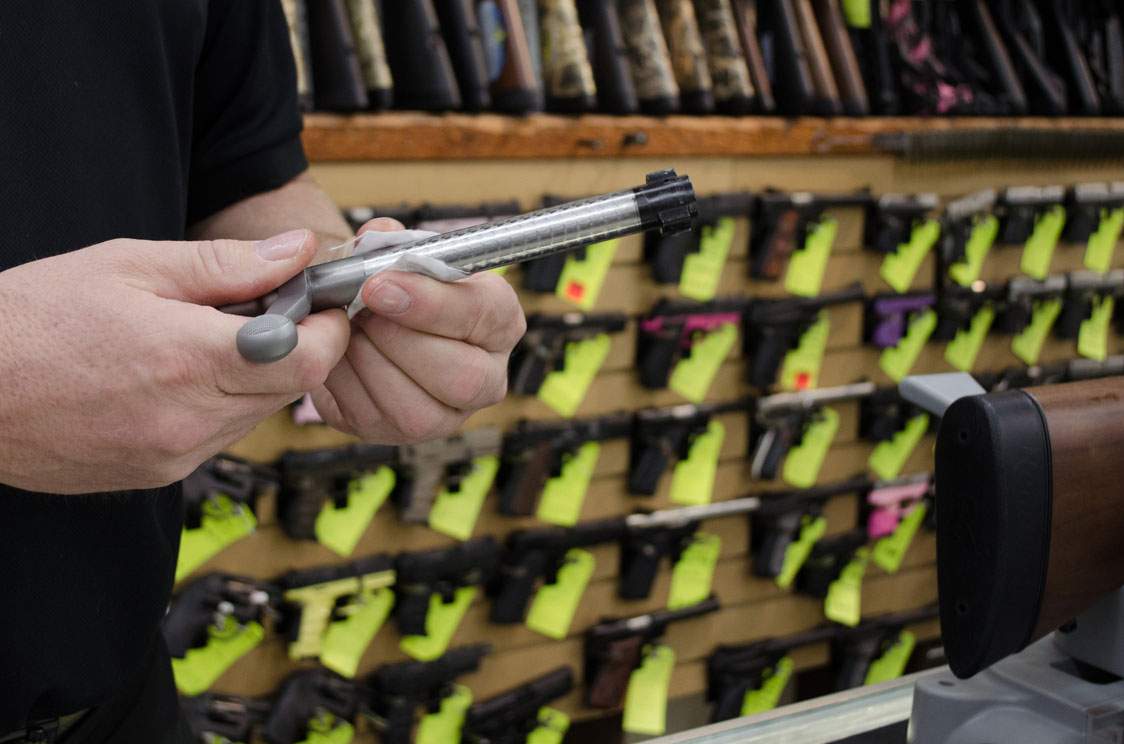
Eric Halter from our Gun Counter will walk you through the basics of cleaning your handgun so you can keep yours in great condition.

Eric knows how to keep a gun clean and firing properly because it’s what he does. When he’s not at Smith & Edwards, Eric spends his time as a gunsmith – something of a family trade, he’s had over 30 years of experience gunsmithing.

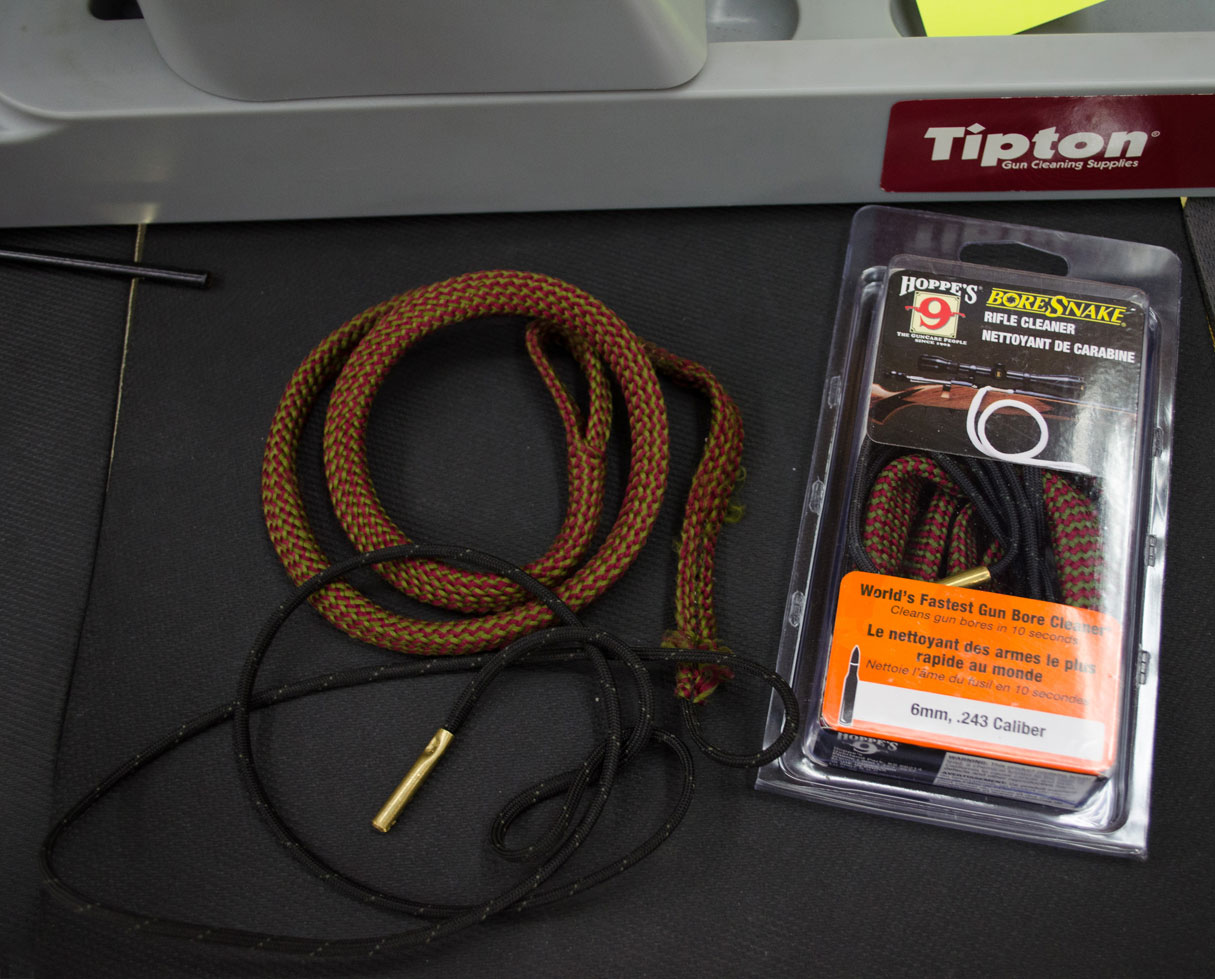
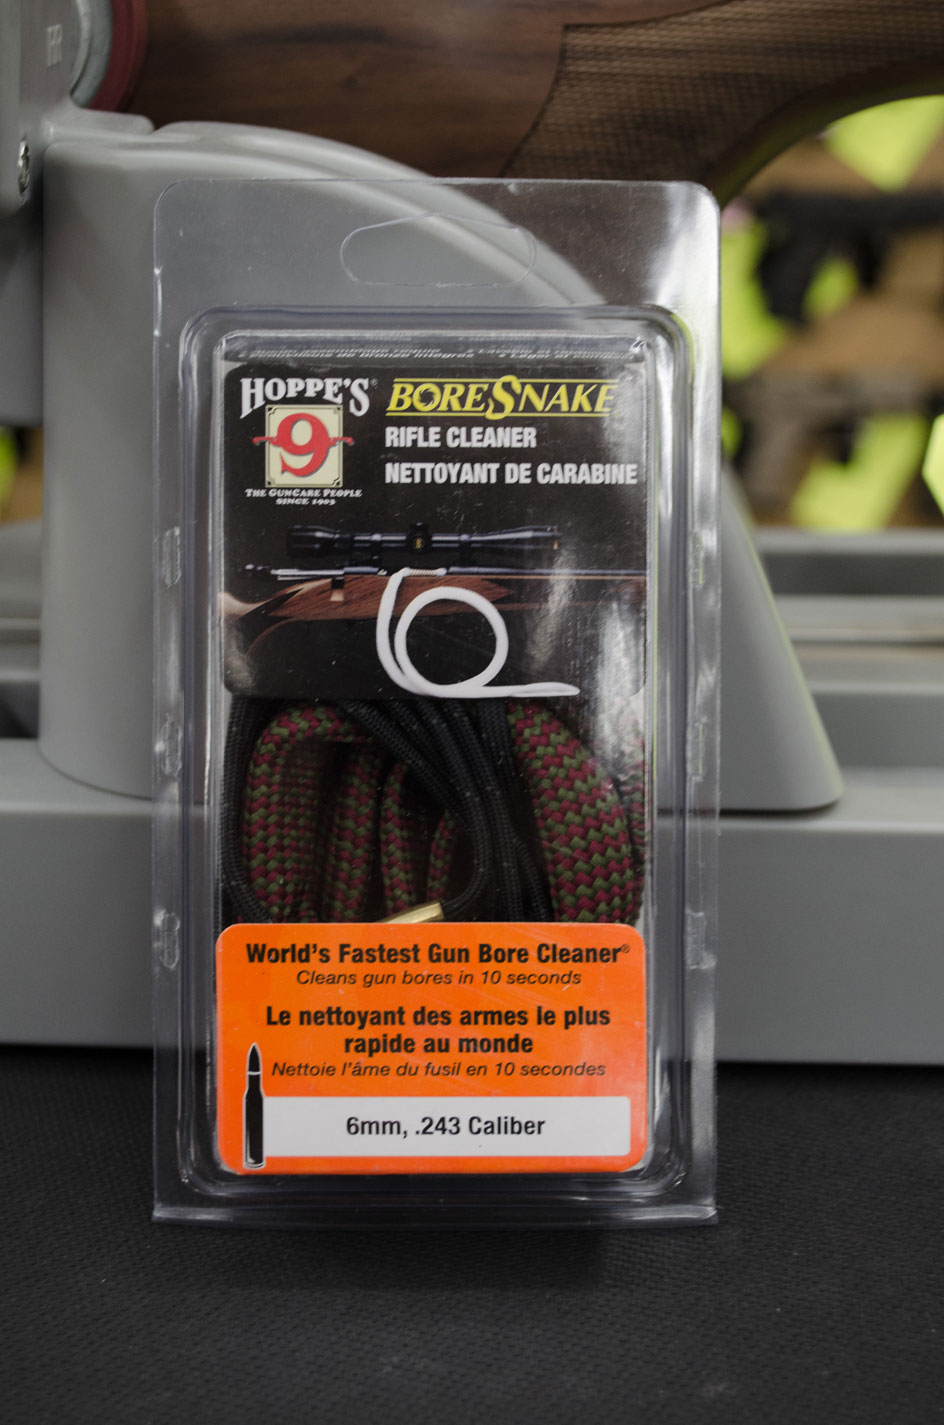
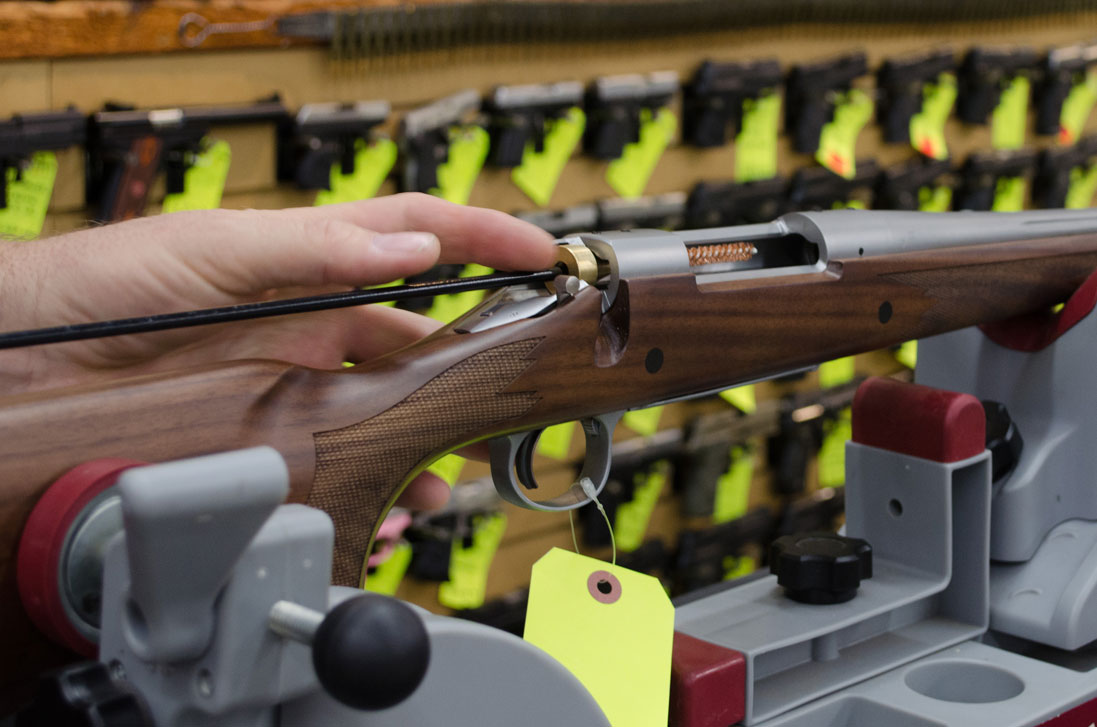
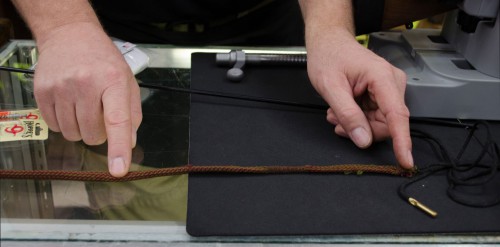
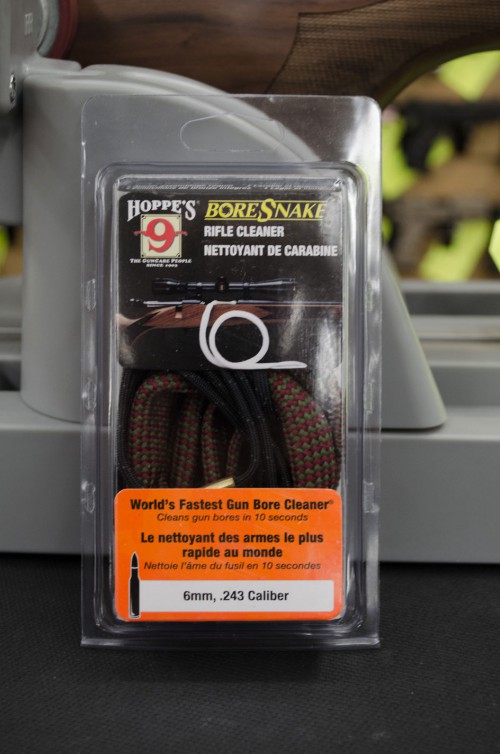
Every time your gun is fired, carbon and copper residue gets deposited and builds up in your bore. A boresnake is a fast way to clean out that residue, and for a deep cleaning after a hunting trip or a session at the range, you can use brushes and patches along with cleaners to restore your gun to pristine condition.

How to clean your gun in the field

A field cleaning is a basic cleaning to get the residue out of your rifle while you’re out in the field. So if you’re not in a place where you can set out all your supplies like your gun vise and cleaning rod, and take the time to give your gun a good cleaning, all you need is your boresnake to do a field clean.

Boresnakes for cleaning your gun

If there’s rain and you’ve gotten water down your bore, if you’re in inclement weather, or you’re in a harsh, dusty, and dirty environment, this is the #1 method to get your rifle back in shape from breech to muzzle.

  1. Take your rifle, making sure it’s unloaded, and remove the bolt.
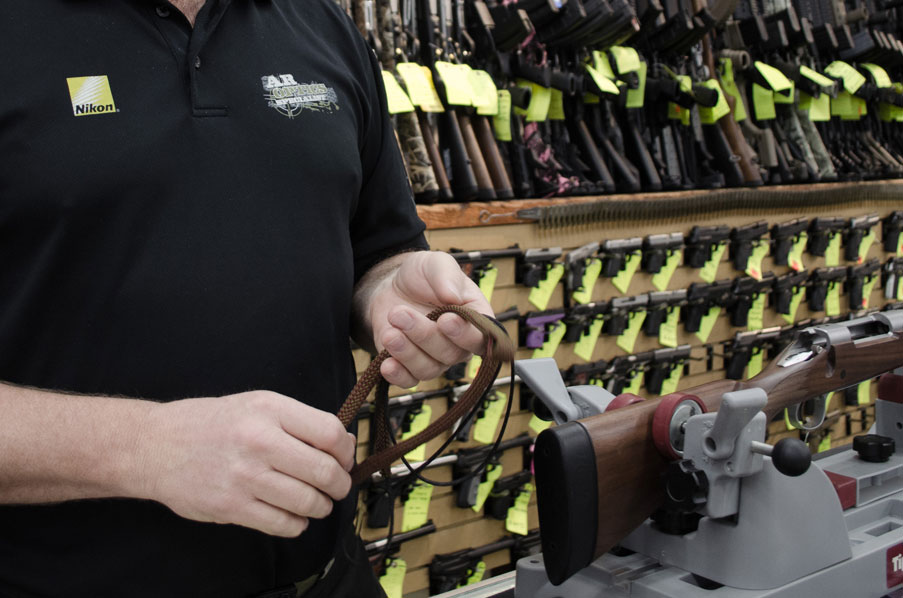
  2. Drop the weighted end of an oiled boresnake down the barrel and pull through the bore, out the muzzle.
    Dropping the boresnake in the borePulling the boresnake down the muzzle
  3. Do that 2-3 times, and you’re good to go.

Gun Cleaning Tip:
Before you go on your trip, lay your boresnake on your bench and wet the first 1/3 of the bore with a bore cleaner like Hoppe’s #9.
Put bore cleaner on the first third of your bore to prep for field cleaning
Then coil it up and put it in a ziploc bag.
Coiled boresnake
Now when you’re out in the field to do a field cleaning, you pull out your ziploc bag, take out your boresnake, and pull that through your rifle and clean out the residue.
Nylon bristles of a boresnake
The brass bristles in the boresnake will help give your gun a good brushing.

When you get home from your trip, you’ll still want to give your gun a good cleaning. A quick & easy field cleaning like this will help you in the field to get the majority of the carbon out, keeping it lubricated and water-resistant, but it won’t take out the heavy copper deposits or carbon deposits like a good deep-cleaning at home.

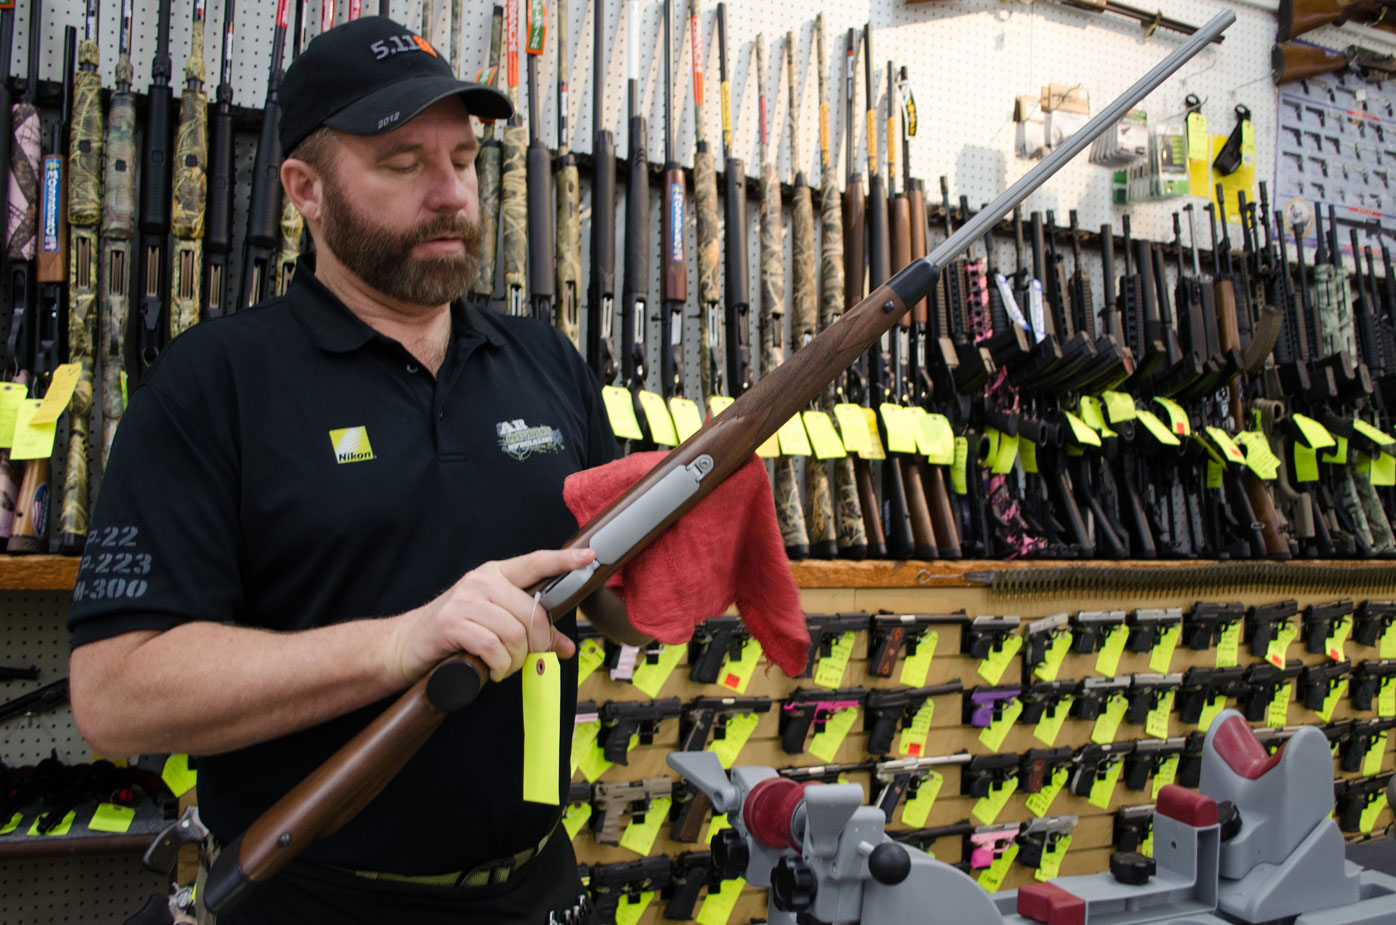
So Eric’s going to show us how to give a long gun the good cleaning it needs. You can follow the same steps on a shotgun or pistol.

How to clean your gun at home

We should mention that your first step ought to be to read your owner’s manual. This will help you see exactly how to disassemble your gun and clean it. Get familiar with your weapon and how to take care of it.

OK, once you get home from the field or the range, set aside a half-hour to give your gun the TLC it deserves.

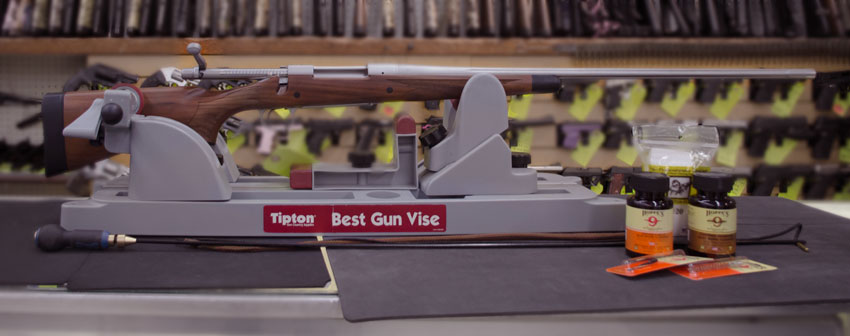
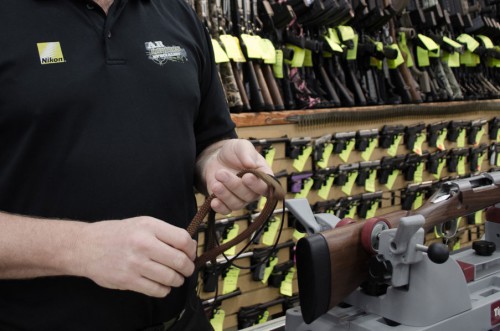
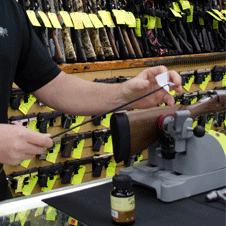
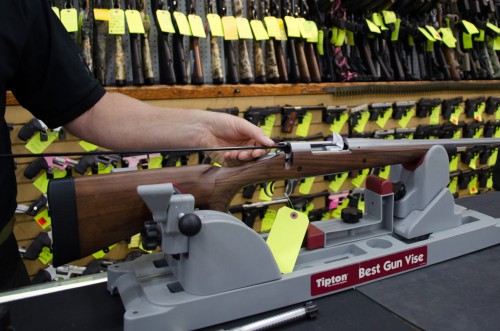
You’ll need: your gun, a gun vise (and a counter or bench to set it on), a cleaning rod with a brush and a jag attachment, cleaning solution, lubricant, flannel patches, and a shop cloth.

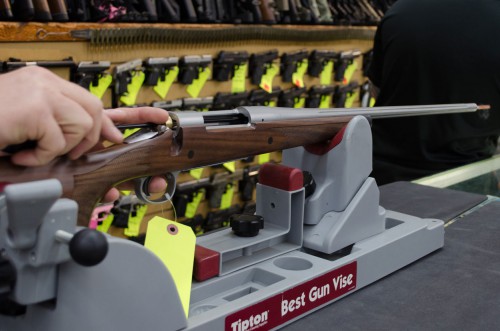
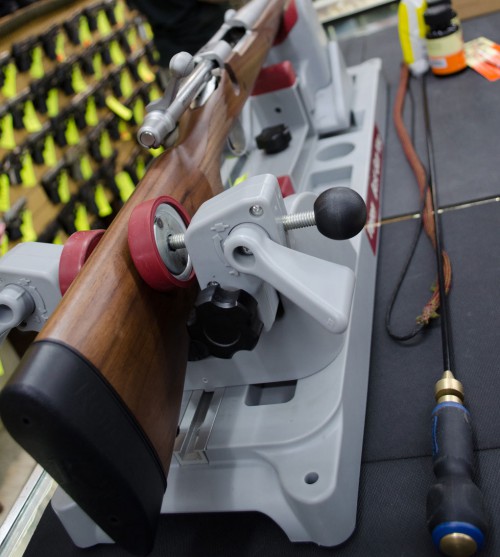
  1. Make sure your gun is unloaded, and then remove the bolt. Rest your gun in a vise.
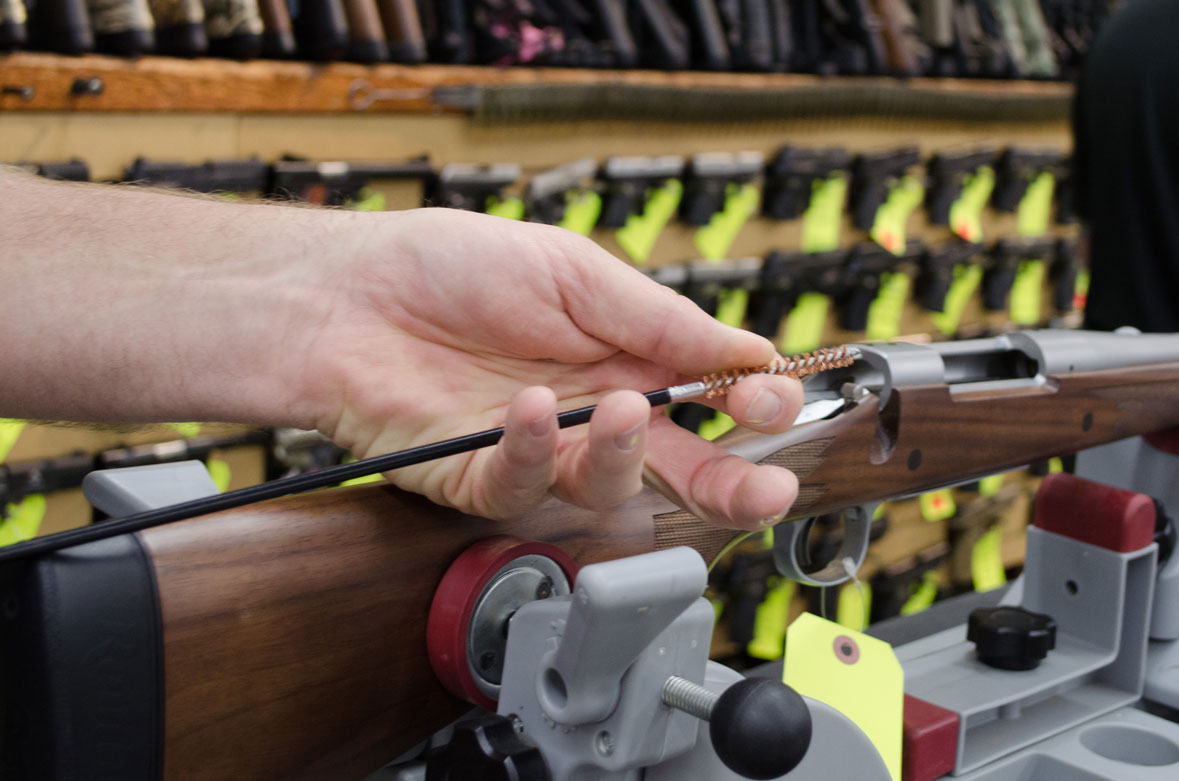
  2. Take your bore brush and screw it onto your cleaning rod. Dip your brush into your solvent (we use Hoppe’s #9 Copper Solvent).
    Bronze bore brush on your cleaning rod
  3. Push the brush and rod through the bore through the end. Do about 20-25 strokes back and forth, then take it out and set your cleaning rod to the side.
    Bronze bore brush cleaning the bore
  4. Let it set for about 5-10 minutes for the chemical reaction. Let the bore cleaner work on the copper fouling and the carbon deposits.
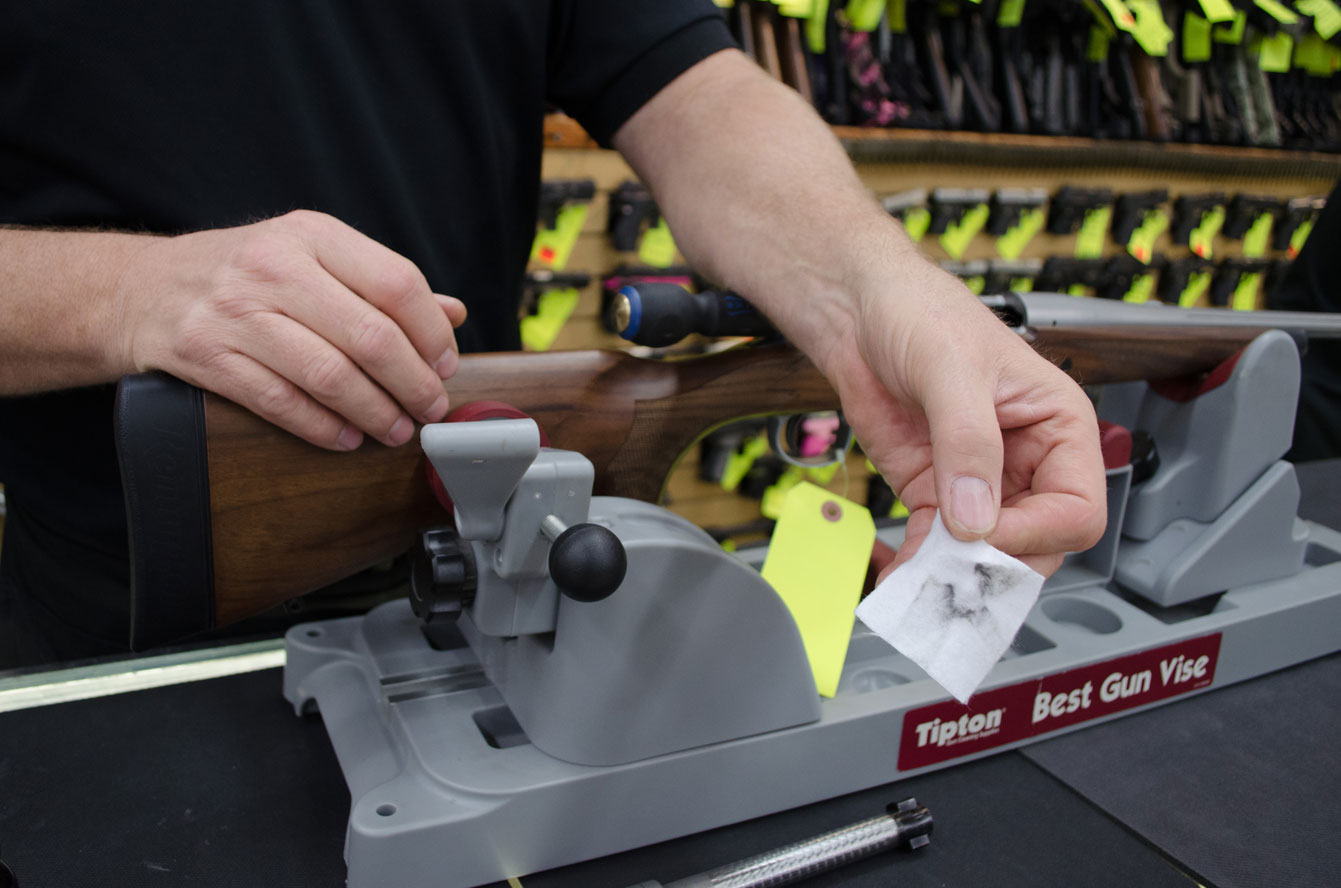
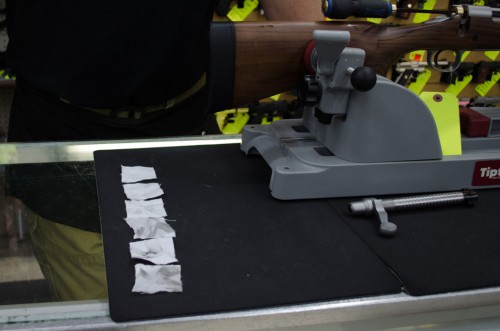
  5. Take your patch jag and screw it onto your cleaning rod. Take a flannel patch and pull a corner halfway through the jag, and fold it over the end.
    Placing a flannel patch in the jag to clean your gun.
    Then, take the patch and run it down through to clean out the dirt in the bore.
    Placing flannel patch in bore on cleaning rod
    Flannel patch coming out the muzzle
    Dirty patch from cleaning this gun
  6. Repeat brushing with solvent as needed.
  7. Keep running fresh patches down through the bore til they come out clean.
    Dirty patches from cleaning the rifle
    Now it’s time to lubricate the bore.
  8. Drop 8-10 drops of oil onto a patch and run it down your bore.
    Dropping gun oil onto flannel patches to clean your gun
    This is a preservative, so that humidity and moisture won’t get in there and rust the bore.
  9. Take a dry patch and run it down the bore to remove any excess lubricant or cleaning oils that are in the bore.
  10. Take one of your patches that had cleaner on it and clean your bolt. Then, lightly oil the bolt.
    Reuse a patch to clean your rifle bolt
  11. When you’re done, take a good clean shop rag and wipe down your gun so it’s clean and dry, removing any oils, dust, and dirt.
    Wipe your rifle down with a clean shop rag
    Put the bolt back in the rifle.
    Place the bolt back in your clean rifle

And you’re all done!

That's a clean rifle! - Eric at Smith & Edwards

These steps are identical for handguns, revolvers, and shotguns. The only difference with a handgun is you’d use a shorter cleaning rod.

Handguns typically don’t get cleaned as often as they should, so for best performance try to do it after every trip or every other trip to the range. Just use the same cleaners and process to get rid of the copper and carbon residue in the barrel.

How often should you clean your gun?

You know your gun best. Eric recommends you do a good cleaning like that every other time you shoot. You should run a boresnake through it after every shooting session.

If your goal is extreme accuracy, you’ll want to clean after every shooting session. Your rifle can shoot through a certain amount of fouling without a problem, but after anywhere from 30-100 rounds, you’ve got fouling in there that will affect your accuracy. If you’re out looking for an elk across a canyon or really needing to hit a target, you’ll want your barrel clean.

If you’re a waterfowl hunter, you’re out in harsh environments – rain, cold, sleet, snow, mud – and your shotguns really take a beating. It’s vitally important to clean your shotgun thoroughly after every usage – making sure to oil it well to keep it water-resistant.

If you’ve got a handgun for home defense, even if you don’t shoot it during the year, the preservative oils can evaporate over time. So while you don’t need to clean it, because you haven’t fired it, you do want to re-oil your home defense firearm once a year – whether it’s a rifle, pistol, or shotgun.

What gun cleaning supplies we recommend

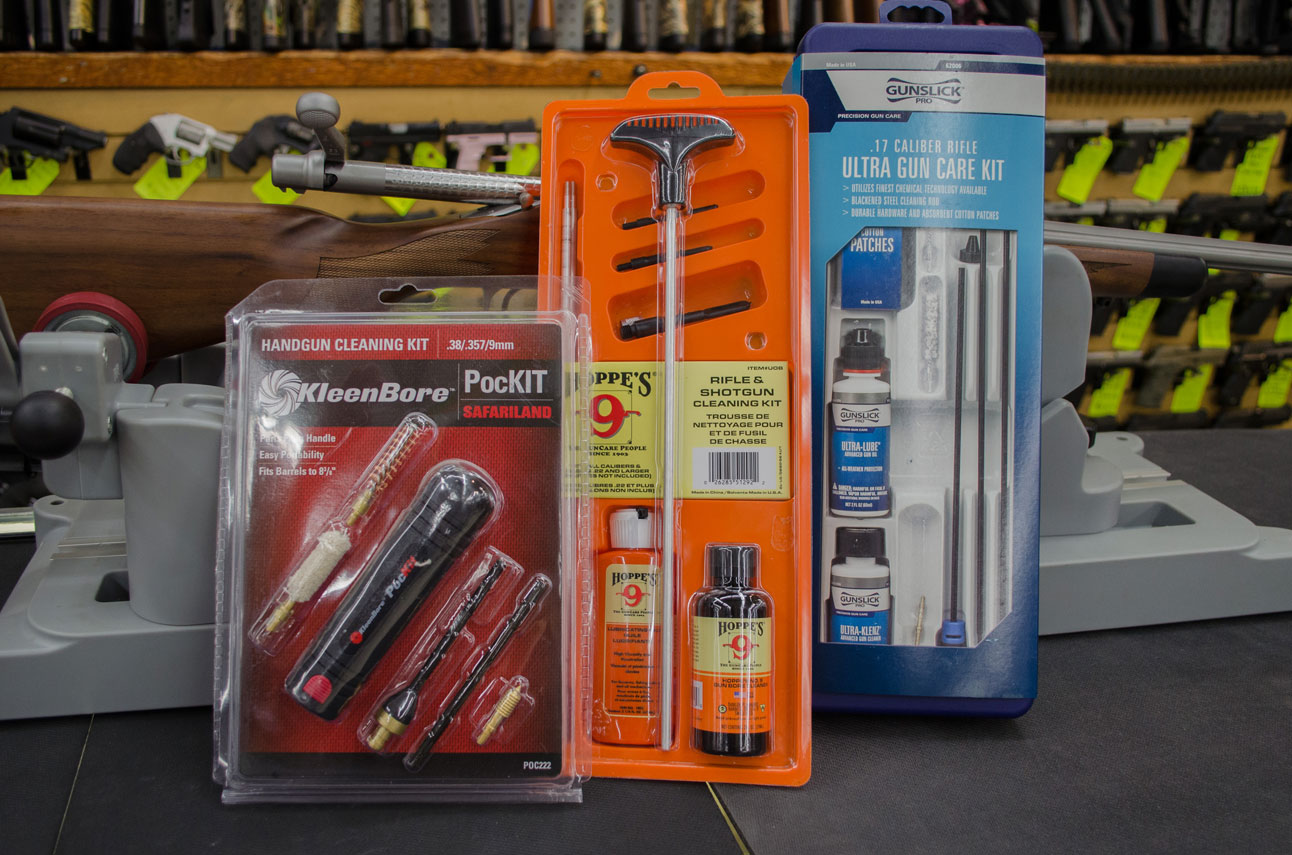
There are a lot of companies that make gun cleaning supplies. Hoppe’s is a great company that has brushes and cleaners, and Outers and Gunslick make great cleaners too. You can also get kits from gun manufacturers, such as Winchester and Remington.

All these are pretty affordable, you’re looking to spend about $20-40 on a kit.

Eric picked out some kits - these are just a few of the dozen or so gun cleaning kits we have here in the store. The small one is a universal handgun cleaning kit.

Eric picked out some kits – these are just a few of the dozen or so gun cleaning kits we have here in the store. The small one is a universal handgun cleaning kit.

We’ve also got Tipton’s Best Gun Vise $99.99 – this vise can adjust to fit rifles, compact pistols, and everything in between. You can find all these gun care products and much more in our Sporting Goods department here at Smith & Edwards.

Tipton Best Gun Vise

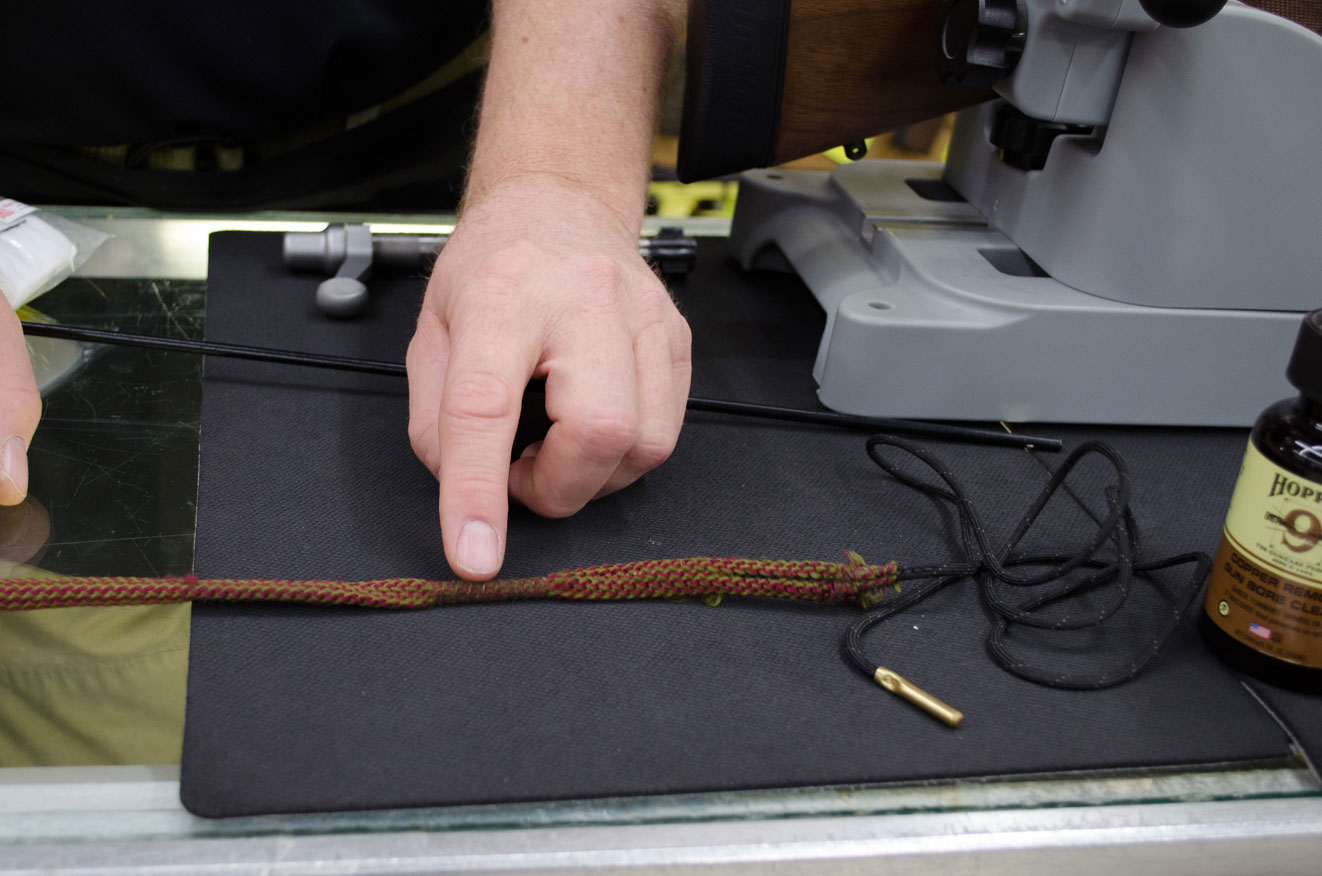
Bore snake – a must-have.

Bore Snake for cleaning your Gun Barrel

Bronze brush and a Slotted Jag – they come in a huge range of sizes, so get the one that fits your bore so you don’t have to scrub as much.

Bore Brush and Jag by Hoppe's

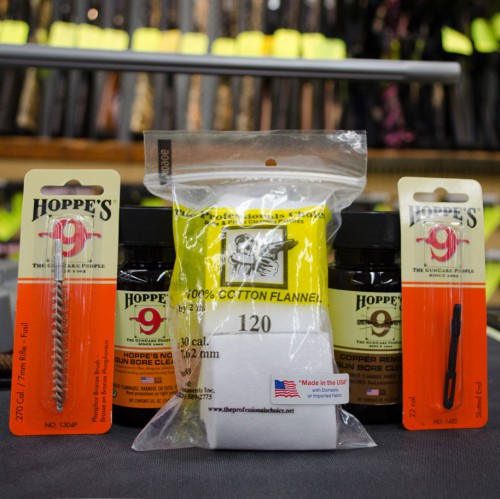
We’ve got tons of flannel patches, a bag will run you about $5.

Hoppe's Gun Cleaners

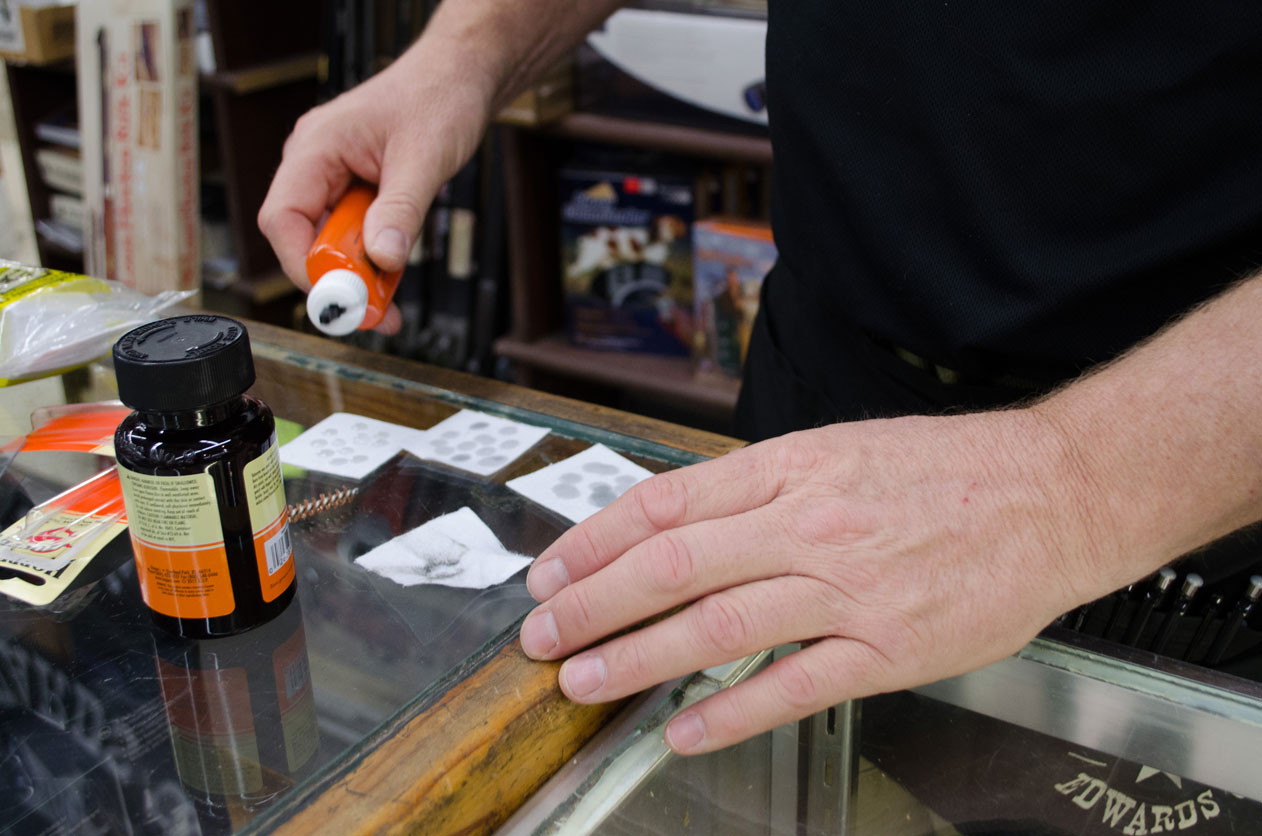
Orange-label Hoppe’s #9 Gun Bore Cleaner: your standard, all-purpose cleaning solution.

Brown-label Hoppe’s #9 Copper Remover is a copper solvent that will dissolve the copper out of your bore. You’ll know it’s working when your patch comes out with a turquoise-green tint to it. Keep running the patches down til they don’t have that blue tint on the patch.

This copper remover is what you’ll want to use frequently if you’re an extreme accuracy shooter or into long-range shooting, to get the pristine bore you need. If you’re familiar with your rifle’s trajectory and exterior ballistics, you don’t want to waste that knowledge by having a dirty rifle and not being able to count on the bullet’s trajectory.

Hoppe’s lubricating oil is a great choice for keeping your bore dry and rust-free til you use it again. It doesn’t have much of an odor at all. Break-Free CLP is another good choice.

Cleaning rod: Pretty basic, you’ll want either a rifle cleaning rod or a handgun-size cleaning rod. This particular one has a sliding piece of brass that fits on the rear of the action, so the rod stays aligned in the center of the bore, so you get a good clean, and faster.

Rifle Cleaning Rod with Brass Alignment disc

Your turn

How do you clean your handgun or rifle? What are your tips & tricks? Leave a comment below and let us know.