Author Archives: Amy Griffiths

About Amy Griffiths

Amy spends most of her day describing items we're adding to Smith & Edwards' web store and she's always coming up with fun ideas! She has 5 kids, and loves paper crafts, tennis, and salsa! Follow her on Pinterest and keep up with the latest goodies Amy's found that she may just bring home with her :)

Make a Bandana Dress for your little girl in this fun sewing tutorial!

How to Make a Bandana Dress for your Little Girl

- posted by Amy Griffiths

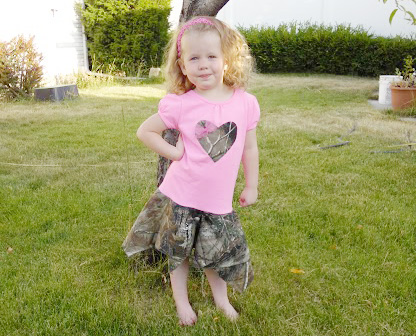
Isn’t she cute? It’s so simple: a t-shirt and two bandanas, and you’ve got a brand-new outfit for your little girl! This is a fun sewing tutorial and you’ll be hooked on making these for your toddler. There’s a lot of room for her to grow in a dress like this!

Abby in her camo bandana dress

For Smith & Edwards, I HAD to make my little girl a Realtree camo dress!

You’ll need:

  • 1 storebought tee
  • 2 bandannas (same or different!)
  • Sewing machine, scissors, ruler, and chalk pencil or sewing marker

How to make a Bandana Dress

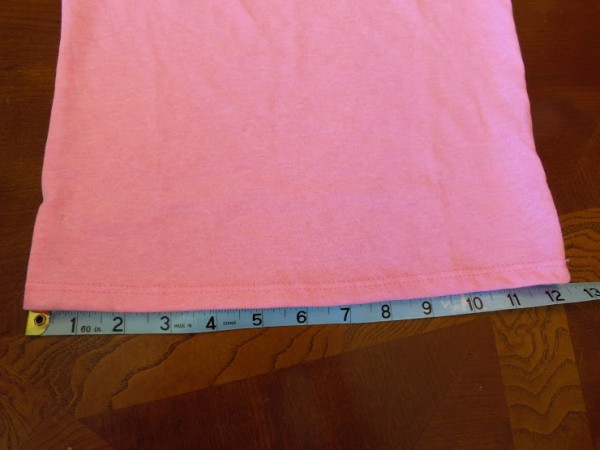
  1. Measure the width of the bottom of the tee.
    Measure the width of your tee shirt.
    Now, use this formula: Multiply the width by 2 and add 1.5".
    For my tee, I took 12.75 x 2 = 25.5. Add 1.5 = 27".
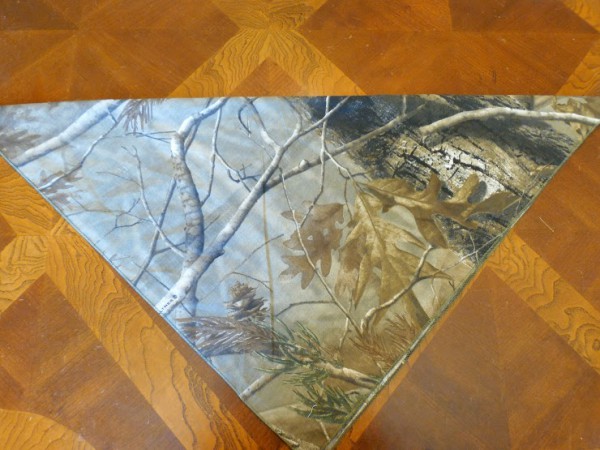
  2. Now, fold your bandana in half to make a triangle, and fold in half again.
    Fold your bandana in half to make a triangle.

  3. Take your number from step 1 and divide by 6.28 (this is pi times 2, for those playing along at home.)
    For me this means 27 / 6.28 = 4.29" (I used 4.25")
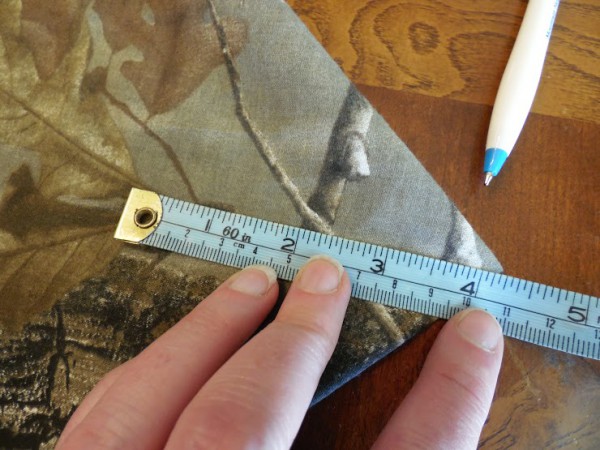
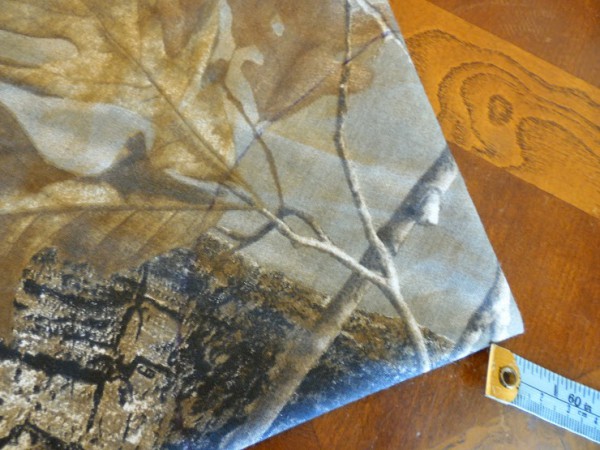
  4. Place one end of your ruler on the corner of the bandana, and mark along the bandanas at the mark you found in step 3 – for me, that’s 4.25". Make sure and make several marks, then join a line with a chalk pencil.

    Measure your length
    And mark where to cut your bandana

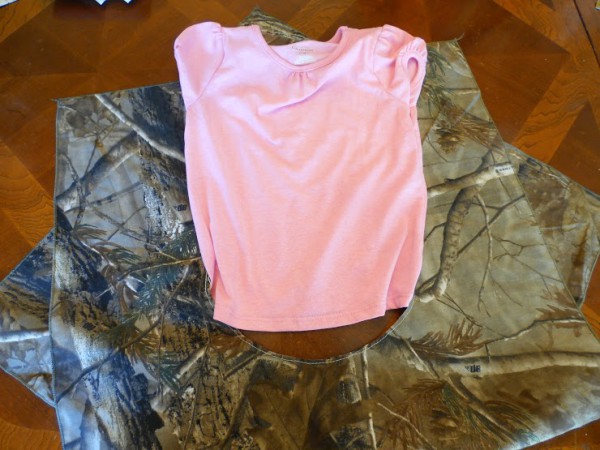
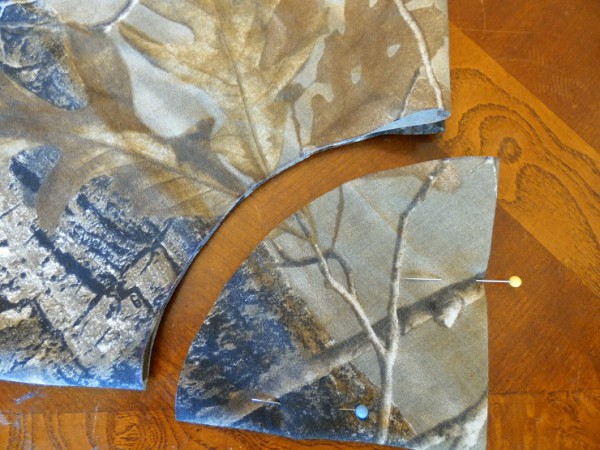
  5. Cut along the line you made. Unfold, and you’ll have a perfect circle cut in the middle of your bandana.

    Cut along your mark

  6. Repeat step 4 & 5 on your second bandanas.
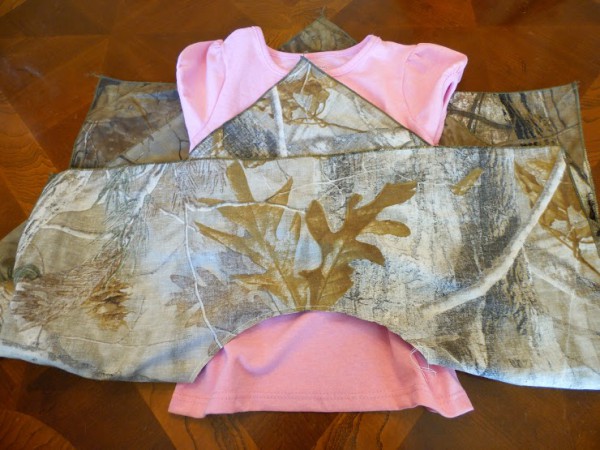
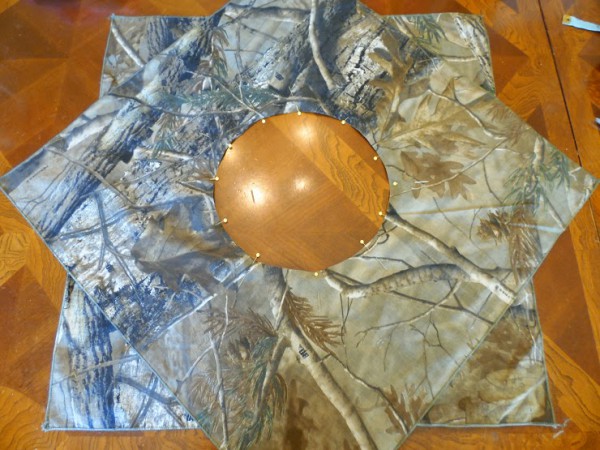
  7. Now, lay one bandana on top of the other, and offset so you can see all eight points. Pin together.

    Unfold the cut bandanas, and layer on top to show eight points.

  8. On your sewing machine, use a large stitch to baste your bandanas together (about 1/4") .

    And unfold your bandana

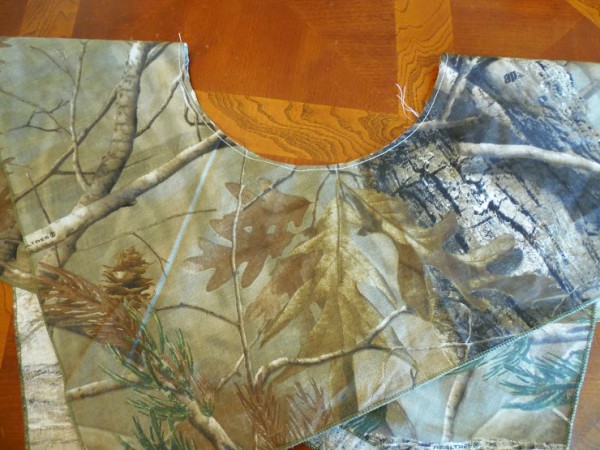
  9. Slip your tee in the opening you’ve made.
    Slip your tee inside the bandana skirt
  10. This part may seem a little tricky! You don’t want to join the edge of the bandanas with the very bottom of the tee: bring it up an inch, so you don’t see the hemmed seam of the tee.
    Make sure the tee hem is below the edge of the bandana skirt!
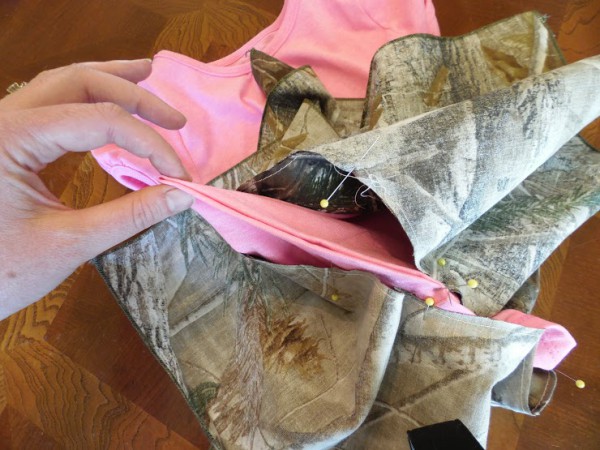
    Make sure right sides are together, and pin tee to bandanas.
    Pin the bandanas to the tee
    I do this by folding the bandana in half, as well as the tee, and pin. Fold that half in half and pin together. Keep doing this until you’ve got about 8-12 pins in.
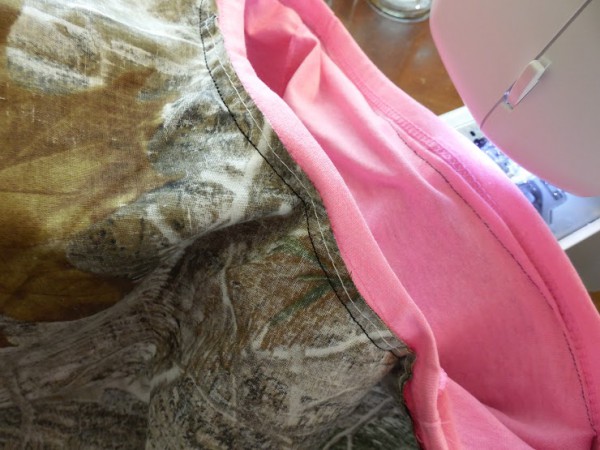
  11. Now, sew it together. Tip: Your tee is smaller than your bandana cutout, so just make sure you stretch your tee as you sew.
    Sew the bandana skirt to the tee
  12. Unfold your dress, and you’re done!
Add an embellishment made from the circles you cut!

Add an embellishment made from the circles you cut!

With the leftover fabric from the bandana holes, you can embellish your dress: Cut out a heart and use iron on fusing like Stick ‘N Hold or Wonder-Under – or, make a handmade flower! It’s all up to you!

Bandana skirt dress with flower embellishment
Get your bandanas online at Smith & Edwards online: Get a Realtre AP Camo Bandana or traditional bandanas to make your own bandana dress!

Love this Sewing Project? Pin it!

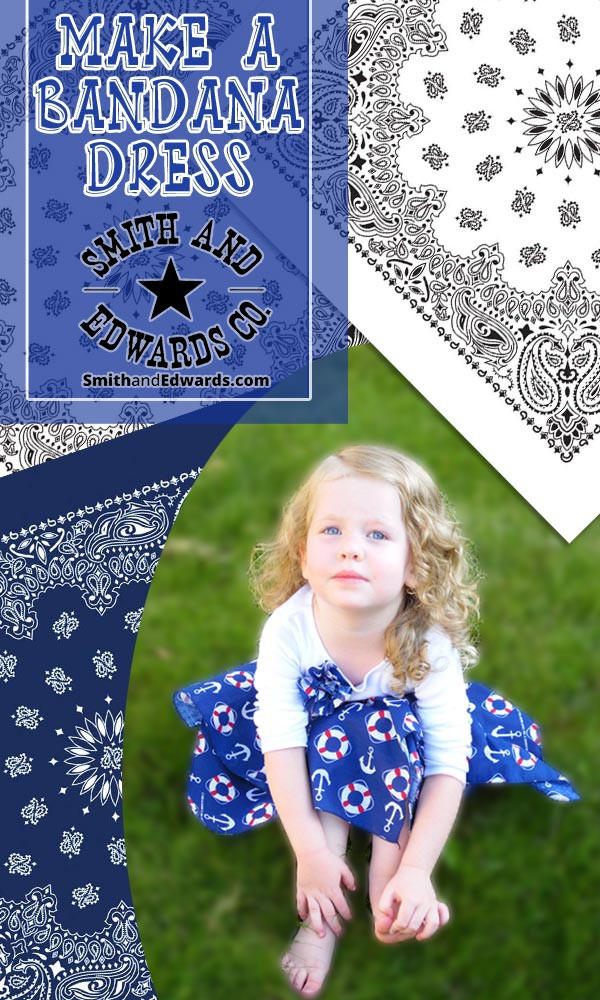
Pin how to sew a Bandana Dress to your crafty board!

Country Boy April Fools Prank Ideas

April Fool’s Pranks from the Western Department

- posted by Amy Griffiths

Nobody loves a good joke more than our Western department. They are infamous for their many pranks. Insomuch that when I joined Smith and Edwards I was even warned not to go over there on April Fool’s Day!

So in light of April Fool’s Day coming up I’m going to share with you some of their pranks that you might want to use for your own April Fool’s pranks!

Drop for Drinks

When you bring up the topic of past pranks in the Western department, there is one that seems to be revered over all, even honored. If they had a Hall of Fame prank board, this would be at the top. They call it Drop for Drinks.

For this “game” you need a quarter, a funnel, and what’s a good prank without ice-cold water.

Start by telling your “victim” the rules of the game. Entice him by telling him the loser buys drinks for everyone else. The idea behind the game is that you drop a quarter from your forehead in a funnel that you are holding up in the waist of your pants. When you make it in, you get to step out of the circle. The last one to catch his quarter buys drinks for everyone else. (I realize it sounds like you’d actually have to be drunk to play this game, but truth is, most our guys are water drinkers!)

Everyone gets in a circle and has a “practice round.” When it’s time for your “friend” to take his turn, wait for him to lean back to get his quarter ready. That’s the time to pour ice-cold water down his funnel. But watch out. After the shock wears off you may need to run! Can you picture why this is a Western department favorite?


Arachnophobia

This next prank they were laughing so hard I couldn’t always understand them! It involves a tarantula, a plastic container, and a co-worker with some serious arachnophobia.

One early morning Shaun came to work with a tarantula in a plastic container. Marty, their fearless leader, made a tarantula look-alike with a sheepskin for the body and dangling leather for the legs – all painted black. They tied it to an unsuspecting, unnamed co-worker’s work apron. (They manufacture leather tack for their wholesale department right here in our store.)

When the man came in to work, Shaun was holding the tarantula in its case, looking around frantically. The co-worker asked what was wrong and Shaun told him that when he came to work that morning there were two tarantulas in that box and now there was only one! You could see the other guy glancing around nervously. He carefully went to his workbench and reached for his apron while still scanning the area anxiously. As he went to put his apron on he saw the tarantula Marty had made dangling off his apron.

Now at this point in the story they are laughing so hard it’s hard to tell what they’re saying.

The poor man couldn’t stretch his arms out long enough to keep that apron away from him as he was screeching and backing up into the middle of the store. (We weren’t open yet so there were no customers to watch the scene, thank heavens!)

He realized it was a joke when he finally noticed everyone laughing. In the words of Marty, “That’s when he started breathing again.”


More Drink Than You Bargain For

The next two pranks show that you should never leave your drink unattended back in the Western department.

Next time you see a fast food drink sitting around, try this favorite trick! All you need is the cup with a straw and lid, a packet of Arby’s sauce (feel free to use Worcestershire sauce, hot sauce, or any other sauce you can find), and some tape.

While the owner is gone, take off the lid. Make a small slit in the Arby’s sauce so the straw can just fit through. Secure it to the straw with tape and replace it in the cup with the lid. When he comes back he’ll take a big swig and get a special surprise!

I love this one, but once again, you’ll need your running shoes on!


The Leaky Pop Can

Don’t let Marty get a hold of your pop can, or water bottle, or pretty much anything that you value.

Apparently he likes to use a razor blade to cut a horizontal slit about 1″ down from the rim, right below the drink opening. The “victim” doesn’t realize it’s there and when he drinks he dribbles all over himself!


Oreo Horseradish Cookies

The next three pranks are simply irresistible!

Start by gently taking off the top of your Oreo. Carefully scrape out the middle of the filling, leaving just a thin outer layer. Fill it in with horseradish sauce, or something similar.

Replace the top of your cookie and replace in the Oreo package. Now you are ready to serve your delightfully deceptive treats!


Tabasco Sauce Donuts

This idea is a pretty simple concept that really packs a punch! First you need a box of store-bought donuts. (I suggest maple bars, but only if you’re sharing with me.)

Fill a clean syringe with Tabasco sauce and carefully insert into the middle of some of the donuts. Your “victim” will see you eating donuts, so won’t think twice about it when you offer him a Tabasco-filled one. Watch the pleasure turn to horror when he starts eating!


Chocolate Cupcake Surprise

Here’s a story I’ve heard over and over again. I guess if they prank a manager it goes down in the history books!

One April Fool’s Day Dani decided to buy some chocolate cupcakes from the store and add a little something of her own – black food color. She injected it in the middle of the cupcake with a syringe. (Apparently a pretty handy tool to have back in the Western department!)

Most of the cupcakes were untouched, and everyone was eating them – so when one was offered to our co-worker, he jumped at the chance.

He started realizing there was a problem when he saw black dye on his hands. Too late. His lips and tongue were black the rest of the day!


Raccoon Eye

For this simple prank you just need an ink pad and some binoculars. Ink around the binocular lenses with the pad so that when the unsuspecting wearer looks into them, they leave him with a surprise he won’t notice til someone tells him – or he looks in a mirror.

The guys in Western did this to a co-worker one time and he went most the day with the “ink spectacles” around his eyes before a co-worker from another department told him about it. Not saying it’s nice, just saying it works. Hehehe


Glue Bottle Jump

I call this the Glue Bottle Jump because that’s exactly what I did when they did this to me! You just need an empty glue bottle and some white 1/8″ cotton cord.

Take an empty bottle of glue and clean out the nozzle well. Marty uses a big bottle of Tear Mender because that’s what he uses all the time. Cut a 1/8″ cotton cord about 12″-15″ long and tie a knot at one end.

With the knot on the inside of the lid, insert the other end through the nozzle and make another knot on the open end. Now it is securely in place so it won’t come out. Pull the thread back through the lid so only the knot is showing on the nozzle of the lid. Attach your nozzle back to the bottle.

Marty, the Western department manager is fabulous at telling stories. He leads you up to the prank by showing you some of his work, or how he makes something. Then, when the moment is just right and he is showing you the glue, he’ll squeeze the bottle right at you and watch you jump…..and sometimes yelp. I’ve seen him do this to others and this harmless joke is always fun for a good laugh! Our friend Jeff was the last victim to his prank so we recorded it and you can see it below. Jeff says he doesn’t get scared easily so we’re pretty proud that we got any reaction out of him.

Thanks for being a great sport Jeff!


These are really only the beginning of the pranks and tricks you might find around here in the Western department. Maybe it’ll give you some ideas for April Fools pranks you can use!

Got some fun April Fools pranks of your own? We’d love to hear them! Please share them below.


Love all things Western? Tom teaches us how to tie a honda in this informative and easy-to-understand video. Check it out here!

Click to check out more Western riding gear and accessories at Smith & Edwards!

Sliester Bits History featured at Smith & Edwards

Brand Spotlight: Sliester Bits

- posted by Amy Griffiths

As a Western tack & lifestyle store and a tack manufacturer ourselves, Smith & Edwards loves spotlighting American companies who produce their wares in the U.S. This post is part of a series spotlighting American manufacturers.

Sliester is a well-known name for Western bits. Steve Dunn spoke with us about Sliester Bits’ history and where the company is today!

Sliester Logo

Steve Dunn of Sliester Bits

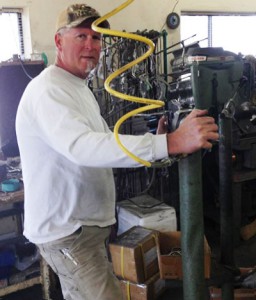
The bit builder: Sliester’s Steve Dunn, squeezing the rivets on a loose jawbit. Racks of bits behind him!

Tell us about Sliester’s history.

A pair of cowboys, Don & Vic Sliester, started the company in 1954 with their aluminum hackamore. At the time, my family (the Dunns) operated a deburring business. We had rock tumblers and de-burring equipment.

Don & Vic came to us to find a process to smooth and polish the bits they made. Each of the bits spends a few hours in our tumbling machines, which slowly sands the sand marks out.

As it turns out, my dad Earl Dunn wound up buying the business from Don & Vic in the 1980s, when I was 18.

Did anything change when the company changed hands?

Not much. It’s the same great quality and craftsmanship since the beginning. We’ve had the same bit builder for the last 35 years, and that’s me!

We’ve had more people helping at times, including my two brothers Jim and Earl, but I’m the one who’s stayed around from the beginning. My dad is still here with me and answers the phone and helps where he can.

All the bits are still made here in America. There’s a lot of competition now for overseas stuff. I believe in my product and I believe in keeping it American-made.

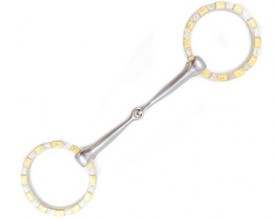
Sliester Full Silver & Jewelers Bronze Ring with Sweet Iron Snaffle

One of the many fine bits Sliester produces: this engraved snaffle bit features full silver & jeweler’s bronze rings.

The Sliester brothers started the company in Sanger, CA. In 1980 we moved the company here to Auberry, California, which is about 20 miles from Sanger. We still make all the bits here in Auberry.

The business has always been named Frontier Supplier Inc manufacturer of Sliester Bits & Spurs. My dad kept the name when we bought it.

What do you love about continuing the Sliester tradition?

My favorite part of the business is being self-employed and working with my hands. I have made bits for some famous people, but I don’t want to say names.

Family-owned and operated – these bits are not mass-produced. If you have ever owned one, you can feel the balance.


Thanks for talking with us, Steve!
Find Sliester Bits online:

Click to explore Steve’s Sliester bits on SmithandEdwards.com.

We also carry pointed and cloverleaf Rowels that Steve makes, which are also sold under the Frontier Supply name.


Shop Bits

Shop Rowels

Click to check out more Western riding gear and accessories at Smith & Edwards!

How to tie a Honda Knot

How to Tie a Honda

- posted by Amy Griffiths
Did you hear about our first ever in-store Dummy Ropin’ contest? We had so much fun we’re already thinking about the next one! Check out what happened and see who won. Sign up for our emails just for horse enthusiasts so you don’t miss out on the next one!


Our western department has western rock stars as far as I’m concerned. Not only do they carry a great selection of quality products, they are also so knowledgeable, friendly, and genuinely good people. They live the lifestyle they are talking about and have first hand experience.

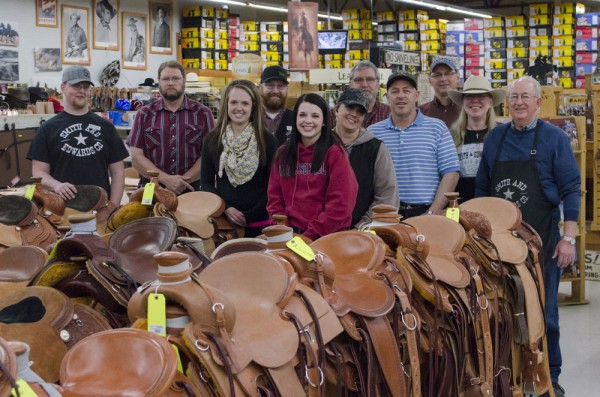
The people of Smith & Edwards' Western department

Tom, Dave, Sam, Marty, Jess, Dani, Steve, Kyle, Shaun, Kris, and Sherm


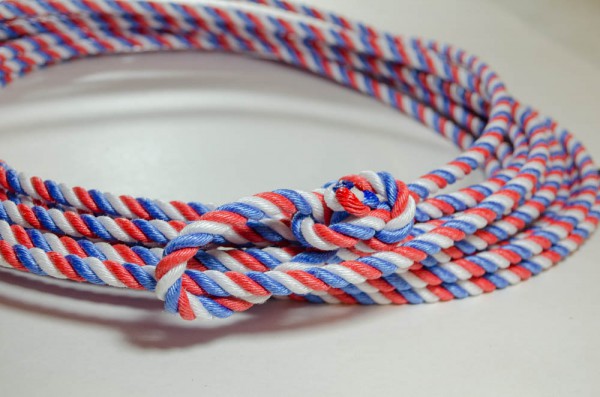
Often they are asked how to do certain things, and how to tie a honda is a common request. Tom, one of our fabulous craftsmen from our manufacturing department (yes, they design and manufacture a lot of the tack they sell, and they do it right here in Smith and Edwards!) agreed to show us how to tie a honda. It must be effective because people keep coming back for more! (click here to skip to a written step-by-step how-to)


Watch How to Tie a Honda

Step by Step Tutorial on How to Tie a Honda

Tying a sturdy honda is really a two step process, but it really is quick and easy. First you make a stopper knot, then you can make your honda.

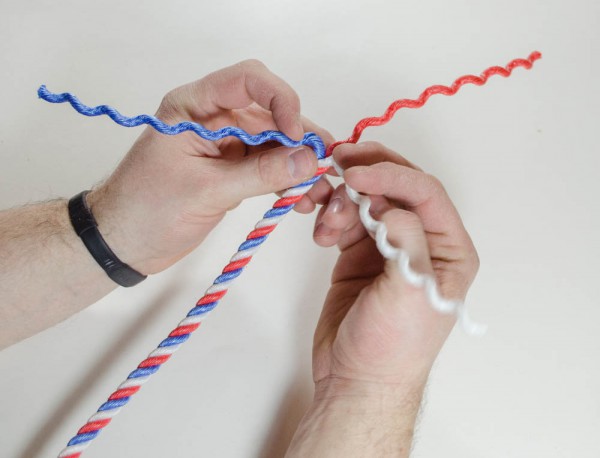
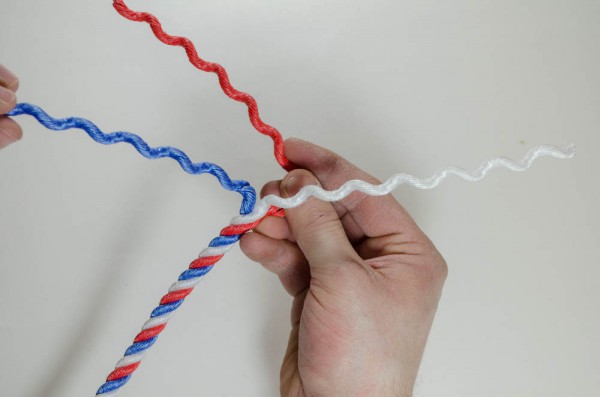
Begin by untying the strands in your rope about 6″ down and separate them. For our tutorial we’re using a 3 strand rope but you can easily do the same action with a 4 strand rope.

Separate the rope strands


Take the middle back red strand and curve it to the left.

Curve to middle back strand to the left


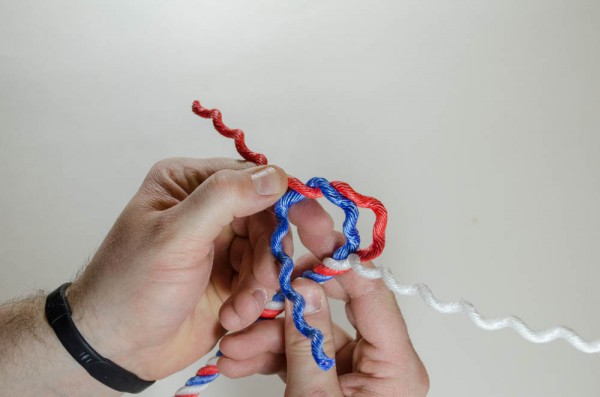
Take the blue strand on the left and go over and then under the middle red strand you just curved to the left.

Over and under left strand


Now take the right white strand and do the same over and under action you as you just did on the previous blue strand.

Next over & under - part 1
2nd Over & Under - part 2


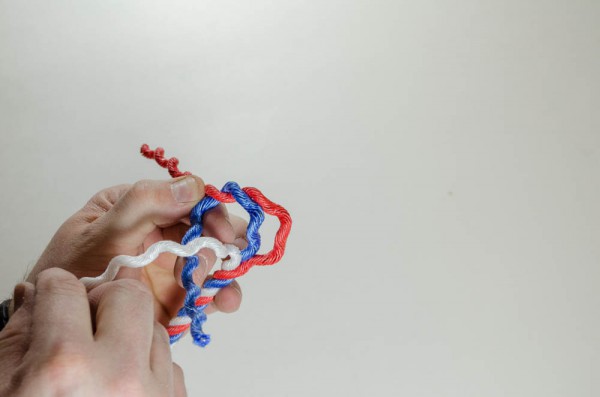
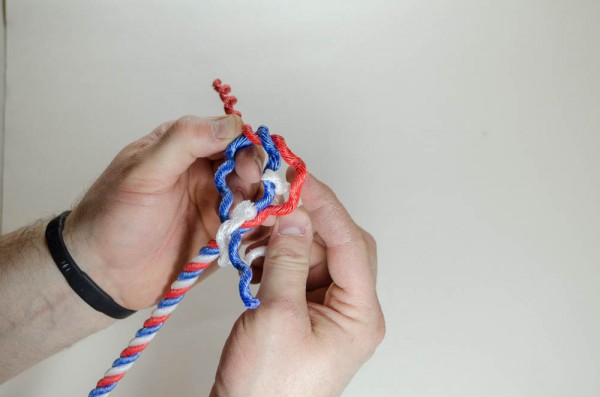
Grab the tip from this same white strand and insert it in the top loop you created with the first red middle strand.

Up through the loop


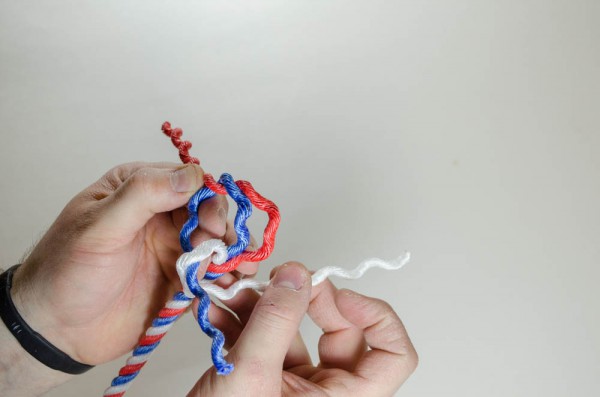
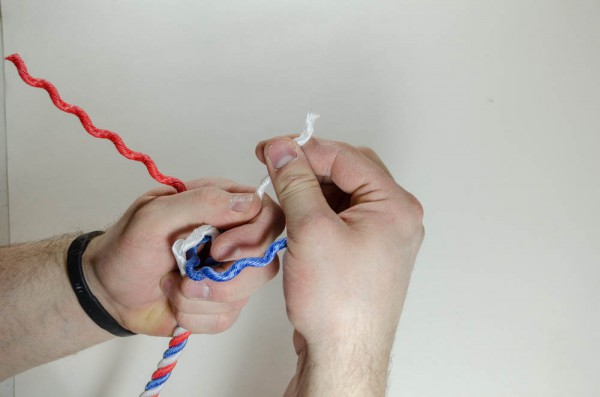
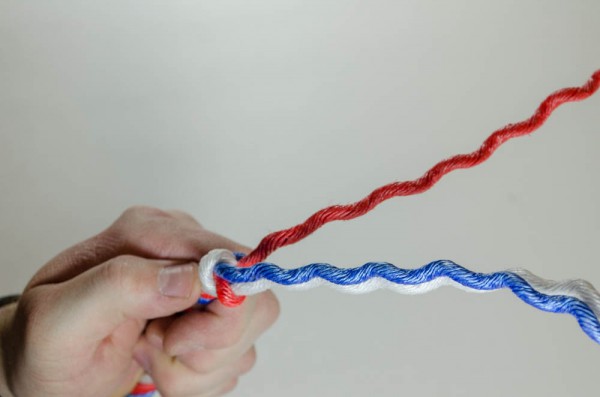
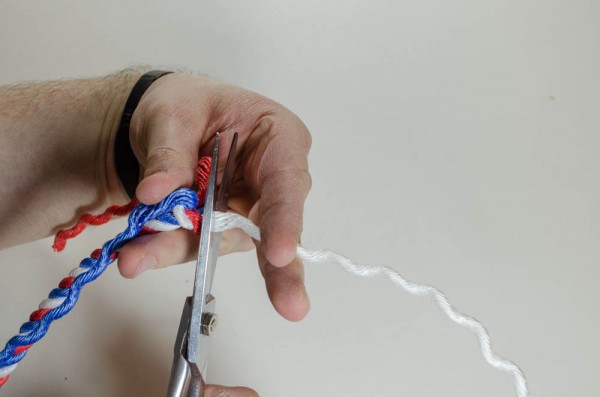
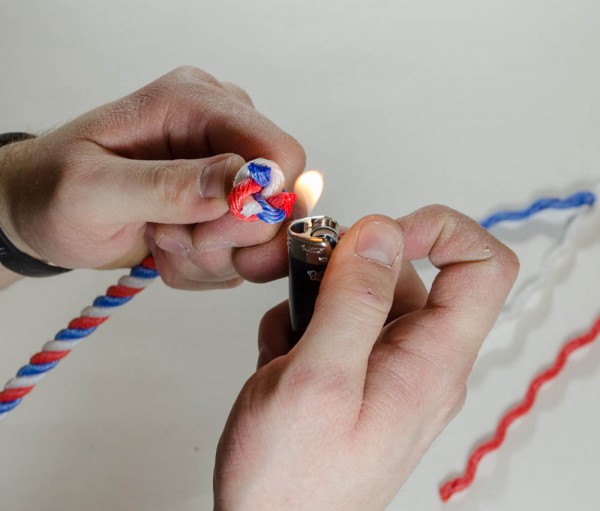
Pull the end of each strand, making a tight knot at the bottom. Cut and burn the ends to seal it.

Pull strands up
Tighten strands
Cut strands
Burn strands


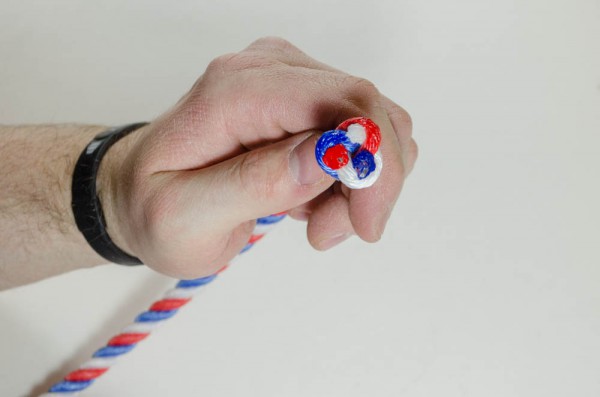
Now you’ve got your stopper knot ready for the next step. Look how great it turned out!

Finished Stopper Knot


Time to tie your Honda

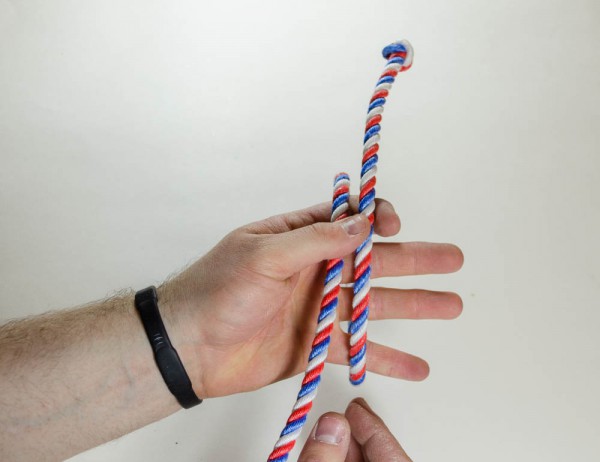
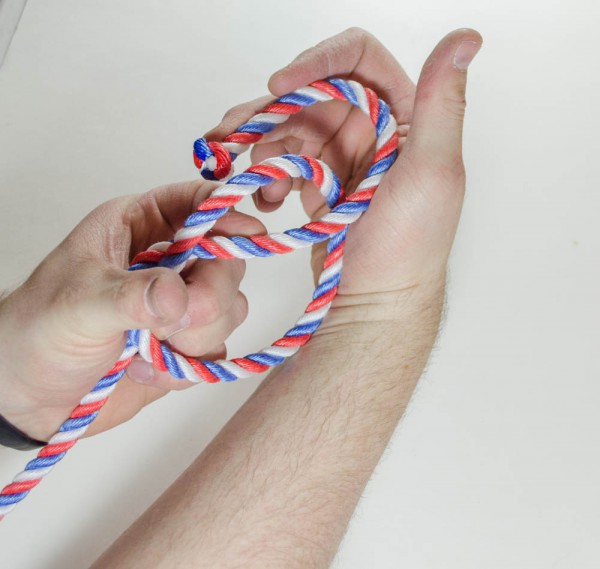
With about 18″ of rope, take the end that has your newly tied stopper knot. Working towards the right of your rope, loop it towards you til the knot faces away.

Loop end toward you til it faces away


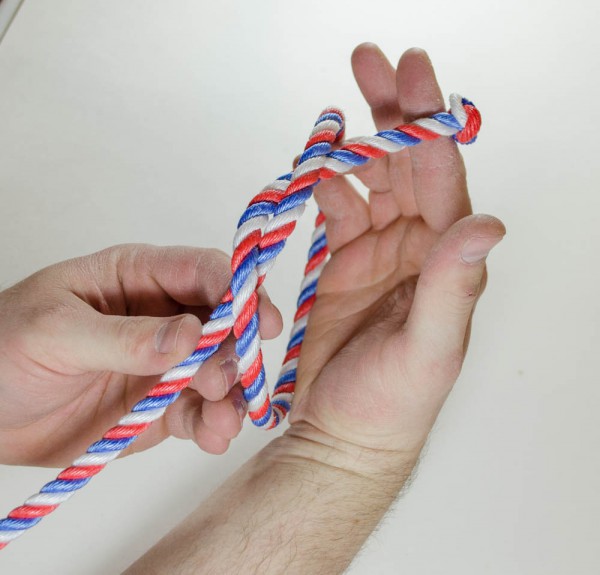
Grab the knot, take it to the left of the loop, then under and up, making an overhand knot.

Make an overhand knot


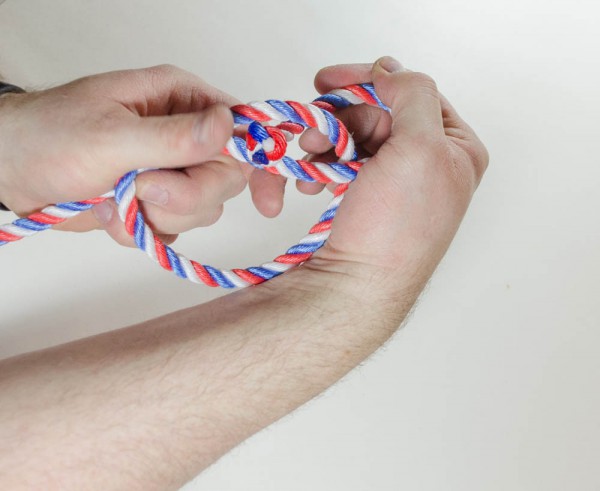
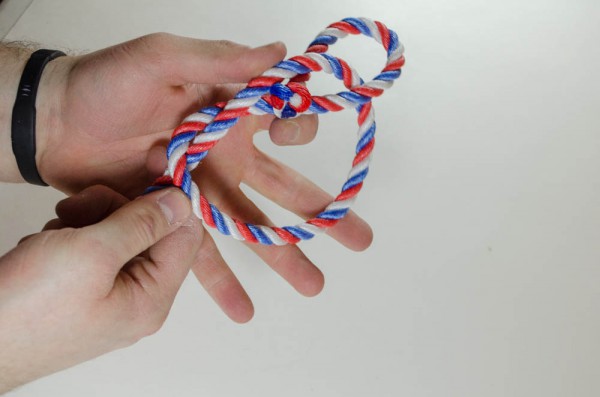
It kind of looks like a pretzel now. Take your knot back behind the top of the loop and tuck it in the top loop of the overhand knot.

Tuck in top loop
Tuck in top loop - part 2


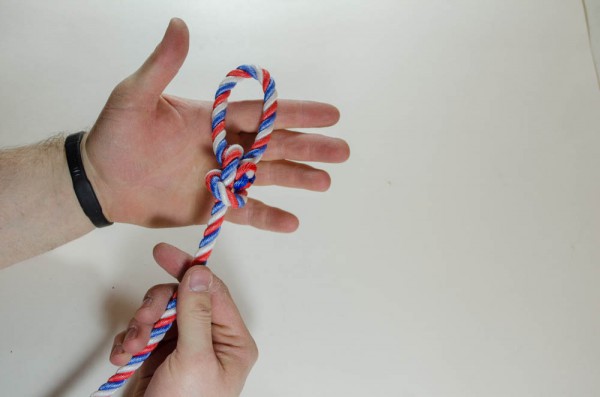
Make sure the upper loop you just made is the size you want and pull the bottom rope tight. Push the stopper knot up as you do this to keep it out of the way.

Pull bottom rope tight


Now you’ve learned how to tie a honda like a pro, just like Tom and the rest of the crew.

Finished Honda Knot
Honda with Rope


Hope you enjoyed the tutorial and feel confident in tying your own hondas. If you have a question or there is something you’d like to know more about, let us know. Tom, Marty, Dani and others are happy to share their skills with us!

Be the first to find out about newly added Western products, special offers just for our online friends, and more helpful tips of the trade by signing up for our emails today. Join your email list here!

Valentine Tulle Crafty Blogger Challenge

Crafty Bloggers’ Valentine Tulle Challenge!

- posted by Amy Griffiths

For many of us, we get just about as excited for Valentine’s Day as we do for Christmas. It’s not so much about the gifts as it is about decorating! Reds, Whites, and Pinks, oh my!

I found some incredible ladies who love it just as much as I do. I call them the crafty bloggers because they are so talented and have their own darling blogs in which they share their ideas and creations with others.

The Challenge

Here’s what I told them: We’ll give each of you 3 rolls of tulle (pink, red, and white of course) and you can be as creative as you want with it. You can use other items but the tulle should be a main supply/focal point used. The trick is to see the fun ways you can use tulle for Valentine’s Day or decorating.

I’ve been so excited to see what they’ve come up with! Ready for the unveiling? Let’s check them out!

The Reveal

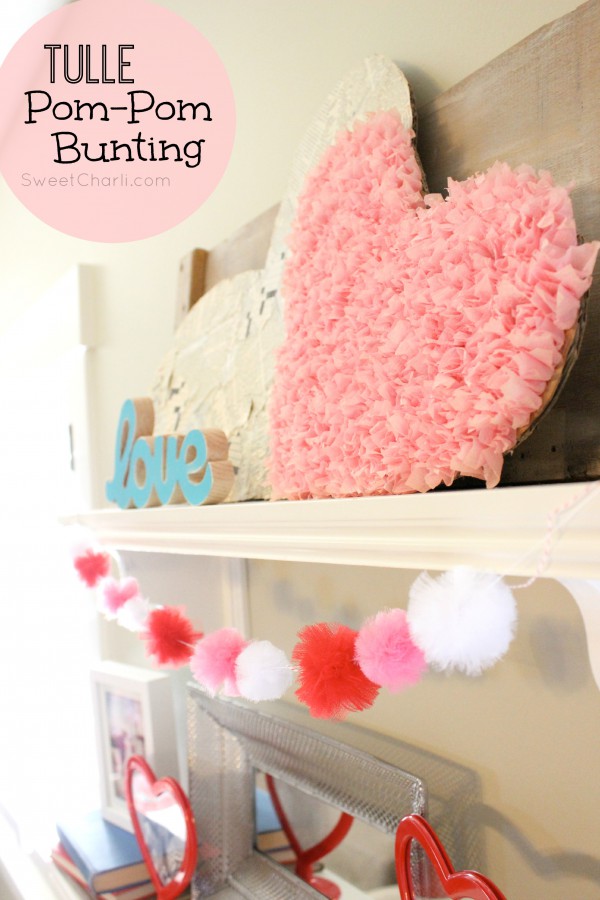
Valentine Bunting made of Tulle

Click the image to get step-by-step instructions on how to make a tulle valentine bunting of your own!


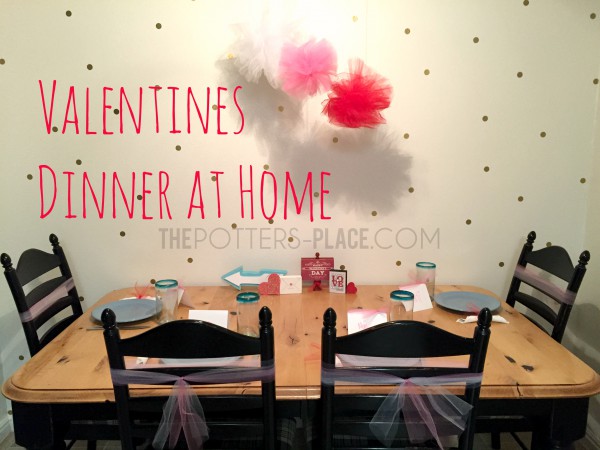
Next we’ve got Staci from The Potters-Place.
Valentine's Dinner at Home

Click on the image to find out what she did to create this look.


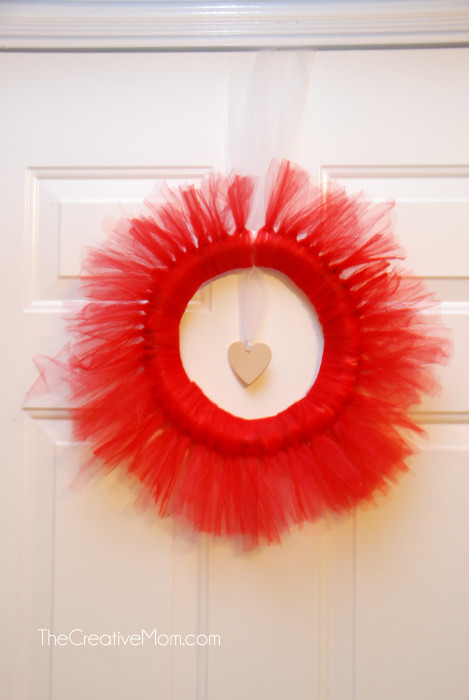
Last but not least we’ve got Natalie from The Creative Mom.
Valentine Wreath

Click on the image to get a tutorial on how you can make a wreath like this one.


Nice job ladies! Thank you so much for taking the Crafty Blogger’s Valentine Tulle Challenge. I feel even more inspired to get out the tulle and start crafting!

Your Turn

So what about you? What do you think about these projects? Are there any that you want to try? Let me know in the comments below. Send pictures if you try something on your own. I’d love to show them off on our brag board!

You can check out my Valentine’s Project Idea here to find out how to make this fun, quick, and easy tulle ornament. You get step-by-step instructions that will hopefully help inspire your creative juices to flow as well as the great ideas above.
Valentine's Ornament made of Tulle

If you would like to be a part of our next bloggers’ challenge, leave a comment below. Happy crafting!

Clever Valentine Ideas for Your Sweetheart

Clever Valentine Ideas for Your Sweetheart

- posted by Amy Griffiths

Flowers? Chocolates? That’s so been done. This year give your sweetie something that not only declares your love but that’s clever and useful too. Keep scrolling for our top picks that are bound to bring a smile to his or her face.

His & Hers Giveaways

But first – enter to win these sweet His & Hers Valentines’ Giveaways from us!
a Rafflecopter giveaway

a Rafflecopter giveaway


Special Gifts for your Sweetheart from Smith and Edwards

What says I love you more than Smith and Edwards gun mugs? Okay, there might be something out there, but you know your Valentine will love these! Tell her, “Shoot, I’d marry you all over again!”
Pink & Black Smith and Edwards Gun Mugs
Find the black one here and the pink one here.


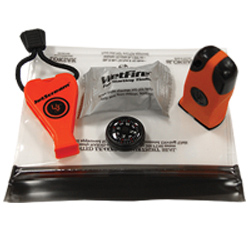
Tell him you couldn’t survive without him with a very cool and high quality survival kit by Ultimate Survival Technology.
Survival Kit by Ultimate Survival Technology
Find more 1st aid kits and supplies here.


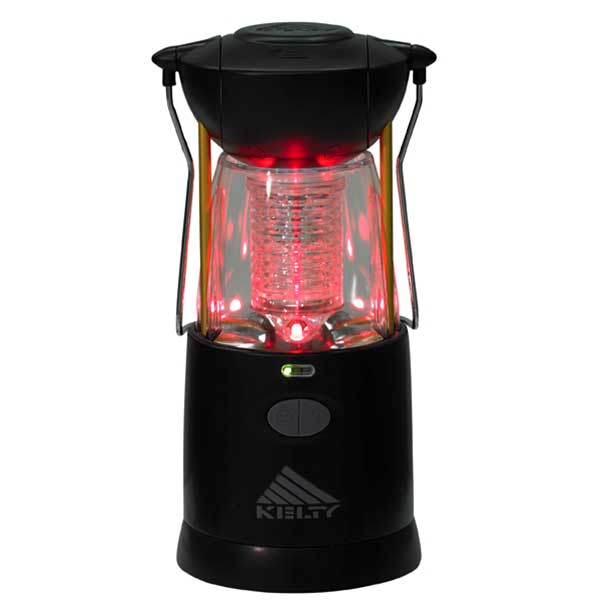
Tell her she’s the light of your life with a Lumaspot Rhythm lantern she’s going to love. Not only is it durable and dependable, it comes with color changing LED disco lights with MP3 compatibility. I love this thing!
Color Changing Lumaspot Rhythm Lantern
Find more lighting options here.


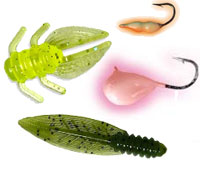
If you know your Valentine loves to fish, tell him that out of all the fish in the sea, you’ve made a great catch! Then give him a box of new fishing lures and jigs you know he’ll love.
Fishing Jigs and Lures
Find more fishing tackle and bait here as well as the perfect Smith and Edwards compartment box here.


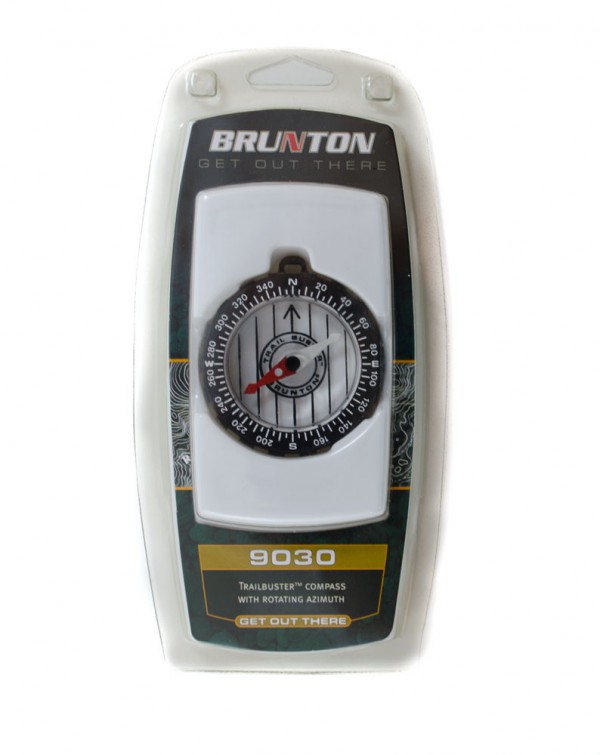
For the avid outdoorsman, tell him he’s found the way straight to your heart. Then give him a high quality compass like this one from Brunton.
Brunton Trailbuster Compass
Find more compasses here.


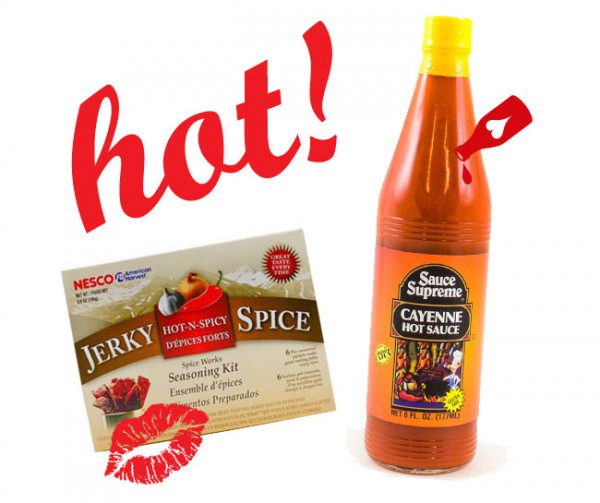
To really spice things up, tell her she’s one hot mama and give her some Hot & Spicy jerky seasoning from Nesco. You may want to throw in some Supreme Hot Sauce as well!
Hot & Spicy Jerky Seasoning and Hot Sauce
Find jerky guns here and more seasonings here.


If he’s a good ole western boy, tell him he makes your heart sing and give him some classic western music.
Western Music CD - Michael Martin Murphy
Find more western music CD’s here.


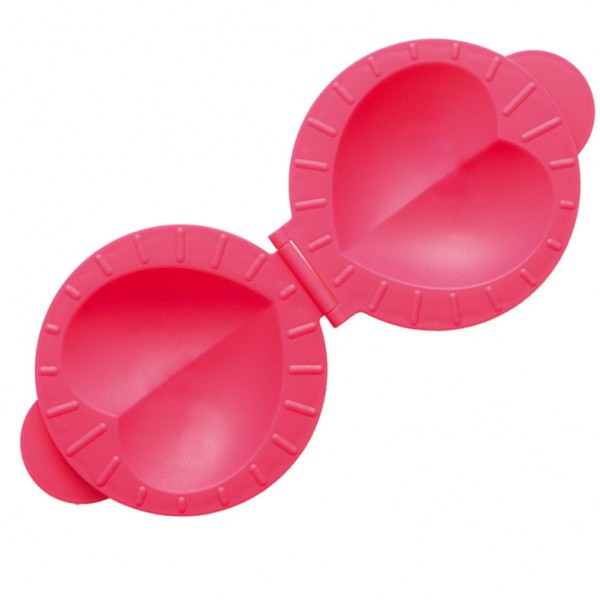
They say the way to a man’s heart is through his stomach. With this heart mold from Tovolo you can remind him how much you love him all year long.
Heart Baking Mold


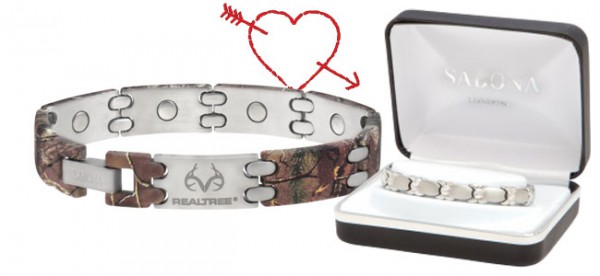
You can’t go wrong with a Stainless Steel Magnetic Bracelet by Sabona® for him or her. When you’ve got a gift this classy, there’s no need to write something clever! The bracelet speaks for itself – top quality, well made, and gorgeous!
Sabona Brackelets for him and her
Find more styles of Sabona® bracelets here. And make sure you entered to WIN one a Sabona bracelet at the top of this post!


Hope this gives you some new ideas for your Sweetheart. Got some clever valentine ideas of your own? Please share them by commenting below. We’d love to hear what you’ve done!

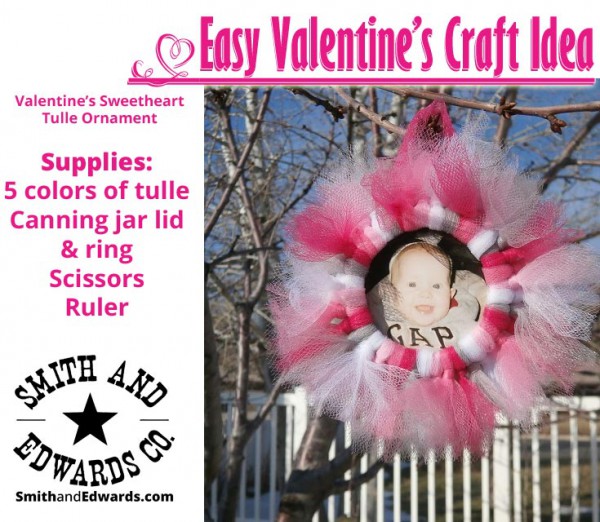
Easy Valentine Sweetheart Ornament

Easy Valentine’s Craft Idea

- posted by Amy Griffiths

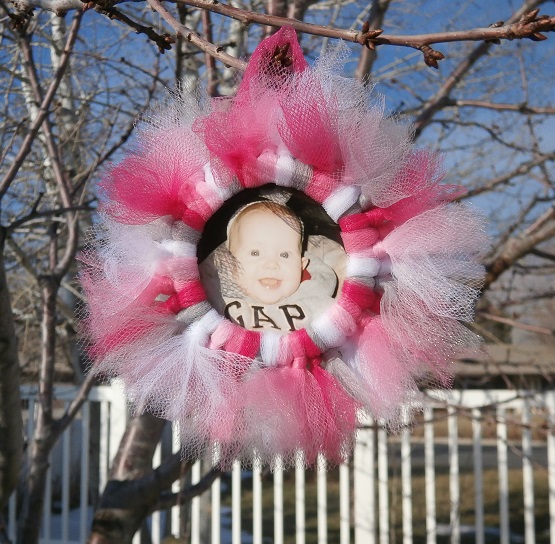
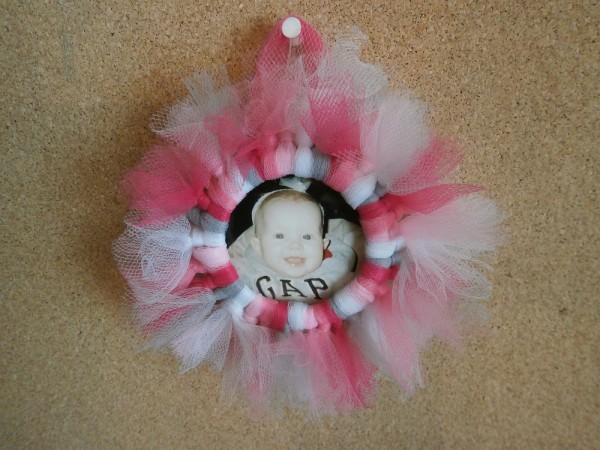
Finished Valentine Photo OrnamentFebruary is right around the corner and you know what that means….Valentine’s Day! I’m a sucker for Valentine’s Day. It’s not so much the presents as it is the colors, decorating, and celebrating those I love.

To share my love for the season I’m going to share an easy Valentine’s craft idea. It’s made with one of my favorite supplies to use…..tulle! It’s so versatile, never loses its shape, and the colors are so vibrant! Adults and kids alike will have fun making these. They are fabulous for 4-H craft projects as well as many other youth groups activities.

Back in December I gave you a peek at this tulle project idea, but in honor of those sweet ones in our lives you now get a step-by-step tutorial. This one is designed for Valentines but it’s a terrific project anytime of year by just mixing up the colors.

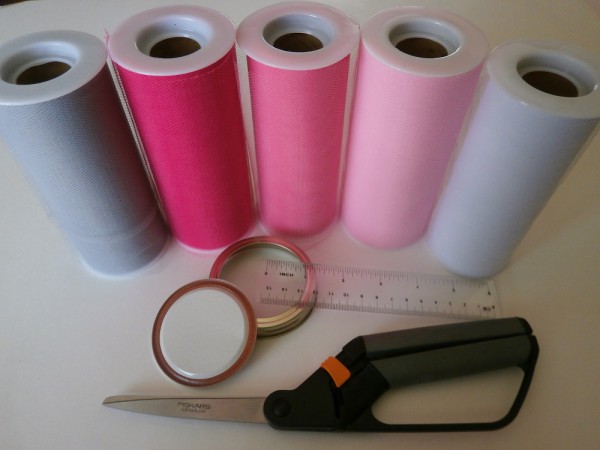
Supplies you need:

Supplies for Valentine Craft Project


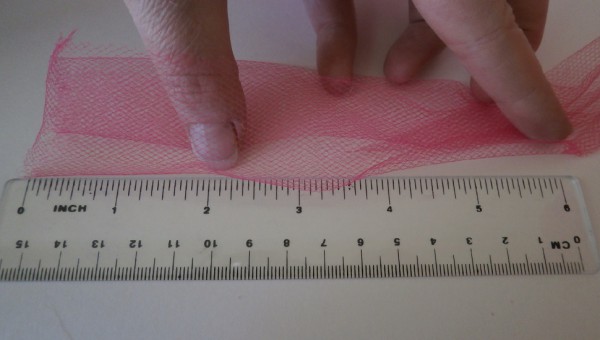
To begin this project you need to cut:
Eight 6″ pieces of Silver Gray, Flamingo Pink, Pink, and White
Six 6″ pieces of Fuchsia
One 12″ piece of Fuchsia

Measuring the tulle


Let’s get started!

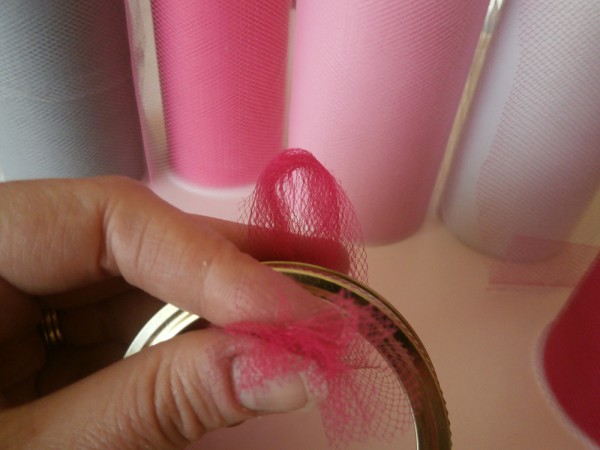
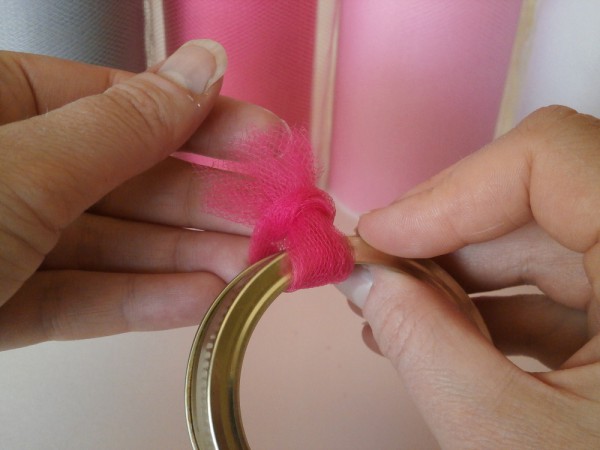
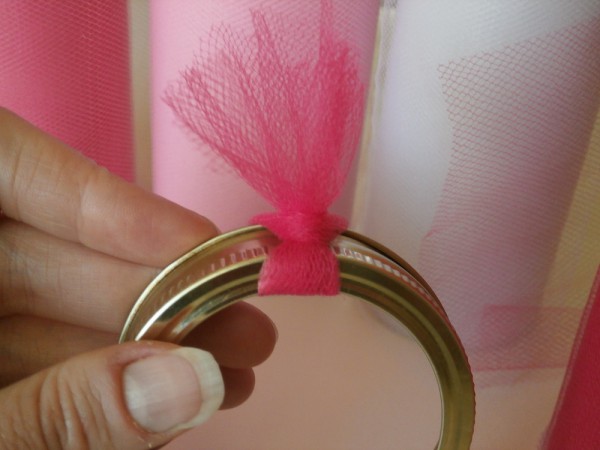
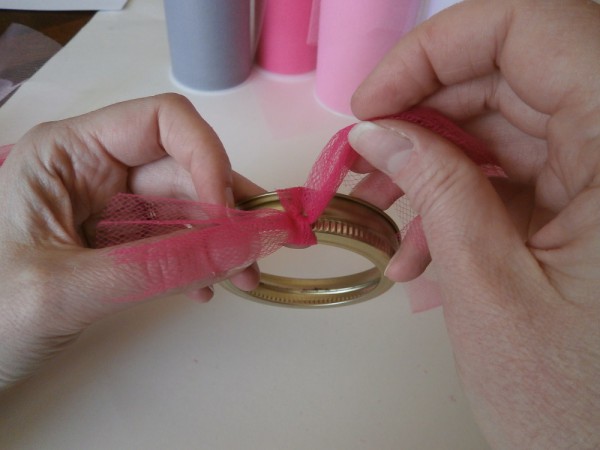
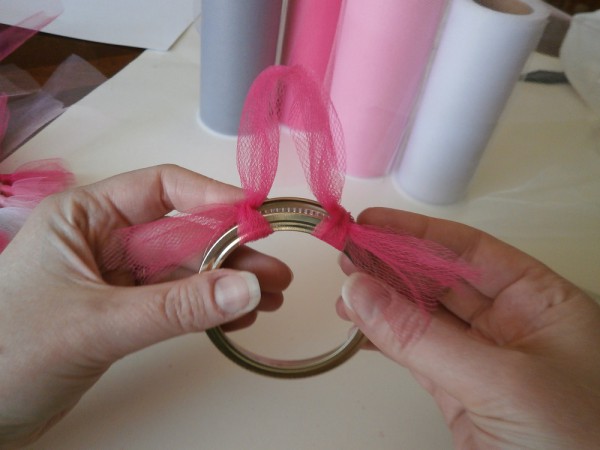
The first thing you’ll want to do is make a loop with one of your 6″ pieces of tulle. Place it outside the ring and thread your ends over the ring, through the loop, and pull. This knot is also known as a Larks Head Knot.

Making a loop

Pulling Ends Through the Loop

Finished Knot


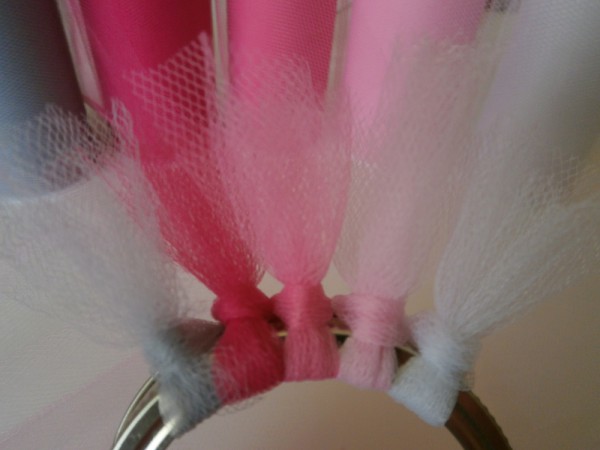
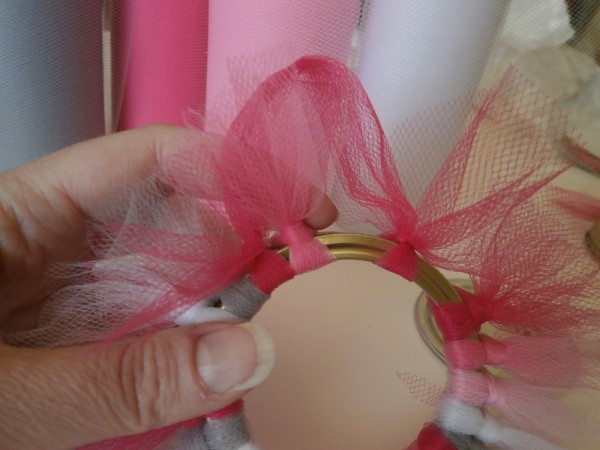
Continue making knots in the pattern of colors you want to use.

Pattern of Finished Knots


I like to make the hanging loop after I’ve tied about half of the knots on the ring. You make this by tying both ends in double knots over the ring. The knot will look different than the others but it blends in beautifully when it’s all done.
Tying the Hanging Loop
Finished Hook Loop


Tie more lark head knots in between your double knots, just like you were doing in the beginning. Continue to follow your original color pattern.

Continuing the color pattern


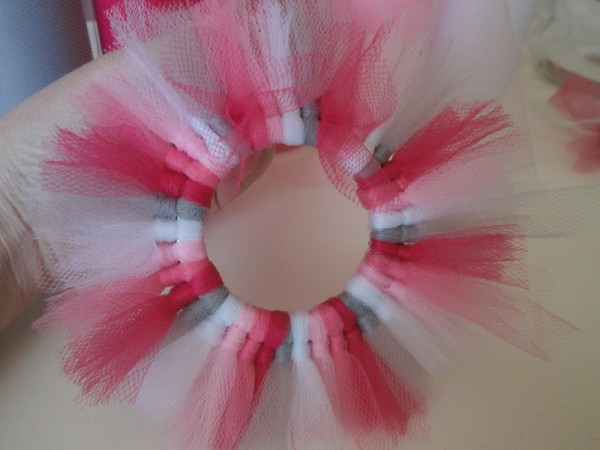
Finish tying until all your tulle is used and your ring is completely covered. They should fit nice and snug so you can no longer see the ring.

Ring is full of knots


Now is the time that I cut out my picture to place in the ornament. It needs to be about 2.5″ in diameter. You can fasten the photo to the center of your lid with a scrapbooking adhesive, but I prefer without.

Before I insert my picture I like to pull all the knots forward, towards the top of the ring. Then I insert the picture from the back end, pushing the lid in behind it for a nice backing. Not a big deal, but I like the look better when it’s done.

How to Cut Your Picture


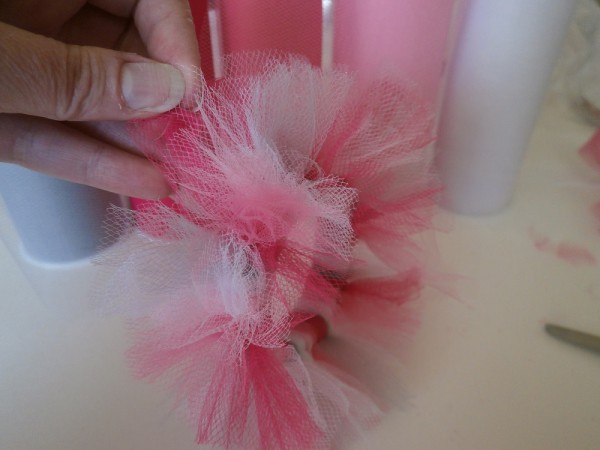
You’re almost done! Now all you need to do is “fluff” your tulle. For each knot I pull the ends of the tulle in opposite directions til you are happy with the overall look.

Fluffing Your Ornament


Now that’s a Valentine to be proud of!

Finished Picture of Valentine Craft Project


Now what?

Now that you’ve found a source of inspiration for a project of your own, check out our tulle here for a bigger selection of regular and glitter tulle that will make your projects pop with color. Then send us pictures of your finished projects to info@smithandedwards.com so we can show them off!

Come play with us on Pinterest! Follow us to get more creative ideas and be sure to pin this image so your friends can get inspired too. Share the love this Valentine’s Day!
Valentine's Sweetheart Tulle Ornament

Hugs & Kisses!

Last Minute Christmas Ideas

Last Minute Gift Ideas – Under $10!

- posted by Amy Griffiths

It’s getting close. You can almost hear the faint jingle bells from Santa’s sleigh. Are you ready?

If you are anything like me you’ve still got some last minute gifts to look for. There are neighbors, co-workers something for the babysitter, and especially those stockings. Why did we think it was such a good idea to have such big stockings!

Time may be running out but you can still find some really fun gifts that they’re going to love. And all under $10!

Pez Dispensers

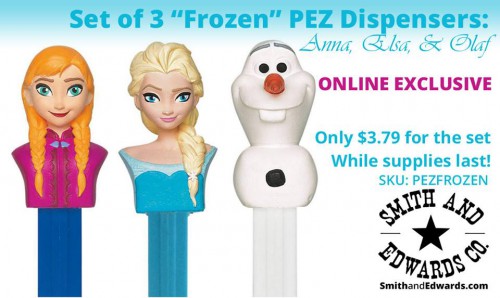
Elsa, Olaf, & Anna Pez Dispensers
The kids will go crazy for Pez in their favorite characters. Frozen’s Elsa, Anna, and Olaf along with other favorites like Cars, Toy Story, Rudolf and more will be the hit of the morning. They are only $1.29 each in-store or get the set of 3 Frozen characters of online only for just $3.79 through 12/27/14.

Redneck Repair Kit

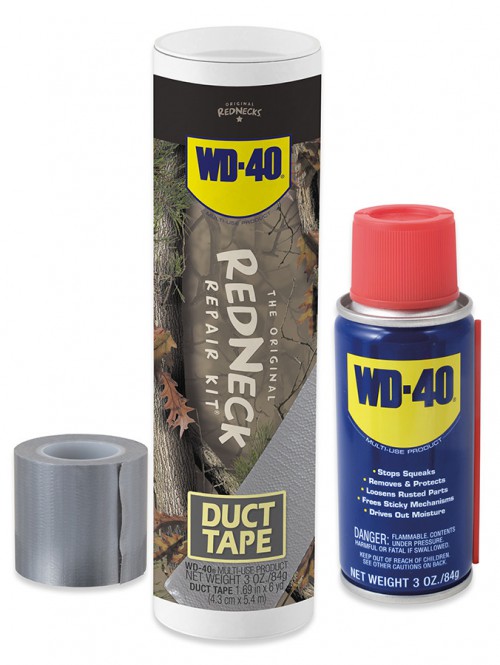
The Original Redneck Repair
This clever gift is as humorous as it is useful! On sale now for only $9.99 through 12/27/14. In-store and online

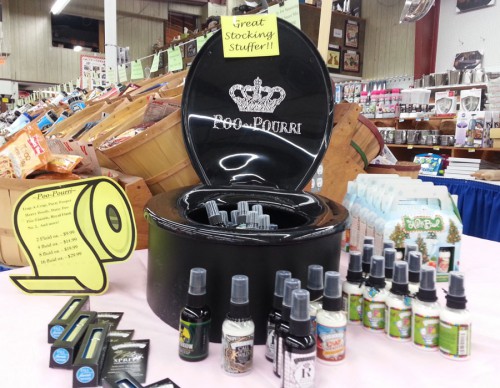
Poo-Pourri

A Display of Poo-Pourri Bottles
Nope. Not a misspelling. This ultra popular gift is the gift that keeps on giving. Sure it brings a chuckle when the gift is unwrapped, but when it’s actually used you’ll be glad you have it and be back for more! Lots of scents to choose from. In-store only

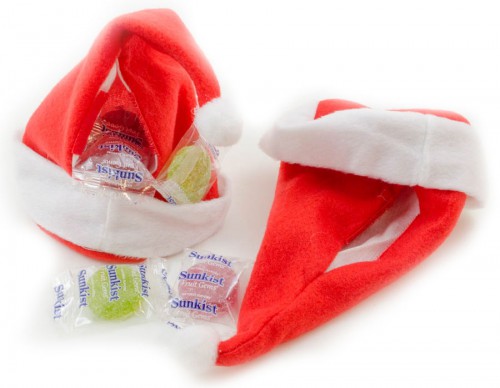
Red Santa Hats

Stuff these Santa hats with Candy!
These are not your ordinary Santa hat! These adorable caps have a velcro closure in the back so you can stuff them with sweet treats, small gifts, or any fun little surprise. They are also a darling decorations just by themselves. You’re not going to believe it. Only $.99 for a set of 4 through 12/27/14!

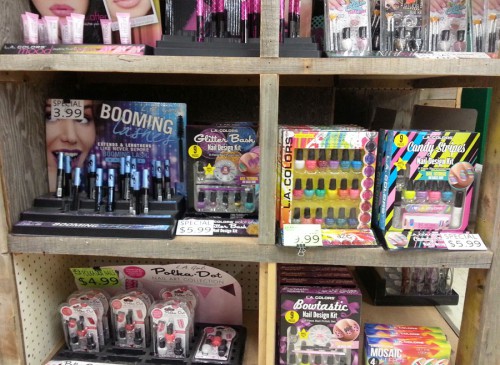
Fingernail Polish/Makeup Kits

Smith and Edwards' Makeup and Fingernail Polish Sets
We have some darling kits that your girls both young and old are going to love! They’re a great bargain starting at only $3.99 through 12/27/14. In-store only

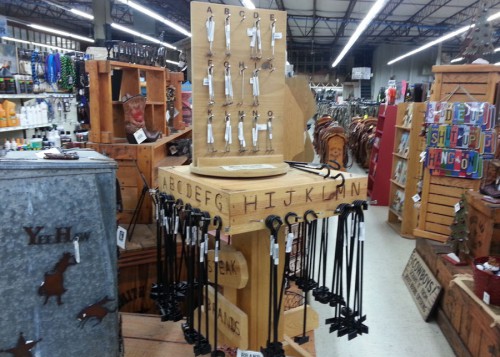
Mini Branding Irons

Steak Branding Irons
What a fun way to monogram! Don’t think these are just for the kids. Your super stud will start branding everything he owns, starting with his steak with these cool irons. You may not want to turn your back to him for the first week though, to make sure you’re not next! In-store and online for just $5.99-$8.99 through 12/27/14.

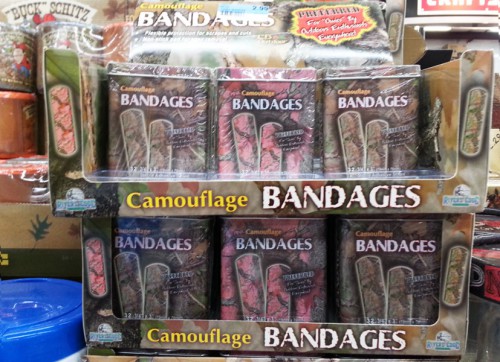
Camouflage Bandages

Camo Band-aids
Always a winner, these camo bandages are just what the doctor ordered. My kids actually ask for bandages in their stockings! In-store only

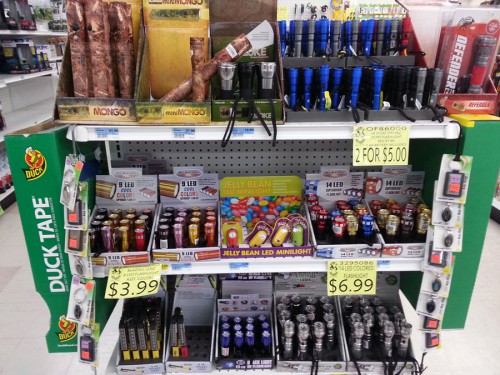
Flashlights

Flashlights at Smith and Edwards
Okay, the idea isn’t new but they are always a favorite. It seems the kids and dad can never get enough, yet they’re never around when we need them!

At Smith and Edwards you’ll be able to find any flashlight you need, with tons to choose from. The mini ones are great for stockings and the kiddos, while dad will really get excited about a mighty King’s Camo Mongo, or maybe something big and bright from Mag-Lite. You just can’t go wrong with a flashlight. Prices start at 2/$5 through 12/27/14. In-store only

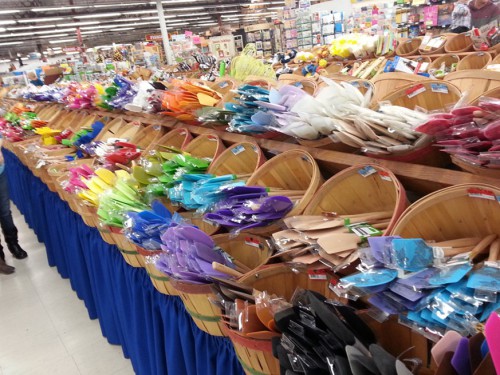
Spatulas

Colorful Spatulas from Smith and Edwards
You can never have too many spatulas, especially when they are so pretty! You won’t believe the selection of colors and styles we’ve got. In-store you’ll find 33 colors of this one style alone! You’re sure to find her/his favorite color. In-store and online

Bonus Gift Idea: DIY Tulle Ornament

And for those of you who like to add a personal touch, try out this super easy and inexpensive tulle ornament. All you need is some rolls of 6″ tulle, a regular canning jar ring, a canning lid, and a photo you want to use. That’s it!

Update: Due to requests, I made this project into a tutorial! Click here for the Sweetheart Ornament How-To.

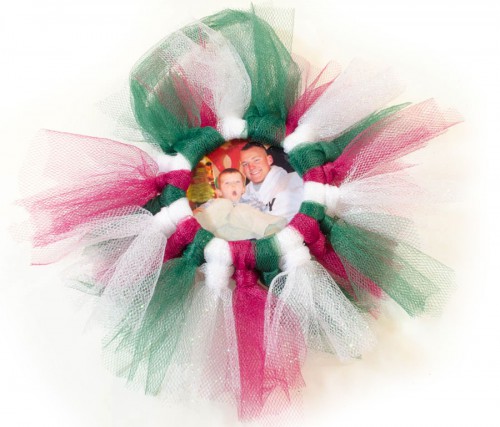
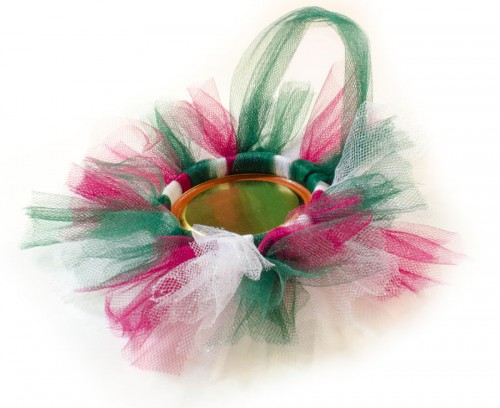
Red, white, and green tulle adorn this Tulle Wreath Photo Frame ornament!
Start by cutting 21 pieces of tulle 8″ long, and one 12″ piece. I used three different colors, so I cut 7 pieces of each.

Hold your ring upside down and make a loop on the back side with your tulle. On the front side, pull your 2 ends through the loop and pull. Both ends should be facing down.

Keep tying your tulle around your ring until it is full. Take your 12″ piece of tulle and tie in a regular knot by the sides of the corresponding color you chose. (Here I used the green, so I tied it right next to the greens so it would blend in.)
Back of the Tulle Wreath Photo Frame ornament showing mason jar lid
Cut your photo just smaller than the canning ring. Glue it to the ring and push it in place from the back.

Ta-da! You’re done. They’ll love it and you’ll want to make more for your tree next year! (Wouldn’t it be darling with cute little Christmas sayings inside all over your tree?!)

You’ll find a terrific selection of glitter and regular tulle at great prices both in-store and online

Hope this gives you some fun last minute gift ideas! May you be able to rest soon, sit back, relax, and enjoy the rest of the Christmas season with friends and family.

7 Mason Jar Gift Ideas

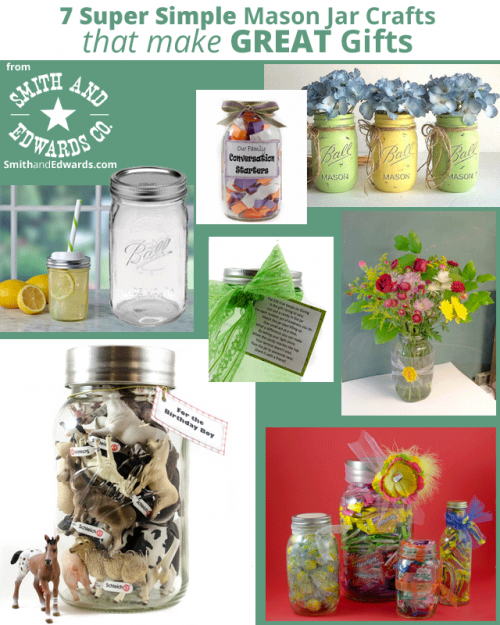
7 Super Simple Mason Jar Crafts that Make Great Gifts

- posted by Amy Griffiths

It’s 10:00 pm and your child tells you she needs a teacher gift for school in the morning. What do you do? You start your daily chores and realize it’s your friend’s birthday, but you don’t have time or money to go to the store. What now?

With 5 kids and a busy schedule, these and many more scenarios like them seem to be what makes my world go round.

Here are 7 easy tried and true mason jar crafts that are not only simple to make, but are kid friendly, inexpensive, can be done in a jiffy, and are sure to bring smiles to the ones receiving them.

1. Candy Jars
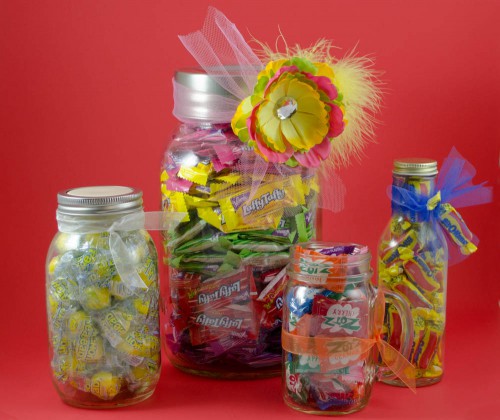
Mason Jar candy jars gift idea

This one is as versatile as the friends you give them to. Keep them simple with a favorite treat you know they like or go elaborate by layering them by color.We used Lemon Heads, Laffy Taffy, Zotz, and Bit O’ Honey. They work beautifully with unwrapped candy like M&Ms or Skittles!

You can finish it off simple and let the candy do the talking, or for the more artistic type, deck it out with ribbons, tulle, flowers, a homemade gift tag – whatever works for you. The sky’s the limit on these mason jar gifts!

2. Painted Vases
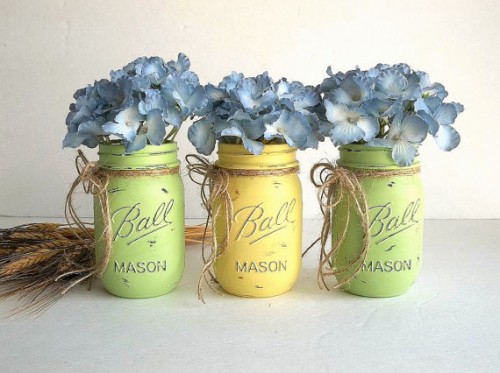
Painted mason jar vases

Painted mason jar vases are all the rage right now. There is something so warming about a nostalgic piece of America, and I love the way these were done with a vintage touch. They are great for flowers, kitchen utensils, pen organizers, or a rainy day money fund.

Since you are making them yourself you can pick out the perfect color for your special friend (after you’ve made one for yourself, of course!)

Image courtesy of Jana from Hydrangea Hill Vintage on Etsy

3. Conversation Jar
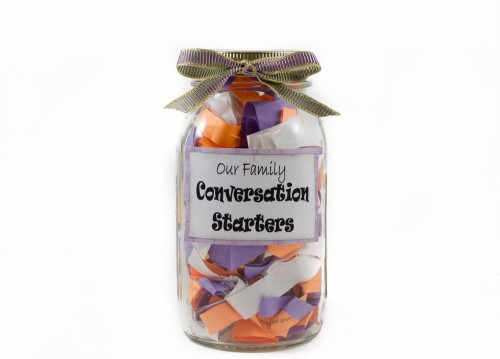
Mason jar conversation starters gift

Want to encourage a more meaningful family time? These mason jar crafts aren’t only fun to make but can make such a difference for the one you are giving it to. You simply cut a bunch of questions in strips, fold them up, and put them in the jar. They are meant to encourage conversation and get to know each other a little better.

Questions may include, “If you were given $100 to spend today, what would you buy with it?” or “Name the best birthday gift you were ever given.” Don’t start to panic, I’ve made it easy on you. Here’s a link to a great site that has done all the work for you so you can just print and copy. I’m sure you’ve got some great ideas too, so feel free to add some of your own.

Some other fun themes to customize this jar idea would be: Couples questions (great wedding gift!), family history questions to ask grandma & grandpa, a teacher’s jar to use in her classroom, dinner party questions, or holiday related questions/activities.

Use your imagination or stick to the script; either way, they are going to love it!

4. The Mega Mason Jar Statement Piece
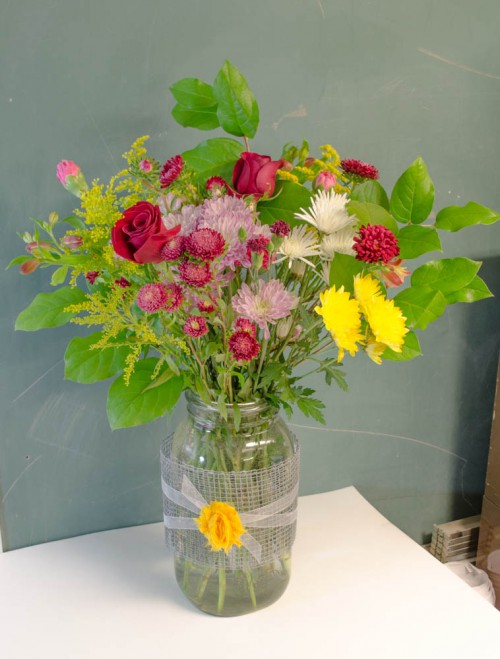
Mason Jar vase

This is absolutely adorable with decoration or without. If you have a friend who loves canning, she’s going to go crazy over this extra large, 1 gallon mason jar (No, you can’t actually preserve in this jar, it’s just awesome!)

Okay, okay, so you will have to go to the store to pick this one up, but once you have it you’ll be glad you do!

For the image shown we wrapped 5.25″ mesh wire fabric we got out of the giant junk playground that is the Smith & Edwards surplus yard to give it a more vintage, rustic look. We added a bit of ribbon and a fabric flower and……voila! A statement piece worthy of attention.

Use it for flowers, fruit, favorite knick-knacks, or just let it stand alone. It really speaks for itself.

5. Toys for Boys
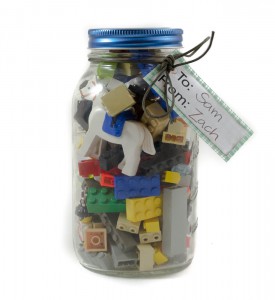
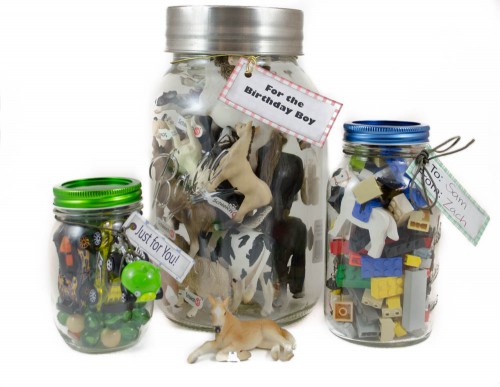
Give your son Lego in a mason jar! Gifts for Boys in a mason jar! Farm animals in a mason jar gift idea
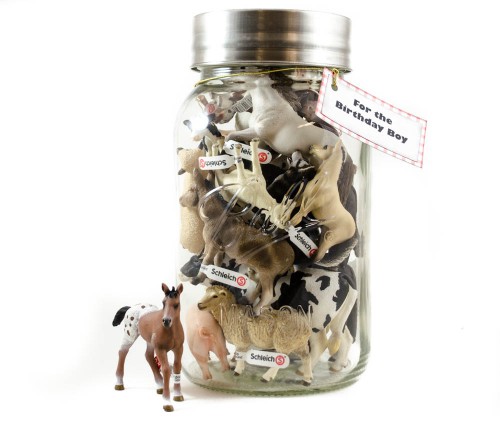
A jar full of building block toys, such as Legos®. A set of jars stuffed with boy-related toys. A gallon size decorative jar stuffed with Schleich® toys.

If you’re like me, it’s easy to whip up something for a girl – ribbons, flowers, glitter and sparkles and you’re good to go! Boy gifts I’ve always struggled with, especially when you want to make something with a little added personal touch.

Here are some ideas I actually got from my sister. She made some darling jars with Hot Wheels in them for a boutique.

People were crazy for them, and they were the first ones gone. She was asked if she would make some more, so I guess it’s not just me looking for boy ideas!

With 2 boys of my own, you can’t go wrong with Legos, marbles, and cars.

For the mega mason jar, it’s fun to create a theme they love and here we used farm animals from Schleich®. I can picture a cool jar full of batman or dinosaur items too, can you?

6. The Gift that Keeps on Giving
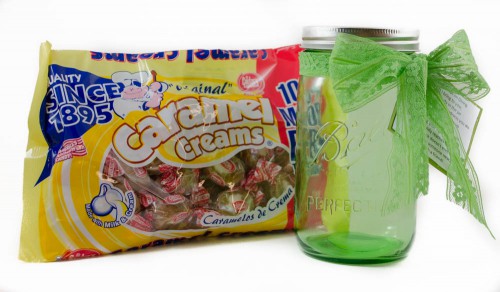
Good Deeds jar

Someone help me, I’m a dreamer. I can’t help myself, I always have been! I believe we can make a difference in the lives of those around us one small act at a time.

That being said, I love the idea of this jar. It’s to encourage looking beyond yourself and seeing what you can do for someone else. It’s a great way to teach kids to be aware of those around them and reminds us to reach out where we can.

Here is what the poem says:

The Gift that Keeps on Giving

Is the gift I bring to you;

Just put a candy in the jar

For each random act of kindness you do.

Watch the jar start filling up

One small act at a time,

What a difference you can make

By letting your light shine.

When the candy reaches the top

Your service doesn’t end,

Pass the jar to someone new;

Share it with a friend!

Each time the recipient of the jar does a random act of kindness he/she puts a piece of candy in the jar. Watch your treats stack up as you are helping others. But it doesn’t stop there, after they fill their jar they can share it with another!

It’s the little things – a simple smile, dropping by to check on a neighbor, helping the lady with 5 little kids pick up the bag she just dropped, or giving some change to the guy in front of you who is short $1.78 for his groceries. Simple things that soften hearts, brighten days, and even give hope. This is a gift that benefits everyone!

7. Mason Jar Drinking Cup with Straw
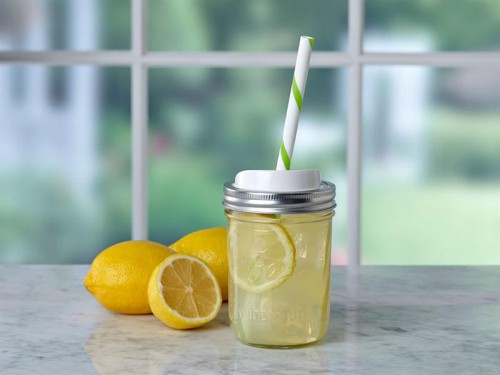
Mason Jar Sip and Straw Lids

Since we’ve been talking about simple mason jar crafts, I just couldn’t resist showing you this cute idea. Ball® recently came out with lids and straws that fit perfectly on the canning jars that make drinking more like a fun activity than a basic need (you can find them here with our canning lids). This is such a fun gift idea!

Just open package, wash before you use, pop on clean mason jar, and you’ve got an easy gift that is ready to go. If you are giving it immediately, fill it with cold lemonade, add some ice and lemons, and really get bonus points!

Take a Peek: Limited-Edition Green and Blue Mason Jars

Curious about the gorgeous blue and green jars and lids throughout this post? Talk about taking your mason jars to the next level!
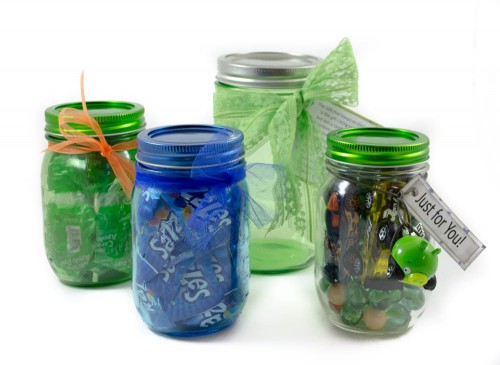
Blue and Green limited edition mason jars

Ball® is making limited edition, period-inspired colored jars and lids in classic blue and green, just like they made 100 years ago! The quality and structure is the same as their awesome canning jars we use now, but with a fabulous vintage flair. (Find them with our canning jars here)

Blue came out in 2013, green in 2014, and a final new color will be unveiled in 2015. Since they are limited editions, grab them while you can find them because they’re not going to be available forever!

Can’t you just imagine how fun your next canning projects could be in these heritage-style mason jars? Perfect for a little added touch to your gift giving – especially at Christmas!

Show us what you make!

I hope these ideas inspire some creative thoughts and give you some hope next time you’re in a jam (no pun intended!) You’ll find the supplies – jars, candy, toys, ribbon & tulle – all at Smith and Edwards. If you have any questions about any of the products shown let us know and we’ll be happy to help any way we can.

We’d also love to see the mason jar gifts you’ve made, so feel free to share (and you may even be spotlighted on a future blog!)

Pin these Mason Jar Gift Ideas for Later!


Seven Mason Jar Gift Ideas on SmithandEdwards.com

Whether you have a passion for canning or just a beginner, feel free to explore our great selection of canning jars, tools, and equipment that will make your food preservation easier than ever.

Be sure to check out our helpful canning tips, too. I learned a lot from reading that blog post!