Tag Archives: tulle

Valentine Tulle Crafty Blogger Challenge

Crafty Bloggers’ Valentine Tulle Challenge!

- posted by Amy Griffiths

For many of us, we get just about as excited for Valentine’s Day as we do for Christmas. It’s not so much about the gifts as it is about decorating! Reds, Whites, and Pinks, oh my!

I found some incredible ladies who love it just as much as I do. I call them the crafty bloggers because they are so talented and have their own darling blogs in which they share their ideas and creations with others.

The Challenge

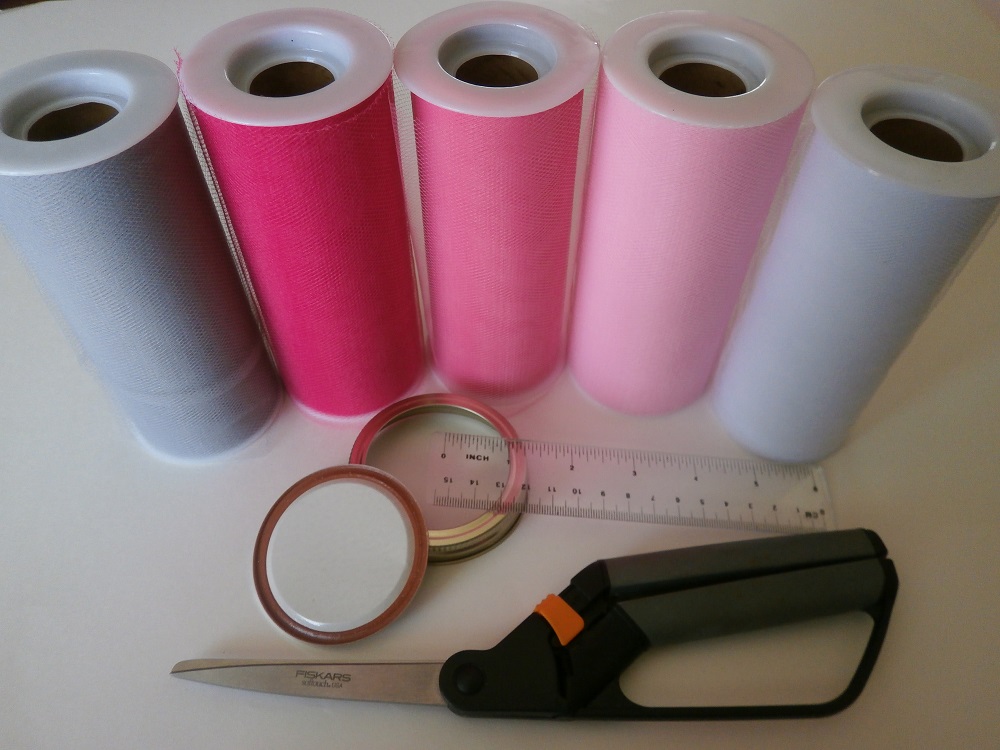
Here’s what I told them: We’ll give each of you 3 rolls of tulle (pink, red, and white of course) and you can be as creative as you want with it. You can use other items but the tulle should be a main supply/focal point used. The trick is to see the fun ways you can use tulle for Valentine’s Day or decorating.

I’ve been so excited to see what they’ve come up with! Ready for the unveiling? Let’s check them out!

The Reveal

Valentine Bunting made of Tulle

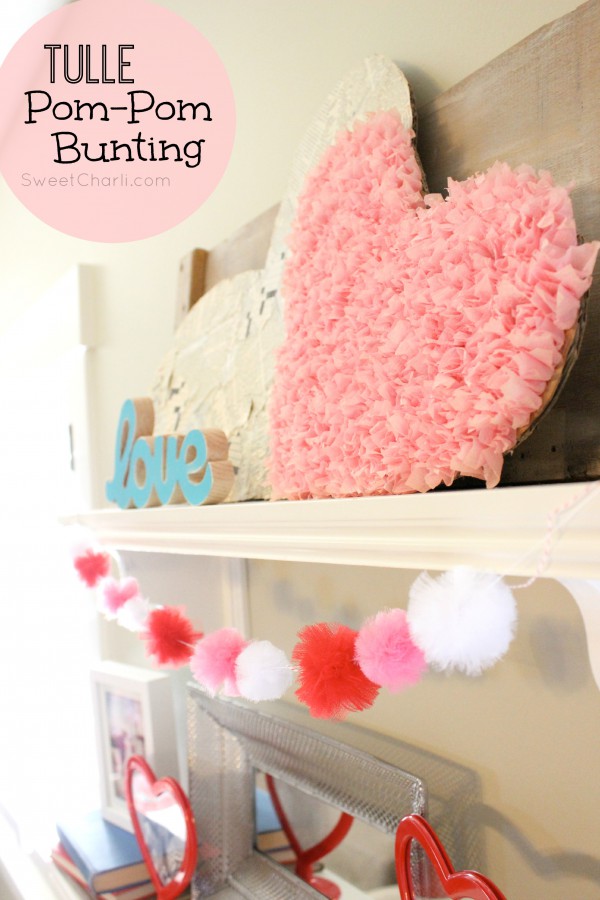
Click the image to get step-by-step instructions on how to make a tulle valentine bunting of your own!


Next we’ve got Staci from The Potters-Place.
Valentine's Dinner at Home

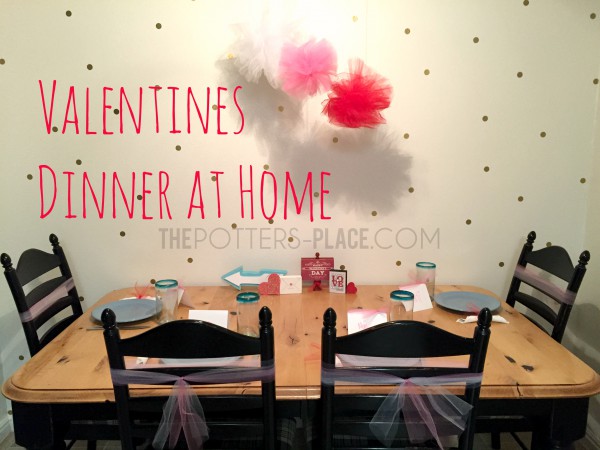
Click on the image to find out what she did to create this look.


Last but not least we’ve got Natalie from The Creative Mom.
Valentine Wreath

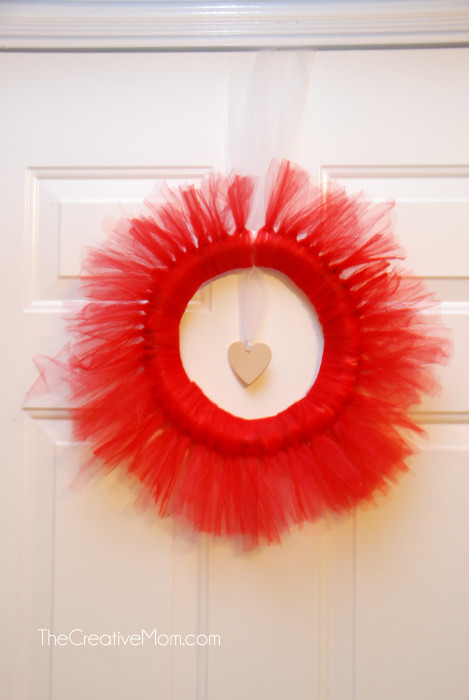
Click on the image to get a tutorial on how you can make a wreath like this one.


Nice job ladies! Thank you so much for taking the Crafty Blogger’s Valentine Tulle Challenge. I feel even more inspired to get out the tulle and start crafting!

Your Turn

So what about you? What do you think about these projects? Are there any that you want to try? Let me know in the comments below. Send pictures if you try something on your own. I’d love to show them off on our brag board!

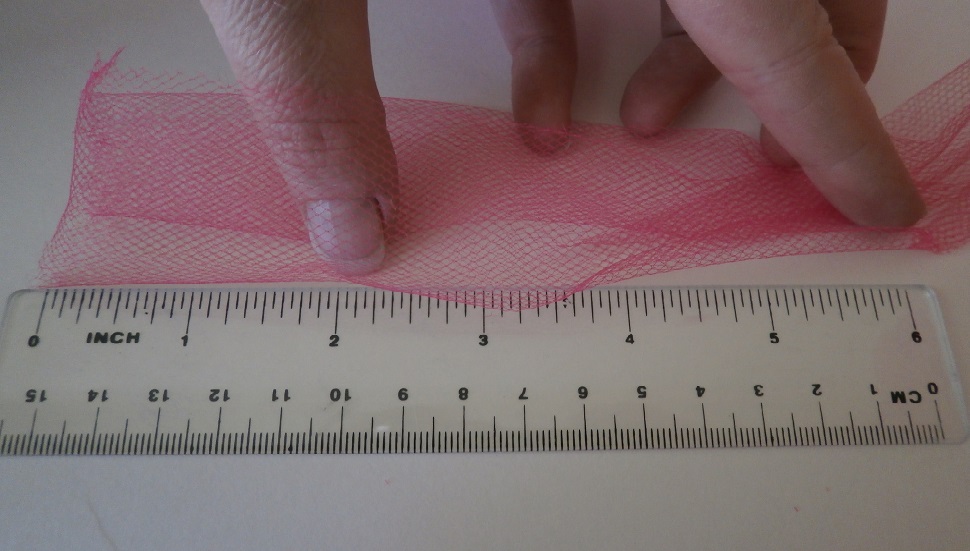
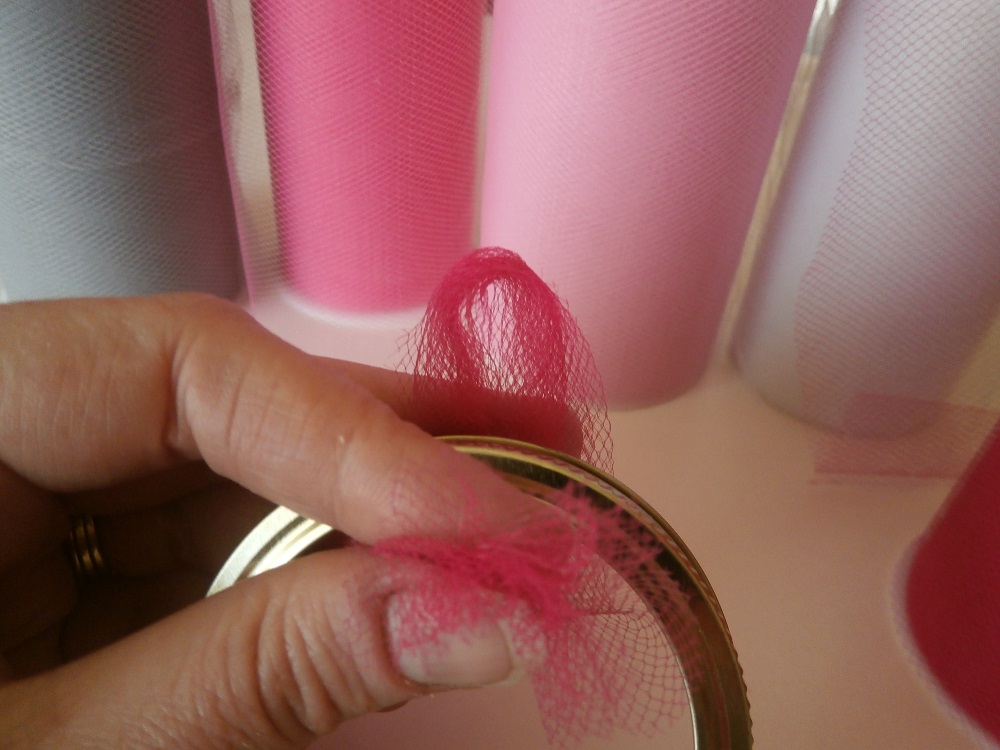
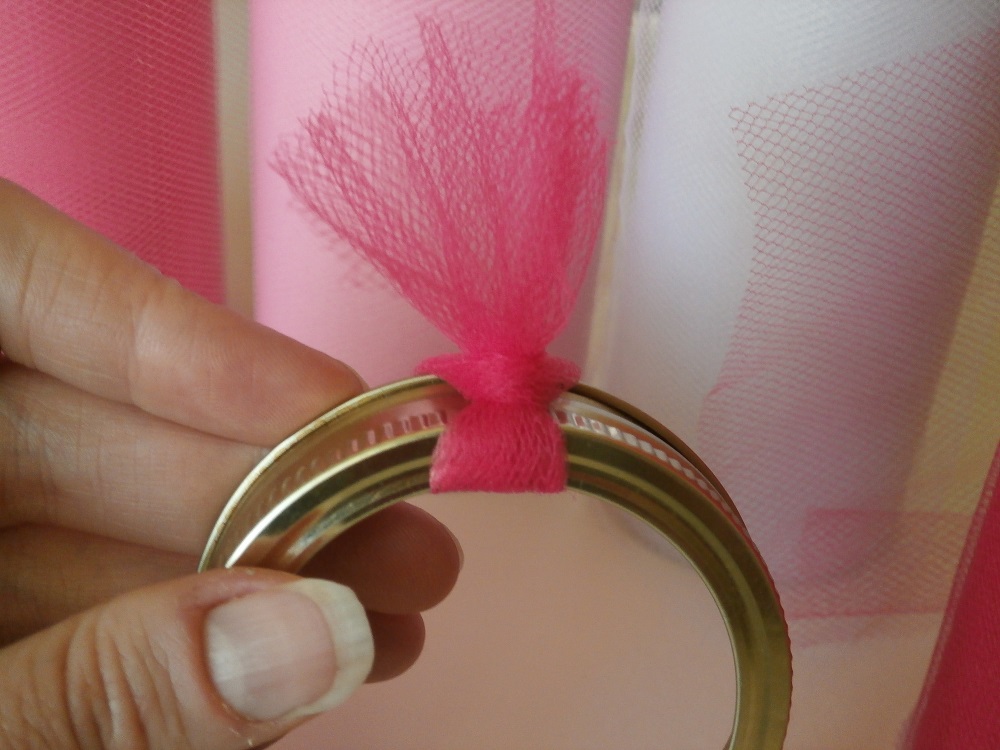
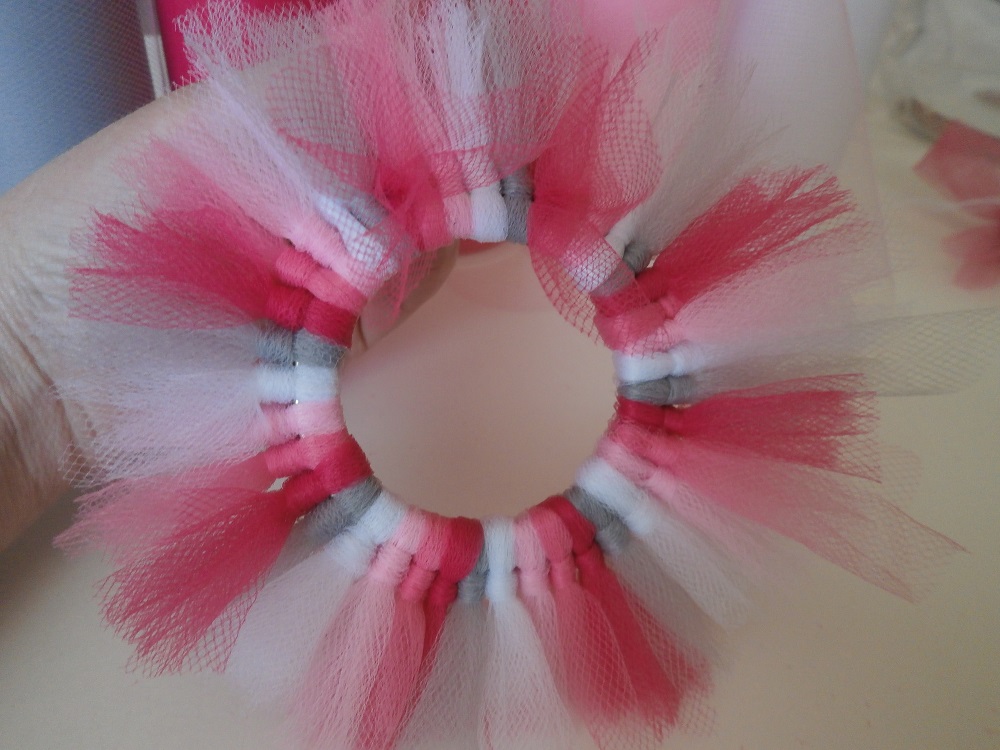
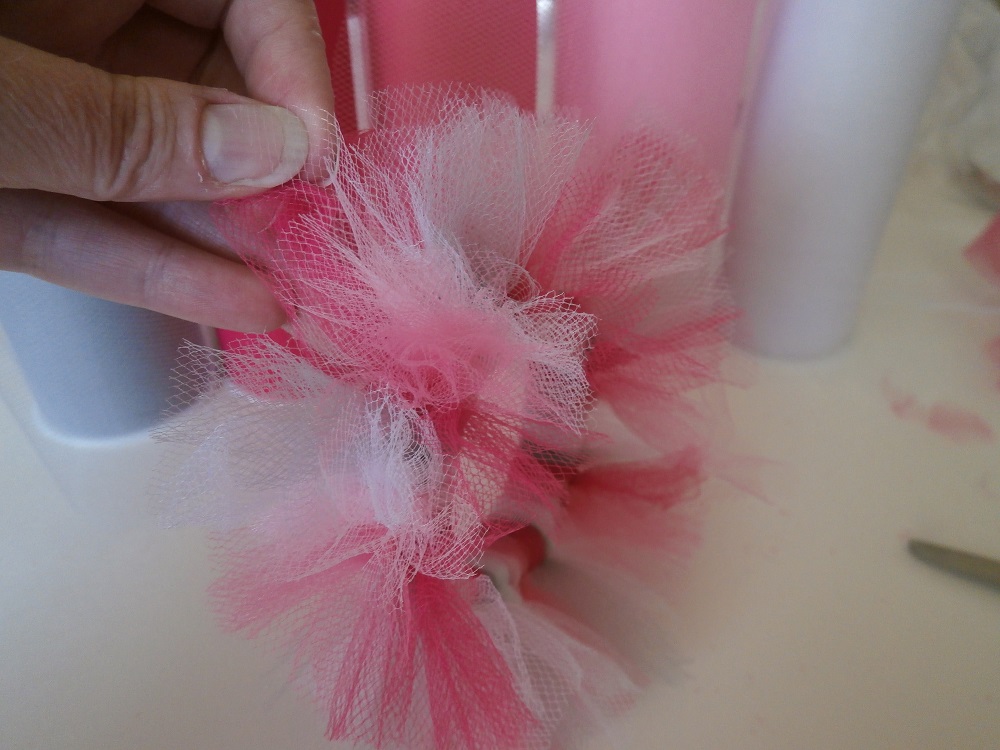
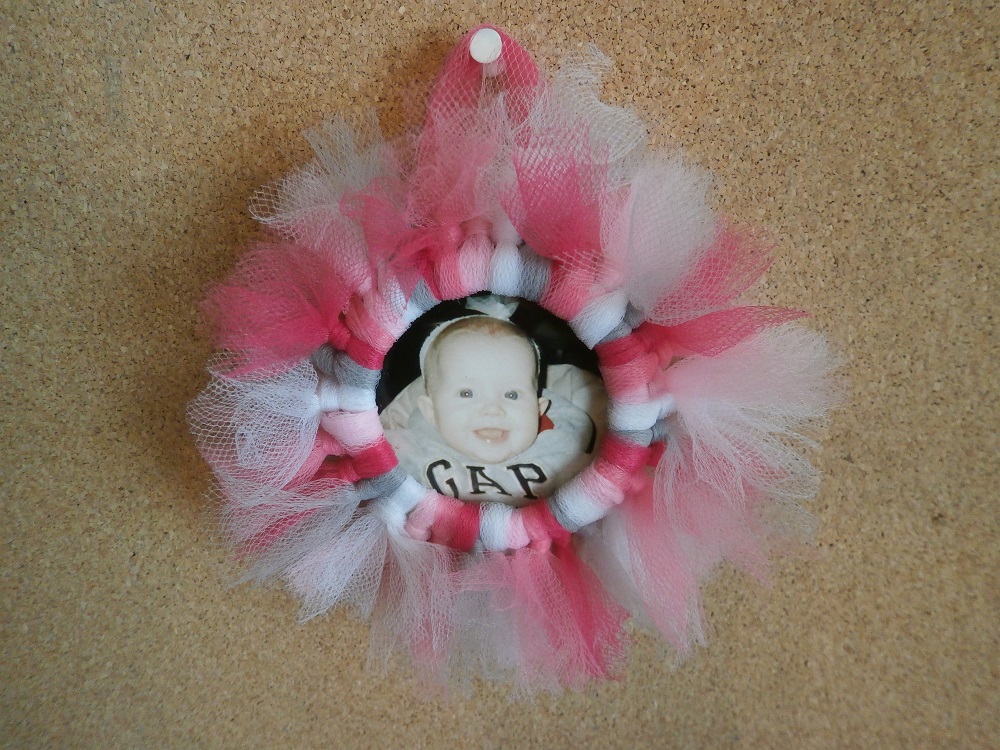
You can check out my Valentine’s Project Idea here to find out how to make this fun, quick, and easy tulle ornament. You get step-by-step instructions that will hopefully help inspire your creative juices to flow as well as the great ideas above.
Valentine's Ornament made of Tulle

If you would like to be a part of our next bloggers’ challenge, leave a comment below. Happy crafting!

Easy Valentine Sweetheart Ornament

Easy Valentine’s Craft Idea

- posted by Amy Griffiths

Finished Valentine Photo OrnamentFebruary is right around the corner and you know what that means….Valentine’s Day! I’m a sucker for Valentine’s Day. It’s not so much the presents as it is the colors, decorating, and celebrating those I love.

To share my love for the season I’m going to share an easy Valentine’s craft idea. It’s made with one of my favorite supplies to use…..tulle! It’s so versatile, never loses its shape, and the colors are so vibrant! Adults and kids alike will have fun making these. They are fabulous for 4-H craft projects as well as many other youth groups activities.

Back in December I gave you a peek at this tulle project idea, but in honor of those sweet ones in our lives you now get a step-by-step tutorial. This one is designed for Valentines but it’s a terrific project anytime of year by just mixing up the colors.

Supplies you need:

Supplies for Valentine Craft Project


To begin this project you need to cut:
Eight 6″ pieces of Silver Gray, Flamingo Pink, Pink, and White
Six 6″ pieces of Fuchsia
One 12″ piece of Fuchsia

Measuring the tulle


Let’s get started!

The first thing you’ll want to do is make a loop with one of your 6″ pieces of tulle. Place it outside the ring and thread your ends over the ring, through the loop, and pull. This knot is also known as a Larks Head Knot.

Making a loop

Pulling Ends Through the Loop

Finished Knot


Continue making knots in the pattern of colors you want to use.

Pattern of Finished Knots


I like to make the hanging loop after I’ve tied about half of the knots on the ring. You make this by tying both ends in double knots over the ring. The knot will look different than the others but it blends in beautifully when it’s all done.
Tying the Hanging Loop
Finished Hook Loop


Tie more lark head knots in between your double knots, just like you were doing in the beginning. Continue to follow your original color pattern.

Continuing the color pattern


Finish tying until all your tulle is used and your ring is completely covered. They should fit nice and snug so you can no longer see the ring.

Ring is full of knots


Now is the time that I cut out my picture to place in the ornament. It needs to be about 2.5″ in diameter. You can fasten the photo to the center of your lid with a scrapbooking adhesive, but I prefer without.

Before I insert my picture I like to pull all the knots forward, towards the top of the ring. Then I insert the picture from the back end, pushing the lid in behind it for a nice backing. Not a big deal, but I like the look better when it’s done.

How to Cut Your Picture


You’re almost done! Now all you need to do is “fluff” your tulle. For each knot I pull the ends of the tulle in opposite directions til you are happy with the overall look.

Fluffing Your Ornament


Now that’s a Valentine to be proud of!

Finished Picture of Valentine Craft Project


Now what?

Now that you’ve found a source of inspiration for a project of your own, check out our tulle here for a bigger selection of regular and glitter tulle that will make your projects pop with color. Then send us pictures of your finished projects to info@smithandedwards.com so we can show them off!

Come play with us on Pinterest! Follow us to get more creative ideas and be sure to pin this image so your friends can get inspired too. Share the love this Valentine’s Day!
Valentine's Sweetheart Tulle Ornament

Hugs & Kisses!