Stay warm in the country with wool clothing, heaters, and horse hoof pads!

Keeping your Horse Warm this Winter

- posted by Rose Marion

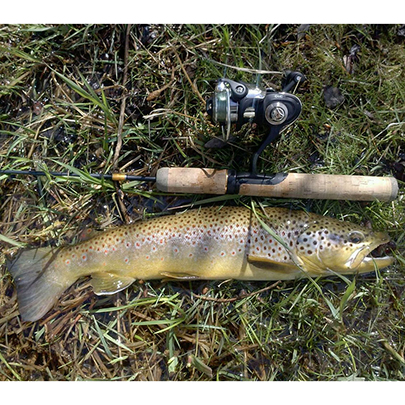
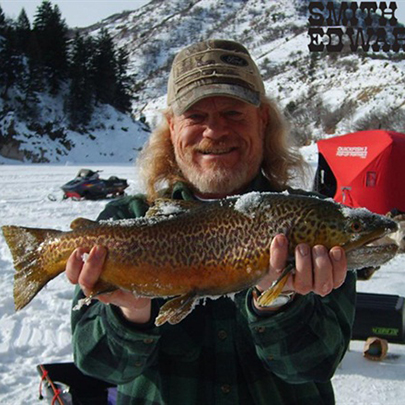
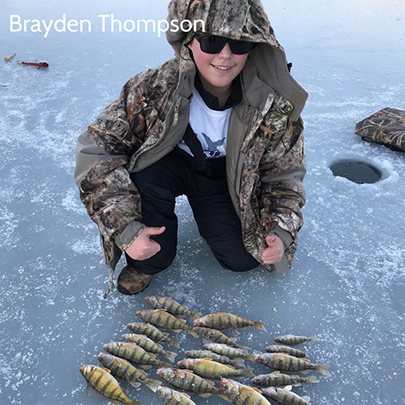
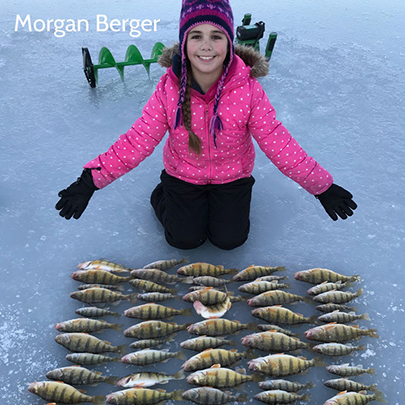
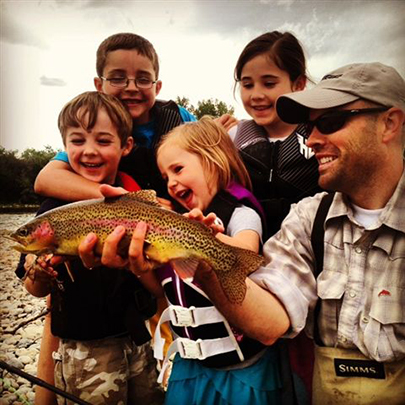
Now that we’re in the thick of winter, the fishermen are excitedly measuring how thick the ice is on their favorite lakes and reservoirs. (view ice fishing tips here!)

If you’ve got horses or livestock, and you don’t have heaters, it’s a tough time of year! Make sure you have the best winter you can with these tips to stay warm no matter how rural your road.

Keep the Horse Warm

Water

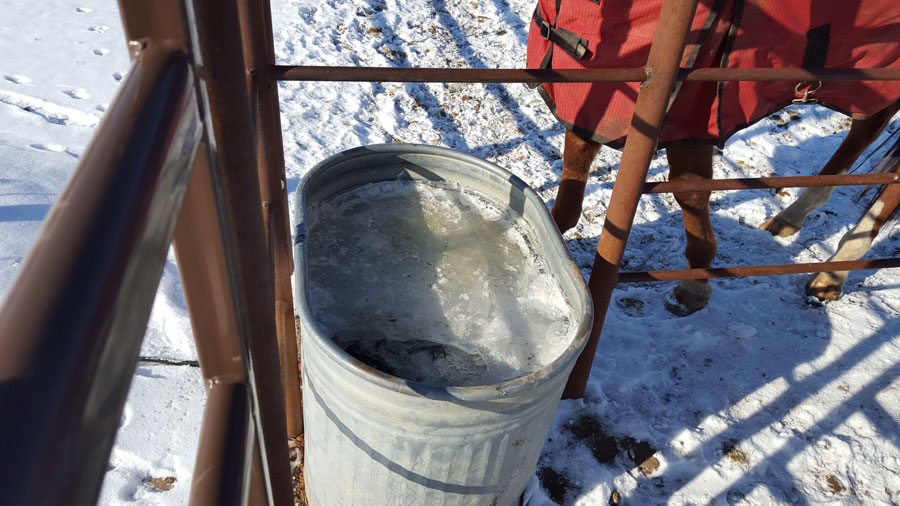
If you don’t have any equipment at all, you’ll be going out each morning to break the ice with a pitchfork. But you have kids to do the work for you, right?

Well, the kids will thank you for investing in a heater or de-icing system. Get a bucket heater from Smith & Edwards here – you can even get yours delivered!
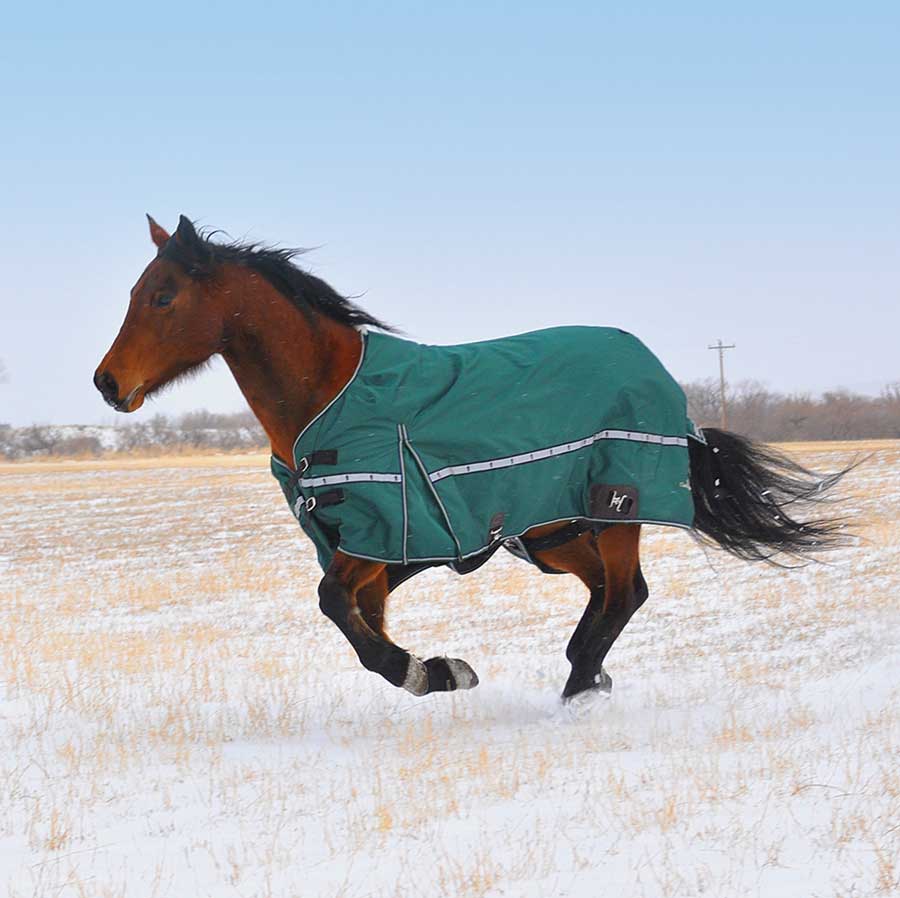
Frozen horse trough

Horse Blankets

There are all kinds of horse blankets out there, and we like the Equibrand especially. Keep your horse warm and dry from the snow and rain with a blanket that moves with them. This makes for less cleanup work for you, too!

Equibrand 10K Cross Trainer Blanket

If you’re venturing into the snow-filled hills on horseback, make sure and ask your farrier about ways to protect your horse. When you’re shoeing your horse, you have several options that prevent snow buildup under the horse’s hooves. See available hoof pads and boots here.

Snow buildup is extremely cold for your horse – plus, kt makes each tread slippery, instead of sure. Plus, the compacted snow adds pressure on the frog, so there are a few styles of hoof pads to keep your horse snow-free.

The Mustad no-snow tube-style hoof pads compresses, and pops back, which prevents the snow from building up on the hoof.

Horse Snow Hoof Pads
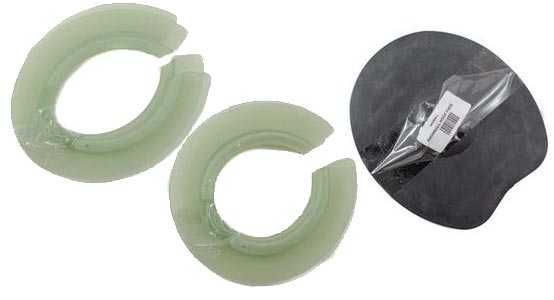
The other style, the Snowball black plastic hoof pad, presses a bubble down into the snow, keeping it away from the hoof and giving your horse a surer step.

Keep Yourself Warm

Many vests & coats are designed to stand up to windstorms and blizzards that would make your eyes tear. Look for wool vests and jackets that will give you years of use and provide maximum natural warming.

We love the Wyoming Traders line of wild rags. These 100% silk wild rags will keep you warm without weighing you down. We just got some new Aztec patterns in, and we’ve got both youth sizes and adult sizes in polka dots, solids, paisley, and more.

Silk is warmer than wool, it gets softer with wear, and naturally wicks moisture away.

Breaking ice in the trough - Wells is wearing a Stormy Kromer hat, and both boys are staying warm with wild rags!

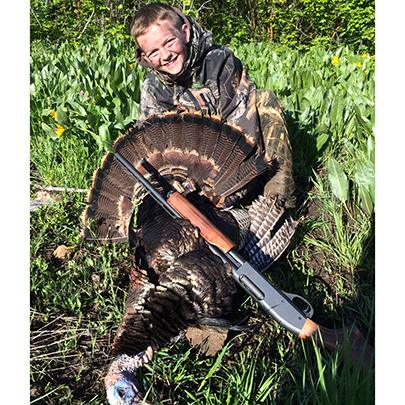
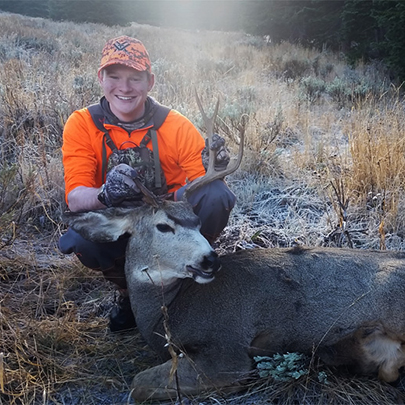
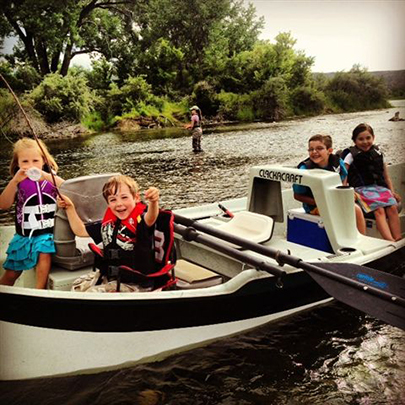
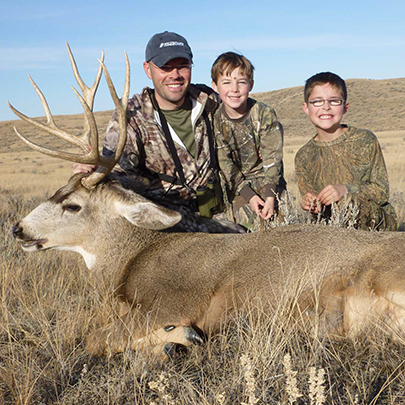
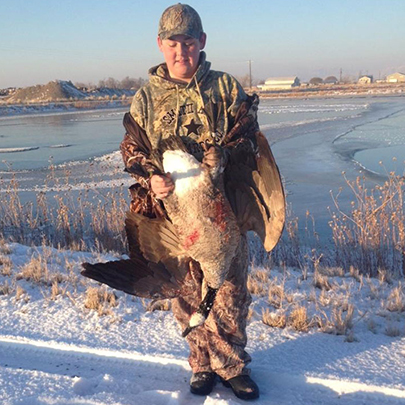
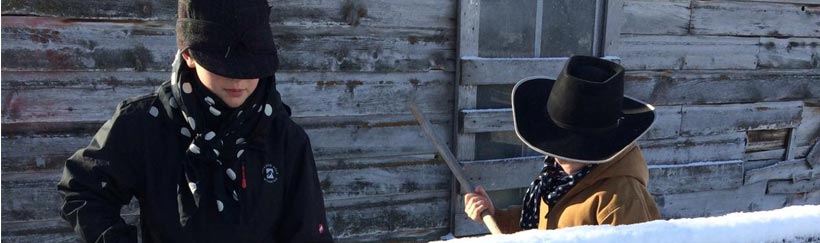
Breaking ice in the trough – Wells is wearing a Stormy Kromer hat, and both boys are staying warm with wild rags!

If you don’t have a felt hat, look at a good Stormy Kromer hat. We carry these hats in store and they are so popular! Made in a wool/nylon blend with 100% cotton flannel, these hats are made in USA and are called “an icon of the great American outdoors.” This hat’s been around for more than 100 years, and it’s still made of six hand-stitched panels.

Don’t let your fingers freeze! Draw on your foam-lined Yellowstone gloves – an old favorite for standing up to barbed wire, these elkskin and deerskin gloves have a foam-lined option for winter.

Nothing beats a day spent duck hunting with your dog

What you need for Waterfowl in Utah

- posted by Rose Marion

Smith & Edwards is lucky to be right next door to Willard Bay, so we get to hear fishing reports from all types of anglers.

Even more than that, we’re just a couple miles from the Harold Crane Waterfowl Management Area, right behind Willard Bay, which is a great spot for ducks: you can bring a boat or even walk right in.

I got to head out an afternoon with Tyler from the Smith & Edwards gun counter, and his dog Roger, who’s a rambunctious ball of energy, still in training.

Duck hunting’s a popular sport among Smith & Edwards employees and friends. I wanted to see what it would take to get started!

Tyler’s Waterfowl Gear Picks

Here’s what Tyler recommends…

Waterfowl camo Smith & Edwards hat

Wear your Smith & Edwards hat for good luck!

Duck hunting camo: Most duck hunters choose Realtree Max-4, Max-5, or MossyOak Shadow Grass Blades patterns. Stay cozy: a good hoodie or jacket is going to keep you good & warm.

Tyler’s rockin’ the Smith & Edwards camo ball cap, too!

A shell belt will keep your ammunition close at hand!

Hunting Waders: The higher the number, the warmer! You can use ankle wraps to keep your jeans from sliding up when you put the waders on.

To take waders off, peel them down your legs!

Duck Calls: Our favorites here at the store are Zink, Primos, and Duck Commander. You can see a selection here, or come into the store and take a peek.

Get some paracord to make yourself a lanyard for your calls!

Shotgun & Shells: Don’t go cheap. You didn’t get all the way out here just to miss! You want a good knock-down Tyler likes the Estate, Hevi-Metal, Fasteel, and Winchester Blind Side shells.

This good-looking gun is a Browning A5 shotgun.

Decoys: Tyler likes the Tanglefree EZ Rig Decoy System, which has also been one of our top sellers this year! It’s such an easy system to use, and like you saw in the video, you can just hook the decoy lines to a carabiner and walk around placing or gathering the decoys.

Roger helping Tyler set up the decoys

The Tanglefree EZ Rig system is easy to manage and set up.

Decoy Gloves: We’ve carried Glacier Glove Decoy Gloves for years and they’re great: the neoprene keeps you warm and dry, they’re super flexible, and have grippy sharkskin-textured fingers & palms. These particular ones are Max-5 camo.

Blind Bag: We like Tanglefree and Wildfowler brands. Keep all your shells and gear together without having to worry.

Dog Supplies: We’ve sold out of the Tanglefree dog vests for the season, but we’ll have more coming for next year! We also carry the DT Dog Training systems here in the store, so if you’re looking to have a bird dog next season, you can start training him now.

Roger loves his duck toy, too!

Duck Hunting gear: shells, bind bag, and dog toy!

We’ve got decoy gloves, a blind bag, plenty of shells, and of course Roger’s squeaky duck toy!

Remember, you’ll need a duck stamp, too. When we were out filming we ran into a DNR agent. Be ready!

Had a good duck season? Send us your pictures to help (at) smithandedwards.com. We want to see ’em and add them to our Braggin’ Board.

Six Steps to Home-Canned Applesauce!

How to Can Applesauce in 6 Easy Steps!

- posted by Jerica Parker

Fall is here! The leaves are falling, the wind is cooler, and it’s time to get ready for winter. One of my favorite ways is by storing all the delicious food we have enjoyed in the summer, so we can have it in the winter as well.

Vickie Maughan, our canning and housewares department manager, shared with us her great recipe for making canned applesauce at home. And we want to share it with you!

The perk of this recipe, is you can eat it right away, storing leftovers in the fridge – and you can also can the applesauce to enjoy in the winter. Her tips and tricks are right here in 6 easy steps:

How to Can Applesauce

  1. Start by washing your apples. Peel them, and then slice them. Vickie used a peeler machine to take off the peel and slice them. Get your own peeler here!
    IMG_2032
  2. Cook the apples in 3/4 cup of water on medium heat. When they reach a boil, lower the heat and steam them until the apples are tender.
    IMG_2036
    IMG_2039
  3. Then, using an immersion blender, blend up the apples until it reaches your desired consistency of applesauce.
    IMG_2042

If you want to enjoy it right away, finish up by sweetening and seasoning however you like it. If you would like to continue to can and store for food storage, continue with the next steps.

  1. When you have reached desired consistency, sweeten and season to how you like.
  2. Next, fill the jars. Using a funnel is so helpful for easy cleanup! Wipe clean to avoid problems with sealing the lids.
    IMG_0436.JPG
  3. Tighten lids and place jars in pot with water just above the level of the jars. Bring to a boil for 20 minutes. Careful! When you take out the jars, they will be very hot. Use a good jar lifter to protect your hands.
    IMG_0440.JPG
    IMG_0444.JPG

And voilà! Delicious applesauce to enjoy and share with your family and friends.

But you better hurry! You have just under 2 weeks left in apple season to get your apples for delicious applesauce. Stop at Pettingill’s and get your apples soon! They are closing for the season on Halloween, October 31.

Make sure to like Pettingill’s Fruit Farm on Facebook, and then take a peek at when we stopped in to Pettingill’s in August.

Explore Canning & Dehydrating supplies at Smith & Edwards!

Dyeing Rodeo Queen Gear with Rodeo Ink

Right on HUE: Dyeing Rodeo Outfits for Queens with Rodeo Ink

- posted by Jerica Parker

I have always looked at Rodeo Queen contestants and wondered how they got all their outfits to match so perfectly. It’s incredible! From their hats, to their boots, and even their horse tack, it is all the same shade.

A frequent question we get asked is, How do I dye my own rodeo queen outfits? So, we asked around to give you the answers.

If you’ve ever tried to dye your own rodeo outfits, you’ve experienced just how hard it really is. Sometimes they can turn out, and other times the whole batch is botched.

So we talked to Ron Hansen, owner of the Rodeo Ink Company. We got the chance to sit down with him and talk to him a little bit about his business Rodeo Ink and dyeing rodeo outfits.

Dyeing Rodeo Outfits Q&A

S&E: How did you get started?

Ron: Ever since my little girl started doing rodeo queen contests, I’ve started dyeing her outfits. Pretty soon, word got out, and I began sending out dye orders for rodeo queens all over the states. It’s been 5 years now since I’ve started, and since Rodeo Ink opened for business.

S&E: What are some common mistakes people will make when dyeing on their own?

Ron: Well, dyeing is kind of a tricky thing. Many times, people don’t take into account all the different materials and dyes you have to use to get the same shade on everything. People can very easily can ruin a pair of jeans when dyeing. I hear a lot of “Help me fix this!” and a lot of times, stripping the dye out again is nearly impossible.

So I help people start over. Some good jeans to start with when dyeing are white Wranglers, style 13 or 14, and blank white boots. That way the dye goes on in its pure color, and you’re not overlapping and getting strange colors in the end.

S&E: What does a rodeo queen need dyed?

Ron: Just about everything! That includes shirt, jeans, boots, etc. Even reins, saddle pads, and custom tack. I can dye all those all the same color to match the outfit. Also, I have a contact with someone who does custom jewelry, airbrushing, and more.

S&E: What other events do you do dyeing for?

Ron: I do stuff for high school rodeo queen contestants, horse shows, Western pleasure, Texas stock shows, and even youth competitions – not just high schoolers. Also, I have worked with State Queens and Miss Rodeo America contestants.

Pearl and Perri Douglas for Box Elder County Minnie Princess

Pearl and Perri Douglas for Box Elder County Minnie Princess

Ron Hansen with Rodeo Ink

S&E: What’s rodeo queening’s effect on families?

Ron: Rodeo Queening is a great program for families. I have been involved in rodeo for more than 30 years and I was a rodeo clown & bull fighter for about 13 years. My whole family has been involved in rodeo for 10 years now and we have learned a lot, and not only about rodeo.

Being involved in rodeo queen pageants teaches kids about responsibility and self-worth, which is something that can help these kids out a lot when growing up.

Now We Know!

Thank you Ron! He gave us some awesome tips and ideas and we hope that those were able to help you as well. He’s got a knack for dyeing and says that he can match any color you send him. He recently added a new gal to help him out during the peak season, where they send out about 10-12 pairs in a week to orders from all across the United States and Canada.

If you would like to get into contact with Ron, or would like to look at some of his work, here you can check out his Rodeo Ink Instagram or his Rodeo Ink Facebook page.

Or, if you are interested in dyeing or other gear, come visit us in Ogden, UT, off I-15 at exit 351 – or, click here for Women’s Jeans, Girls’ Jeans, Paracord, and Tack.

Explore Country Clothing, Camo, Cowboy Boots & more at Smith & Edwards!

Can SureCan…? This gas can sure can!

- posted by Jerica Parker

Now, I know what you’re thinking… another gas can?? Yes!

SureCan is a new and renovated gas can that is becoming popular in various local businesses, including here at Smith and Edwards. The SureCan is made in the USA and the company is local here in Ogden, Utah. The Standard Examiner just recently featured Brad Ouderkirk, owner of the SureCan, in an article as well. Read the article here.

Watch the SureCan in Action

We know and understand the typical issues with gas cans… they tip over and spill gas all over, they are hard to aim when pouring into your machine, and they can leak. The frustration is discouraging and totally not worth it.

That is why I wanted to tell you about this awesome, brand new product we are carrying! The SureCan gas can is guaranteed no spill, no leak, and gas-free hands after using it. But what makes it different from other gas cans? I asked Randy, our Lawn and Garden department manager, exactly what makes it unique.

“The features speak for themselves,” Randy told me as he showed me the flexible, rotating nozzle and the thumb-release trigger. No more messy tipping and aiming! After using this can, we have had people tell us just how easy it is to use.

“Lifting a 5 gallon gas can and tipping is not easy,” Randy says. But this new, renovated gas can solves that problem. So yes… SureCan sure can!

SureCan: Feed Your Machines

Get it now!

SureCan 5 gallon gas can SureCan 2.2 gallon gas can
Get your 5 gallon SureCan Gas Can here! Get your 2.2 gallon SureCan Gas Can here!

Also available in store at Smith and Edwards! Exit 351 off I-15 in Ogden, Uah – Find it in the Lawn and Garden department in the front of the store.

Emission Control Information:

This container complies with U.S. EPA emission regulations for portable fuel containers (40 CFR Part 59). The emissions warranty is valid for a minimum of one year from date of purchase.

Check out Sporting Goods!

See all Boating accessories, Camping, Hiking, Hunting, Fishing, and more.

Shop Sporting Goods on SmithandEdwards.com

Take your Kid's Halloween Costume to the Next Level

A Fun Way to Take Your Kids’ Halloween Costume to the Next Level

- posted by Jerica Parker

BANG! PEW PEW!! ARRGG!

Yep… it’s that time of year again. Kids running around dressed up, pretending they’re pirates or cowboys with their imaginary swords and guns. Well, let’s make their game of pretend a reality! No… not with REAL swords or guns… but here at Smith and Edwards we have Wooden Toy Swords and Rubber Band Guns that your kids will just love!

Some kids enjoying the rubber band shooting gallery at our Fall Kickoff

Kolt and Tynisha enjoying the rubber band shooting gallery at our Fall Kickoff

Kids dream of having their own gun or sword as a part of their Halloween get-up: from pirates to soldiers to their favorite comic book character. Yes – all the wooden guns feature the orange plastic safety tip!

The best part is that you can decorate these wooden toys however you like! It’s all part of the fun to let your kids paint, color, and design their own personalized swords or shields. And when you do, send us in photos of your creations! We would love to see them :)

Check out all our different models of Wooden Swords, Shields, and Rubber Band Guns.

Playing with wooden guns

The jeep in the surplus department has seen some serious fights!


So make your child’s Halloween costume complete this year with cute additions such as these wooden toys. Even if it’s not Halloween, these are great gifts for your child to play their heart out anytime.

Smith and Edwards employees Chris and Kevin show us that you are never too old for pretend.

Smith and Edwards employees Chris and Kevin show us that you are never too old for pretend

Looking for more creative ideas for this Halloween? Melissa and Ashley, part of the team here at Smith and Edwards, has awesome ideas on Halloween Mason Jar Decorations.

Click here to explore all our wooden toy swords and rubber band guns

Explore all our wooden toy swords and rubber band guns!

Colton Egger - Cutest Cowboy in Texas

The Littlest Cowboy in Texas and his Wild Rag

- posted by Jerica Parker

Whether you’re working out on the ranch, or goin’ out on the town, a young cowboy or a timeless one, some things just never change. Just how Wranglers have been around for what seems like forever and they have never lost their style.

As for the Egger family, passing on these timeless traditions to their kids, as well as adding some of their own, is a must.

Colton and his guitar

We recently had this cute little family buy some of the 100% silk Wild Rags we sell here in our store. Afterwards, they sent us some beautiful photos they had taken of their young son, Colton, by Sallie Scott with Country Grace Photography.

Colton Egger posing with his wild rag!

Colton’s set up camp and he’s ready to play!

The photos turned out so cute! This little cowboy is a natural. And he’s got on a Wild Rag! If that doesn’t convince you they’re good looking, I don’t know what will.

The Eggers aren’t the only family loving these scarves. Marty Thompson, our Western Tack manager here at Smith and Edwards, and his family also love them. His cute kids know a couple different ways tie a Wild Rag to be the slickest lookin’ cowboy around. Click here to see Marty’s son Wells show you How to Tie Wild Rags.

Besides being good looking, Wild Rags are really very practical. They can keep you warm in the cold, and wick away the moisture in the heat. Use them to filter out dust in their air and breathe through it, or to filter out dirty water to drink. And those are just some of their many uses!

They come in many different designs and colors, you can choose whichever fits you best. Here at Smith and Edwards, we happen to have a wide selection of Wild Rags to choose from. Click here to see Wild Rags.

Colton at the river

So enjoy your own! Just like the Egger family, you can send us photos of how you use your Wild Rags! Just send us an email at info@smithandedwards.com. And just like Colton, you can be toughest and most handsome cowboy out there.

Colton in his straw cowboy hat

Special thanks to Colton Egger, his dad Clint, and photographer Sallie Scott of Country Grace Photography!

How to install a Mule Hide Horn Wrap

How to wrap a Mule Hide Horn Wrap

- posted by Rose Marion
Elk herd on Highway 89 - photo by Rose Marion

The elk herd over on Highway 89 definitely exists. Check out those earrings!

Everyone knows about the elk herd over on Highway 89, north of Pettingill’s and just across the freeway from us. Smith & Edwards, you may not realize, has been raising a mule herd for decades.

I wouldn’t tell you a tall tale! These mules have been here in the yard since we started making tack back in 1979. We feed them corn cobs, pemmican bites, leftover MREs, all kinds of things.

That turns them a little blue, just like the mule hide. (Eeyore is a distant bloodline member).

Some times we bring these mules packing with us. They’re great for elk quarters as well as bringing all types of fishing gear when we go out to Willard Bay!

Blue Mule - originally by Dario Urruty via Wikipedia and edited by Rose Marion

Anyway, the reason we have Utah’s biggest blue mule herd is to keep up with demand for mule hide horn wraps. And the first question we get from buckaroos and ranch hands is, what’s the best way to install a mule hide wrap?

So, Marty made this video to see exactly how it’s done. Check out his saddle string tip!

Why use a Mule Hide Horn Wrap?

Wrapping your saddle horn with a strip of mule hide will protect it, but that’s just one benefit. Having this strip on your horn will act the opposite of a rubber dally: instead of gripping your rope, the mule hide practically turns to glass and allows you to feed the rope.

So how do you wrap a saddle horn with mule hide?

First, nail the end of the wrap to the bottom of your saddle. Then, bring the wrap up and over the swells. Here’s Marty’s tip: take your saddle strings and lay them under the wrap.

Then, wrap the mule hide around your horn, making sure to get the swells on your last loop. The last step of the wrap is pulling the end of the wrap underneath your first wrap, using Marty’s saddle string trick.

Then, you can use an old shovel handle with a strip of leather to smooth & tighten the wrap, getting rid of any bubbles.

Did you know? The blue color comes from the chrome tan process for these leather strips.

Get your mule hide horn wrap here. That’s just one item, though… We’ve got tons more saddle accessories, pack bags, grooming & show equipment, and country gifts here!

How to Freeze Corn

How to Freeze Corn – Plus Easy Corn-Cutting Method!

- posted by Jerica Parker

What do you do with all that left-over corn you made for dinner? Throw it out? Stick it in the fridge, forget about it, and then throw it out? Not anymore!

With this easy video & guide, you don’t need to let the words “canning” or “food storage” intimidate you. Melissa in our Housewares department will walk you through the steps.

Easy Frozen Corn Storage: Watch How!

Now, this is something I have done with my family since I was a little girl. We have our own garden and we love corn. So when it is corn season, we all get together to freeze our own corn for storage. It’s so simple and the corn comes out with that same fresh-from-the-garden taste.

How To Freeze Corn in 6 Steps

Here are some quick and easy steps for freezing your corn:

  1. Shuck the corn.
    • Shucking means to take off the husk and the silk hairs. As Melissa shows in the video, one easy method is to hold the corn between your knees and pull the husk toward your body.
      Shucked corn
  2. Wash the ears of corn and remove any remaining silk.
    Washing corn before boiling
  3. Blanch (or boil) the corn in boiling water for about 6 minutes.
    • The reason behind blanching the corn, is to stop the enzymes that can make the corn taste bad later. Cooking it first helps preserve the flavor when you want to eat it later on.
  4. Place the corn in ice water (using a pair of tongs to protect your hands) to slightly cool them off, just until they’re cool enough to handle.Resting the corn in an ice bath
  5. Cut the corn off the cob.
    • This part is optional. If you like, you can freeze them whole, on-the-cob. After step 4, you would wrap them in plastic wrap and then put those in freezer bags to freeze. If you prefer cut corn then you can take a knife and cut the kernels off the cob to freeze. In my family, we have always cut the corn off. It’s your choice!
    • Editor’s Tip: To cut the corn off the cob, you can put them in the center of a Bundt pan. This will hold them as you cut off the corn and it will fall right into the pan. Or a simple board with nails pounded through (about 5″ apart) can hold the cob steady while you cut.
      To make a nailboard, simply take an extra shelf or spare board. Paint it, then hammer a 4" nail through it. Then you can simply set each ear of corn on the nail, and safely cut the corn.

      To make a nailboard, simply take an extra shelf or spare board. Paint it, then hammer a 4″ nail through it. Then you can simply set each ear of corn on the nail, and safely cut the corn.

  6. Now, simply scoop the kernels you just cut off into freezer bags.
    • You can put 1 1/2 to 2 cups in a bag, depending on how big you want your portion sizes to be when you eat them. When the bags are flattened to about 1/2 – 1 inch thick, you can stack them nicely in your freezer to make the best use of freezer space.

More Tips on the Freezing Process

How to freeze corn in 6 easy steps!

  • 11 1/2 dozen large ears of corn should give you about 58 cups of corn to freeze.
  • Vickie, Kitchen Dept. Manager at Smith and Edwards, says to lay the bag with corn flat as you zip it up. When you have about an inch left to zip, squeeze the air out. “If it has air in it in the freezer, it is more likely to get freezer burn,” she says.
  • Melissa has another idea on how to get the air out. She says when you have the full bag, you can slowly lower it into a lot of water, just until it reaches the zipper line. The water on the outside of the bag helps push the water out and you can seal it while still partly in the water.
  • Don’t put too many bags in the freezer at once! If you put a lot of warm things in the freezer, it may begin to thaw out your other frozen foods. But if you put in just a few at a time until they’re frozen, they will freeze faster and won’t thaw any of your other food.

Now you have corn to eat for the next few months! It’s a great and easy way to start up your own food storage without the complicated recipes or big pressure cookers.

We would love to hear back from you! If this worked for you, or if you have any other tips or secrets to help others in starting their canning & food preserving, please leave a comment below.

If you liked this, you will LOVE our other frozen food storage tips! Make sure you check out How to Freeze Beets and How to Freeze Cherries.

Luci Lantern

Backpacking Stories: Illuminating Rainy Chapters with a Little LED

- posted by Mike Vause
Mike Vause, Smith & Edwards

Mike Vause, Camping manager

My Grandpa used to say: “Too much of anything is not good.”

Is it possible to have too much gear? Too many gadgets?

I do love new stuff, but when I am in my backpacker mindset, some stuff just gets left behind. Most backpackers love convenience and comfort, but have to be choosy when it comes to weight.

For years, having a pack under 40 pounds was my goal. As I am no longer 20, my goal has changed to the low 30’s for pack weight for a 4 day or so hike.

Since I have, through the years, carried a lot of weight to get my young children into the backcountry (they are all full grown now), I try to take advantage of the payback opportunity as much as possible. If I can’t convince one of my sons to carry it, I usually leave it home.

Lightbulb Moment

Luci Solar Lantern

The Solar-Rechargeable Luci Lantern – squishes down flat, diffuses light like a charm. You know, you really should have one of these in your pack.

On this last Uinta backcountry adventure, I found an item that I just had to try out. The Luci Inflatable Solar Lantern has been selling by the hundreds in my department.

I honestly didn’t get how, but its success made me think that I was missing out.

I bought one at the last minute (along with about $200 worth of last-minute necessities) and left the solar lantern on my dashboard to charge that afternoon. My pack was in that low 30# range, so I threw it in my pack.

Two of the nights were cold, rainy, and early-in nights. Reading was a great escape to pass the time.

The LED lights were perfect in the tent and the inflatable feature diffused the light output to perfection. It was awesome. The Luci was light enough to perch in the gear loft and do its job.

In the morning, I left it outside the tent and headed out to fish. The afternoon rains soaked it, but it still recharged without a problem and was ready for the next chapter of nighttime reading.
Luci Lantern hangs easily in a tent

The Luci promotes itself as an inflatable light – and the fact that its plastic lining diffuses light in the tent is a big plus. But the more important factor for me was that this item, nearly the size of your typical lantern, collapses down smaller than the book I packed – now that’s nifty.

Waterproof, lightweight, rechargeable, and affordable. It’s worth a look.

Get yours online at SmithandEdwards.com here or come see it here at the store off the I-15 Willard Bay turnoff.

Check out our Camping and Hiking gear - click here!