How to use a Pickling Crock

How to use a Pickling Crock: the Art & Science

- posted by Rose Marion
Teresa with USU Extension service

Teresa with USU Extension service helped answer some common fermenting & pickling questions for us!

When people think of pickles, large quart jars of olive-colored pickles come to mind. But there’s another way to make pickles that takes a lot less heat, a lot more time, and some say, yields a lot tastier results:

Fermenting Pickles and Vegetables

When you make pickles in a traditional pickling crock, in some ways it’s much less work: simply prepare your pickles, load them in the crock according to the recipe, and give them a few weeks.

This yields crisp, crunchy, delicious pickles!

And you can make sauerkraut and more fermented dishes the same way.

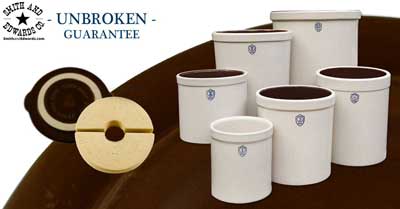
Our favorite brand of stoneware pickling crocks are the Ohio Stoneware line (click to shop), which is make in the USA in Zanesville, Ohio. And when you order yours from Smith & Edwards, we guarantee they arrive in perfect condition!

We carry lids, weights and pickling crocks in a huge range of sizes, as well as the very-popular 3-gallon fermentation set.

What size Pickling Crock do I need?

The US Department of Agriculture recommends a 1 gallon container for each 5 pounds of fresh vegetables. So a 5-gallon stone crock is an ideal size for fermenting about 25 pounds of fresh cabbage or cucumbers, according to the USDA Complete Guide to Home Canning.

Cucumbers and cabbage must be kept 1-2 inches under brine while fermenting, so weights can be instrumental.

Make sure to wash your crock, weights, and lid with hot soapy water, and rinse them well with very hot water, before adding your vegetables.
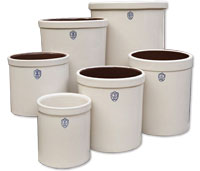
Ohio Stoneware crocks at Smith & Edwards

You can get a pickling crock for any size project – from one to five gallons – and the weights & lids to match.

Why & How to use a Pickling Crock

We were lucky to have Teresa Hunsaker from the USU Extension Service here at Smith & Edwards this summer to check pressure canner lids, as well as give tips on the fermenting process. Fermenting is only growing in popularity as people return to the traditional method, as well as gain interest in probiotics and the health benefits of fermented foods for the digestive system.

Read on for common fermenting mistakes, how to process your vegetables after fermenting them, and a fermented Dill Pickle Recipe!

Pickling Crock Common Mistakes

One of the common problems Teresa sees has to do with salt: especially people not using enough salt.

Salt is hugely important with shredded vegetables and pickles: otherwise, the brine goes scummy and your lovely batch of pickles or sauerkraut is lost. It’s so important to use the right salt ratio!

Use your standard pickling salt: you can use both iodized and noniodized table salt. Noncaking materials added to table salts may make your brine cloudy. USDA advises against flake salt because it varies in density. Reduced-sodium salts may be used in quick pickle recipes; this may give your pickles a slightly different taste than expected. But, reduced-sodium salt is not recommended for fermented pickles.

Layer your vegetables, then salt, then vegetables, then salt: this is especially important with cabbage.

Another mistake Teresa sees is not having your crock at the right temperature. Some people will store their pickles in the basement as they ferment, or in a room that gets too hot.

The temperature should be between 68-74 degrees. That’s because if it’s too hot, it will process too fast and produce scummy brine. Too cold, and the process will take too long.

The traditional way to make kimchi is actually to bury the fermentation pot in the ground, to keep the temperature constant!

Fermenting is both an art and a science!

How Long does Fermenting Take?

The length of time needed for your batch of pickles or sauerkraut depends on your recipe. It takes about 3 weeks for sauerkraut, and there’s a good recipe out there for 21-day pickles.

Follow your recipe exactly, including changing out the brine: with the 21-day pickles, you need to change the brine every few days.

OK, they’re done… Now what?

You can can your sauerkraut or pickles after they’re done: just process them. For sweet pickles, it just takes 15 minutes; for whole dills, about 25 minutes does the trick at this altitude.
Or, you can waterbath them – check your local recommendations and keep them under 185°.

But you don’t HAVE to can them at all. Your crock pickles can hold in the fridge for weeks!
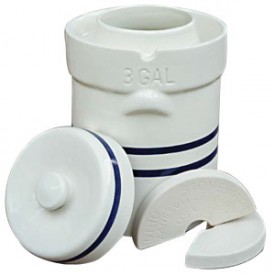
Ohio Stoneware Fermentation Crock

This 3-gallon fermentation crock features a channel for the lid to rest in, and comes with matching weights.

What’s the difference between pickling crocks and fermentation crocks?

Either style works well.

The fermentation style is designed for keeping the vegetables down better, and it features vents. You do want some air circulation to temper the temperature.

Dill Pickles Recipe for Pickling Crocks

Use the following quantities for each gallon capacity of your container.

  • 4 lbs of 4-inch pickling cucumbers
  • 2 tbsp dill seed or 4 to 5 heads fresh or dry dill weed
  • 1/2 cup salt
  • 1/4 cup vinegar (5%)
  • 8 cups water and one of more of the following ingredients:
    • 2 cloves garlic (optional)
    • 2 dried red peppers (optional)
    • 2 tsp whole mixed pickling spices (optional)

Procedure: Wash cucumbers. Cut 1/16 inch slice off blossom end and discard. Leave 1/4-inch of stem attached. Place half of dill and spices on bottom of a clean, suitable container. Add cucumbers, remaining dill, and spices. Dissolve salt in vinegar and water and pour over cucumbers. Add suitable cover and weight. Store where temperature is between 70° and 75° F for about 3 to 4 weeks while fermenting. Temperatures of 55° to 65° F are acceptable, but the fermentation will take 5 to 6 weeks. Avoid temperatures above 80° F, or pickles will become too soft during fermentation. Fermenting pickles cure slowly. Check the container several times a week and promptly remove surface scum or mold. Caution: If the pickles become soft, slimy, or develop a disagreeable odor, discard them. Fully fermented pickles may be stored in the original container for about 4 to 6 months, provided they are refrigerated and surface scum and molds are removed regularly. Canning fully fermented pickles is a better way to store them. To can them, pour the brine into a pan, heat slowly to a boil, and simmer 5 minutes. Filter brine through paper coffee filters to reduce cloudiness, if desired. Fill hot jar with pickles and hot brine, leaving 1/2 inch headspace. Remove air bubbles and adjust headspace if needed. Wipe rims of jars with a dampened clean paper towel. Adjust lids and process as below, or use the low temperature pasteurization treatment.

– recipe from USDA’s Complete Guide to Home Canning, Guide 6: Fermented Foods and Pickled Vegetables

Want to learn how to make sauerkraut in a fermentation crock? Enter your email address to get access to a free printable Fermented Sauerkraut recipe!

Explore Pickling Crocks…

Smith & Edwards Pickling Crocks

How to shape a Palm Leaf Cowboy Hat

3 Ways to Shape a Palm Leaf Hat

- posted by Rose Marion

Need some shade at the rodeo or playing after work? Our Western guy Marty can show you how to shape a palm leaf hat today in a Gus, Brick Top, & Buckaroo style.

He shapes these cowboy hats here at the store with a steamer, and you can shape yours with just a bucket of water at home – watch how!

Cowboy Hat Styles

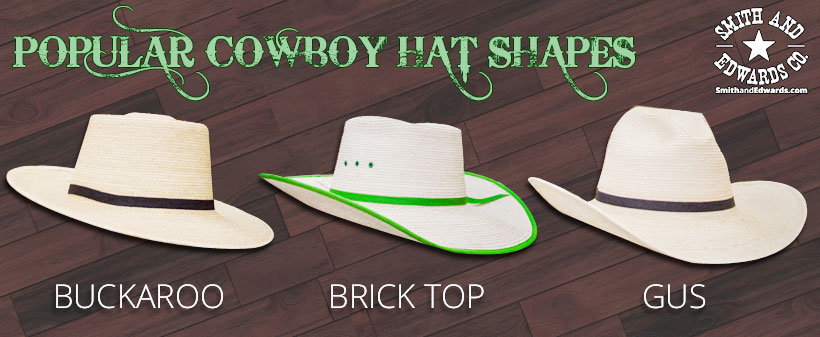
In the Buckaroo style, you’ll have a smooth bowl-shaped indent in the crown, round all the way around. Use a bowl or a ball to get this shape. Then you can raise the middle of the indent over another round shape, like a smaller ball, from the inside. You can also shape a nice lip in the top of the crown. The Buckaroo typically has a pretty flat brim, too.

This is the style of hat that Tom wore for his Trek outfit – he shaped it himself!

A Brick Top hat means you have four corners in the brim of the hat, and an even indent.
Buckaroo, Brick Top, and Gus styles you can shape your next hat with!
The most common styles of hat Marty sees is a Cattleman’s crown and a Gus. The Cattleman is like the hat Marty’s wearing: two dents running from front to back. The Gus is just like the Cattleman’s, but the dents are only in the front of the hat.

How to Shape Your Hat at Home

To do this at home, fill a bucket with water. You can use cold water and let it soak a while, or lukewarm will speed it up a bit.

Start with the crown and use your fingers and thumbs to start the shape.

Move to the brim and shape your brim.

Now let it dry. You’re all done!
Get a Hat of your Own

Get your own palm leaf hat from Smith & Edwards! We carry a HUGE selection of Sunbody hats, which is our favorite brand of palm leaf hat. These hats are Guatemalan-made and hold their shape nice after you shape them. They come in lots of adult sizes as well as kids’ sizes.

Get your own Sunbody hat at Smith & Edwards!

Come in to Smith & Edwards in Farr West and we’ll shape one up for you, too!

The Tradition of Ogden Pioneer Days

- posted by Regan Taylor

Utah’s founding is a story of 148 pioneers trekking over 1,000 miles across the country and finally arriving to the Salt Lake Valley on July 24th, 1847. By 1869, some 70,000 or so more pioneers made this long, strenuous trip to our beautiful state of Utah.

In the summer of 1934, Mayor Harmon W. Peery started what’s known as “Ogden Pioneer Days”. This was how he wanted to celebrate and remember Utah’s pioneer ancestors and heritage.

The Ogden Pioneer Days has definitely been a tradition that has stuck; every year, the Ogden Pioneer Stadium puts on a rodeo and other special events, such as a parade and western festival, that attracts many people. Today, it’s known to be among the top 5 best large outdoor rodeos by the Professional Rodeo Cowboy’s Association (PRCA).

Jim Smith And The Ogden Pioneer Days

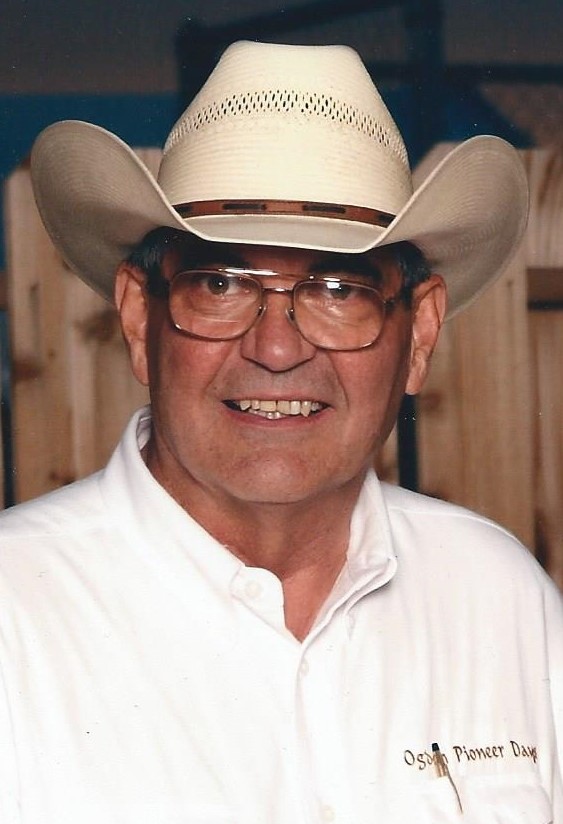
Jim Smith, son of Smith and Edwards Bert Smith, was President of Smith and Edwards since the 60’s, and an ardent supporter of the rodeo lifestyle. To understand Jim and Paula Smith’s total involvement with the Ogden Pioneer Days tradition, I talked with Jim’s close friend and Executive Administrator of Ogden Pioneer Days, Jackie Belnap.

Jim Smith

Jim Smith

Jackie recalled Jim becoming a part of the Ogden Pioneer Day’s Heritage Foundation Board some 10 or so years ago. But she says his active involvement really had been going on for somewhere between 35-45 years before. He was there to sponsor or support in ANY way he could.

Jackie said it was almost like every time the board thought to ask the Smith family for help, that they had already had it in their minds to help anyway. In other words, he didn’t have to be asked; Jim jumped in with both feet because of the passion he had for the Ogden Pioneer Days and community. And Paula was always right there with him, supporting in anyway she could too.

One moment that stood out to Jackie was when Ogden Pioneer Days had their volunteer appreciation party. Jackie had asked if Jim would be willing to give out a couple free gifts to some of these volunteers for their involvement and help with the Ogden Pioneer Days activities. Expecting just a couple free gifts, like they had agreed to, Jackie was stunned when she came to Smith and Edwards to pick them up. Jim had filled up an entire pick-up truck full of gifts for these volunteers who had taken time out of their day to help out. All 300 volunteers received a gift that night.

Of course, he did more than just support financially. Jim did all he could because he truly cared about all these people and what the Ogden Pioneer Days stands for. Jackie told me: “We would sometimes refer to him as our water boy. He was always making sure the cowboys had their cold water ready and that the coolers were always filled. There was literally no end to his support.”
Paula and Tenlee Smith

“Dad and Mom enjoy rodeo and the lifestyle. Dad competed in rodeo when he was younger and they raised all of us kids to love it too. Dad enjoyed his involvement with Ogden Pioneer Days. One of his main concerns was making sure the needs of the contestants were met. Mom has also helped out by volunteering in the contestant hospitality tent. She has always been everyone’s mom. This time of year the rodeo athletes spend a lot of time on the road. Its nice for them to feel like they have a place where they can refuel and recharge.

Dad always believed fully in giving back to the community and service. The Ogden Pioneer Heritage Foundation is one of the many boards he served on. He always felt like the store (Smith and Edwards) was blessed and that we are lucky to have the success that we do. It was his way of giving back. They are a great example of service before self.” -Misti Kosoff, daughter of Jim and Paula Smith

Jim Smith passed away in March, 2013. But his presence and support for our community is still deeply rooted. After he passed, the Jim Smith Memorial Scholarship was created. This is a $1,000 scholarship for high school seniors involved with rodeo, 4-H or FFA. All around Ogden at special rodeo events or fairs, you’re more than likely going to see a Smith and Edwards sponsor sign.

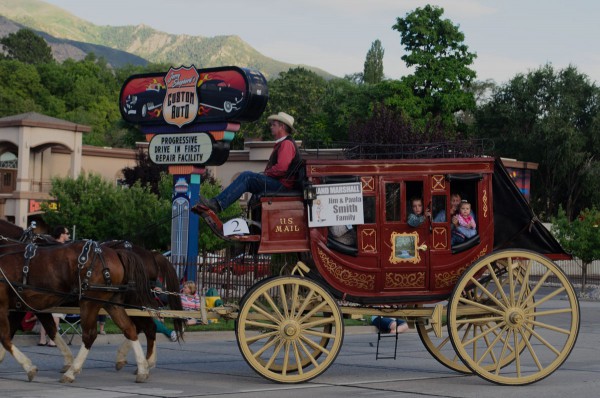
There was no limit to how much support Jim and Paula had for our community. This year, Jim and Paula Smith are being honored as Grand Marshalls for the Ogden Pioneer Days 2015 celebration. To learn more click here.

Grand Marshalls of 2015 Horse n Hitch Parade

Paula and the Smith family ride as Grand Marshalls in the Horse N Hitch parade on Washington

If you’ve thought about going but have never lived the crazy fun of the Ogden Pioneer Days, I highly recommend you try it this year. The events have been going on for about a week or so, but there’s still time to get in on all the action!

Events You Don’t Want To Miss

July 19th, at Ogden Pioneer Stadium at 8 a.m.:

  • Slack Breakfast and Timed Slack Event.

July 20th at Golden Spike Arena at 2 p.m.:

  • Miss Rodeo Utah Horsemanship Competition: Come out and support your favorite rodeo gal!

July 20th, at Ogden Pioneer Stadium at 6:30:

  • Pre-Rodeo and PRCA Rodeo: “Standard Examiner Family Night”.

July 21st, at Ogden Pioneer Stadium at 6:30:

  • Pre-Rodeo and PRCA Rodeo: “Patriot Night”.

July 22nd, at Ogden Pioneer Stadium at 6:30:

  • Pre-Rodeo and PRCA Rodeo: “National Day of American Cowboy” theme.

July 23rd, at Ogden Pioneer Stadium at 6:30:

  • Pre-Rodeo and PRCA Rodeo: “Tough enough to wear pink” night. Come at 6 p.m. to check out the Miss Rodeo Utah Freestyle Horsemanship Competition.

July 24th, THE BIG DAY!!

  • 9 a.m. on Washington Boulevard: Kick off the 24th of July with a Parade down the streets of Ogden. 20th street to 30th street.
  • 6 p.m.: Pre-Rodeo
  • 7:30 p.m.: PRCA Rodeo
  • 8:30 p.m.: Coronation of 2015 Miss Rodeo Utah
  • After the Miss Rodeo Utah is crowned, don’t forget to stay and watch the display of fireworks.

Pre-Rodeo Events Include:

  • Mutton Bustin’
  • Junior Posse Jamboree
  • Wild Cow Milking
  • Musical Chairs
  • Hide Racing

To get more details on registration and each event, visit the Ogden Pioneer Days website by clicking here.

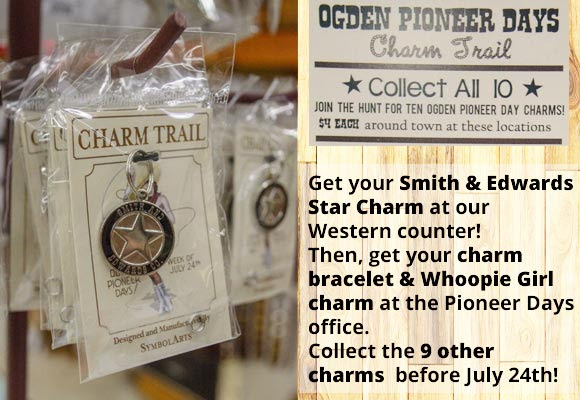
We’re a stop on the Charm Trail, get your Smith & Edwards star charm at our Western department counter!

kZMFiBHB5mUzni1xQg0b_ezKFeWHoIdB5Q0A_g93XdqB2t7L5JJzh86c2xgxNtq7IGo56FTpDb0Gs0Eo3JH9Z8rWXCSnmO1Ts0yVGzoqSNApPaD_uhYDwxyTpIhSbcelKOpmat0VnMIFK7O7llCynw=s0-d-e1-ft

Smith & Edwards Wrangler Rebates for Ogden Pioneer Days

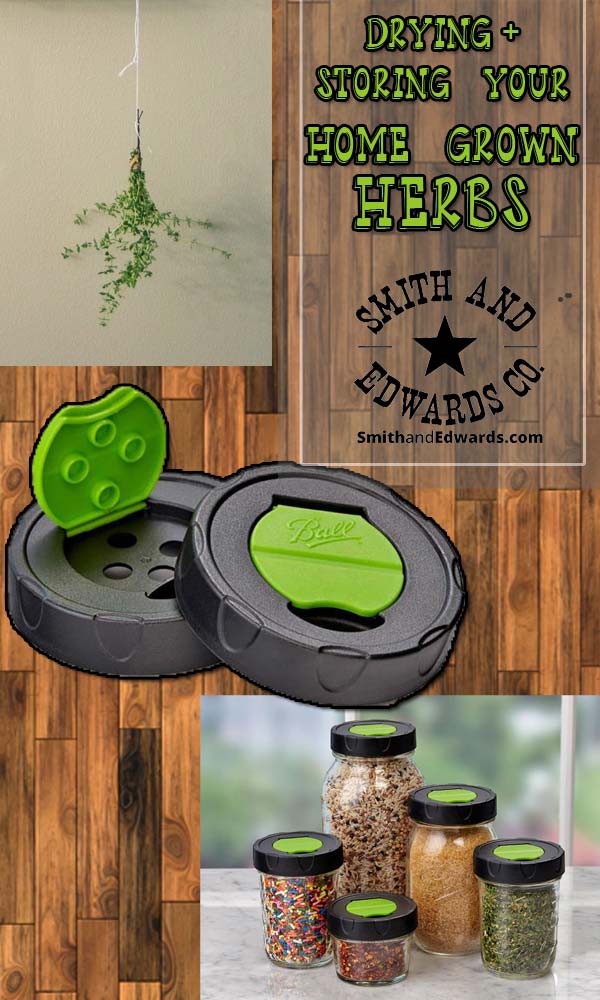
Mason Jar Herb Shakers are a great way to use your dried herbs year-round!

Have Herbs? Dry & Preserve in Mason Jar Herb Shakers!

- posted by Rebecca Adams

The best part of having your own garden is harvesting your own vegetables, fruits, and herbs. Drying herbs is simple, and with your own herb garden you can have the comfort of fresh and organic herbs and spices at your fingertips.

When to get ready

The early summer months of May and June is the best time to head over to your local nursery, and you can find an abundant supply of different herbs and spices to choose from. Some popular choices that do really well in the ground as well as in raised beds, are cilantro, thyme, basil, and chives.
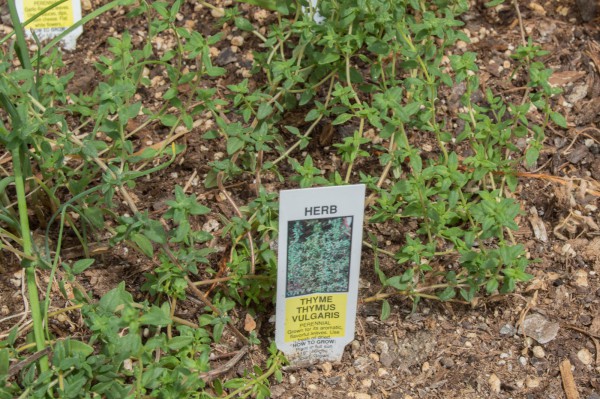
Thyme growing

How to Pick and Dry Herbs

The process is easy: harvest the herbs before they flower and the best time is early morning before the sun hits them. Be sure to give yourself plenty of time to finish the process, because it’s best if you start to prep your herbs for drying when you first pick them.

Make sure you wash gently and drain excess water, then tie a rubber band around the bottom with the herbs leaves facing down. Then hang in a moisture free area. It’s that simple!
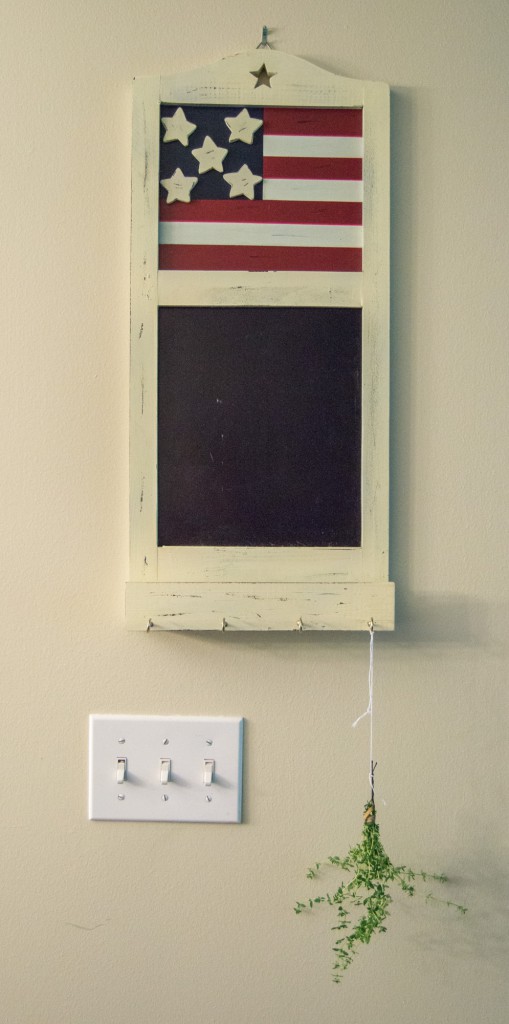
Bundle of thyme drying

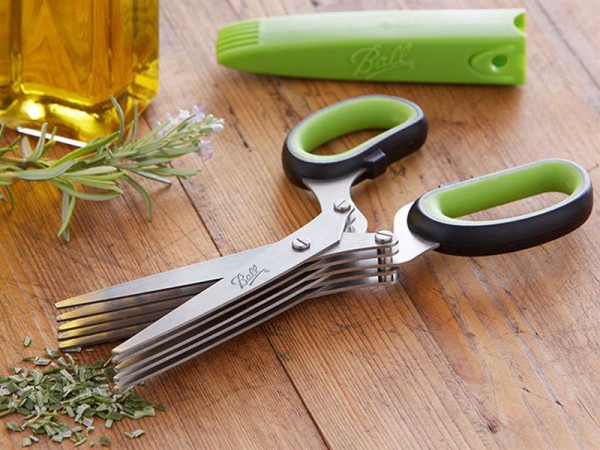
If you prefer, place the herbs on a mesh screen in a food dehydrator and let it run. This is a great method for parsley and chives: Cut the herbs with kitchen scissors, then let dry on a screen tray.

Kitchen Scissors - Ball Herb 5 Blade Scissors
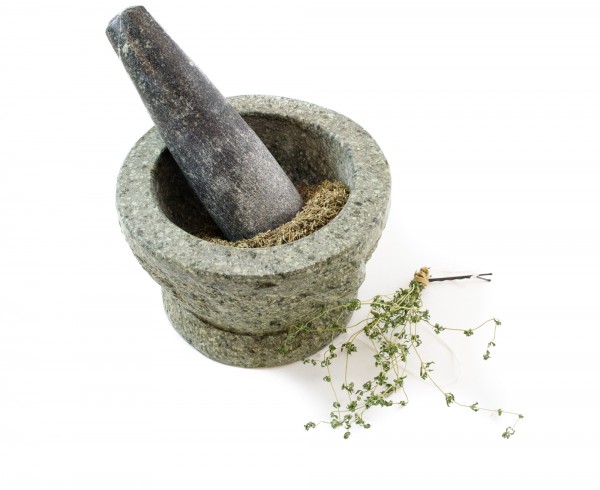
My favorite part is crushing the herbs with a mortar and pestle!
Thyme in mortar & pestle

Store your Herbs in Mason Jar Shakers

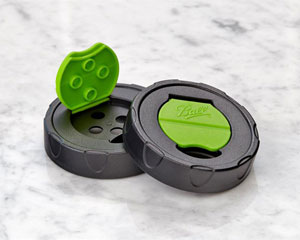
Ball brand Mason Jar herb shaker caps

I love these Ball Mason jar herb shaker caps – so useful and super-affordable!

I love these shaker lids for regular Mason jars that you can personalize and put your homegrown spices and herbs in! They work great for pretty jam & jelly jars as well as the pint & a half size Mason jars. You can even work on your biggest regular-mouth Mason jars.

They have nice big holes so you can shake out sprinkles and sugar spots as well as your favorite herbs and spices. Even mini chocolate chips! Mmm!

Add a label and you’re set!

See more Mason Jar lids & drinking mugs here. Click here to see Canning jars, too.

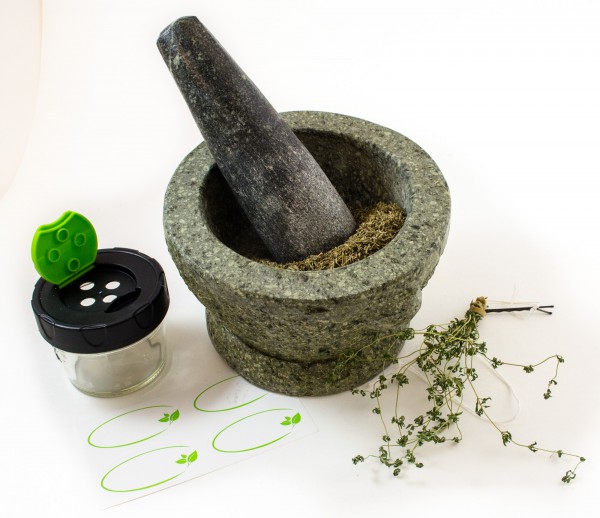
Thyme in a Mason Jar herb shaker

Put a label on your herb shaker and you’re set!

Help Us Grow! Share this tip on Pinterest!

Check out how to turn your summer herbs into cute shakers!

Range Day 2015 recap

Thanks for coming to Range Day 2015!

- posted by Mike Vause

To all our friends in Weber County, Box Elder County, & beyond who came to Range Day 2015…. THANK YOU! We are so glad to be here for you as you came and tried out a slew of guns. It was so great to see families here and we can’t wait for the next one!

Trying out the latest from Smith & Wesson

Trying out the latest from Smith & Wesson

Crowd Favorites

Our vendors really pulled through, and brought some fun & hard-to-find guns. Some of the most popular guns:

  • Springfield handguns: 1911 and XD’s
  • Smith & Wesson handguns (and a 500!)
  • Savage rifles
This little automatic BB revolver that our Umarex rep brought was a big favorite!

This little automatic BB revolver that our Umarex rep brought was a big favorite!

  • Browning rifles
  • Both 338 Lapua rifles
  • Sig 9mm & 45 pistols
  • TacSol .22pistols & rifles
  • CZ Scorpion 9mm
He likes this one!

He likes this one!

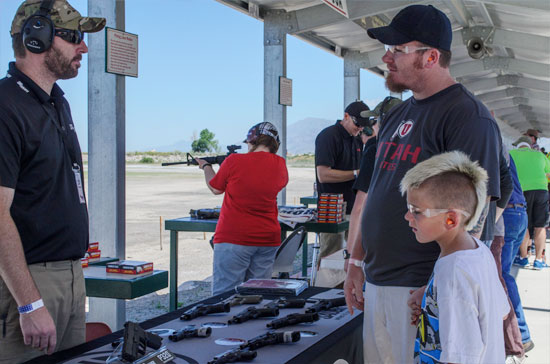
Last year, we had a gun at each of the 20 lanes. Thanks to vendors stepping it up this year, we had easily 50+ guns to try out!

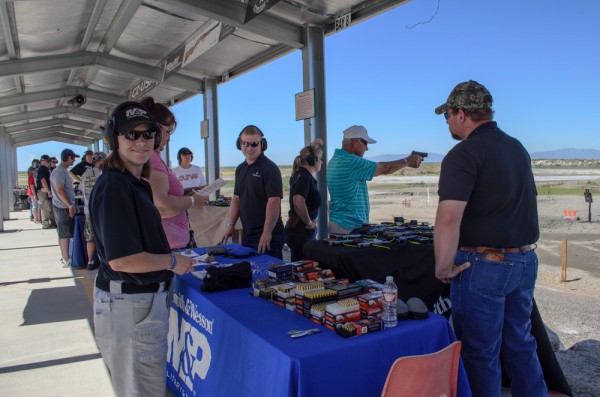
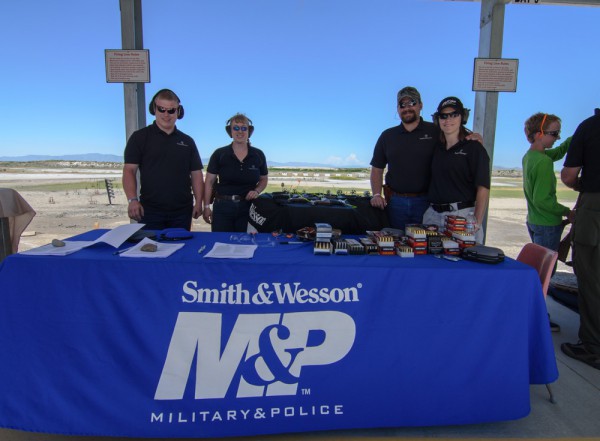
Smith & Wesson at our Range Day

Smith & Wesson Reps and a whole ton of ammo at the Smith & Wesson booth!

Sig Sauer offerings at Range Day

Checking out the Sig Sauer offerings

Heard at Range Day:

  • When is the next one?
  • Thanks for such a cool event
  • Do you do this every year?
  • This is a nice setup and a nice range
  • I didn’t know that this range was even here
  • There are lots of options here!
  • I wanted to try this gun out before I bought it.
  • Hey, I saw you on YouTube!
  • This is what we wanted for the city range – Perry City Police Chief Weese

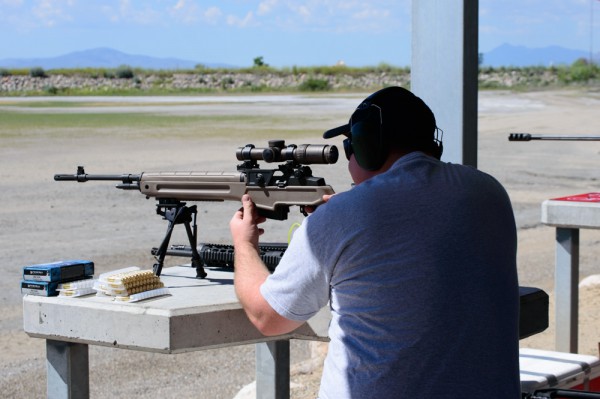
Range Day Rifle

“Range Day was an awesome experience. I loved having so many choices of firearms from so many different manufacturers. The cost was very affordable. The manufacturer reps explained all the benefits and features of each gun and optics. The Smith and Edwards staff made the event fun for all.” – Mike Taylor, Smith & Edwards fan and 338Lapua enthusiast

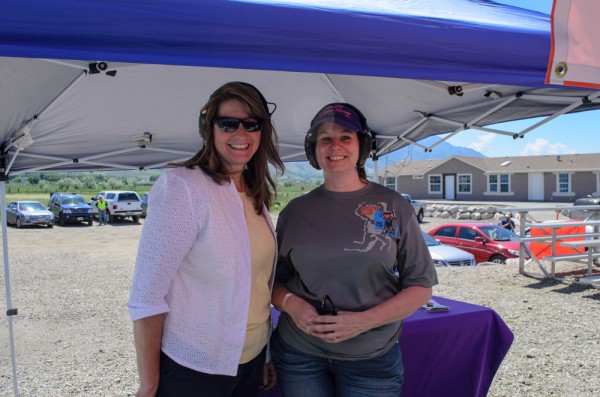
Connie and Karen

Perry City Mayor Karen Cronin and Connie Wolf from The Well Armed Woman (Northern Wasatch chapter)

Better than Last Year!

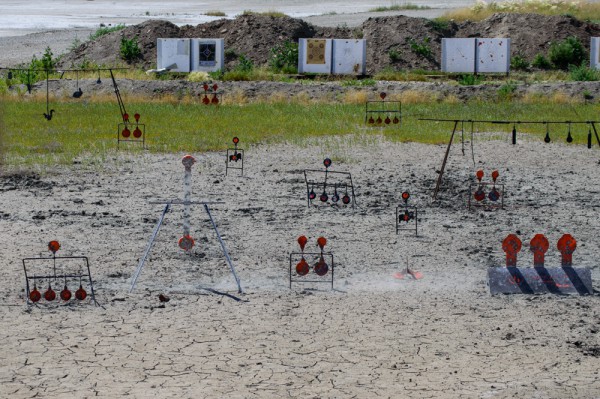
The Perry Range added a dueling tree this year, so the dueling tree was a fun challenge: 10 people won & received free ammo passes! Right on. This event definitely topped last year’s Range Day.

We’ve really got to thank our AWESOME sponsors! Many more vendors showed their products this year, which not only meant that you got to try out more guns: you got more attention. Vendors got to explain specs, gun operation, and give you feedback.

Long range rifle - photo by Rebecca Adams

And, we the Smith & Edwards team were able to spend more time making sure the gun fit you, you had a good grip and stance, and that you felt confident operating the gun.

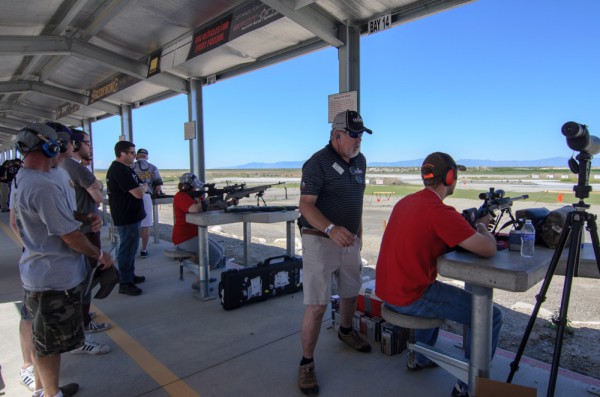
Spotting the long range targets

Spotting the long range targets

In addition to more vendors & many more options of guns to try out, this year we had more giveaways, and more parking!

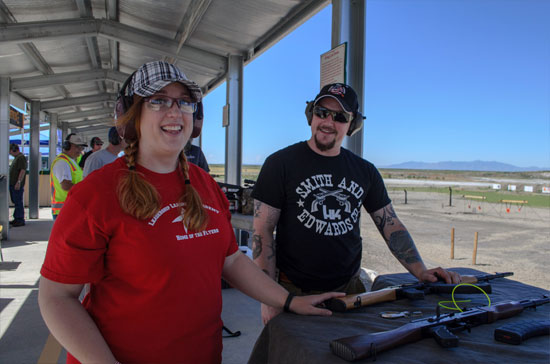
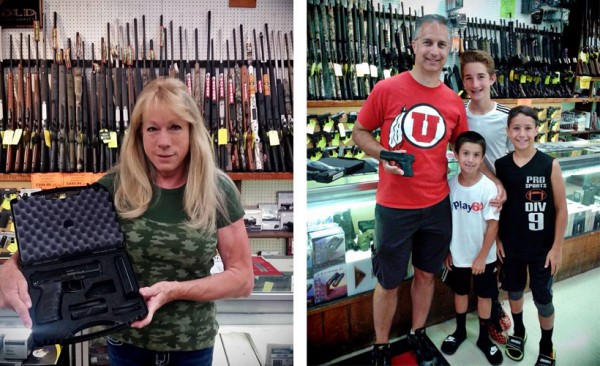
Faye and Matt took home a FREE gun each! Thanks to H&K and Springfield Armory for sponsoring these awesome giveaways.

Faye and Matt took home a FREE gun each! Thanks to H&K and Springfield Armory for sponsoring these awesome giveaways. We also gave away BUCKETS of 22 ammo.

Thanks again for coming and making Range Day 2015 a great event. Leave a comment & let me know if you think we should do it a 3rd year!

We put these targets to use!

We put these targets to use!

Join our Email List to hear about all events like this!

The only way to know when Smith & Edwards is up to something cool like Range Day is to join our email list!


Well, if you’re a HUGE fan then come on over and like our Facebook page too, and subscribe to our YouTube channel. But only if you REALLY love us….

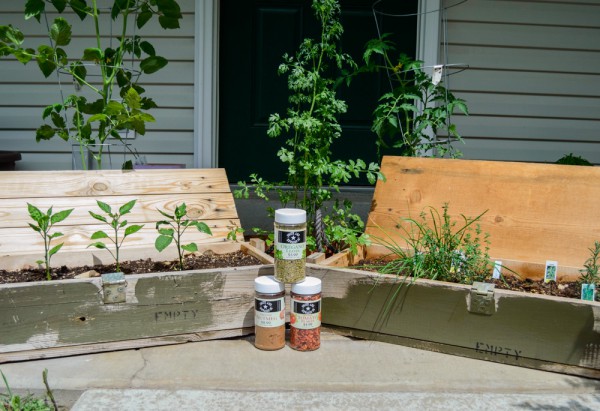
Over 120 Brand Name Smith and Edwards Spices!

- posted by Rebecca Adams

Smith and Edwards has everything you need, if we can find it. Why not have our own line of affordable spices, seasonings, rubs, herbs, and air dried vegetables?

From the freshest ingredients comes over 120 spices that are must haves for your kitchen.

A few of the Smith and Edwards line up. Oregano, nutmeg, and tomato flakes!

A few of the Smith and Edwards line up. Oregano, nutmeg, and tomato flakes!


You’ll find new ways to use these spices following our Pinterest board, For Your Kitchen. New recipes are added weekly!


Nutmeg Spice and Tomato Flakes

Nutmeg Spice and Tomato Flakes


You’ll find all the spices by clicking this link here. You’ll find more ideas for your kitchen by visiting our kitchen and housewares section on our website!

I love my raised garden! Click to find these vintage ammo boxes and make them your own too!

Mike showing us the essentials of handgun grip and stance

Handgun Grip & Stance for Marksmanship

- posted by Mike Vause

Long before James Bond drew a gun, pointed it, and shot the bad guy squarely in the chest…

He had to develop his form.

Grip and stance are the most important things to know about with any type of gun. Your grip keeps you safe and on-target. Your stance keeps you firmly planted and able to repeat a shot – and even move if necessary.

Maybe you love target practice, or maybe you are interested in getting into shooting competitions. Maybe you’re interested in improving your accuracy for personal defense situations. Or – maybe you haven’t actually gone to the gun range yet!

I made this video for you so that no matter your skill or experience level, you’ll feel confident and EXCITED to head to the range!

Watch the Essentials of Handgun Grip & Stance

In the video, I gave you some good pointers:

  • Hold the gun in your dominant hand with the whole hand high in the grip but under the slide
  • Keep your thumbs next to each other on the other side of the gun
  • Hold your nondominant hand as a support, keeping the gun steady so you can repeat your shot
  • Try to keep both eyes open so you can see your target, and what you shot, better
  • Keep an athletic stance, with your knees bent
  • Lean in toward the gun, not backing away from it

With these tips you can head to the range, even as a beginner, and have a great time!

What do you want to know about marksmanship?

Want more marksmanship tips? Leave a comment with what you want to see, and I can make a more advanced video to address more in-depth marksmanship tips, now that we’ve covered the basics.

Enter to win a FREE Gun!

Yep – you could win one of 2 FREE handguns that we’re giving away leading up to Range Day. Enter with your email address or Facebook account to enter to win!

In addition to what I showed you about form, every shooter, new or experienced, should know the 4 rules of gun safety.

The Four Rules of Gun Safety

  1. Treat every gun as if it’s loaded. Guns require a heavy level of respect. Don’t make the news: always assume the gun is loaded.
    Before you clean your gun or hand it to someone to use, check there’s no ammunition. Eject the magazine, check the chamber visually and with your finger. Even when cleaning or handling a gun you know is empty, follow the following three rules.
  2. Never point a gun at anything you’re not willing to destroy. A gun always has to point at something. Make sure it’s a wall, a table, or the ground. At the Range, it’s good practice to always keep the gun pointing down range, at the targets.
  3. Always know what your target is – and what’s BEYOND it. This is important for home defense more than at the range: if you fire your gun, what will the bullet hit behind your target?
  4. Keep your finger off the trigger until you are aimed at the target & ready to fire.
    In the movies you see good guys and bad guys running around with their finger on the trigger. In real life, that’s an easy way to get hurt in a hurry. It’s easy to get startled or twitch, and the first thing that’s going to happen is pulling the trigger. It’s just instinct. So as Blaine showed in the video, keep your finger on the frame of the gun until you’re in place and ready to shoot.

I’ll see you at Range Day! Every lane at Range Day will have a gun for you to shoot as well as a Smith & Edwards or manufacturer representative to help you load the gun and shoot it safely. We’re here to help you have a good time!

Get your Ammo Pass here or at the Gun Counter at Smith & Edwards.

Please subscribe to our YouTube channel, and join our email list here.


Utah company Burnett Metal Art featured on Smith & Edwards

Personalize Your Garden with Utah Original Art

- posted by Rebecca Adams

Spring is all about getting out and enjoying the beauty of the outdoors. Smith and Edwards has fresh flowers, planters, and garden accessories that will help you create that perfect outdoor haven.

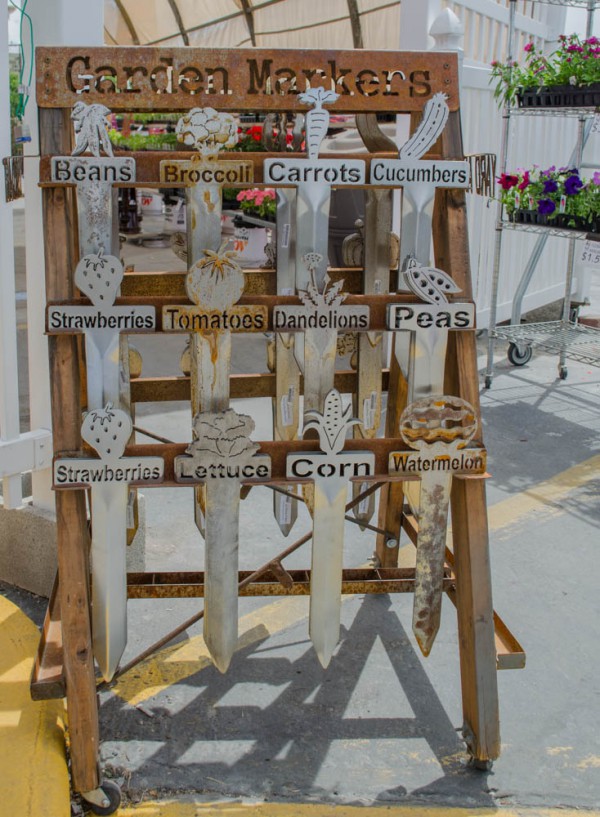
You can find the perfect way to organize your beautiful garden with Burnett Metal Art garden markers – made right here in Utah!

Personalize your garden with Utah's original Burnett Metal Art

An amazing line of garden markers!

Burnett Metal Art is a Utah based company out of Garland. The Burnetts have found that being a Utah-based company has brought in a lot of business because the people are great to work with, and Utah is a great state for small businesses. The Burnett family has owned and operated this welding and fabrication business for over 100 years!

After purchasing their CNC plasma table in 2011, Brody and Weston Burnett, two of the sons, and their wives, Kara and Trista, started Burnett Metal Art. Daughter Tristin (Burnett) Lindsay is head designer for product development. I had the pleasure of talking to Tristin and ask her a few questions about the company.

The Burnett Family

The Burnett Family

Q. What inspired your family to create this business?

A. One of our big inspirations came from our mother, Susan. She has collected all varieties of nativity scenes throughout her life. She wanted us to design and cut her one from metal. She has helped us design a few of our nativities as well. We now have about 13-15 nativities designed and we have plans to have 50 designed and available in the next 2 years.

Q. What drives you in your business?

A. Our motivation comes from when our customers get excited about new products we design and produce. We get satisfaction out of seeing our products displayed in yards when we drive down roads and even go out of our small town and see our products in yards or on houses in other areas!

Our motivation also comes from being able to design things that we would like in our own homes and yards and being able to use them ourselves. We are also motivated and determined to make Burnett Metal Art as successful as our welding business has been.

Q. How big is your company? Have you or are you thinking about growing across America?

A. We currently have 8 employees. The company started with just a few products and now has nearly 100 products and is sold in over 12 locations in Utah, as well as online.

We have the desire and a plan in place to start Burnett Metal Art spreading across America. We are working with different retail outlets to expand our reach outside of Utah.

Q. What are your most popular items? Any customer favorites?

A. Our most popular items are our yard art and garden markers. We also sell a lot of our nativity scenes as well. Our customer favorites are our garden markers and yard art as well. We are hoping that our Holiday line will be just as big with our customer base.

Q. Why do customers love your garden markers?

A. Our products are built to last. We make each one durable and long lasting. They are a unique product to enhance your home or garden. We can also customize any product to make it unique and specific to your taste.

Q. What makes Burnett Metal Art unique?

A. Our company is unique because it is a family owned business. It started with our father working at the welding shop, then going to owner, and now 4 siblings are working here as well.

Q. Is there any history or background that makes your company what it is?

A. The business was originally a blacksmith shop that started over 100 years ago and has progressed to a Welding and Fabrication Shop. Now we have added the Metal Art business as well!

Q. What is your favorite product to sell – or is there a product in the future that you are going to add to your already creative collection?

A. We love selling our garden stuff the most. We have plans of adding decorative metal furniture to our collection.


It was amazing to be able to talk and find out more about these garden and yard markers that are made right here in the U.S.A. – thanks, Tristin! Smith & Edwards loves featuring small businesses like Burnett Metal Art – especially family-owned businesses based in Utah, just like us. These fun metal garden markers make great additions to your garden and outdoor decorations!
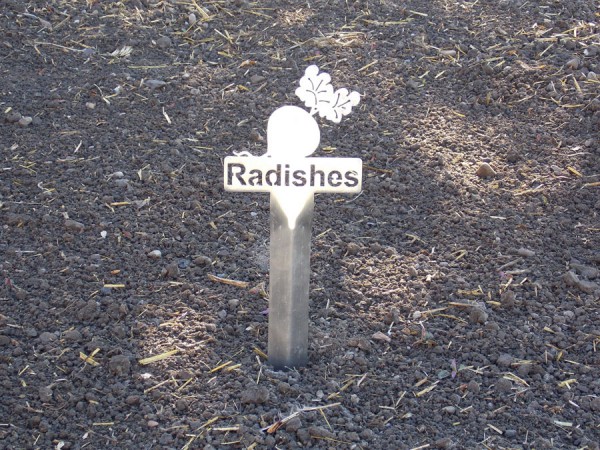
Radishes metal garden marker from Burnett at Smith & Edwards

You can find these cute garden markers by clicking here.

Watch our Springfield Dueling Tree from a GoPro!

Springfield Dueling Tree Competition – GoPro Video

- posted by Rose Marion

Mike Vause challenged me to a duel the other day….

He’d already bought the ammo, so I said OK!

We went to the Perry Three Mile Creek Range and squared off at the dueling tree.

(You’ll get to try your marksmanship skills at the Dueling Tree on Range Day!)

Watch the Competition from a First-Person Perspective

I didn’t know Mike would show up wearing a GoPro… you’ve got to take a look at it from his perspective!

About the Dueling Tree

The dueling tree’s designed for two shooters to swing the targets to the other side. If you’ve hit all of yours, your opponent can swing them back to you!

(We would have started out with equal gongs on a side… but we didn’t bring our waders)

Best of all, the Dueling Tree’s made out of good steel so it’s not just restricted to rimfire. Wahooo!

What we Shot

Both of us shot Springfield guns. I gotta tell you, I love these guns – I’m 5’2 with not a lot of grip strength, and I can rack the slide very easily. I also like the grip safety, it makes sure I’ve got a good proper grip on the gun and makes me feel more secure on it.

I shot the Springfield XDM 9mm in 5.25. Mike shot the Springfield XDM 45 in 4.5 with TFX TrueGlo Night Sights.

Your Turn!

Come try your hand at the dueling tree on Range Day, June 12th 2015, at the Perry Range. See you then!

Want more videos? Make sure and subscribe to our Youtube Channel, as well as join our email list for videos, tips, & savings :)

Smith & Edwards reviewing the Springfield XD Line

Talking About What’s COOL at Springfield Right Now

- posted by Rose Marion

Sporting Goods managers Mike Vause and Chris Jacobson took me out to the Perry Three Mile Creek gun range this month so we could check out some of the Springfields that will be available to shoot at Range Day 2015 on June 12, 2015.

Take a look:

Your 2015 Ammo Pass for Range Day gets you...Just wait til next week, you’ll get to see Mike and me going head-to-head shooting Springfields, from a very unique perspective…

Get your ammo pass today for Range Day 2015 at the Sporting Goods counter, or online!

(You’ve already got your vacation day booked, right?)

You’re already on our email list, right? Look at how awesome you are!