Check out the new line of Hangman Products at Smith & Edwards!

Brand Spotlight: Hangman Products

- posted by EmmaLee Sessions

Smith and Edwards is continuously growing and expanding in our business, and that includes working with new manufacturers and carrying new brands.

Recently, we have added Hangman® Products to our store! There are a few reasons for YOU to be as excited about these products as we are.

Hangman® Products make your Walls Happy!

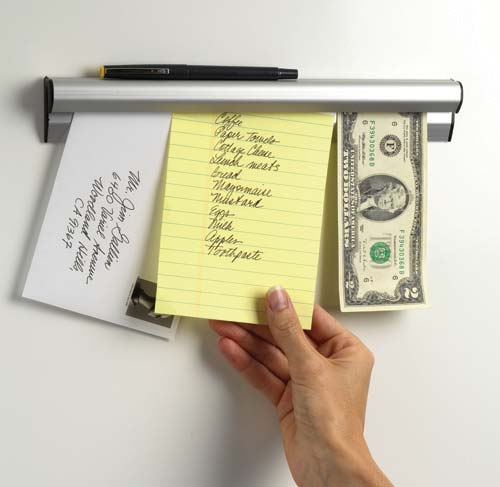
Hangman Products are perfect for hanging pictures and other wall art. Hangman also carries products to hang your electronic devices, such as the Wallsaver Speaker Hanging Kit and No Stud TV Hanger.

"<yoastmark

Hangman Speaker Mount Kit

Hangman TV Mount

Hangman TV Mount Kit

We know that you’ll love these Hangman products! With a motto of “Hanging solutions for everyday needs,” they are perfect for organized people. They can even help the unorganized person become organized, too!

Hangman wall organizer

Hangman Wall Organizer

Where to get American Hangman Products

Hangman® Products is an American hardware company that makes most of their products right here in the USA. They are made with quality and care for their customers.

You’ll find Hangman® Products on aisle 40 by the Rope Room at Smith & Edwards off I-15 off exit 351 in Ogden, Utah, as well as right here on our website.

Check out Hangman Products, now at Smith & Edwards!

Check out Hangman® on Instagram and their Pinterest boards for even more inspiration!

Pickling & Fermenting Crocks Frequently Asked Questions

Fermentation and Pickling Crocks Questions & Answers

- posted by EmmaLee Sessions

You’ve probably had fresh, homemade pickles at some point in your life – maybe even homemade sauerkraut or kimchi. You may have even tried your hand at home pickling and fermenting. Whether you’re an expert, a novice or somewhere in-between I would bet that you have a question or two about pickling crocks.

Right here we answer some frequently asked questions about these fragile, ceramic creations with help from industry experts at Ohio Stoneware.

We’ve carried these Ohio made stoneware pickling crocks for several years (see them online here!) here at Smith & Edwards. Throughout that time we’ve gotten a lot of questions from our customers about pickling crocks. Here are some of the most questions we’ve received. Answers to these questions were provided to us from the experts at Ohio Stoneware and the Utah State University Extension Office.
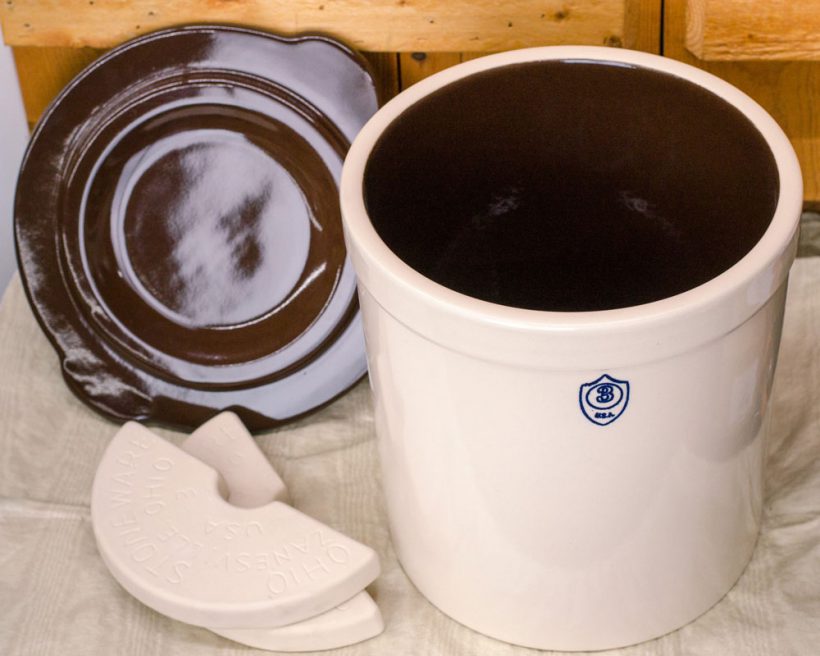
Three gallon pickling crock set: crock, lid, and weights

Have a pickling crock question you don’t see answered here? Leave a comment below and we’ll track down an answer for you!

Pickling Crock Questions about Getting Started

Q: What do I need to get started?

A: You need a pickling crock with a set of weights and a lid. Whether you buy a pickling or fermentation crock is up to you. There are many brands to choose from, but our favorite here at Smith and Edwards is the Ohio Stoneware crocks.

Once you have your basic kit assembled, all you need is a few of your favorite recipes. Then you’re ready to start making delicious, fresh pickles.

You can also try pickling other vegetables, or even try your hand at fermenting!

Find out more tips about getting started with pickling crocks, and a FREE recipe, here.

Q: Are crock lids and weights necessary, or are there “pickling hacks”?

A: These items are necessary. Pickling weights hold your produce under the brine. Pickling crock lids keep excess air & contaminants from reaching your pickles.

However, you can use some shortcuts. Instead of weights, you could use a plate weighted down with bricks. Also, if you have a plate large enough, you could use that as a lid.

Crock weights are designed & sized specifically for your individual crock, so I recommend them – but you can get by without them.
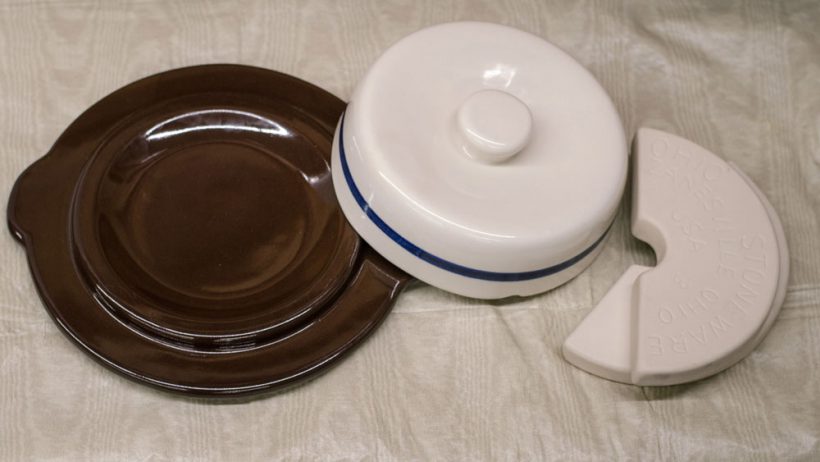
Pickling & Fermentation crock lids and weights

How do I care for my pickling crock?

It’s quite simple, really. Your crock needs only to be washed with soap and water. The goal is to get rid of anything that would cause bacteria to form in your crock. So a little bit of hot water and soap will do just the trick. Here are some more questions we get about cleaning pickling crocks.

Q: Should I wash my crock by hand, or in the dishwasher?

A: Most pickling crocks, like the Ohio Stoneware crocks, have been treated with a special glaze that has been specially formulated to withstand the power of your dishwasher. But – due to their sheer size and majesty, your pickling crocks might not fit in your dishwasher!

If your 1-gallon or 2-gallon pickling crock fits, you can rest easy knowing that you won’t hurt your crock by putting it in the dishwasher. But handwashing is a good bet.

Q: What type of scrubber is best?

A: Most scrubbers will work great with your crock. You’re not likely to ruin the glaze. Still, Ohio Stoneware recommends that you don’t use anything too abrasive. Steer clear of metal scrubbing tools.
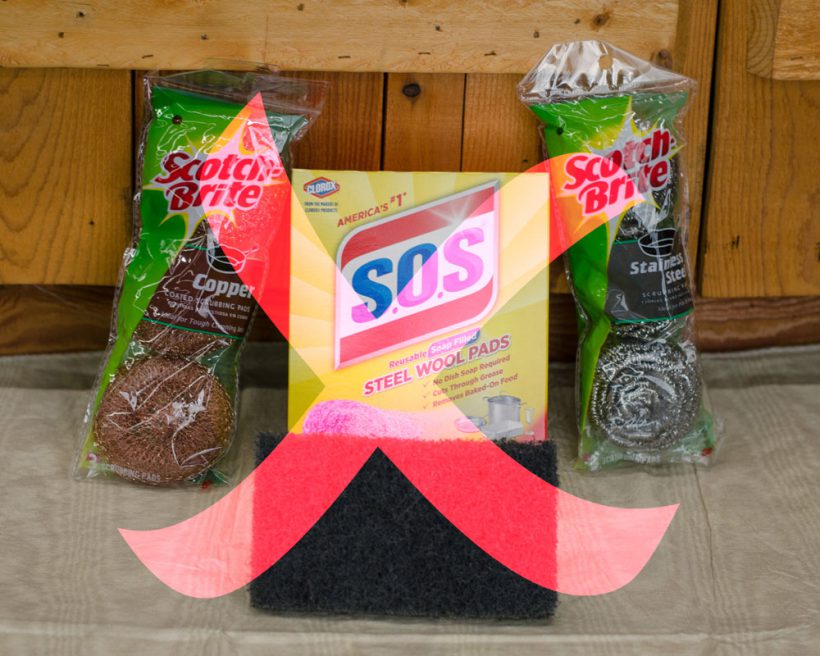
Don't use these abrasive cleaners on your ceramic pickling crock!

The traditional, little green scrubbing pads that you can find in most cleaning aisles (or on our center bargain tables here at Smith and Edwards) are the perfect tool for doing the job. Any other plastic-bristled scrubbers or foam sponges, even our favorite Scrub Daddy scrubbers, will work great on your pickling crocks!
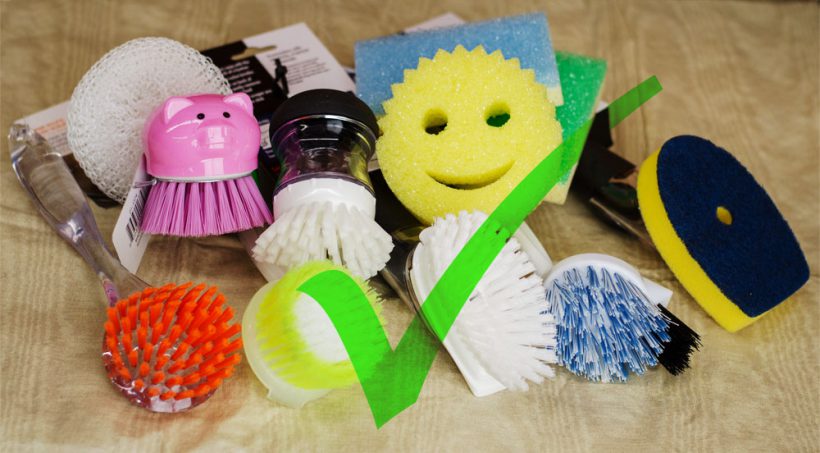
Use the Scrub Daddy or any foam, sponge, or plastic-bristle scrubbers on your pickling crocks

Q: Is it safe to pour scalding-hot water in my crock?

A: Your pickling crock has been coated with some kind of glaze and was heated, or fired, in a kiln. Temperatures inside of an industrial kiln, which is like a giant oven, can reach up to 2500°F. So, a little bit of scalding hot water isn’t going to hurt your crock.

Something I would suggest would be to avoid pouring boiling hot water into your crock when the crock is extremely cold.

Have you ever seen what happens to glass when it is super-heated and then cooled too quickly? You get really cool cracks in the glass making it look like crystal! That’s not something that you want to have happen to your pickling crock.

Q: Can I still use a cracked crock? How about if the glaze is cracked?

A: If the crack is deep enough that the clay of the crock is exposed, it is recommended that you invest in a new crock. It would be impossible to guarantee that an older crock was made with lead-free clay and health and safety should be your number one concern when pickling and fermenting.

However, if you notice that your glaze is cracked but the clay is not exposed, you should be okay to continue using your crock. Be sure and check with the manufacturer if you have questions about the composition of your crock.

Chips in the rim aren’t an issue at all.

More Pickling Crock Questions

Q: Does the color of the interior of my crock have any special meaning?

A: Pickling crocks have been manufactured in this fashion for many years now. That’s just the way it is! Your crock’s color won’t affect your produce in any way.
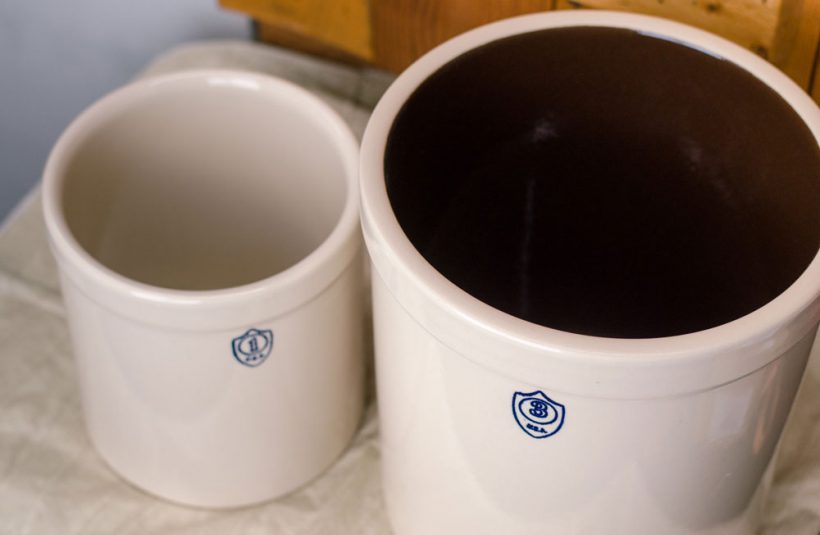
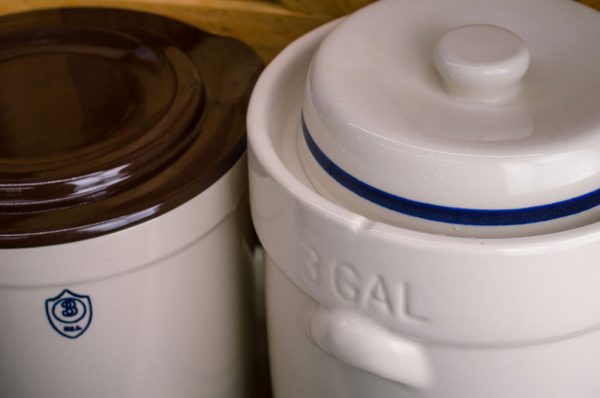
This one gallon pickling crock has a natural interior, while the three gallon crock has a chocolate-brown interior

This one gallon pickling crock has a natural interior, while the three gallon crock has a chocolate-brown interior

Q: Will salt seep through the sides of my crock?

A: Salt should not seep through your crock. If this is happening, the crock’s glaze or walls have been damaged in some way, and it is now time to invest in a new crock.

Also, the denser the clay and more vitrified a crock is, will affect this undesirable occurrence.

Q: Why is the rim of my crock unglazed?

A: There needs to be a seam between two different colors. This is known as a parting seam. The manufacturer removes the glaze from the rim, because it would just look unattractive. That is, again, how crocks are traditionally made.

Q: What is the difference between pickling crocks and fermentation crocks?

A: Trick question! These crocks are used for the same things, and really shouldn’t be named differently. You can pickle and ferment in either an open-top (pickling) crock or a water-seal (fermentation) crock. Let’s take a quick look at the Ohio Stoneware crocks.
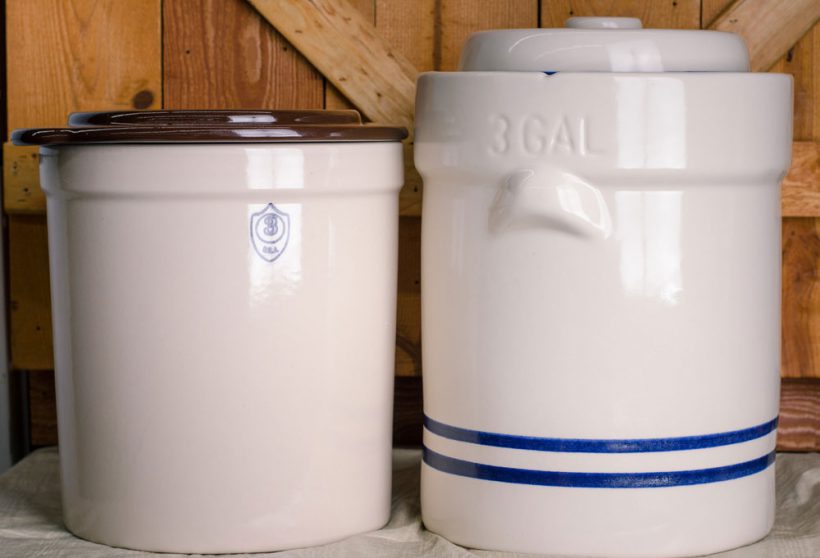
Three gallon pickling crock vs Three gallon fermentation crock

Here’s a side-by-side comparison: on the left is an open-top crock, and on the right, a water-seal crock. They’re commonly called a pickling crock (L) and a fermentation crock (R).

Open-top crocks made by Ohio Stoneware are sturdier and denser. This is because of the form that the crocks are made from. Ohio Stoneware presses these crocks in a metal mold with a hydraulic press.

The water-seal crock is a poured form, so it isn’t as dense. Also, the handles aren’t a functional difference – they are just decorative.

Whether you buy an open-top crock or a water-seal fermentation crock is really just dependent on your personal preferences.
Here's a look at the "moat" in a fermentation crock, or water seal crock.Q: Why does this crock have a “moat” around the opening?

A: Europeans have traditionally used water-seal crocks in fermenting. Americans typically ferment in open-top crocks. There is generally more attention needed for the water-seal crocks, because you have to make sure that the moat stays full of water.

If the water in the moat evaporates, oxygen and other particles will be able to get into your brine solution. This can cause problems, including slimy and soft pickles, cloudy brine, bloom, or other bacteria growth.

You must also continuously check for bloom, which is the bubbles on top of the weights. You must skim the bloom off the brine every 2-3 days to ensure that your pickles turn out perfectly.

Questions about the Fermentation Process

Q: How do I know when my pickles & fermented foods are ready?

A: Follow your recipe, or even do some taste-testing. Really, that’s OK! Taste-testing helps you know how much longer to ferment or pickle.

Generally, the longer you pickle something, the stronger the taste. Just keep an eye on things.

Q: Can I ever re-use my brine? What about with pickled eggs?

A: No, you cannot. Even with pickled eggs! It is always best to start at the beginning for the best-tasting and safest pickles.

Q: What types of salt should I use? Are there different salts for different applications?

A: Use a pickling or canning salt. These salts are cleaner and have no additives, which can affect the quality of your brine and produce. In all of your pickling and canning, use a salt made specifically for these purposes.
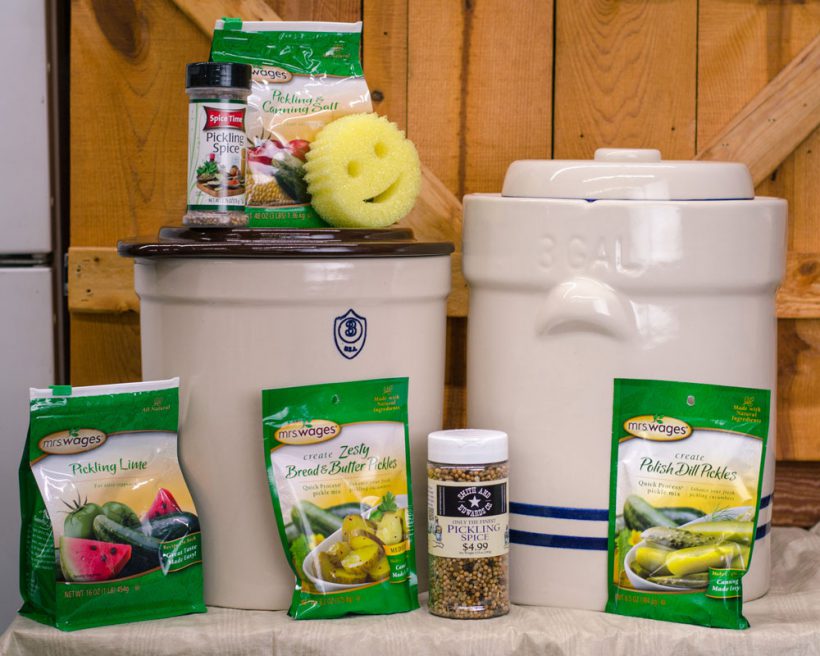
Everything you need for making pickles at home - you can find it all at Smith & Edwards!

Q: Do I have to be exact on the amount of salt and produce?

A: Yes. You need to go-to a good source for the ratio. Follow your recipe.

Q: What temperature do I need to keep my brine?

A: The ideal temperature range for pickling is between 68° F and 74° F. If you are not in that range, you can run into lots of problems:

If your solution is too hot, this can cause soft and slimy pickles. If your climate is fairly warm, then you need to pay more attention to your pickles. You may need to change out the brine more frequently and there is more “pickle-sitting” involved.

If your solution is too cold, it takes a longer time for the fermentation process to take place. This can mean cloudiness in your brine and a poorer-quality pickle.
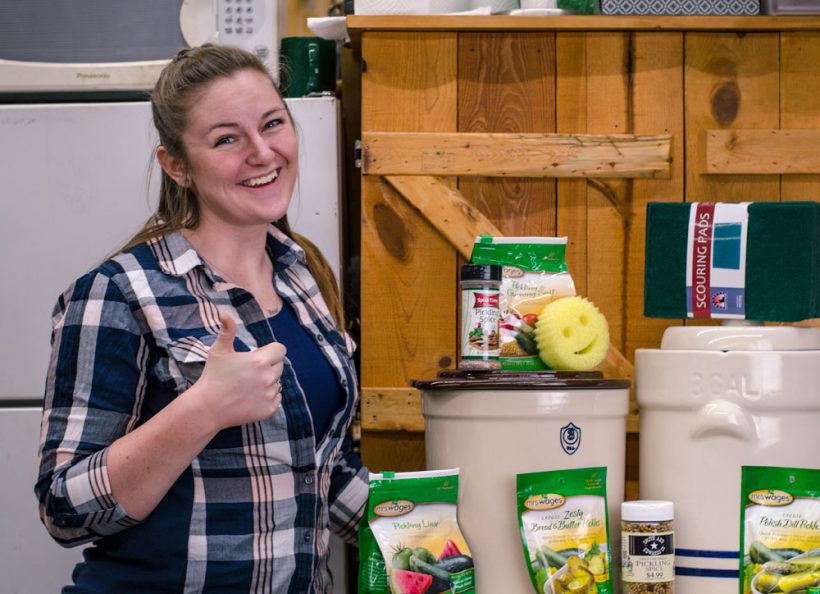
You'll be good to go with these pickling crock tips!

teresa-hunsaker-usu-extension

What’s next?

The best step is to either start or continue pickling!

Whether you’re a seasoned pickling veteran, or just starting out, we are sure you’ll have more questions. Just remember the best resources you have in your pickling adventures.

You can contact your manufacturer for any questions that you have regarding workmanship, materials, and care. Any additional questions you have about pickling and fermenting can be answered by contacting your local Extension office. The Utah State University Extension office is always happy to answer any questions you have about pickling and fermenting and many other types of food preservation and safety as well.

Call the local expert on all things canning and fermenting, Teresa Hunsaker with the USU Extension Service, at 801-399-8200. Or email her at teresa.hunsaker (at) usu.edu.

Remember to stay safe and informed for the best pickles and cleanest crocks in town. Happy pickling!

How to Freeze Beets

How to Freeze Beets

- posted by Rose Marion

Beets are a yummy vegetable packed with nutrients like manganese, potassium, copper, magnesium, vitamin C, iron, and vitamin B6. They’re a delicious Utah summer crop, and you can freeze beets to enjoy them year-round.

Our produce experts Vickie Maughan, our Housewares manager, and Jean from Pettingill’s Fruit Farm, teamed up to freeze beets last week and here’s how they did it.

You’ll need:

Directions: How to Freeze Beets

  1. Put on your gloves!
  2. Wash the fresh beets and cut of the beet greens, leaving 1″ of beet green stems. Don’t remove the tails or beet green stems, because if you cut them off, the beets will bleed out and lose their color.
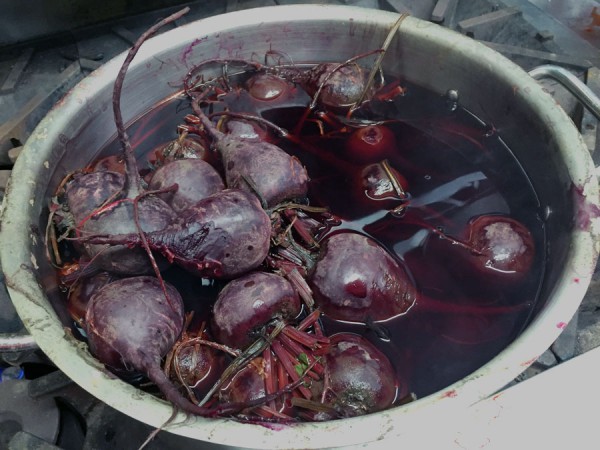
  3. Boil the beets in a pot of water until tender. Then, set aside and let them cool off.

    Boiling the beets with their stems & tails on will keep the rich purple-red color from bleeding out!

    Boiling the beets with their stems & tails on will keep the rich purple-red color from bleeding out!

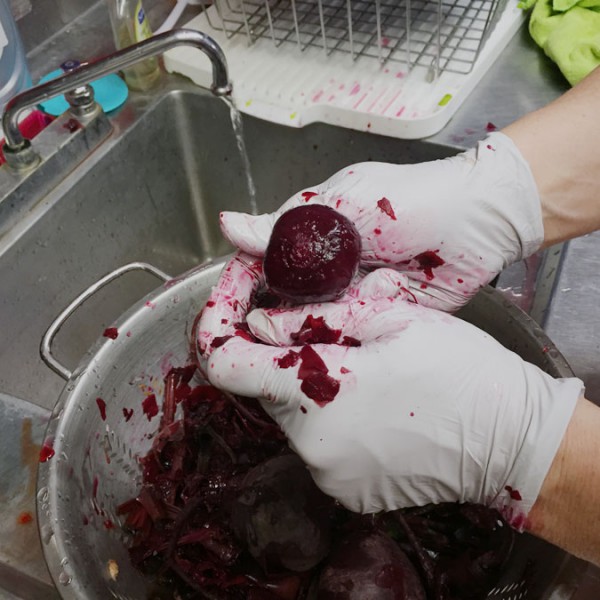
  4. Peel the beets. You don’t need a tool: you can massage the beet skin, tail, & beet green stems and they’ll fall off the beet in your fingers.
    Rinsing and peeling the beets
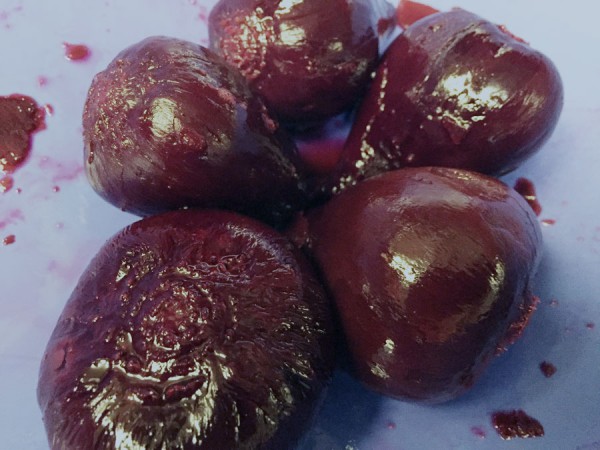
    Whole peeled beets, ready to slice and freeze
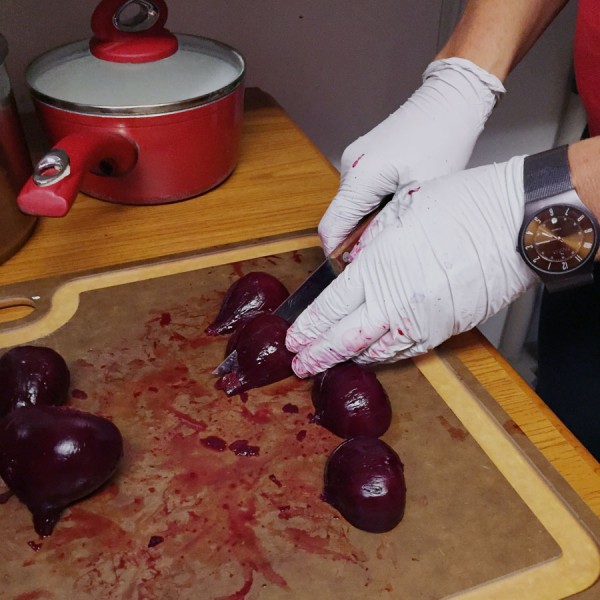
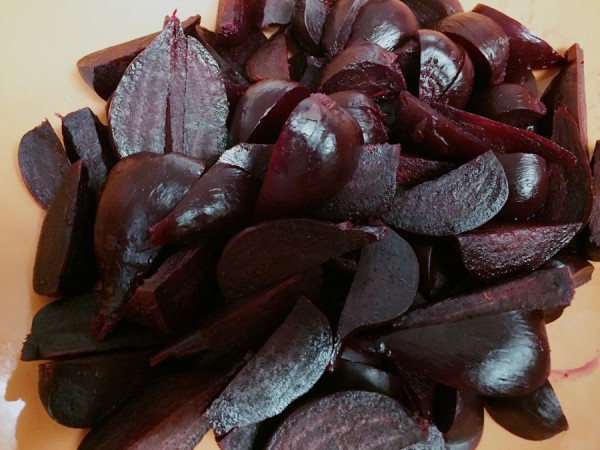
  5. Slice, dice, cube, quarter, or halve the beets any way you’d like. We love mandolins for slicing vegetables!
    Slicing peeled beets
    Chopped beets ready to freeze
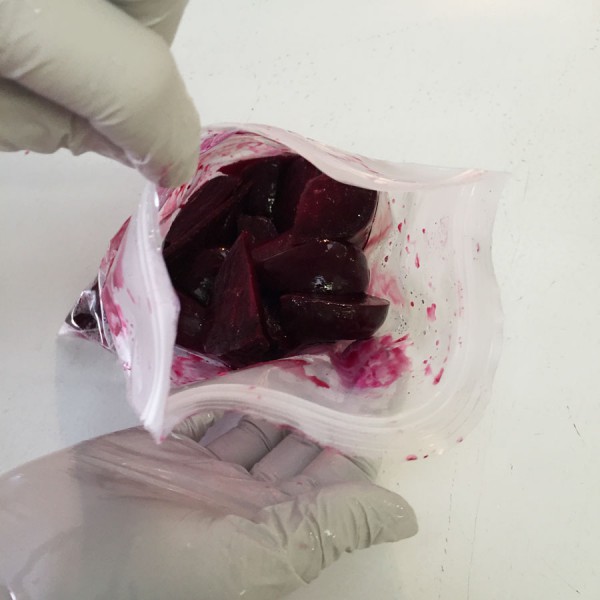
  6. Put in a freezer Ziploc baggie with as many servings as you’ll want.
    Putting fresh cooked beets in freezer bags
    You can freeze them individually like cherries (view our How to Freeze Cherries guide), or if your family loves beets, you can freeze them all together.
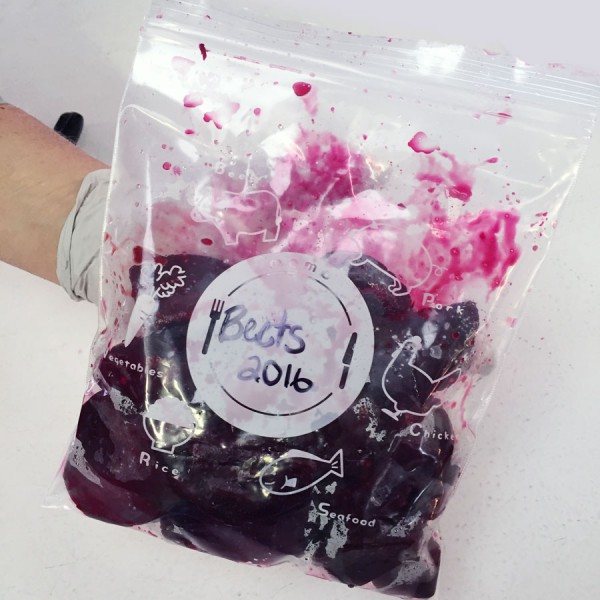
    Beets ready to freeze
    Tip: Flatten the bag when you put it in the freezer so they stack nicely and will thaw evenly.

This winter, you can take the bag out to enjoy garden-fresh beets at the peak of their flavor. Microwave or lightly simmer them in a covered pan with butter, when your family’s ready to eat!

If you liked this, you will LOVE our other frozen food storage tips! Make sure you check out How to Freeze Cherries and How to Freeze Corn.

How to freeze cherries

How to Freeze Cherries

- posted by Rose Marion

Here in northern Utah we’re lucky to get large yields of cherries in late June & early July! While there’s no end to what you can do with fresh cherries – cobbler being my favorite! – freezing cherries is a wonderful use for these short-seasoned juicy treats!

Freezing cherries will let you taste that sweetness even in January. Plus, you can use these for your shakes & smoothies.

Vickie, our Housewares manager, and Jean from Pettingill’s Fruit Farm, got together to show me how to freeze my own cherries. Take a look!

You’ll need:

Directions: How to Freeze Cherries

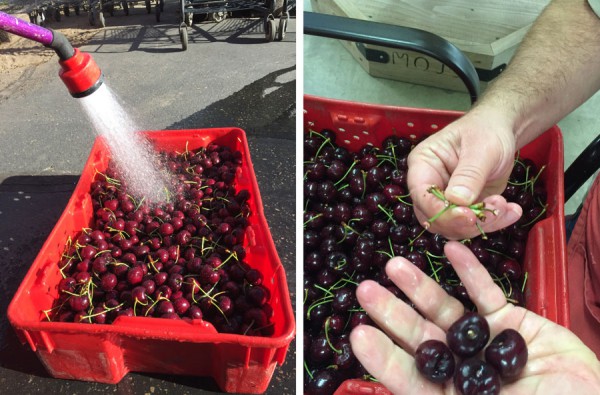
  1. Wash the cherries and remove their stems. Tip: use a colander!
    Washing cherries and removing the stems
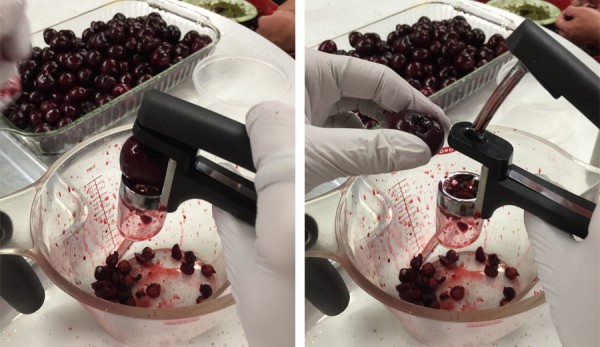
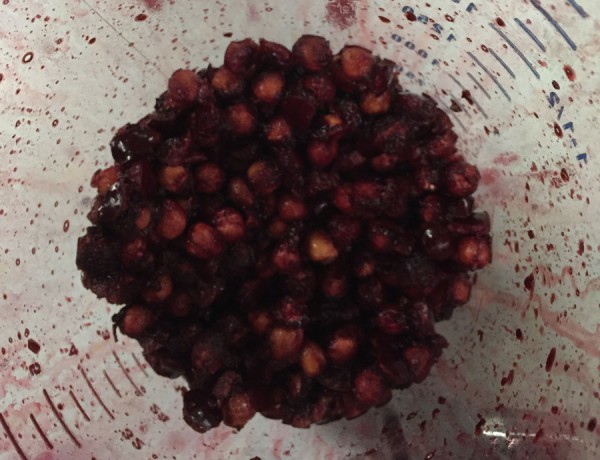
  2. Pit the cherries. Jean & Vickie like using a handheld cherry pitter and collecting the pits in an extra jar or measuring cup.
    Pitting cherries with a cherry pitter - and GLOVES!
    Cherry pits go in an extra jar!
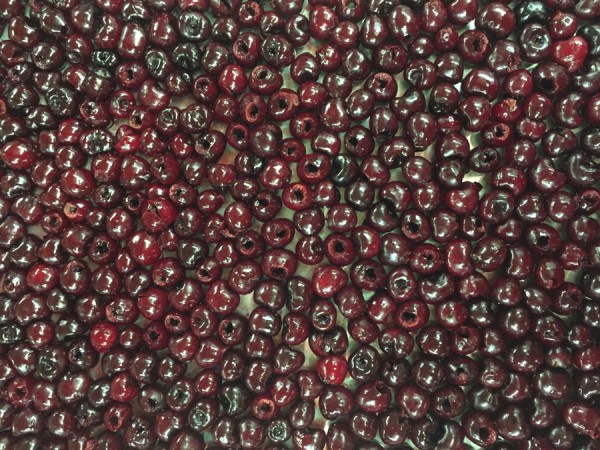
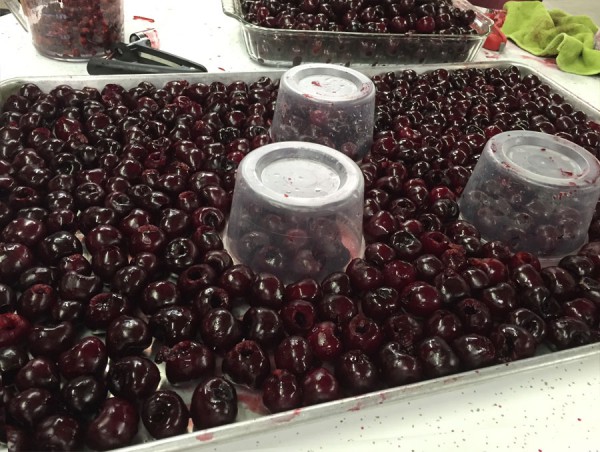
  3. Place the pitted cherries on the cookie sheet.
    Cherries on the cookie sheet, ready to freeze
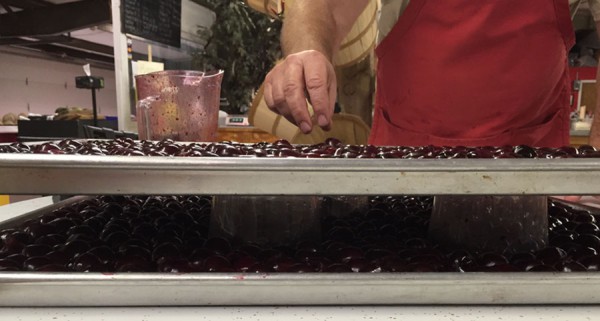
  4. Secret Tip: Double decker your cherries! Place short drink cups or tupperware on the cookie sheet and place it in the freezer. Then, fill another cookie sheet with cherries and place it on top of the cups to freeze twice as many cherries!
    getting-ready-to-freeze-cherries freezing-cherries-in-layers
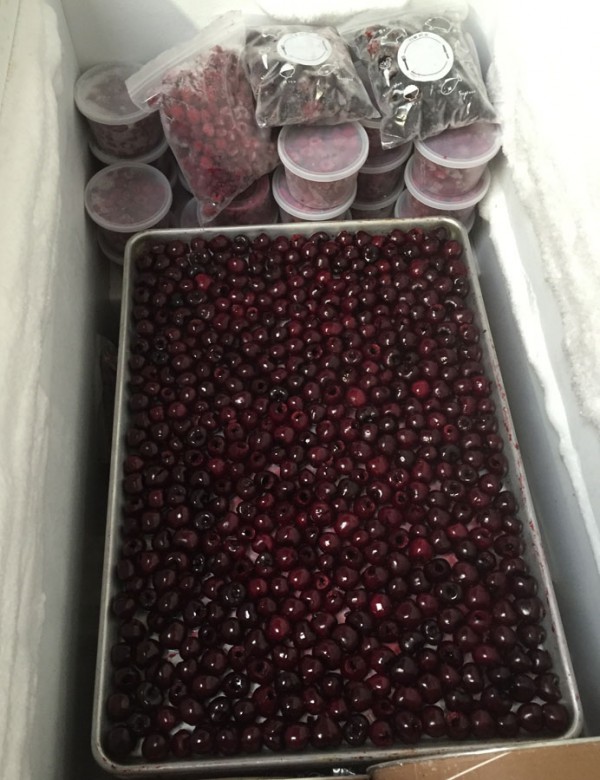
  5. Let the cherries freeze overnight.

    Freezing cherries in a chest freezer

    A chest freezer is GREAT for freezing cherries…

  6. The next day, take a spatula and release the bottoms of the cherries from the cookie sheet.
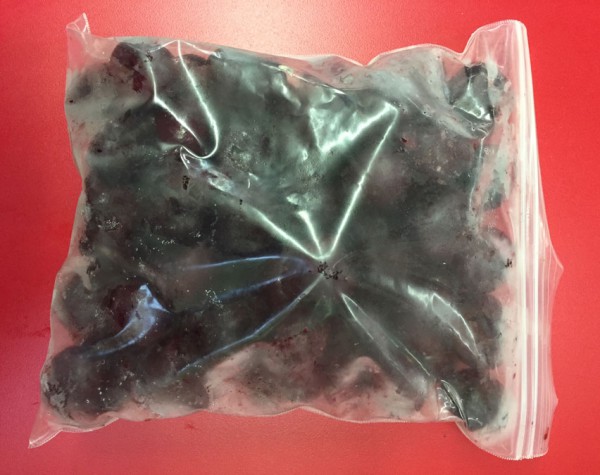
  7. Gather the cherries and place them in freezer Ziploc bags. Quart, gallon – your choice!
    Frozen & bagged cherries

Questions we get asked about Freezing Cherries

Q: Is it messy?

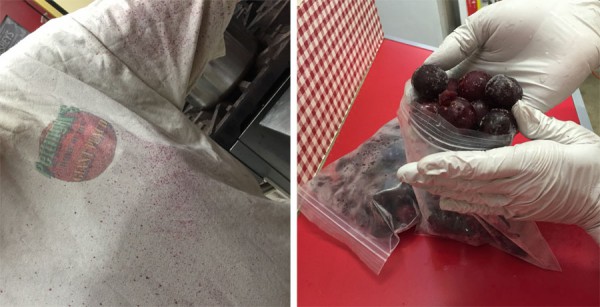
YES! Wear surgical gloves so it doesn’t stain your hands, and wear a work shirt.

Cherry pitting stains & gloves

Pitting cherries is messy business! Wear gloves.

Q: Why not freeze them in bags from the get-go?

By freezing them individually first, they don’t get stuck to each other. Then after you put them in the bag, they break apart easily.

Q: What can you do with frozen cherries?

Vickie LOVES to make smoothies with frozen cherries. YUM!

Eat these fresh-picked as a treat when the snow’s flying in January, just like you were eating it fresh in July!!

Do you have more questions for us? Leave a comment & let us know!


If you liked this, you will LOVE our other frozen food storage tips! Make sure you check out How to Freeze Beets and How to Freeze Corn.

Looking for more food preserving, dehydrating, or canning supplies? Shop our canning supplies on the online store!

How to use a Pickling Crock

How to use a Pickling Crock: the Art & Science

- posted by Rose Marion
Teresa with USU Extension service

Teresa with USU Extension service helped answer some common fermenting & pickling questions for us!

When people think of pickles, large quart jars of olive-colored pickles come to mind. But there’s another way to make pickles that takes a lot less heat, a lot more time, and some say, yields a lot tastier results:

Fermenting Pickles and Vegetables

When you make pickles in a traditional pickling crock, in some ways it’s much less work: simply prepare your pickles, load them in the crock according to the recipe, and give them a few weeks.

This yields crisp, crunchy, delicious pickles!

And you can make sauerkraut and more fermented dishes the same way.

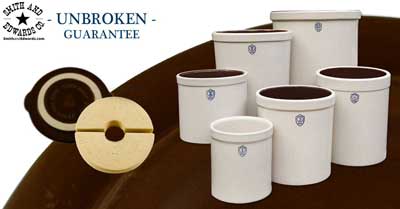
Our favorite brand of stoneware pickling crocks are the Ohio Stoneware line (click to shop), which is make in the USA in Zanesville, Ohio. And when you order yours from Smith & Edwards, we guarantee they arrive in perfect condition!

We carry lids, weights and pickling crocks in a huge range of sizes, as well as the very-popular 3-gallon fermentation set.

What size Pickling Crock do I need?

The US Department of Agriculture recommends a 1 gallon container for each 5 pounds of fresh vegetables. So a 5-gallon stone crock is an ideal size for fermenting about 25 pounds of fresh cabbage or cucumbers, according to the USDA Complete Guide to Home Canning.

Cucumbers and cabbage must be kept 1-2 inches under brine while fermenting, so weights can be instrumental.

Make sure to wash your crock, weights, and lid with hot soapy water, and rinse them well with very hot water, before adding your vegetables.

Ohio Stoneware crocks at Smith & Edwards

You can get a pickling crock for any size project – from one to five gallons – and the weights & lids to match.

Why & How to use a Pickling Crock

We were lucky to have Teresa Hunsaker from the USU Extension Service here at Smith & Edwards this summer to check pressure canner lids, as well as give tips on the fermenting process. Fermenting is only growing in popularity as people return to the traditional method, as well as gain interest in probiotics and the health benefits of fermented foods for the digestive system.

Read on for common fermenting mistakes, how to process your vegetables after fermenting them, and a fermented Dill Pickle Recipe!

Pickling Crock Common Mistakes

One of the common problems Teresa sees has to do with salt: especially people not using enough salt.

Salt is hugely important with shredded vegetables and pickles: otherwise, the brine goes scummy and your lovely batch of pickles or sauerkraut is lost. It’s so important to use the right salt ratio!

Use your standard pickling salt: you can use both iodized and noniodized table salt. Noncaking materials added to table salts may make your brine cloudy. USDA advises against flake salt because it varies in density. Reduced-sodium salts may be used in quick pickle recipes; this may give your pickles a slightly different taste than expected. But, reduced-sodium salt is not recommended for fermented pickles.

Layer your vegetables, then salt, then vegetables, then salt: this is especially important with cabbage.

Another mistake Teresa sees is not having your crock at the right temperature. Some people will store their pickles in the basement as they ferment, or in a room that gets too hot.

The temperature should be between 68-74 degrees. That’s because if it’s too hot, it will process too fast and produce scummy brine. Too cold, and the process will take too long.

The traditional way to make kimchi is actually to bury the fermentation pot in the ground, to keep the temperature constant!

Fermenting is both an art and a science!

How Long does Fermenting Take?

The length of time needed for your batch of pickles or sauerkraut depends on your recipe. It takes about 3 weeks for sauerkraut, and there’s a good recipe out there for 21-day pickles.

Follow your recipe exactly, including changing out the brine: with the 21-day pickles, you need to change the brine every few days.

OK, they’re done… Now what?

You can can your sauerkraut or pickles after they’re done: just process them. For sweet pickles, it just takes 15 minutes; for whole dills, about 25 minutes does the trick at this altitude.
Or, you can waterbath them – check your local recommendations and keep them under 185°.

But you don’t HAVE to can them at all. Your crock pickles can hold in the fridge for weeks!

Ohio Stoneware Fermentation Crock

This 3-gallon fermentation crock features a channel for the lid to rest in, and comes with matching weights.

What’s the difference between pickling crocks and fermentation crocks?

Either style works well.

The fermentation style is designed for keeping the vegetables down better, and it features vents. You do want some air circulation to temper the temperature.

Dill Pickles Recipe for Pickling Crocks

Use the following quantities for each gallon capacity of your container.

  • 4 lbs of 4-inch pickling cucumbers
  • 2 tbsp dill seed or 4 to 5 heads fresh or dry dill weed
  • 1/2 cup salt
  • 1/4 cup vinegar (5%)
  • 8 cups water and one of more of the following ingredients:
    • 2 cloves garlic (optional)
    • 2 dried red peppers (optional)
    • 2 tsp whole mixed pickling spices (optional)

Procedure: Wash cucumbers. Cut 1/16 inch slice off blossom end and discard. Leave 1/4-inch of stem attached. Place half of dill and spices on bottom of a clean, suitable container. Add cucumbers, remaining dill, and spices. Dissolve salt in vinegar and water and pour over cucumbers. Add suitable cover and weight. Store where temperature is between 70° and 75° F for about 3 to 4 weeks while fermenting. Temperatures of 55° to 65° F are acceptable, but the fermentation will take 5 to 6 weeks. Avoid temperatures above 80° F, or pickles will become too soft during fermentation. Fermenting pickles cure slowly. Check the container several times a week and promptly remove surface scum or mold. Caution: If the pickles become soft, slimy, or develop a disagreeable odor, discard them. Fully fermented pickles may be stored in the original container for about 4 to 6 months, provided they are refrigerated and surface scum and molds are removed regularly. Canning fully fermented pickles is a better way to store them. To can them, pour the brine into a pan, heat slowly to a boil, and simmer 5 minutes. Filter brine through paper coffee filters to reduce cloudiness, if desired. Fill hot jar with pickles and hot brine, leaving 1/2 inch headspace. Remove air bubbles and adjust headspace if needed. Wipe rims of jars with a dampened clean paper towel. Adjust lids and process as below, or use the low temperature pasteurization treatment.

– recipe from USDA’s Complete Guide to Home Canning, Guide 6: Fermented Foods and Pickled Vegetables

Want to learn how to make sauerkraut in a fermentation crock? Enter your email address to get access to a free printable Fermented Sauerkraut recipe!

Explore Pickling Crocks…

Smith & Edwards Pickling Crocks

Over 120 Brand Name Smith and Edwards Spices!

- posted by Rebecca Adams

Smith and Edwards has everything you need, if we can find it. Why not have our own line of affordable spices, seasonings, rubs, herbs, and air dried vegetables?

From the freshest ingredients comes over 120 spices that are must haves for your kitchen.

A few of the Smith and Edwards line up. Oregano, nutmeg, and tomato flakes!

A few of the Smith and Edwards line up. Oregano, nutmeg, and tomato flakes!


You’ll find new ways to use these spices following our Pinterest board, For Your Kitchen. New recipes are added weekly!


Nutmeg Spice and Tomato Flakes

Nutmeg Spice and Tomato Flakes


You’ll find all the spices by clicking this link here. You’ll find more ideas for your kitchen by visiting our kitchen and housewares section on our website!

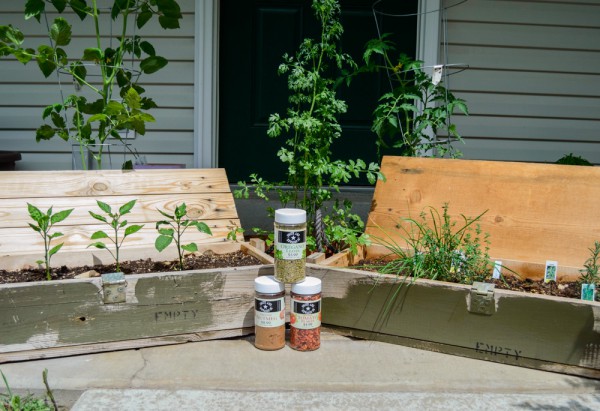
I love my raised garden! Click to find these vintage ammo boxes and make them your own too!

Easy Valentine Sweetheart Ornament

Easy Valentine’s Craft Idea

- posted by Amy Griffiths

Finished Valentine Photo OrnamentFebruary is right around the corner and you know what that means….Valentine’s Day! I’m a sucker for Valentine’s Day. It’s not so much the presents as it is the colors, decorating, and celebrating those I love.

To share my love for the season I’m going to share an easy Valentine’s craft idea. It’s made with one of my favorite supplies to use…..tulle! It’s so versatile, never loses its shape, and the colors are so vibrant! Adults and kids alike will have fun making these. They are fabulous for 4-H craft projects as well as many other youth groups activities.

Back in December I gave you a peek at this tulle project idea, but in honor of those sweet ones in our lives you now get a step-by-step tutorial. This one is designed for Valentines but it’s a terrific project anytime of year by just mixing up the colors.

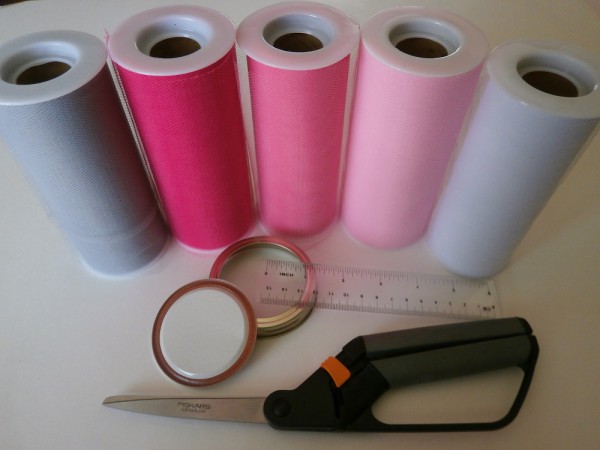
Supplies you need:

Supplies for Valentine Craft Project


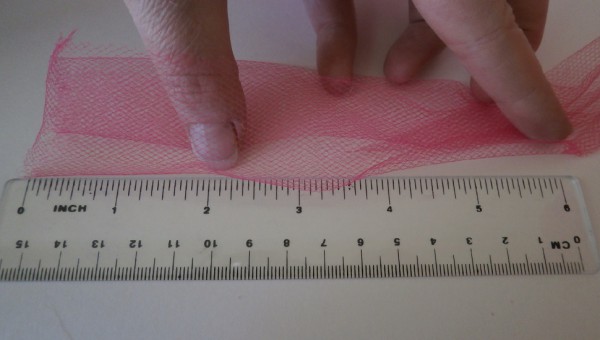
To begin this project you need to cut:
Eight 6″ pieces of Silver Gray, Flamingo Pink, Pink, and White
Six 6″ pieces of Fuchsia
One 12″ piece of Fuchsia

Measuring the tulle


Let’s get started!

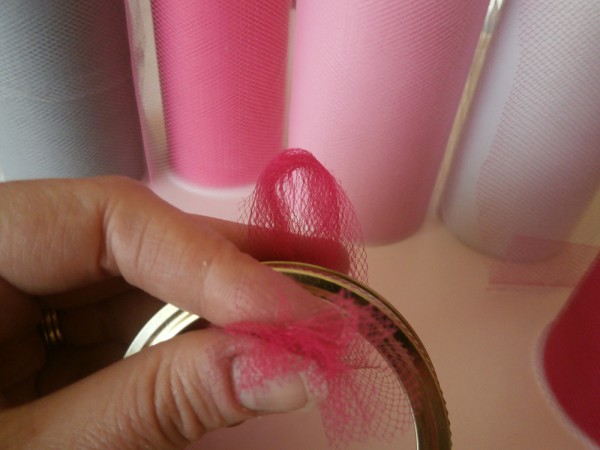
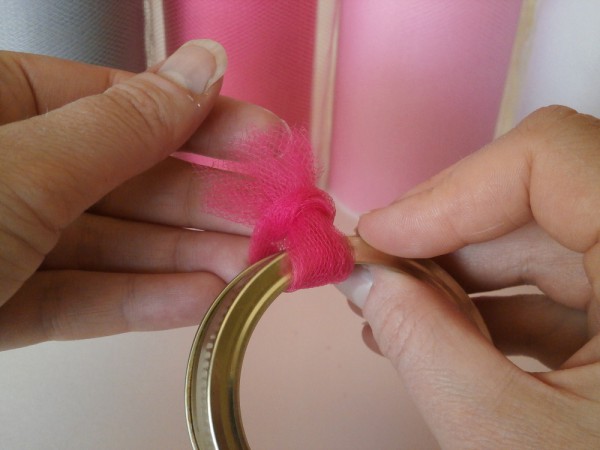
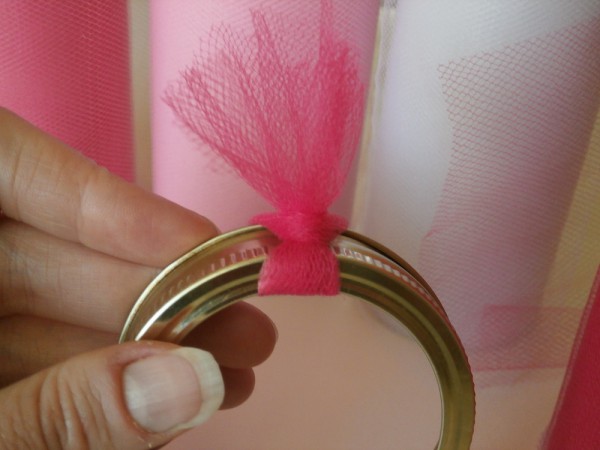
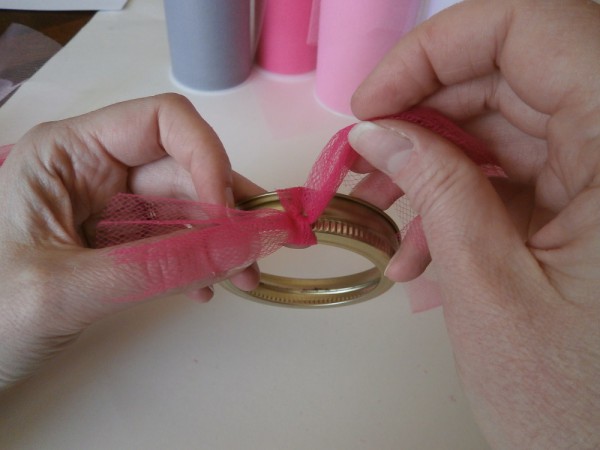
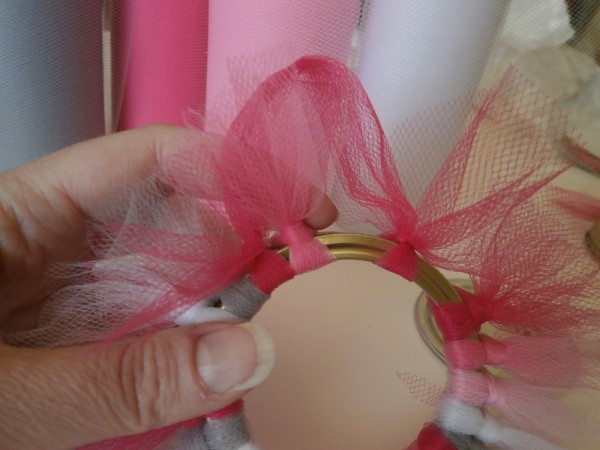
The first thing you’ll want to do is make a loop with one of your 6″ pieces of tulle. Place it outside the ring and thread your ends over the ring, through the loop, and pull. This knot is also known as a Larks Head Knot.

Making a loop

Pulling Ends Through the Loop

Finished Knot


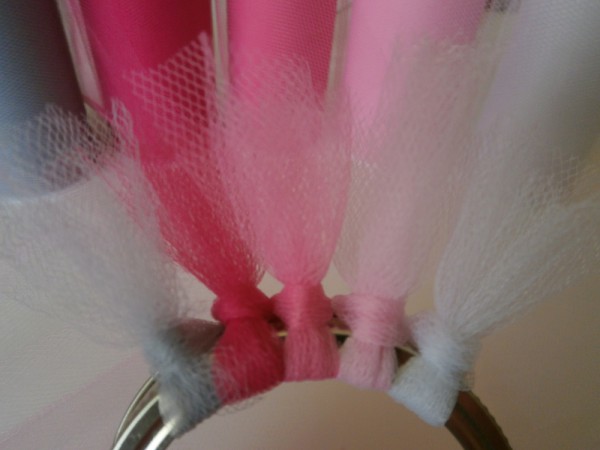
Continue making knots in the pattern of colors you want to use.

Pattern of Finished Knots


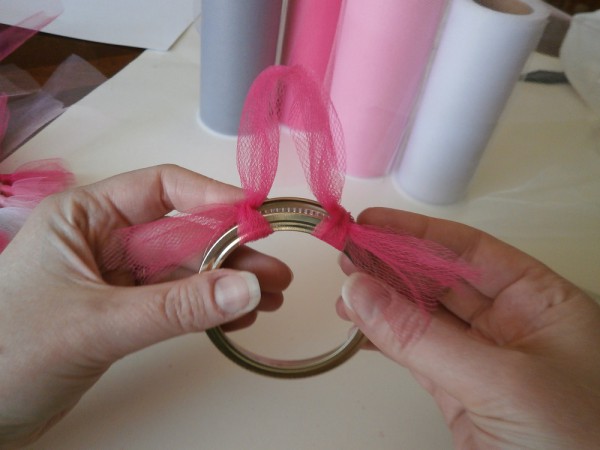
I like to make the hanging loop after I’ve tied about half of the knots on the ring. You make this by tying both ends in double knots over the ring. The knot will look different than the others but it blends in beautifully when it’s all done.
Tying the Hanging Loop
Finished Hook Loop


Tie more lark head knots in between your double knots, just like you were doing in the beginning. Continue to follow your original color pattern.

Continuing the color pattern


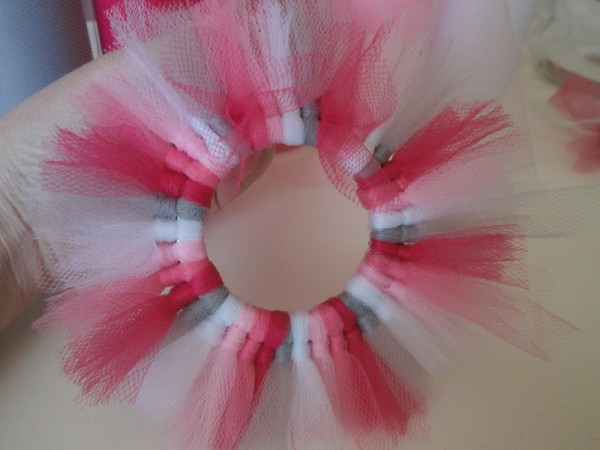
Finish tying until all your tulle is used and your ring is completely covered. They should fit nice and snug so you can no longer see the ring.

Ring is full of knots


Now is the time that I cut out my picture to place in the ornament. It needs to be about 2.5″ in diameter. You can fasten the photo to the center of your lid with a scrapbooking adhesive, but I prefer without.

Before I insert my picture I like to pull all the knots forward, towards the top of the ring. Then I insert the picture from the back end, pushing the lid in behind it for a nice backing. Not a big deal, but I like the look better when it’s done.

How to Cut Your Picture


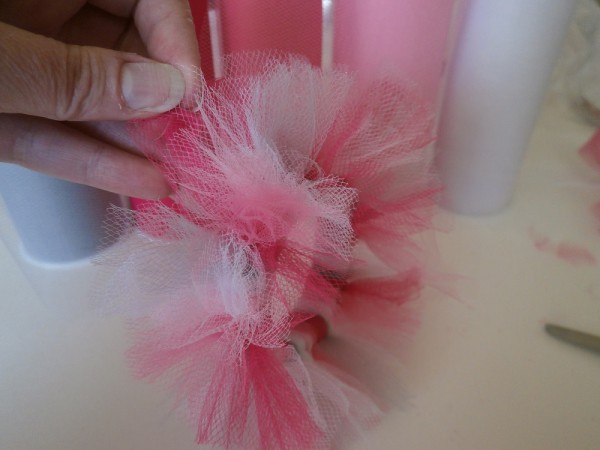
You’re almost done! Now all you need to do is “fluff” your tulle. For each knot I pull the ends of the tulle in opposite directions til you are happy with the overall look.

Fluffing Your Ornament


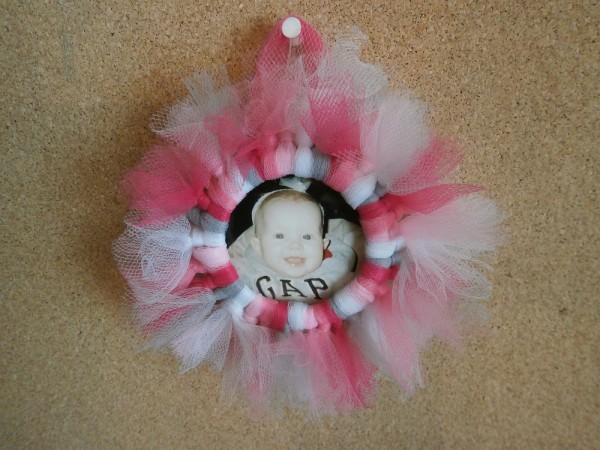
Now that’s a Valentine to be proud of!

Finished Picture of Valentine Craft Project


Now what?

Now that you’ve found a source of inspiration for a project of your own, check out our tulle here for a bigger selection of regular and glitter tulle that will make your projects pop with color. Then send us pictures of your finished projects to info@smithandedwards.com so we can show them off!

Come play with us on Pinterest! Follow us to get more creative ideas and be sure to pin this image so your friends can get inspired too. Share the love this Valentine’s Day!
Valentine's Sweetheart Tulle Ornament

Hugs & Kisses!

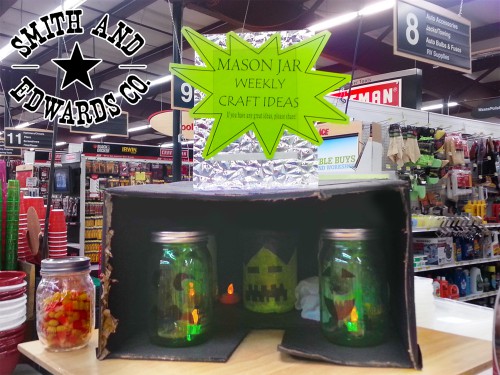
Use tissue paper to make fun faces on mason jars!

Fun Halloween Mason Jar Ideas!

- posted by Rose Marion

The people in our Housewares department are ALWAYS full of ideas! That’s why when I saw they are doing a weekly Mason jar idea I HAD to share it with you!

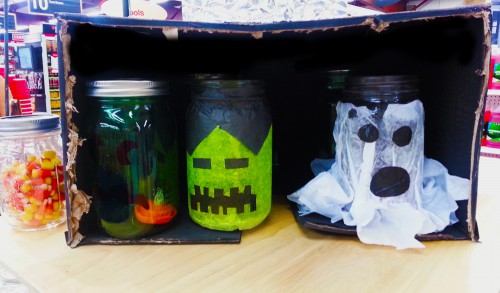
Halloween Mason Jar ideas: Jack O'Lantern Jars Use tissue paper to make fun faces on mason jars!
Place tea lights or battery-operated candles in mason jars for fun decorations. Use tissue paper to create fun Jack o’Lantern faces like ghosts and Frankenstein, then use Mod Podge or glue to glue them to mason jars!

They used a limited edition, green Mason jar to create these fun decorations, but you can use clear ones, too!

You can use Mod Podge or glue to attach tissue paper to the glass jars – OR, you can even use a Sharpie marker to draw on the glass. They glow better when you use tissue paper, we found!

Everyone in Housewares contributed to this Halloween mason jars idea, and Ashley and Melissa put them together.

Nice going, Melissa and Ashley!

Want more Mason Jar ideas?

Mason Jar gift ideas

There are a million and a half fun things to do with Mason jars BESIDES canning… if you’re looking for inspiration, check out Amy’s 7 Super Simple Mason Jar Crafts that Make Great Gifts. Doesn’t she have great ideas? I think it’s something to do with the fact that Amy was in HOUSEWARES before she came to the Web department! Hm…. I think Vickie‘s on to something in her Housewares department, if only she could bottle it…

Keep your Mason Jar rims clean with this funnel

The Secret to Clean Jar Rims: a New Canning Funnel

- posted by Rose Marion

To enjoy home canned salsa and pickled beets, we have to be certain we’re canning safely in the summer. Making sure our jar rims are clean and not sticky is so important – but most canning funnels wind up still letting some syrup or jam drip over. Isn’t there a better way? A clean canning funnel?

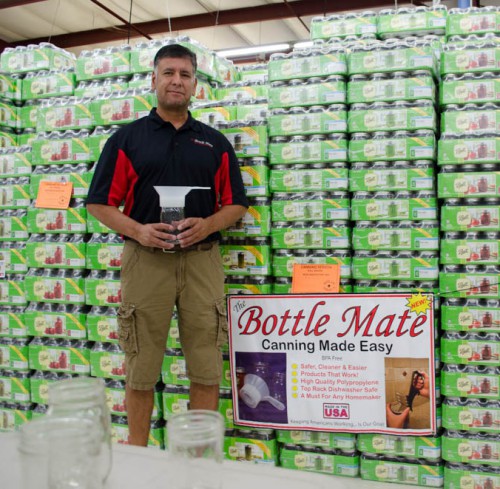
Carefully ladling, pouring, and wiping down 89 jars of salsa could make anyone break down…. instead, Mark Gallegos woke up the next morning at 3am and designed the Bottle Mate canning funnel.

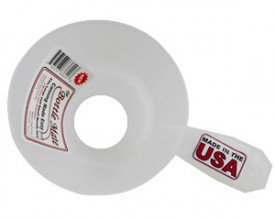
This canning funnel is available in-store and in our online Canning Equipment department!

This canning funnel is available in-store and in our online Canning Equipment department!

That was 4 years ago, and now Mark’s canning funnels are our most popular funnel!

What makes this canning funnel the best for keeping rims clean?

  • It’s cleaner
  • It’s safer
  • It’s lightweight
  • Doesn’t get hot
  • Doesn’t wobble
  • Wide, sturdy handles for great gripping

If you have arthritis, Mark has found that the broad handle and sturdy plastic makes it the best funnel for his clients to use.

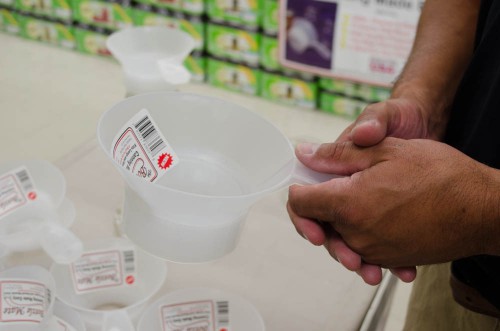
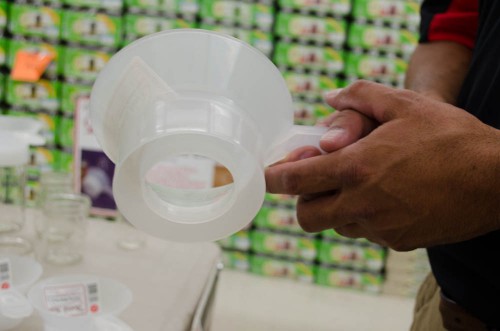
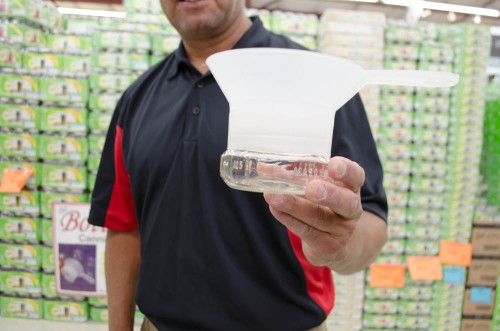
The Bottle Mate canning funnel has a broad, sturdy handle for easy grippingMade from BPA-free polypropelene, these funnels are lightweight and rest on the outside of the jar, giving you stability so you can pour or ladle salsa, corn, beets, or jam right into the funnel and jar without holding onto the funnel. The Bottle Mate funnel’s design has 2 rings: one for the funnel to go into the jar, and an outer ring to rest on the outside of the jar. This keeps your rims clean on wide mouth & regular jars!

This clean canning funnel made in Utah has 2 rings to keep your jars clean!

Mark’s design has the secret: the two-ring design allows the funnel to completely cover the rims of your canning jars, keeping them sauce- and jam-free for safe canning!

Designed by Mark in Utah and manufactured right here in Ogden, the Bottle Mate canning funnels have been featured in Edible Wasatch magazine and on Good Day Utah!

Mark loves his salsas and marinara sauce, and he’s the only one of 5 siblings who cans, so he stays busy. Phew, 89 jars? Wow!

The Bottle Mate Canning FunnelBottle Mate funnels are the right size and rest on the outside of canning jars. So you can leave headspace on even specialty jam jars – they won’t sink all the way down into the jar like other funnels!

Mark Gallegos and his Bottle Mate Canning Funnel

Mark Gallegos and his Bottle Mate Canning Funnel

Thanks, Mark! Happy Canning!

See the Bottle Mate Canning funnel online here, and click here to see all Canning Equipment & Gadgets.

7 Mason Jar Gift Ideas

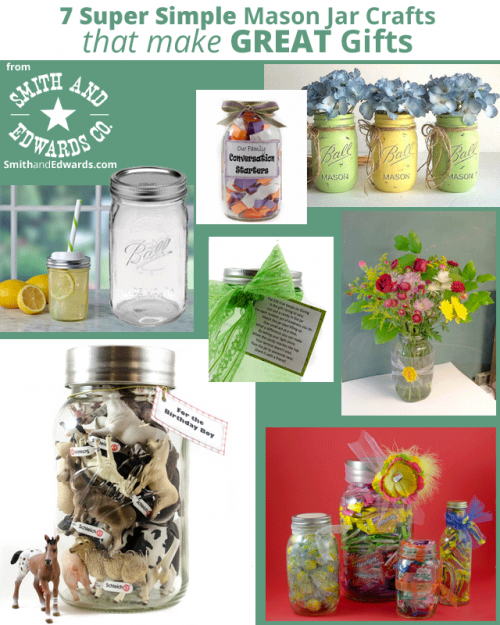
7 Super Simple Mason Jar Crafts that Make Great Gifts

- posted by Amy Griffiths

It’s 10:00 pm and your child tells you she needs a teacher gift for school in the morning. What do you do? You start your daily chores and realize it’s your friend’s birthday, but you don’t have time or money to go to the store. What now?

With 5 kids and a busy schedule, these and many more scenarios like them seem to be what makes my world go round.

Here are 7 easy tried and true mason jar crafts that are not only simple to make, but are kid friendly, inexpensive, can be done in a jiffy, and are sure to bring smiles to the ones receiving them.

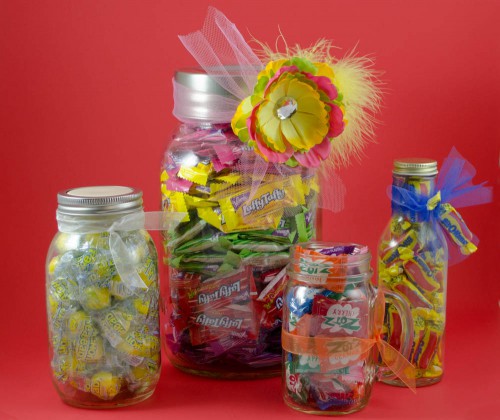
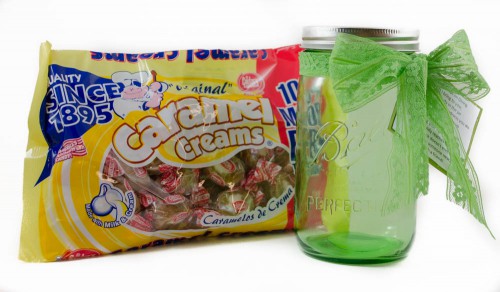
1. Candy Jars

Mason Jar candy jars gift idea

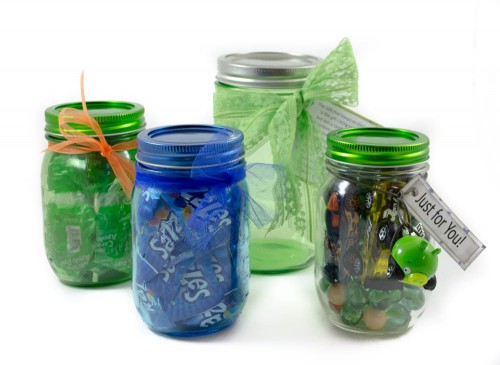
This one is as versatile as the friends you give them to. Keep them simple with a favorite treat you know they like or go elaborate by layering them by color.We used Lemon Heads, Laffy Taffy, Zotz, and Bit O’ Honey. They work beautifully with unwrapped candy like M&Ms or Skittles!
You can finish it off simple and let the candy do the talking, or for the more artistic type, deck it out with ribbons, tulle, flowers, a homemade gift tag – whatever works for you. The sky’s the limit on these mason jar gifts!

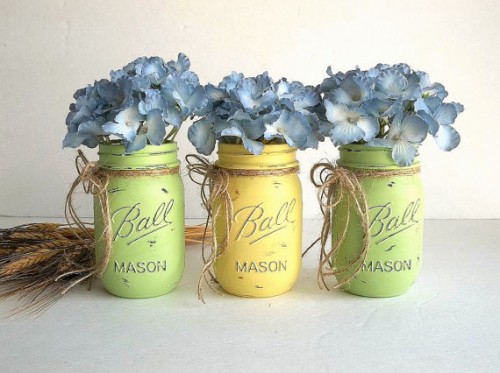
2. Painted Vases

Painted mason jar vases

Painted mason jar vases are all the rage right now. There is something so warming about a nostalgic piece of America, and I love the way these were done with a vintage touch. They are great for flowers, kitchen utensils, pen organizers, or a rainy day money fund.

Since you are making them yourself you can pick out the perfect color for your special friend (after you’ve made one for yourself, of course!)

Image courtesy of Jana from Hydrangea Hill Vintage on Etsy

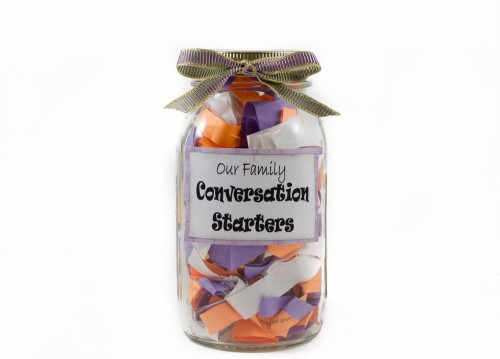
3. Conversation Jar

Mason jar conversation starters gift

Want to encourage a more meaningful family time? These mason jar crafts aren’t only fun to make but can make such a difference for the one you are giving it to. You simply cut a bunch of questions in strips, fold them up, and put them in the jar. They are meant to encourage conversation and get to know each other a little better.

Questions may include, “If you were given $100 to spend today, what would you buy with it?” or “Name the best birthday gift you were ever given.” Don’t start to panic, I’ve made it easy on you. Here’s a link to a great site that has done all the work for you so you can just print and copy. I’m sure you’ve got some great ideas too, so feel free to add some of your own.

Some other fun themes to customize this jar idea would be: Couples questions (great wedding gift!), family history questions to ask grandma & grandpa, a teacher’s jar to use in her classroom, dinner party questions, or holiday related questions/activities.

Use your imagination or stick to the script; either way, they are going to love it!

4. The Mega Mason Jar Statement Piece

Mason Jar vase

This is absolutely adorable with decoration or without. If you have a friend who loves canning, she’s going to go crazy over this extra large, 1 gallon mason jar (No, you can’t actually preserve in this jar, it’s just awesome!)

Okay, okay, so you will have to go to the store to pick this one up, but once you have it you’ll be glad you do!

For the image shown we wrapped 5.25″ mesh wire fabric we got out of the giant junk playground that is the Smith & Edwards surplus yard to give it a more vintage, rustic look. We added a bit of ribbon and a fabric flower and……voila! A statement piece worthy of attention.

Use it for flowers, fruit, favorite knick-knacks, or just let it stand alone. It really speaks for itself.

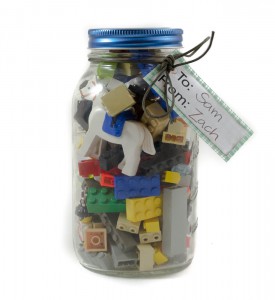
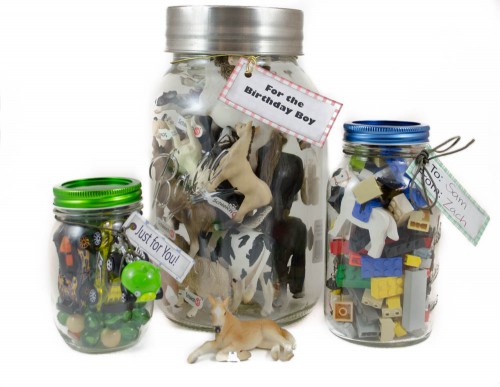
5. Toys for Boys

Give your son Lego in a mason jar! Gifts for Boys in a mason jar! Farm animals in a mason jar gift idea
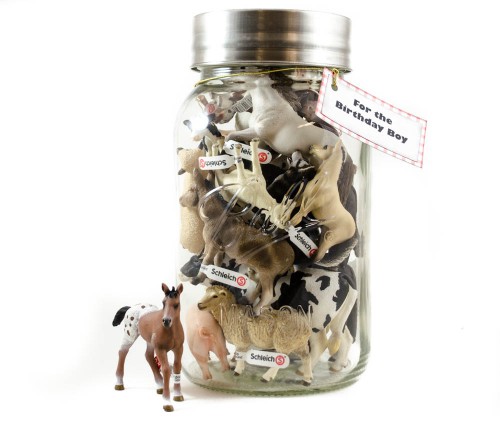
A jar full of building block toys, such as Legos®. A set of jars stuffed with boy-related toys. A gallon size decorative jar stuffed with Schleich® toys.

If you’re like me, it’s easy to whip up something for a girl – ribbons, flowers, glitter and sparkles and you’re good to go! Boy gifts I’ve always struggled with, especially when you want to make something with a little added personal touch.

Here are some ideas I actually got from my sister. She made some darling jars with Hot Wheels in them for a boutique.

People were crazy for them, and they were the first ones gone. She was asked if she would make some more, so I guess it’s not just me looking for boy ideas!

With 2 boys of my own, you can’t go wrong with Legos, marbles, and cars.

For the mega mason jar, it’s fun to create a theme they love and here we used farm animals from Schleich®. I can picture a cool jar full of batman or dinosaur items too, can you?

6. The Gift that Keeps on Giving

Good Deeds jar

Someone help me, I’m a dreamer. I can’t help myself, I always have been! I believe we can make a difference in the lives of those around us one small act at a time.

That being said, I love the idea of this jar. It’s to encourage looking beyond yourself and seeing what you can do for someone else. It’s a great way to teach kids to be aware of those around them and reminds us to reach out where we can.

Here is what the poem says:

The Gift that Keeps on Giving

Is the gift I bring to you;

Just put a candy in the jar

For each random act of kindness you do.

Watch the jar start filling up

One small act at a time,

What a difference you can make

By letting your light shine.

When the candy reaches the top

Your service doesn’t end,

Pass the jar to someone new;

Share it with a friend!

Each time the recipient of the jar does a random act of kindness he/she puts a piece of candy in the jar. Watch your treats stack up as you are helping others. But it doesn’t stop there, after they fill their jar they can share it with another!

It’s the little things – a simple smile, dropping by to check on a neighbor, helping the lady with 5 little kids pick up the bag she just dropped, or giving some change to the guy in front of you who is short $1.78 for his groceries. Simple things that soften hearts, brighten days, and even give hope. This is a gift that benefits everyone!

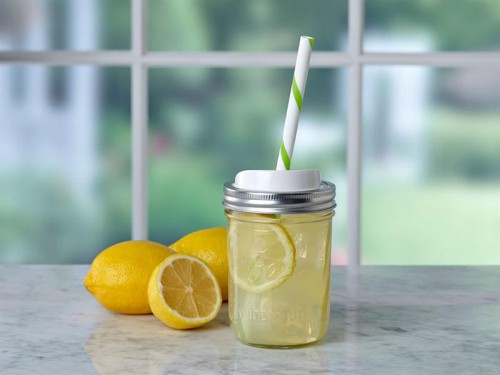
7. Mason Jar Drinking Cup with Straw

Mason Jar Sip and Straw Lids

Since we’ve been talking about simple mason jar crafts, I just couldn’t resist showing you this cute idea. Ball® recently came out with lids and straws that fit perfectly on the canning jars that make drinking more like a fun activity than a basic need (you can find them here with our canning lids). This is such a fun gift idea!

Just open package, wash before you use, pop on clean mason jar, and you’ve got an easy gift that is ready to go. If you are giving it immediately, fill it with cold lemonade, add some ice and lemons, and really get bonus points!

Take a Peek: Limited-Edition Green and Blue Mason Jars

Curious about the gorgeous blue and green jars and lids throughout this post? Talk about taking your mason jars to the next level!

Blue and Green limited edition mason jars

Ball® is making limited edition, period-inspired colored jars and lids in classic blue and green, just like they made 100 years ago! The quality and structure is the same as their awesome canning jars we use now, but with a fabulous vintage flair. (Find them with our canning jars here)

Blue came out in 2013, green in 2014, and a final new color will be unveiled in 2015. Since they are limited editions, grab them while you can find them because they’re not going to be available forever!

Can’t you just imagine how fun your next canning projects could be in these heritage-style mason jars? Perfect for a little added touch to your gift giving – especially at Christmas!

Show us what you make!

I hope these ideas inspire some creative thoughts and give you some hope next time you’re in a jam (no pun intended!) You’ll find the supplies – jars, candy, toys, ribbon & tulle – all at Smith and Edwards. If you have any questions about any of the products shown let us know and we’ll be happy to help any way we can.

We’d also love to see the mason jar gifts you’ve made, so feel free to share (and you may even be spotlighted on a future blog!)

Pin these Mason Jar Gift Ideas for Later!


Seven Mason Jar Gift Ideas on SmithandEdwards.com

Whether you have a passion for canning or just a beginner, feel free to explore our great selection of canning jars, tools, and equipment that will make your food preservation easier than ever.

Be sure to check out our helpful canning tips, too. I learned a lot from reading that blog post!