New campfire foods for Norther Utah

Campfire Food for Camping in Utah this Summer

- posted by EmmaLee Sessions

Spring is almost over, and summer is fast approaching. Kids will be out of school and for many of you this means vacations and adventures in the great outdoors. My favorite summer adventure includes sitting around a campsite, eating good food, and hanging out with good friends while roasting things over the campfire. I love it!

When you set out on your next family trip you’ll want to make sure that you have the essentials with you. Essentials like sleep gear, a working car, and good food. That last one is my personal favorite. Check out these great products that we carry here at Smith & Edwards! Guaranteed to make your mouth water and allow for a good time.

Make fresh Mayo, Whipped Cream, & Butter while Camping

Some of the newest items we got in are these fancy food prep items by Cookut. This France-based company delivers fun, innovative products that are simple, practical, and cool. Check out their mayonnaise, butter, and whipped cream shakers!

Yummy homemade whipped cream in minutes
Homemade mayonnaise with a zing

Each shaker is made of a glass jar with specially shaped silicone balls. These balls are shaped specifically to whip up these condiments in minutes. You have great tasting, easy to make condiment from scratch. Follow the recipe printed on the bottle or alter it slightly according to your own tastes.

These shakers are not only great for home use! Their sleek, compact design makes them perfect to use at your next family outing or camp-out. You’ll be able to make the perfect amount so none of it goes to waste. You can even use your fresh-made butter on other goodies you roast over the campfire!

Make Sweet Campfire Treats with the DoughyMaker

The Doughy Maker isn’t a new item, but it is definitely a product to get excited about. Previously marked at $19.99, we’ve got the Doughy Maker sitting at 50% off! This little tool is perfect for making delicious cinnamon sugar coated dessert balls, and our Housewares manager Vickie’s son Gabriel can tell you how good they are.

Getting started with your DoughyMaker
Adding dough to the Doughy Maker
Step 2 in Doughy-Making
Roasting doughies over the fire
Baked doughies
Adding butter and cinnamon to the doughies

You can even use them at home over a backyard fire pit! Your possibilities for campfire desserts doesn’t end at cinnamon coated biscuits. Try your hand at using corn bread dough, cookie dough, and brownie batter. Or, make delicious meatballs and mushroom delights! All it takes is a little bit of imagination.

You’ll definitely want to add this must-have item to your camping list. Not only is is a great product, but it was also developed right here in Northern Utah. This is just the start of the delicious possibilities that Smith & Edwards has to offer.

Making doughies on a fire pit
Doughies taste even better with friends!
DoughyMaker with fresh doughies

Get your DoughyMaker today – only $9.99 for a limited time!

Mountain House = Mountain Man Meals

Many outdoor enthusiasts are familiar with the Mountain House brand of freeze dried meals. For those of you who are new to the game, here is a little explanation for you.

Mountain House freeze dried meals were originally developed for the special forces troops. Freeze dried foods are lighter than traditional MREs and they retain more of their original flavor. Each meal weighs mere ounces and cooks in under 10 minutes. All you need is boiling water!

Awhile ago we asked our customers what some of their favorite flavors are. People were really passionate as they shared their favorite meal. Some of the responses we received included beef stroganoff, sweet and sour pork, and spaghetti. Smith & Edwards’ own Paul Wright said he really likes the Italian-style pepper steak. You can check out these an other great flavors by clicking right here.

I had never experienced the Mountain House freeze dried foods until this past year. On a snowshoeing excursion up the North Ogden Divide in Northern Utah I had the sweet and sour pork. It was delicious! I’m definitely looking forward to camping trips this summer so I can have more of these great meals.

We just added new flavors, including Spicy Southwest Breakfast Hash and Chicken Fajita Bowl.

Smith & Edwards also carries the Mountain House freeze dried desserts. The apple crisp is one of our top sellers. We even sell their freeze dried ice cream!

No matter what you are in the mood for Mountain House has a meal for you. Order them online or come in the store today for all of your outdoor needs.

Pickling & Fermenting Crocks Frequently Asked Questions

Fermentation and Pickling Crocks Questions & Answers

- posted by EmmaLee Sessions

You’ve probably had fresh, homemade pickles at some point in your life – maybe even homemade sauerkraut or kimchi. You may have even tried your hand at home pickling and fermenting. Whether you’re an expert, a novice or somewhere inbetween I would bet that you have a question or two about pickling crocks.

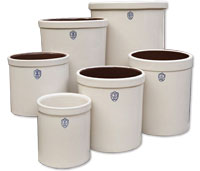
Right here we answer some frequently asked questions about these fragile, ceramic creations with help from industry experts at Ohio Stoneware.

We’ve carried these Ohio made stoneware pickling crocks for several years (click to see them online!) here at Smith & Edwards. Throughout that time we’ve gotten a lot of questions from our customers about pickling crocks. Here are some of the most questions we’ve received. Answers to these questions were provided to us from the experts at Ohio Stoneware and the Utah State University Extension Office.

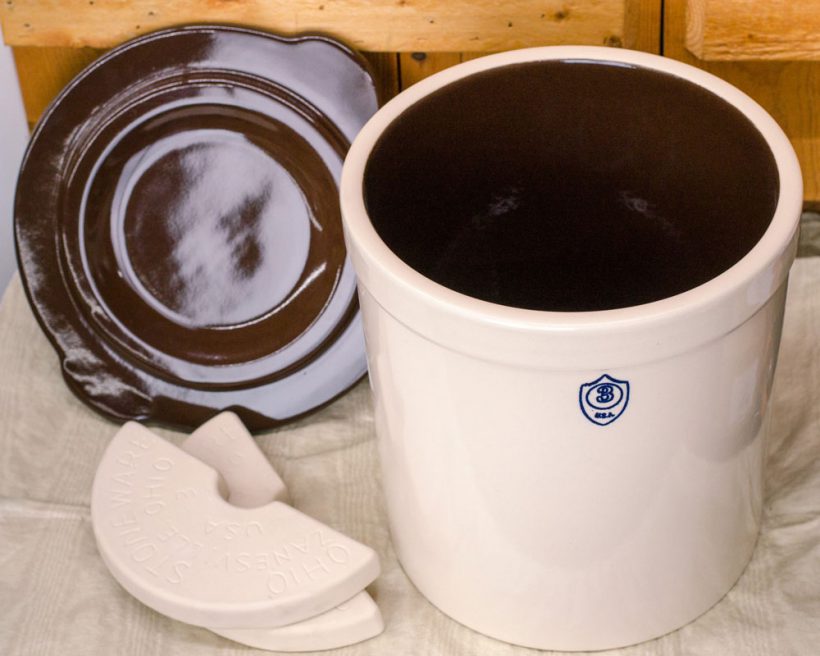
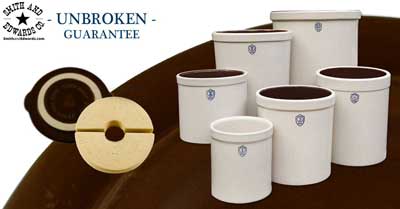
Three gallon pickling crock set: crock, lid, and weights

Have a pickling crock question you don’t see answered here? Leave a comment below and we’ll track down an answer for you!

Pickling Crock Questions about Getting Started

Q: What do I need to get started?

A: You need a pickling crock with a set of weights and a lid. Whether you buy a pickling or fermentation crock is up to you. There are many brands to choose from, but our favorite here at Smith and Edwards is the Ohio Stoneware crocks.

Once you have your basic kit assembled, all you need is a few of your favorite recipes. Then you’re ready to start making delicious, fresh pickles.

You can also try pickling other vegetables, or even try your hand at fermenting!

Find out more tips about getting started with pickling crocks, and a FREE recipe, here.

Q: Are crock lids and weights necessary, or are there “pickling hacks”?

A: These items are necessary. Pickling weights hold your produce under the brine. Pickling crock lids keep excess air & contaminants from reaching your pickles.

However, you can use some shortcuts. Instead of weights, you could use a plate weighted down with bricks. Also, if you have a plate large enough, you could use that as a lid.

Crock weights are designed & sized specifically for your individual crock, so I recommend them – but you can get by without them.

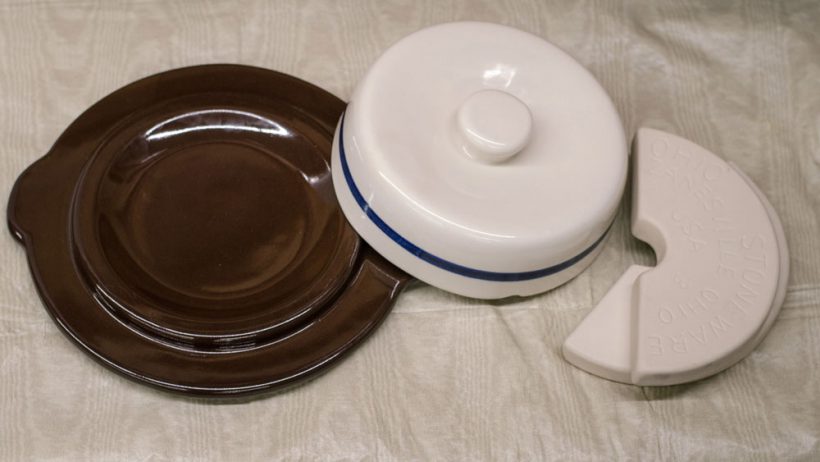
Pickling & Fermentation crock lids and weights

How do I care for my pickling crock?

It’s quite simple, really. Your crock needs only to be washed with soap and water. The goal is to get rid of anything that would cause bacteria to form in your crock. So a little bit of hot water and soap will do just the trick. Here are some more questions we get about cleaning pickling crocks.

Q: Should I wash my crock by hand, or in the dishwasher?

A: Most pickling crocks, like the Ohio Stoneware crocks, have been treated with a special glaze that has been specially formulated to withstand the power of your dishwasher. But – due to their sheer size and majesty, your pickling crocks might not fit in your dishwasher!

If your 1-gallon or 2-gallon pickling crock fits, you can rest easy knowing that you won’t hurt your crock by putting it in the dishwasher. But handwashing is a good bet.

Q: What type of scrubber is best?

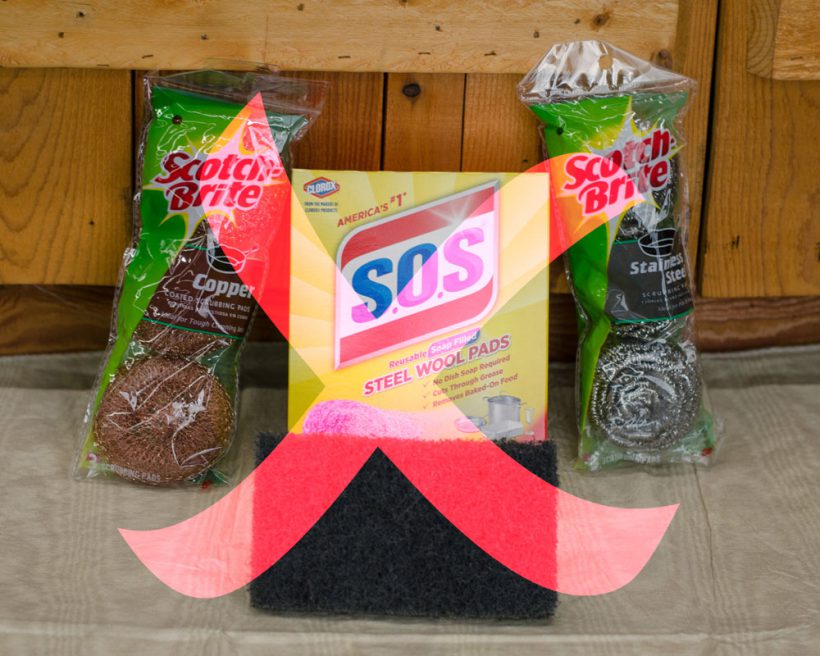
A: Most scrubbers will work great with your crock. You’re not likely to ruin the glaze. Still, Ohio Stoneware recommends that you don’t use anything too abrasive. Steer clear of metal scrubbing tools.

Don't use these abrasive cleaners on your ceramic pickling crock!

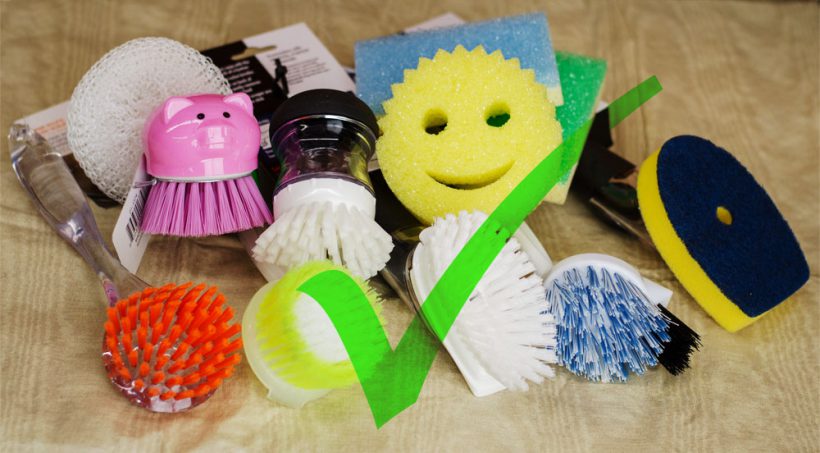
The traditional, little green scrubbing pads that you can find in most cleaning aisles (or on our center bargain tables here at Smith and Edwards) are the perfect tool for doing the job. Any other plastic-bristled scrubbers or foam sponges, even our favorite Scrub Daddy scrubbers, will work great on your pickling crocks!

Use the Scrub Daddy or any foam, sponge, or plastic-bristle scrubbers on your pickling crocks

Q: Is it safe to pour scalding-hot water in my crock?

A: Your pickling crock has been coated with some kind of glaze and was heated, or fired, in a kiln. Temperatures inside of an industrial kiln, which is like a giant oven, can reach up to 2500°F. So, a little bit of scalding hot water isn’t going to hurt your crock.

Something I would suggest would be to avoid pouring boiling hot water into your crock when the crock is extremely cold.

Have you ever seen what happens to glass when it is super-heated and then cooled too quickly? You get really cool cracks in the glass making it look like crystal! That’s not something that you want to have happen to your pickling crock.

Q: Can I still use a cracked crock? How about if the glaze is cracked?

A: If the crack is deep enough that the clay of the crock is exposed, it is recommended that you invest in a new crock. It would be impossible to guarantee that an older crock was made with lead-free clay and health and safety should be your number one concern when pickling and fermenting.

However, if you notice that your glaze is cracked but the clay is not exposed, you should be okay to continue using your crock. Be sure and check with the manufacturer if you have questions about the composition of your crock.

Chips in the rim aren’t an issue at all.

More Pickling Crock Questions

Q: Does the color of the interior of my crock have any special meaning?

A: Pickling crocks have been manufactured in this fashion for many years now. That’s just the way it is! Your crock’s color won’t affect your produce in any way.
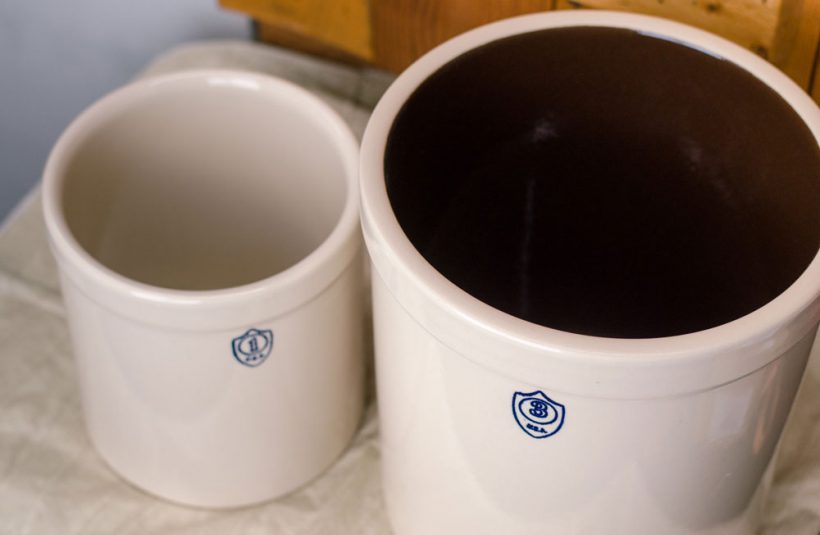
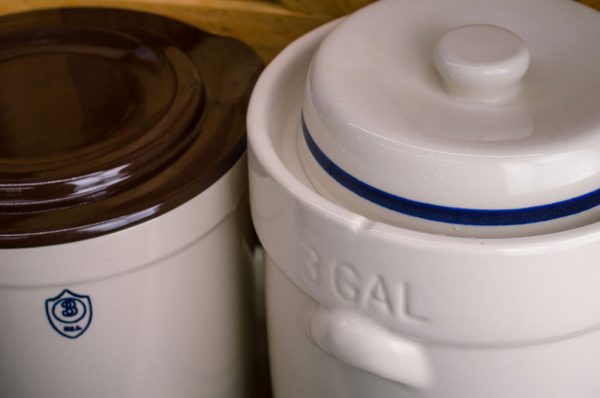
This one gallon pickling crock has a natural interior, while the three gallon crock has a chocolate-brown interior

This one gallon pickling crock has a natural interior, while the three gallon crock has a chocolate-brown interior


Q: Will salt seep through the sides of my crock?

A: Salt should not seep through your crock. If this is happening, the crock’s glaze or walls have been damaged in some way, and it is now time to invest in a new crock.

Also, the denser the clay and more vitrified a crock is, will affect this undesirable occurrence.

Q: Why is the rim of my crock unglazed?

A: There needs to be a seam between two different colors. This is known as a parting seam. The manufacturer removes the glaze from the rim, because it would just look unattractive. That is, again, how crocks are traditionally made.

Q: What is the difference between pickling crocks and fermentation crocks?

A: Trick question! These crocks are used for the same things, and really shouldn’t be named differently. You can pickle and ferment in either an open-top (pickling) crock or a water-seal (fermentation) crock. Let’s take a quick look at the Ohio Stoneware crocks.
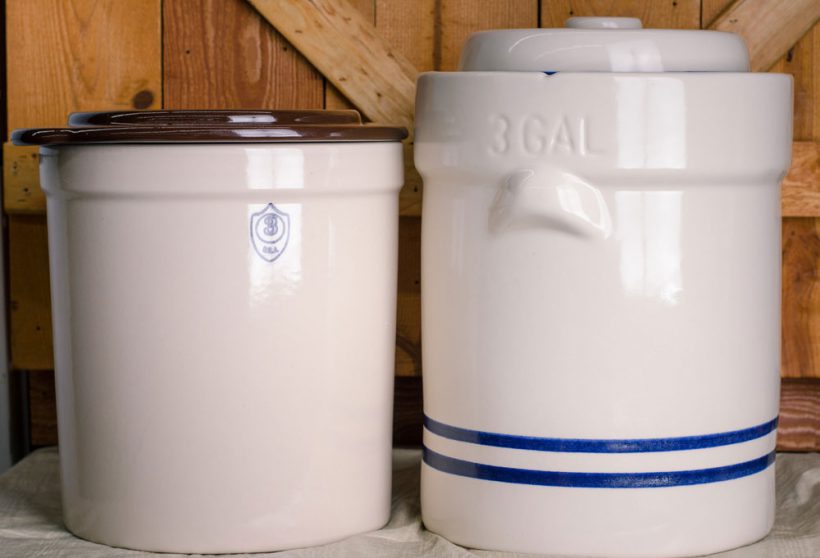
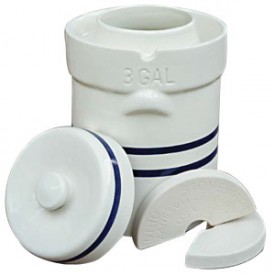
Three gallon pickling crock vs Three gallon fermentation crock

Here’s a side-by-side comparison: on the left is an open-top crock, and on the right, a water-seal crock. They’re commonly called a pickling crock (L) and a fermentation crock (R).

Open-top crocks made by Ohio Stoneware are sturdier and denser. This is because of the form that the crocks are made from. Ohio Stoneware presses these crocks in a metal mold with a hydraulic press.

The water-seal crock is a poured form, so it isn’t as dense. Also, the handles aren’t a functional difference – they are just decorative.

Whether you buy an open-top crock or a water-seal fermentation crock is really just dependent on your personal preferences.
Here's a look at the "moat" in a fermentation crock, or water seal crock.Q: Why does this crock have a “moat” around the opening?

A: Europeans have traditionally used water-seal crocks in fermenting. Americans typically ferment in open-top crocks. There is generally more attention needed for the water-seal crocks, because you have to make sure that the moat stays full of water.

If the water in the moat evaporates, oxygen and other particles will be able to get into your brine solution. This can cause problems, including slimy and soft pickles, cloudy brine, bloom, or other bacteria growth.

You must also continuously check for bloom, which is the bubbles on top of the weights. You must skim the bloom off the brine every 2-3 days to ensure that your pickles turn out perfectly.

Questions about the Fermentation Process

Q: How do I know when my pickles & fermented foods are ready?

A: Follow your recipe, or even do some taste-testing. Really, that’s OK! Taste-testing helps you know how much longer to ferment or pickle.

Generally, the longer you pickle something, the stronger the taste. Just keep an eye on things.

Q: Can I ever re-use my brine? What about with pickled eggs?

A: No, you cannot. Even with pickled eggs! It is always best to start at the beginning for the best-tasting and safest pickles.

Q: What types of salt should I use? Are there different salts for different applications?

A: Use a pickling or canning salt. These salts are cleaner and have no additives, which can affect the quality of your brine and produce. In all of your pickling and canning, use a salt made specifically for these purposes.
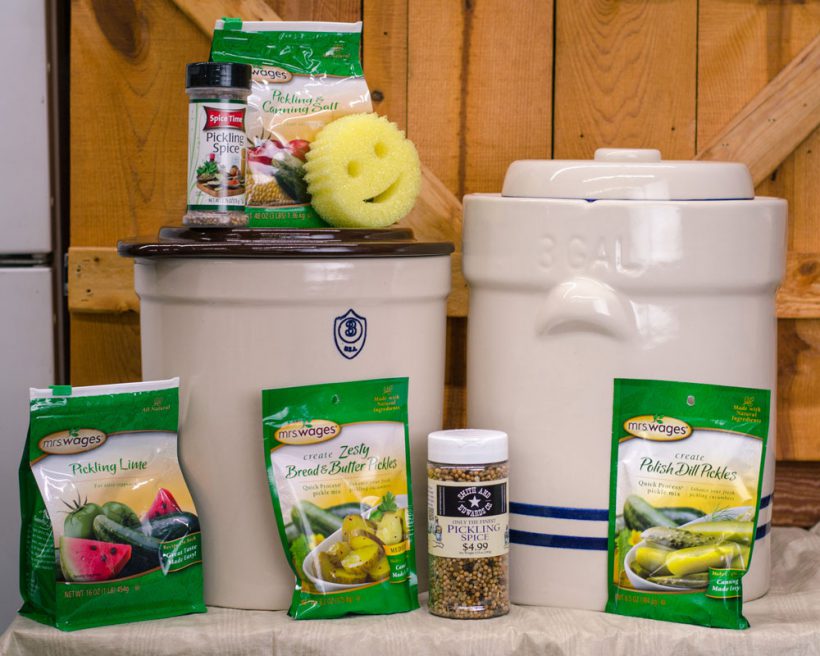
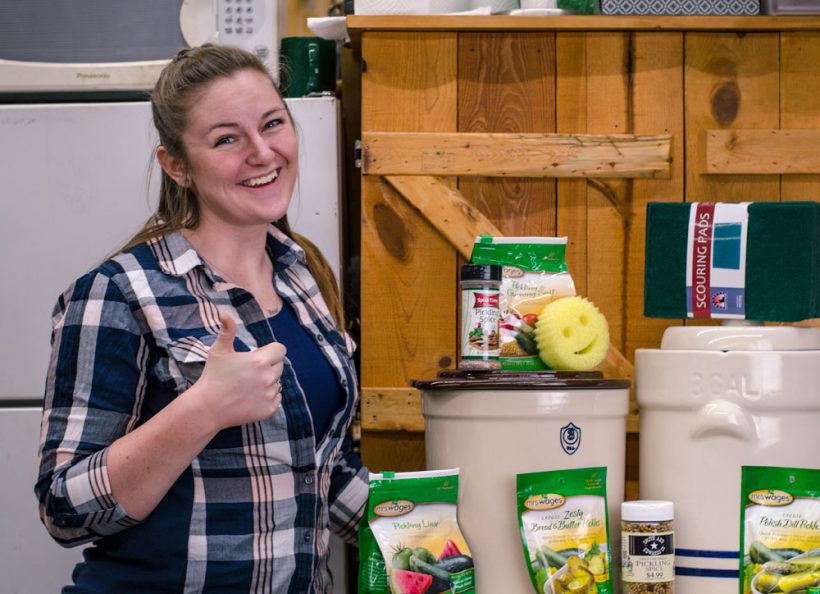
Everything you need for making pickles at home - you can find it all at Smith & Edwards!

Q: Do I have to be exact on the amount of salt and produce?

A: Yes. You need to go-to a good source for the ratio. Follow your recipe.

Q: What temperature do I need to keep my brine?

A: The ideal temperature range for pickling is between 68° F and 74° F. If you are not in that range, you can run into lots of problems:

If your solution is too hot, this can cause soft and slimy pickles. If your climate is fairly warm, then you need to pay more attention to your pickles. You may need to change out the brine more frequently and there is more “pickle-sitting” involved.

If your solution is too cold, it takes a longer time for the fermentation process to take place. This can mean cloudiness in your brine and a poorer-quality pickle.
You'll be good to go with these pickling crock tips!

teresa-hunsaker-usu-extension

What’s next?

The best step is to either start or continue pickling!

Whether you’re a seasoned pickling veteran, or just starting out, we are sure you’ll have more questions. Just remember the best resources you have in your pickling adventures.

You can contact your manufacturer for any questions that you have regarding workmanship, materials, and care. Any additional questions you have about pickling and fermenting can be answered by contacting your local Extension office. The Utah State University Extension office is always happy to answer any questions you have about pickling and fermenting and many other types of food preservation and safety as well.

Call the local expert on all things canning and fermenting, Teresa Hunsaker with the USU Extension Service, at 801-399-8200. Or email her at teresa.hunsaker (at) usu.edu.

Remember to stay safe and informed for the best pickles and cleanest crocks in town. Happy pickling!

New from Stanley & Berne at Smith & Edwards

4 New Ways to Stay Warm & Keep Food Hot in Tough, Cold Weather

- posted by Rose Marion

With winter just around the corner, we’ve stocked up on your must-haves for playing & working outside.

Whether your job’s out in the elements, or you like to play out in the snow, you’ll love these new clothes and food & drink items from rugged brands like Stanley & Berne.

Some Smith & Edwards employees volunteered to help show off the new goods – thanks guys!

New from Stanley

Stanley thermoses are the go-to for keeping coffee, hot chocolate, soup, & chili warm while you’re working at a cold job site. We visited the north yard at Smith & Edwards to put them to the test.
logan-and-nicolo-with-stanley-thermoses-and-berne-workwear-820x656
These are tough enough to keep your meals & hot chocolate warm for 2 days. Now that’s good for just about any type of traveling or outdoor job. Not to mention they’re perfect for Ice Fishing & Elk Camp!

These Stanley insulated stainless steel pint cups have a grip built in. They come with a sipping lid, and keep your iced beverage cold for 4 hours!

These Stanley insulated stainless steel pint cups have a grip built in. They come with a sipping lid, and keep your iced beverage cold for 4 hours!

If you want to keep your cold beverages cold, Stanley thermoses are still the way to go! With growlers and cups, you’re covered for summer concerts & relaxing on the porch.

Stanley producst new at Smith & Edwards

New items from Stanley include a 2-gallon Adventure Jug Beverage Dispenser (bottom left), metal lunch box, insulated growlers, and new sizes of the time-tested Stanley thermos!

We carry the old Stanley standards, plus we just got in brand-new styles! Stanley now has a crock pot and a water jug with spout dispenser in 1-gallon & 2-gallon sizes. There’s also a new Stanley lunch pail that nests a Stanley bottle or mug with plenty of room for food.

New hot-food items from Stanley

EmmaLee’s Stanley 3-quart Adventure Vacuum Crock keeps hot food hot for 12 hours, and cold food cold up to 16 hours!
Cole’s holding the Stanley 2-Stage Lid Thermos. Depending on which size thermos you buy, this insulated stainless steel thermos will keep ice water cold for 36-48 hours!

Explore Stanley Thermoses

Brand-new Silicone Dutch Oven liner

Dreamed up in Utah, these genius reusable Dutch oven liners are here at Smith & Edwards! Sized exactly for your 12″ or 6-quart Dutch oven, there will be more sizes to come.

Made to withstand temperatures up to 450 degrees, this saves you from hauling that heavy cast iron pan over to the sink or stream to scrape dried dessert off the sides. Just peel it from your Dutch oven, then hand wash or place in dishwasher!

Silicone Dutch oven liner

This blue Dutch oven liner will keep your cast iron clean! Plus: Click here for Dutch oven cookbooks. Click for our popular camo tablecloths!


This new item is COMING SOON to Smith & Edwards…. watch this page for updates!

Looking for more outdoor Cooking must-haves?

Explore Dutch Ovens Explore Cast Iron Cookware & Accessories Shop all Outdoor Cookware

New Name in Workwear: Berne

You can see our clothing buyer, Craig, above. He just added a new line of workwear. Why?

  • Berne’s jackets feature pleated action backs and elbows to let you move with ease when you’re working. Instead of the whole jacket shifting when you reach or lift, the elbows and back extend to keep you covered.
  • Every men’s & women’s work jacket & coat features 3 inside-chest pockets
  • All main seams on Berne insulated outerwear feature triple-needle stitching for extra security
  • It’s a great product at a good price!

berne-workwear-features-820x461

Berne is also available for ladies! Styled & designed to fit ladies comfortably, you’ll find insulated work wear designed for women from the Berne product line. And it’s not just the tailoring: choose from traditional or fresh, bold colors like bright blue and dark pink!

Berne is just the latest addition to our huge workwear collection. You’ll find Carhartt, CAT, Dickies, Ariat, and Wrangler RIGGS workwear in our store in Ogden, Utah as well as our web store. You’ll also find our customers’ favorite made-in-USA work gloves, Yellowstone Gloves (read why they’re a favorite, here).

Nicolo, Logan, John, & Jerica modeling Berne workwear

Nicolo, Logan, John, & Jerica

Bonus: Much of this gear is also great for Ice Fishing, too!

Shop Workwear Clothing

Warmth from the Inside, Out: Thermals & Base Layers

Skiing, snowboarding, hunting, ice fishing – the key to staying warm in those awesome winter hobbies is to keep a synthetic base layer on! Cotton will actually chill you when you sweat – so choose a good top & bottom baselayer set from Columbia or Under Armour for ladies. For the guys, we have those same brands plus Carhartt base layers available.

You'll find women's base layers for Columbia & Under Armour - perfect for ice fishing!

We carry them for her! You’ll find women’s base layers for Columbia & Under Armour. They’ll keep her warm ice fishing!

Get base layers for him: Carhartt, Columbia, & Under Armour to keep heat in & combat moisture!

Get base layers for him: Carhartt, Columbia, & Under Armour to keep heat in & combat moisture!

Shop Men's thermal clothing Shop Women's thermal clothing & Base layers Explore all clothing

Special thanks!

Thanks to Craig from Clothing, Nicolo from Receiving, Logan from Shoes, John from Lawn & Garden, Cole from Shipping, and Jerica & EmmaLee from the Web Store for modeling these products for us. You make us look good!
Thanks to Smith & Edwards employees for modeling!
Here's the Scoop on Poop

Solve these 4 Embarrassing Bathroom Mistakes!

- posted by Rose Marion

Four embarrassing bathroom mistakes - and how to prevent them!Here’s the SCOOP on POOP.

Everybody does it, according to this book. But it doesn’t have to make you gag or groan.

Here at Smith & Edwards, we’ve collected a HUGE pile of accessories for your throne room. We wanted to make a big stink about them because they will make your life BETTER!

Two of these have been featured on the hit show SHARK TANK and they need to be in your bathroom.

Emma Lee from our Housewares department was our brave volunteer to show you 4 embarrassing situations that can happen at ANYONE’S house – even yours! – and what you can do to prevent odor, injury, and discomfort.

You and your guests will be glad you’ve thought through these scenarios! This is funny sh–…. stuff!!

YOU WERE GONE SO LONG, I THOUGHT YOU FELL IN!

I don’t know about you, but that’s the WORST phrase to hear after coming back to the table at a restaurant. Come on, there was a line for the restrooms!

Even WORSE than hearing that phrase?

ACTUALLY FALLING IN.

Don't fall in! Let the Illumibowl light your way!

Don’t fall in! Let the Illumibowl light your way!

Have you fallen in because someone left the seat up? Tripped over the toilet?

Gotten hurt getting the light on? Been blinded by a brilliant bulb?

UGH!

No longer.

The Illumibowl’s an LED toilet light that will SAVE YOUR BUM.

Why we recommend the Illumibowl toilet bowl light (get yours here):

  • Great for all ages of aimers
  • No more blinding bright lights
  • Motion-activated light that will shine a steady color or multiple – your choice
  • Featured on Shark Tank!

Your Illumibowl's waiting for you at Smith & Edwards - in fun LED colors! Illumibowl Features: It fits any toilet, it's motion-activated, and you can set to single color or color-changing!
SO CLOSE… BUT SO FAR AWAY

Bathroom wipes are a comfort – but only if they’re within reach!

Keep bathroom wipes at hand!

You’ll find a collection of wipe dispensers that fit right on your toilet paper holder, keeping those must-haves at your fingertips.

Bou’De is the classic white dispenser, and for the kiddos, there are pink and blue wipe dispensers (these come with STICKERS!). For the outdoorsman in your life, we’ve got Bob’s Butt Wipes. These are “wipes that work as hard as you do!”

Why we love these hanging flushable wipe dispensers:

  • The polish after the toilet paper
  • Aloe freshness, within reach
  • Sewer & septic tank friendly
  • Refillable!

SQUATTY POTTY

Also a huge hit on Shark Tank, this plastic stool elevates your legs to make the bathroom less of a strain. There’s science behind it! The plastic’s easy to clean, and we also carry bamboo Squatty Potties for an elevated experience.

Before & after: Squatty PottyWhy we love the Squatty Potty:

  • Perfect height & angle for a smooth movement
  • It helps you poop better!
  • Easily stores against the toilet bowl

SPRAY BEFORE YOU GO – NO ONE WILL KNOW

Before & after: Spray Poo-Pourri and no one will know!Poo-pourri is one of our Housewares manager Vickie’s FAVORITE products to sell. She even places it in our employee bathrooms (is she just being nice, or is she trying to say something?)

Poo-pourri comes in a HUGE range of scents, from Juniper Woods (juniper, eucalyptus, and citrus) to Tropical Hibiscus (hibiscus, apricot and citrus), and Trap-A-Crap (cedarwood & citrus).

Here’s why Vickie loves selling Trap-a-Crap Poopourri before-you-go toilet spray:

  • Odor trapper for any crapper
  • Spritz in bowl and proceed to stack logs as usual
  • Wipes out odor
  • Eliminates embarrassment

BONUS BATHROOM MUST-HAVE: WOODS WIPES

OK, ok, so we’ve got everything you need for SERIOUS bathroom problems.

There’s one more gem that’s great in any outdoorsman’s bathroom and is EQUALLY great as a white elephant or gag gift.

For the outdoorsman who has it all: CAMO TOILET PAPER.

When it’s time to unload, just stop, drop, and unroll. For the poo-fessional hunter & home enthusiast, comes Hunter’s Helper Woods Wipe, the leafy-soft & biodegradable camouflage T-P. Also available in blazin’ orange, and for a limited time, pink camo (for doe ‘doo).

Essentials for every bathroom at Smith & Edwards

So there’s the scoop on poop for you, from Smith & Edwards. Your business is our business, whether that’s in the home, in the cabin, or where the bear goes. We’ve got your back!

Come on in or check out our online store for all this cr– I mean, everything you could possibly want for your bathroom and home. We know our stuff!

How to make dried apricots & apricot freezer jam

How to Make Dried Apricots & Apricot Jam

- posted by Rose Marion

What do you do with a couple pounds of fresh Utah apricots?

Some of the best ways to preserve that fresh, tangy sweetness are dehydrating apricots and turning them into apricot freezer jam.

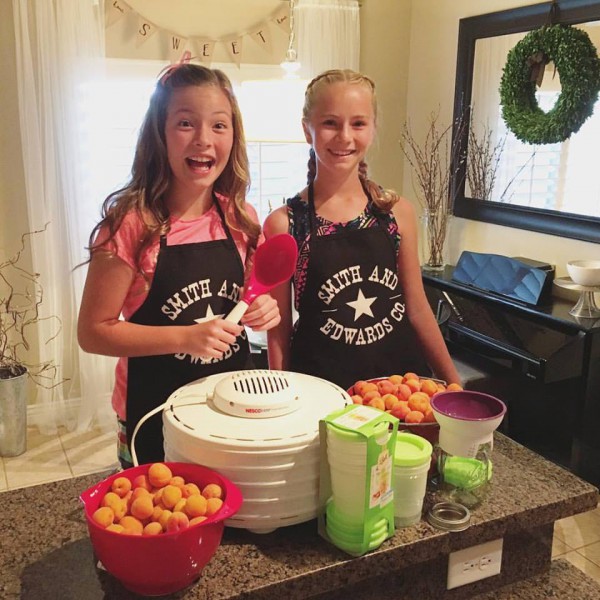
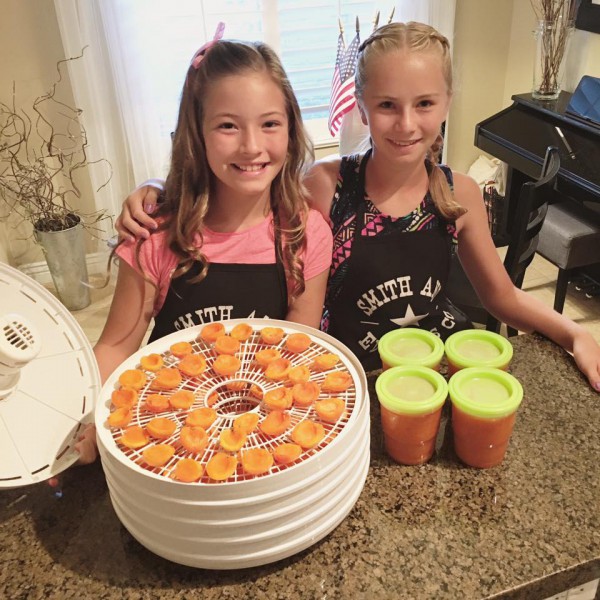
Maggie & Hannah are 10-year-old friends, cousins, and daughters of Smith & Edwards employees. They gave it a shot! Here’s how they did – and if they can do it, YOU & your kids can, too!

Maggie & Hannah about to make apricot jam and dehydrated apricots

Making Dried Apricots

You’ll need:

  1. Wash and dry the apricots. Then, cut the apricots in half. Lastly, separate the halves, and pull out the pit.
    Dehydrating Apricots: Pitting
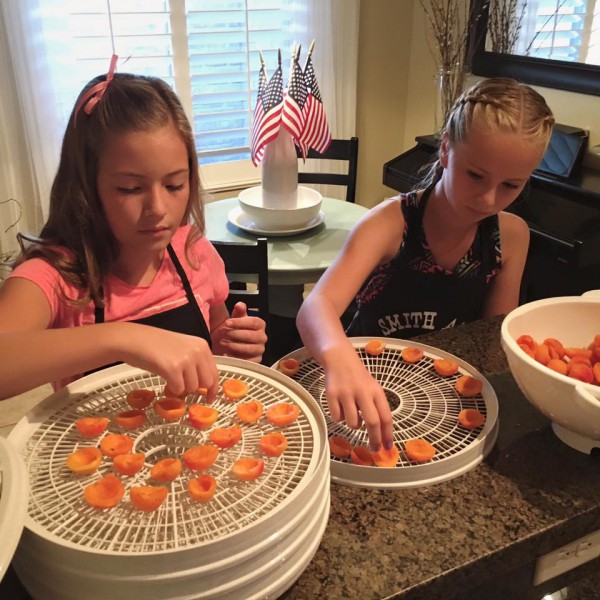
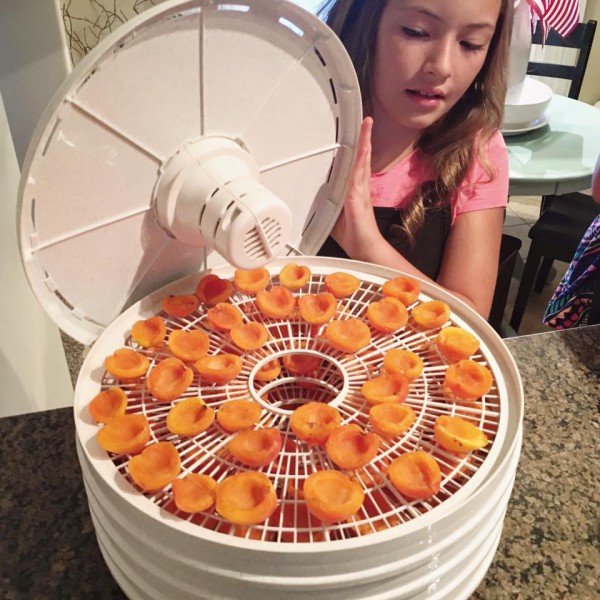
  2. Now arrange the apricots on your dehydrator screens. You can actually place them closer together than this, because they’ll shrink as they dry.
    Dehydrating apricots: placing the halves on the dehydrator screen
  3. Let them dry according to your dehydrator’s instructions. This batch only took Maggie & Hannah about 1 hour.
    Maggie making dried apricots

Making Apricot Freezer Jam

We used:

  1. Cut and discard the apricot pits, then mash the apricots.
    Making apricot freezer jam: mashing the apricots
  2. Add sugar, lemon juice, and the Freezer Jam fruit pectin, according to the package directions.
    Making apricot freezer jam: adding sugar and lemon juice
    Making apricot freezer jam: adding pectin
  3. Stir, then ladle the apricot jam into freezer jam jars.
    Making apricot freezer jam: ladling into freezer jars
  4. This apricot freezer jam will keep in the fridge up to 3 weeks, or in the freezer up to a year!
    Maggie & Hannah making dehydrated apricots & freezer jamTheir grandmother has a secret about adding crushed pineapple to the recipe. Try it out and see what you like!

Your Turn!

What’s happening in your kitchen? We love to see pictures of what you’re making! Leave a comment, tag us on Facebook or Instagram, or send us an email.

Summer Stress Relief for Angry Mamas

- posted by Rose Marion

Are you an angry mama?

We get it! If you’ve spent the summer driving the kiddos to practice, camp, and sleepovers, all while thinking to yourself “Well, when do I get to take a vacation?”…. you’ll find some great ways to RELAX at Smith & Edwards.
Check them out!

Summer Stress Relief: 5 Fun Distractions

  1. Angry Mama kitchen goodies

    Scrubbing the microwave is one of my least favorite things to do…. maybe it’s because I’m 5’2 and the microwave is literally over my head.

    Vickie, our Housewares manager, found this cute & hilarious line of kitchen goodies that no mama should be without.

    Angry Mama jar openers, microwave cleaners, and mats
    Check out the Angry Mama microwave cleaner (just add vinegar & water!), silicone lid opener, and mat.

  2. Adult Coloring Books:

    Did you know? August 2 is Coloring Book Day! Coloring isn’t just for kids.

    In Ogden, I’ve even seen adult coloring book groups meeting at Grounds for Coffee downtown. Get a group of your girl friends together and have a coloring book night.

    Adult Coloring Books at Smith & Edwards - plus 99-cent crayons!

    We’ve carried kids’ coloring books for a long time, and we’ve added fun floral, geometric, and designer adult-friendly coloring books. Plus check out the 99-cent pack of crayons – I love colored pencils, but you don’t have to sharpen crayons!

  3. Lotions & Body Scrubs

    Your hands have done so much: held your babies, changed their diapers, pulled your earrings back from their little fingers, fixed meals, taken care of the dog, vacuumed, loaded load after load in the dishwasher – time to pamper them. Choose some J.R. Watkins (the same brand that makes high-quality spices) or Caldrea lotions & body scrubs to thank your hands for everything they do for you.

    With scents such as Lavender, Grapefruit, Coconut Milk & Honey, Pear Blossom Agave, Pomegranate Acai, and even Peppermint rejuvenating foot lotion, you’ll finally start experiencing the relaxation you deserve.

    You'll find Watkins, Caldrea, & more kinds of body scrubs & lotions by aisle 12 in our Housewares department!

    You’ll find Watkins, Caldrea, & more soothing body scrubs & lotions by aisle 12 in our Housewares department!

    For those aches that won’t go away, we also carry pain relieving creams, sprays, gels, and menthol camphor vapor rubs & mists.

  4. Aromatherapy

    That’s right, Aromatherapy is coming to Smith & Edwards! In September we’ll be carrying the Airome line of essential oil diffusers.

    Airome Essential Oils Diffuser

    You’ll find essential oils at Smith & Edwards soon as well as these ultrasonic essential oil diffusers. These diffusers use ultrasonic vibrations to create a soothing mist of water and essential oils. All the benefits of essential oils plus a wonderful room scent in an elegant LED-lit diffuser.

    In the meantime, check out our deliciously-scented line of McCall’s candles.

  5. Take time for yourself!

    No mama should have to feel like she’s in it alone! Take time for yourself – you can’t give & care for everyone on an empty tank.

    Leave the kids with Grandma while you check out a pickleball league, comedy show, First Friday Art Stroll, yoga class, bike ride, or a craft night with friends.

How to Freeze Beets

How to Freeze Beets

- posted by Rose Marion

Beets are a yummy vegetable packed with nutrients like manganese, potassium, copper, magnesium, vitamin C, iron, and vitamin B6. They’re a delicious Utah summer crop, and you can freeze beets to enjoy them year-round.

Our produce experts Vickie Maughan, our Housewares manager, and Jean from Pettingill’s Fruit Farm, teamed up to freeze beets last week and here’s how they did it.

You’ll need:

  • Disposable gloves
  • Kitchen knife
  • Pot of water
  • Ziploc freezer bags

How to Freeze Beets

  1. Put on your gloves!
  2. Wash the fresh beets and cut of the beet greens, leaving 1″ of beet green stems. Don’t remove the tails or beet green stems, because if you cut them off, the beets will bleed out and lose their color.
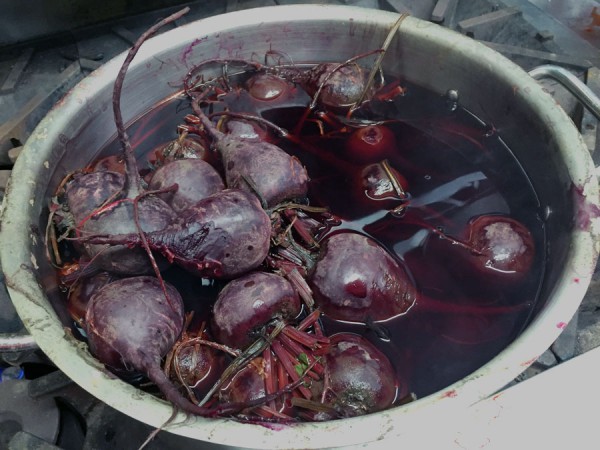
  3. Boil the beets in a pot of water until tender. Then, set aside and let them cool off.

    Boiling the beets with their stems & tails on will keep the rich purple-red color from bleeding out!

    Boiling the beets with their stems & tails on will keep the rich purple-red color from bleeding out!

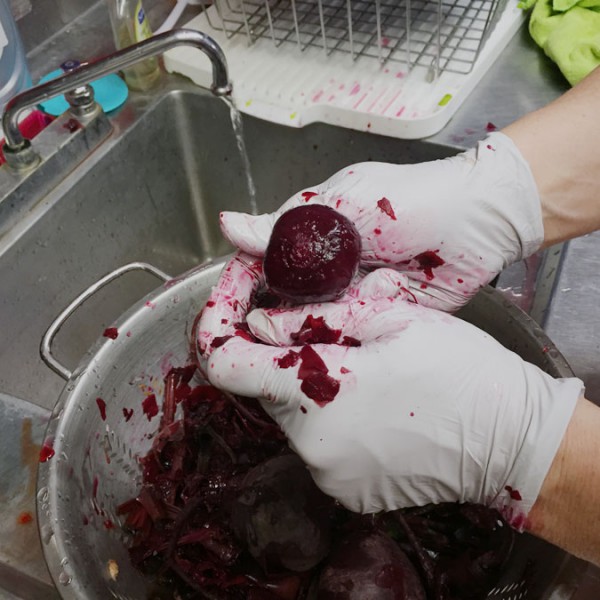
  4. Peel the beets. You don’t need a tool: you can massage the beet skin, tail, & beet green stems and they’ll fall off the beet in your fingers.
    Rinsing and peeling the beets
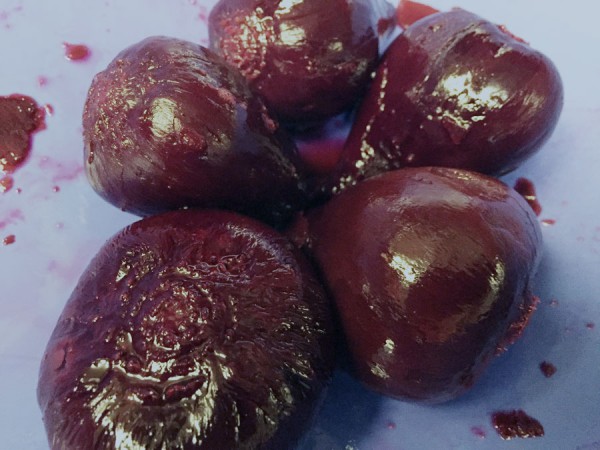
    Whole peeled beets, ready to slice and freeze
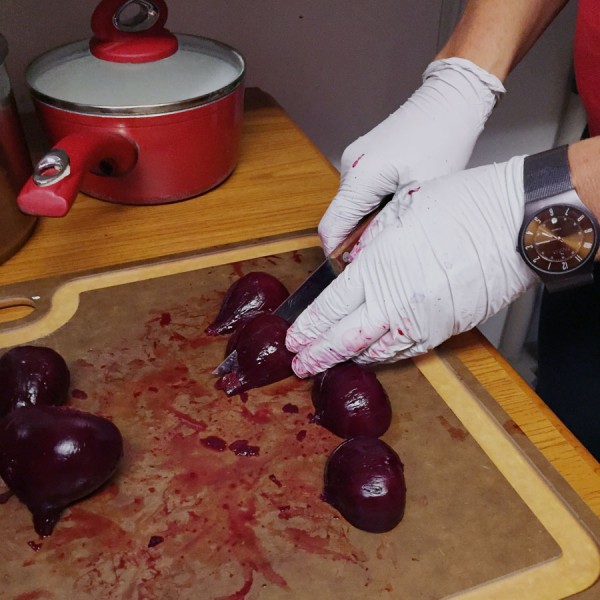
  5. Slice, dice, cube, quarter, or halve the beets any way you’d like. We love mandolines for slicing vegetables!
    Slicing peeled beets
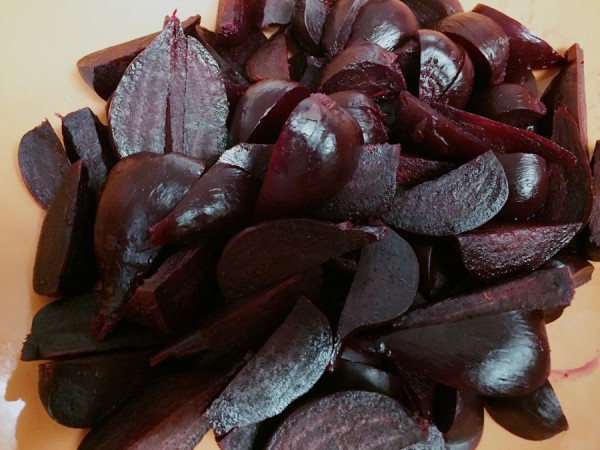
    Chopped beets ready to freeze
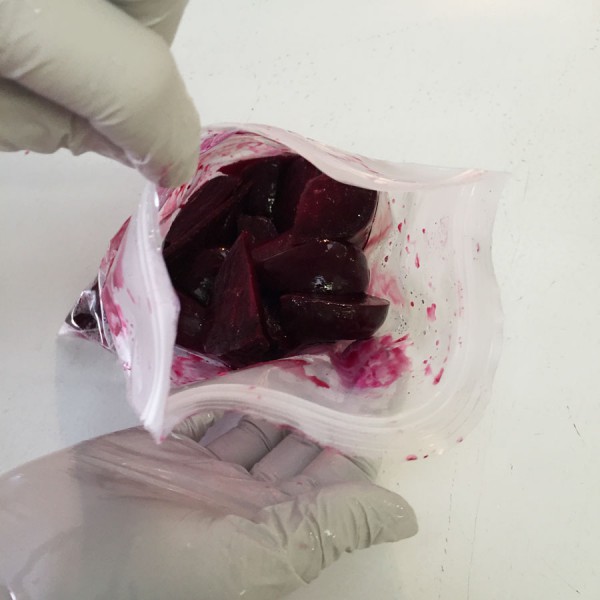
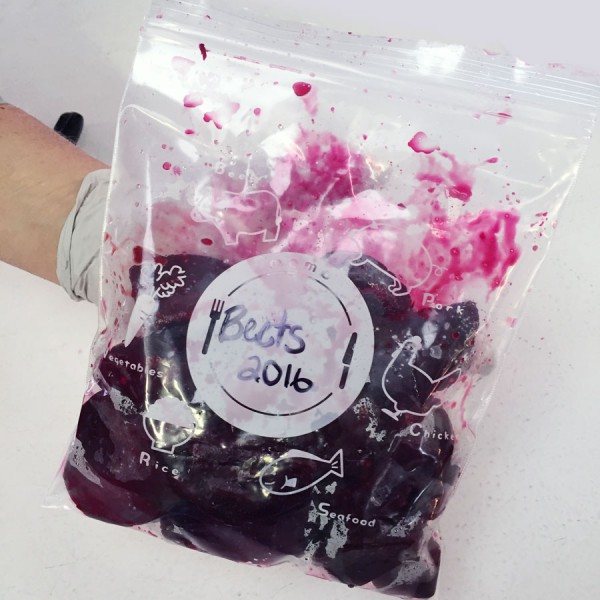
  6. Put in a freezer Ziploc baggie with as many servings as you’ll want.
    Putting fresh cooked beets in freezer bags
    You can freeze them individually like cherries (click here), or if your family loves beets, you can freeze them all together.
    Beets ready to freeze
    Tip: Flatten the bag when you put it in the freezer so they stack nicely and will thaw evenly.

This winter, you can take the bag out to enjoy garden-fresh beets at the peak of their flavor. Microwave or lightly simmer them in a covered pan with butter, when your family’s ready to eat!

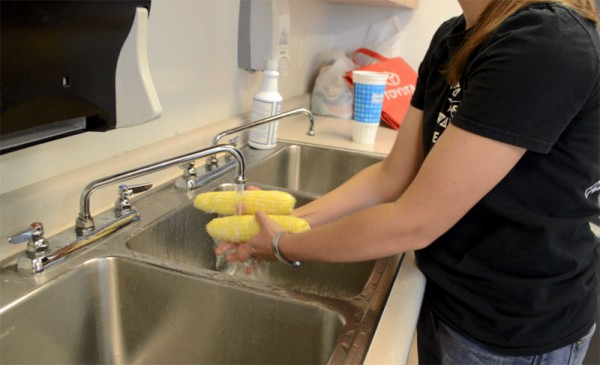
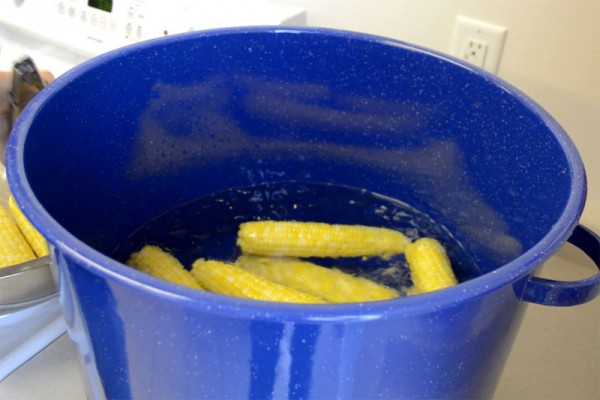
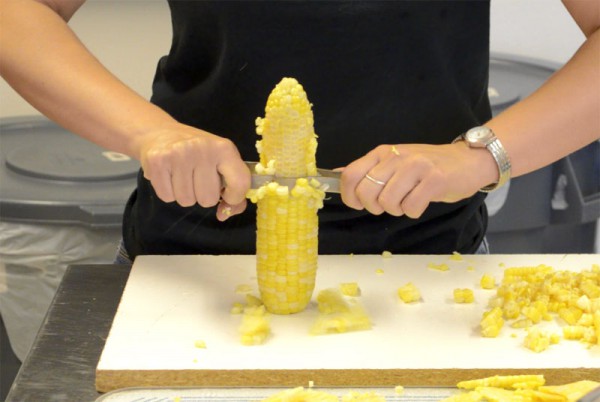
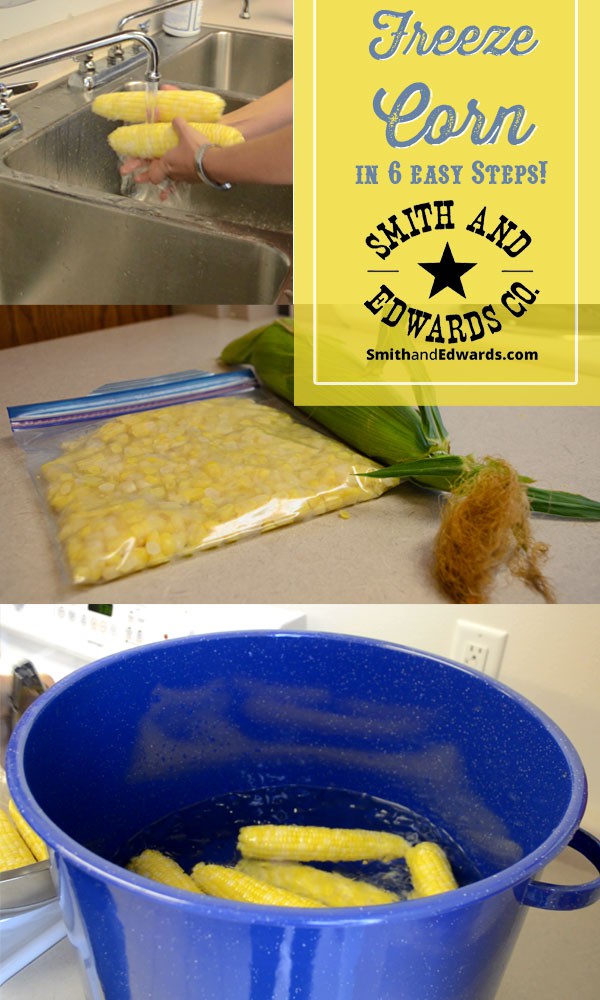
If you liked this, you will LOVE our other frozen food storage tips! Make sure you check out How to Freeze Cherries and How to Freeze Corn.

How to freeze cherries

How to Freeze Cherries

- posted by Rose Marion

Here in northern Utah we’re lucky to get large yields of cherries in late June & early July! While there’s no end to what you can do with fresh cherries – cobbler being my favorite! – freezing cherries is a wonderful use for these short-seasoned juicy treats!

Freezing cherries will let you taste that sweetness even in January. Plus, you can use these for your shakes & smoothies.

Vickie, our Housewares manager, and Jean from Pettingill’s Fruit Farm, got together to show me how to freeze my own cherries. Take a look!

You’ll need:

How to Freeze Cherries

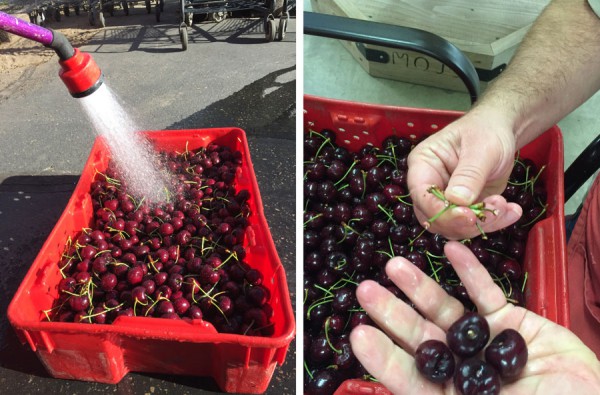
  1. Wash the cherries and remove their stems. Tip: use a colander!
    Washing cherries and removing the stems
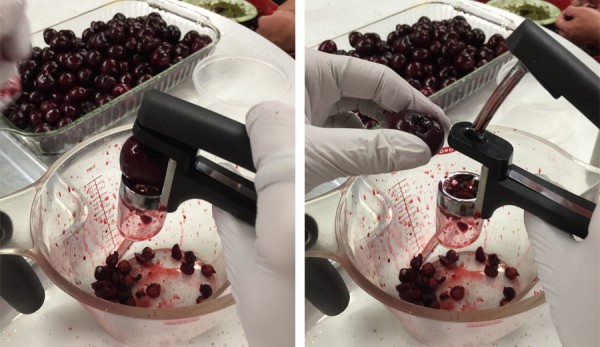
  2. Pit the cherries. Jean & Vickie like using the OXO cherry pitter, and collecting the pits in an extra jar or measuring cup.
    Pitting cherries with a cherry pitter - and GLOVES!
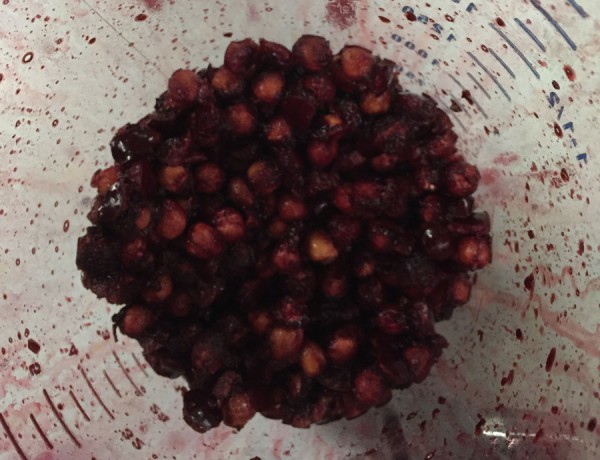
    Cherry pits go in an extra jar!
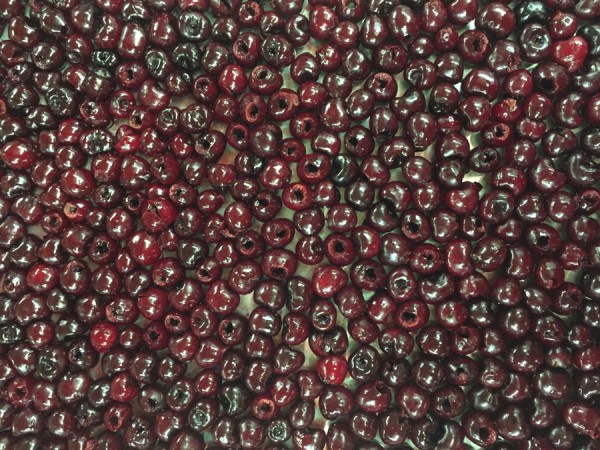
  3. Place the pitted cherries on the cookie sheet.
    Cherries on the cookie sheet, ready to freeze
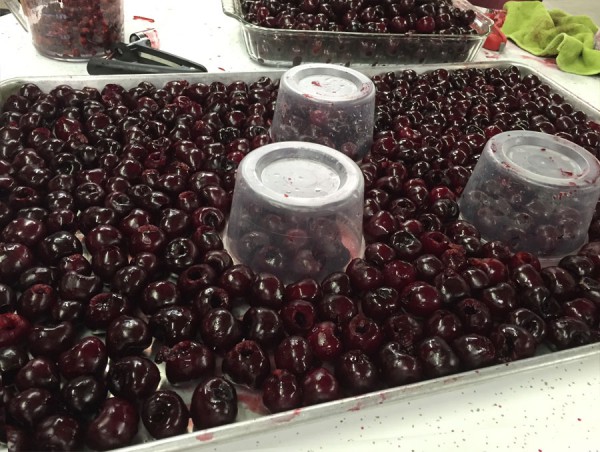
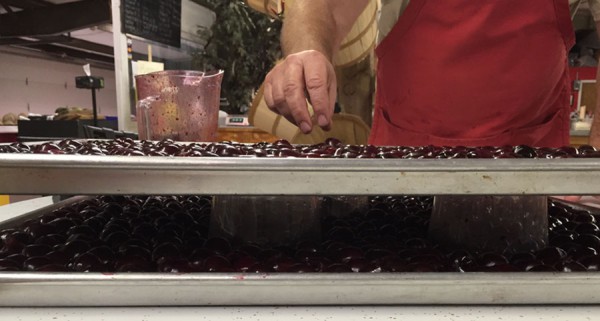
  4. Secret Tip: Double decker your cherries! Place short drink cups or tupperware on the cookie sheet and place it in the freezer. Then, fill another cookie sheet with cherries and place it on top of the cups to freeze twice as many cherries!
    getting-ready-to-freeze-cherries freezing-cherries-in-layers
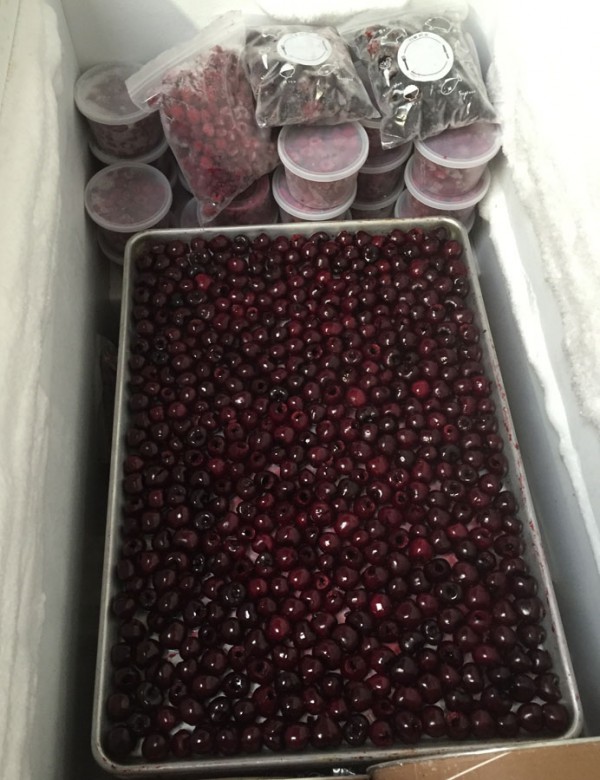
  5. Let the cherries freeze overnight.

    Freezing cherries in a chest freezer

    A chest freezer is GREAT for freezing cherries…

  6. The next day, take a spatula and release the bottoms of the cherries from the cookie sheet.
  7. Gather the cherries and place them in freezer Ziploc bags. Quart, gallon – your choice!
    Frozen & bagged cherries

Questions we get asked about Freezing Cherries

Q: Is it messy?

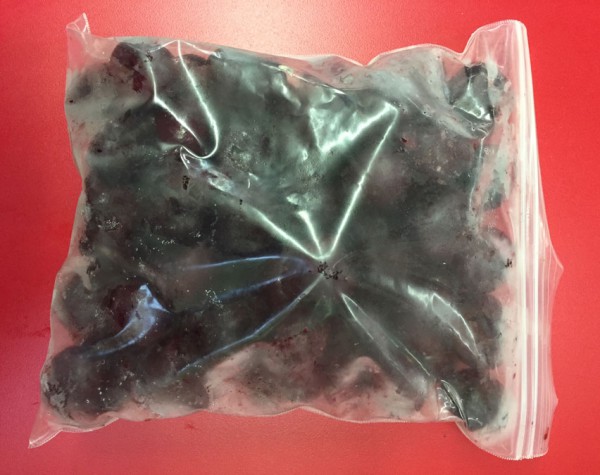
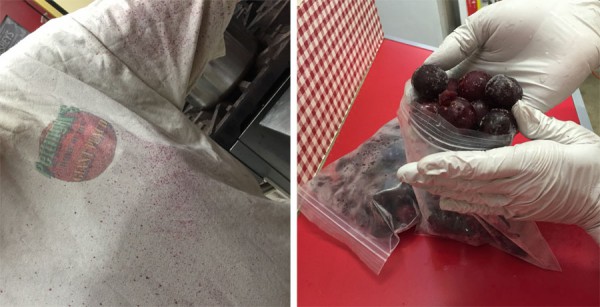
YES! Wear surgical gloves so it doesn’t stain your hands, and wear a work shirt.

Cherry pitting stains & gloves

Pitting cherries is messy business! Wear gloves.

Q: Why not freeze them in bags from the get-go?

By freezing them individually first, they don’t get stuck to each other. Then after you put them in the bag, they break apart easily.

Q: What can you do with frozen cherries?

Vickie LOVES to make smoothies with frozen cherries. YUM!

Eat these fresh-picked as a treat when the snow’s flying in January, just like you were eating it fresh in July!!

Do you have more questions for us? Leave a comment & let us know!


If you liked this, you will LOVE our other frozen food storage tips! Make sure you check out How to Freeze Beets and How to Freeze Corn.

Looking for more food preserving, dehydrating, or canning supplies? Click here to see canning supplies on our online store!

Chaser, the 2016 limited-edition Ty Beanie Boo, has landed at Smith & Edwards!

Chaser has Landed! (Limited-Edition Ty Beanie Boo)

- posted by Rose Marion

Look what just landed – We’ve got “CHASER” the Limited-Edition Teeny Ty at Smith & Edwards!
Ty's CHASER has landed at Smith & Edwards!
Chaser cannot be purchased at any store, so we’re giving him away – FREE! Even his tagging is super special and sparkly.

Careful, Chaser's still teething - he might nibble your finger!

Careful, Chaser’s still teething – he might nibble your finger!

Just follow the 3 steps below to enter to win this cute red dragon Beanie Boo before July 30th, then stop in to see all of the Teeny Ty characters we now carry.

We’ve also got Beanie Boos in a variety of sizes and characters – come check them out! Shop for Ty Beanie Boos & Teeny Beanies online at Smith & Edwards here.

Or, visit us at Smith & Edwards off I-15 at exit 351, at 3936 N Highway 126 in Ogden, Utah.
You could WIN your own Chaser!

How to Enter the Chaser Beanie Boo Giveaway

1. Click here to enter the Giveaway on Facebook by July 30, 2016.
2. Name/Tag the Ty® Beanie Boo lover in your life as a comment under the post! You can enter more than one person (or multiple people can enter the same person), just make sure each entry is added as an individual comment to the post.
3. Make sure you “like” and share the giveaway post.
That’s it! Giveaway ends at midnight (MST), 07/30/16, so enter and share!

Enter to win CHASER, the Teeny Ty Beanie Boo!

*NO PURCHASE IS NECESSARY. This promotion is in no way sponsored, endorsed or administered by, or associated with Facebook.

Make your own DIY Bucket Washing Machine with Smith & Edwards - watch Melissa's video!

How to Make your own Laundry Bucket Washer (video)

- posted by Rose Marion

Pig muck-covered overalls? Horse leg wraps? Greasy shop rags? There’s no way those are going in the nice front-loading washing machine.

Here’s a neat way to turn 5-gallon buckets into a shop washing machine that keeps the mucky things out of the clothing laundry. We saw this on Pinterest and HAD to try it out!

Plus, you can also keep this on hand for emergencies: the Zombie Apocalypse or when the power goes out.

Thanks to Melissa in our Housewares department for showing us how to do it, and Marty for cleaning the leg boots!

Tip: Did you just buy a new pair of dark-wash denim jeans? Add a cup of vinegar and don’t add soap. Then, add your new jeans and let them sit overnight. This will help set the dye, and you won’t get as much indigo rub-off on the rest of your laundry!

Make your own DIY Laundry Bucket at Home

You’ll need these supplies:

Directions:

  1. Drill holes in one of the buckets, both the bottom and 1/3 to 1/2 of the way up the sides.
  2. Drill a hole in the lid with a 2″ hole saw. Then, insert the bushing.
  3. Now drill 1/2″ holes in the rubber plunger.
    You’re done!