Tag Archives: DIY

Make your own DIY Bucket Washing Machine with Smith & Edwards - watch Melissa's video!

How to Make your own Laundry Bucket Washer (video)

- posted by Rose Marion

Muck-covered overalls? Horse leg wraps? Greasy shop rags? There’s no way those are going in the nice front-loading washing machine.

Here’s a neat way to turn 5-gallon buckets into a shop washing machine that keeps the mucky things out of the clothing laundry. We saw this on Pinterest and HAD to try it out!

Plus, you can also keep this on hand for emergencies: the Zombie Apocalypse or when the power goes out.

Thanks to Melissa in our Housewares department for showing us how to do it, and Marty for cleaning the leg boots!

Tip: Did you just buy a new pair of dark-wash denim jeans? Add a cup of vinegar and don’t add soap. Then, add your new jeans and let them sit overnight. This will help set the dye, and you won’t get as much indigo rub-off on the rest of your laundry!

Make your own DIY Laundry Bucket at Home

You’ll need these supplies:

Directions:

  1. Drill holes in one of the buckets, both the bottom and 1/3 to 1/2 of the way up the sides.
  2. Drill a hole in the lid with a 2″ hole saw. Then, insert the bushing.
  3. Now drill 1/2″ holes in the rubber plunger.
  4. You’re done!
Bug Out Bag & 72-hour Kit tips from Smith & Edwards

Prepare with 72-Hour Kits & Bug Out Bags

- posted by Rose Marion

It’s that time of year to check your preparedness gear, make sure you have a communication/meetup plan for your family, & rotate your food storage.

One important piece of your preparedness plan is having a bag with all your necessities. Some people recommend a bug-out bag, but here in Utah a 72-hour kit is the most recommended pack to have.

What’s the difference? Mike Vause from our Sporting Goods department asked Ryan Seager, our Surplus manager, and Jean Dimick, our Preparedness manager, and here’s what he found.

What Ryan suggests for a Bug-Out Bag

A bug out bag, or go-bag, is a small bag designed to get your from Point A to Point B. Point B should have more supplies, such as your 72-hour kit or your food storage.

You might keep your bug-out bag in your car or truck, or in your desk at work; some place you can get to it easily and go.

So it’s a minimalist kit that has just the necessities to survive. You can buy a pre-made bug out bag, or create your own based on your needs & preferences:

  • 1 quart water, a container, & water purification method
  • Food (preferably a high-calorie bar)
  • Bivvy or compact sleeping bag
  • Poncho
  • Paracord
  • First aid kit
  • Multitool with a good blade
  • Lighting: headlamp or area lighting
  • Gloves, hat, scarf, light jacket, and spare clothes (if possible)
  • Fire starter
  • Personal defense

Jean’s picks for a 72-Hour Kit:

A 72-hour kit has the supplies you need to survive for 3 days. You’ll store more food and supplies than a bug-out bag, and for this you should consider a large backpack from the camping department, rather than a slim tactical pack. See Hiking & Camping packs here.

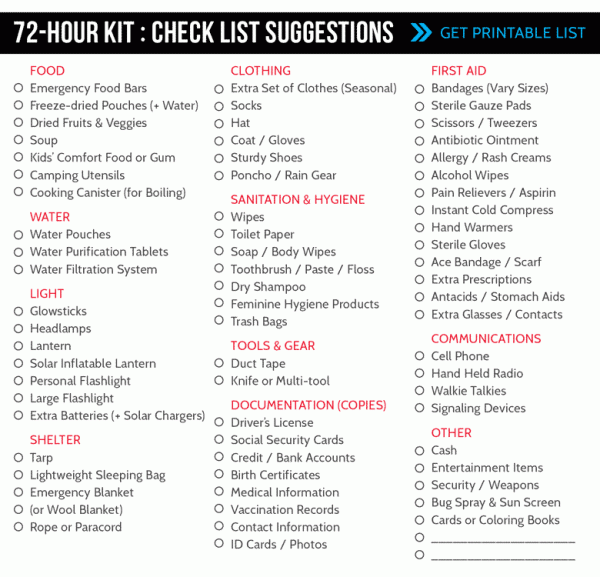
You can download a list of suggested items for your family’s 72-hour kits Get a printable ID card and 72-hour kit ideas from Smith & Edwards, as well as ID cards for your children:

Get your 72-hour kit list!

Did you know?

Save the Children has excellent resources for teachers, parents, and caretakers. Check them out here! You can also make your own ID cards for your children on the Child Safe Kit®’s website.

How to use a Pickling Crock

How to use a Pickling Crock: the Art & Science

- posted by Rose Marion
Teresa with USU Extension service

Teresa with USU Extension service helped answer some common fermenting & pickling questions for us!

When people think of pickles, large quart jars of olive-colored pickles come to mind. But there’s another way to make pickles that takes a lot less heat, a lot more time, and some say, yields a lot tastier results:

Fermenting Pickles and Vegetables

When you make pickles in a traditional pickling crock, in some ways it’s much less work: simply prepare your pickles, load them in the crock according to the recipe, and give them a few weeks.

This yields crisp, crunchy, delicious pickles!

And you can make sauerkraut and more fermented dishes the same way.

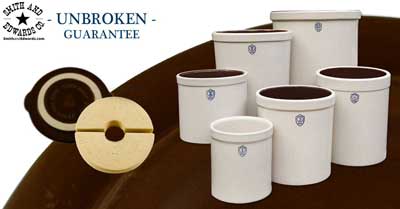
Our favorite brand of stoneware pickling crocks are the Ohio Stoneware line (click to shop), which is make in the USA in Zanesville, Ohio. And when you order yours from Smith & Edwards, we guarantee they arrive in perfect condition!

We carry lids, weights and pickling crocks in a huge range of sizes, as well as the very-popular 3-gallon fermentation set.

What size Pickling Crock do I need?

The US Department of Agriculture recommends a 1 gallon container for each 5 pounds of fresh vegetables. So a 5-gallon stone crock is an ideal size for fermenting about 25 pounds of fresh cabbage or cucumbers, according to the USDA Complete Guide to Home Canning.

Cucumbers and cabbage must be kept 1-2 inches under brine while fermenting, so weights can be instrumental.

Make sure to wash your crock, weights, and lid with hot soapy water, and rinse them well with very hot water, before adding your vegetables.
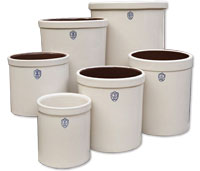
Ohio Stoneware crocks at Smith & Edwards

You can get a pickling crock for any size project – from one to five gallons – and the weights & lids to match.

Why & How to use a Pickling Crock

We were lucky to have Teresa Hunsaker from the USU Extension Service here at Smith & Edwards this summer to check pressure canner lids, as well as give tips on the fermenting process. Fermenting is only growing in popularity as people return to the traditional method, as well as gain interest in probiotics and the health benefits of fermented foods for the digestive system.

Read on for common fermenting mistakes, how to process your vegetables after fermenting them, and a fermented Dill Pickle Recipe!

Pickling Crock Common Mistakes

One of the common problems Teresa sees has to do with salt: especially people not using enough salt.

Salt is hugely important with shredded vegetables and pickles: otherwise, the brine goes scummy and your lovely batch of pickles or sauerkraut is lost. It’s so important to use the right salt ratio!

Use your standard pickling salt: you can use both iodized and noniodized table salt. Noncaking materials added to table salts may make your brine cloudy. USDA advises against flake salt because it varies in density. Reduced-sodium salts may be used in quick pickle recipes; this may give your pickles a slightly different taste than expected. But, reduced-sodium salt is not recommended for fermented pickles.

Layer your vegetables, then salt, then vegetables, then salt: this is especially important with cabbage.

Another mistake Teresa sees is not having your crock at the right temperature. Some people will store their pickles in the basement as they ferment, or in a room that gets too hot.

The temperature should be between 68-74 degrees. That’s because if it’s too hot, it will process too fast and produce scummy brine. Too cold, and the process will take too long.

The traditional way to make kimchi is actually to bury the fermentation pot in the ground, to keep the temperature constant!

Fermenting is both an art and a science!

How Long does Fermenting Take?

The length of time needed for your batch of pickles or sauerkraut depends on your recipe. It takes about 3 weeks for sauerkraut, and there’s a good recipe out there for 21-day pickles.

Follow your recipe exactly, including changing out the brine: with the 21-day pickles, you need to change the brine every few days.

OK, they’re done… Now what?

You can can your sauerkraut or pickles after they’re done: just process them. For sweet pickles, it just takes 15 minutes; for whole dills, about 25 minutes does the trick at this altitude.
Or, you can waterbath them – check your local recommendations and keep them under 185°.

But you don’t HAVE to can them at all. Your crock pickles can hold in the fridge for weeks!
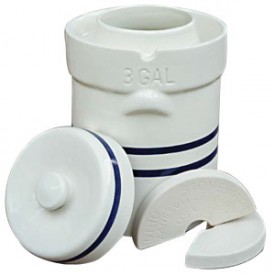
Ohio Stoneware Fermentation Crock

This 3-gallon fermentation crock features a channel for the lid to rest in, and comes with matching weights.

What’s the difference between pickling crocks and fermentation crocks?

Either style works well.

The fermentation style is designed for keeping the vegetables down better, and it features vents. You do want some air circulation to temper the temperature.

Dill Pickles Recipe for Pickling Crocks

Use the following quantities for each gallon capacity of your container.

  • 4 lbs of 4-inch pickling cucumbers
  • 2 tbsp dill seed or 4 to 5 heads fresh or dry dill weed
  • 1/2 cup salt
  • 1/4 cup vinegar (5%)
  • 8 cups water and one of more of the following ingredients:
    • 2 cloves garlic (optional)
    • 2 dried red peppers (optional)
    • 2 tsp whole mixed pickling spices (optional)

Procedure: Wash cucumbers. Cut 1/16 inch slice off blossom end and discard. Leave 1/4-inch of stem attached. Place half of dill and spices on bottom of a clean, suitable container. Add cucumbers, remaining dill, and spices. Dissolve salt in vinegar and water and pour over cucumbers. Add suitable cover and weight. Store where temperature is between 70° and 75° F for about 3 to 4 weeks while fermenting. Temperatures of 55° to 65° F are acceptable, but the fermentation will take 5 to 6 weeks. Avoid temperatures above 80° F, or pickles will become too soft during fermentation. Fermenting pickles cure slowly. Check the container several times a week and promptly remove surface scum or mold. Caution: If the pickles become soft, slimy, or develop a disagreeable odor, discard them. Fully fermented pickles may be stored in the original container for about 4 to 6 months, provided they are refrigerated and surface scum and molds are removed regularly. Canning fully fermented pickles is a better way to store them. To can them, pour the brine into a pan, heat slowly to a boil, and simmer 5 minutes. Filter brine through paper coffee filters to reduce cloudiness, if desired. Fill hot jar with pickles and hot brine, leaving 1/2 inch headspace. Remove air bubbles and adjust headspace if needed. Wipe rims of jars with a dampened clean paper towel. Adjust lids and process as below, or use the low temperature pasteurization treatment.

– recipe from USDA’s Complete Guide to Home Canning, Guide 6: Fermented Foods and Pickled Vegetables

Want to learn how to make sauerkraut in a fermentation crock? Enter your email address to get access to a free printable Fermented Sauerkraut recipe!

Explore Pickling Crocks…
Smith & Edwards Pickling Crocks

How to shape a Palm Leaf Cowboy Hat

3 Ways to Shape a Palm Leaf Hat

- posted by Rose Marion

Need some shade at the rodeo or playing after work? Our Western guy Marty can show you how to shape a palm leaf hat today in a Gus, Brick Top, & Buckaroo style.

He shapes these cowboy hats here at the store with a steamer, and you can shape yours with just a bucket of water at home – watch how!

Cowboy Hat Styles

In the Buckaroo style, you’ll have a smooth bowl-shaped indent in the crown, round all the way around. Use a bowl or a ball to get this shape. Then you can raise the middle of the indent over another round shape, like a smaller ball, from the inside. You can also shape a nice lip in the top of the crown. The Buckaroo typically has a pretty flat brim, too.

This is the style of hat that Tom wore for his Trek outfit – he shaped it himself!

A Brick Top hat means you have four corners in the brim of the hat, and an even indent.
Buckaroo, Brick Top, and Gus styles you can shape your next hat with!
The most common styles of hat Marty sees is a Cattleman’s crown and a Gus. The Cattleman is like the hat Marty’s wearing: two dents running from front to back. The Gus is just like the Cattleman’s, but the dents are only in the front of the hat.

How to Shape Your Hat at Home

To do this at home, fill a bucket with water. You can use cold water and let it soak a while, or lukewarm will speed it up a bit.

Start with the crown and use your fingers and thumbs to start the shape.

Move to the brim and shape your brim.

Now let it dry. You’re all done!

Get a Hat of your Own

Get your own palm leaf hat from Smith & Edwards! We carry a HUGE selection of Sunbody hats, which is our favorite brand of palm leaf hat. These hats are Guatemalan-made and hold their shape nice after you shape them. They come in lots of adult sizes as well as kids’ sizes.

Get your own Sunbody hat at Smith & Edwards!

Come in to Smith & Edwards in Farr West and we’ll shape one up for you, too!

How to tie a Honda Knot

How to Tie a Honda

- posted by Amy Griffiths
Did you hear about our first ever in-store Dummy Ropin’ contest? We had so much fun we’re already thinking about the next one! Check out what happened and see who won. Sign up for our emails just for horse enthusiasts so you don’t miss out on the next one!


Our western department has western rock stars as far as I’m concerned. Not only do they carry a great selection of quality products, they are also so knowledgeable, friendly, and genuinely good people. They live the lifestyle they are talking about and have first hand experience.

The people of Smith & Edwards' Western department

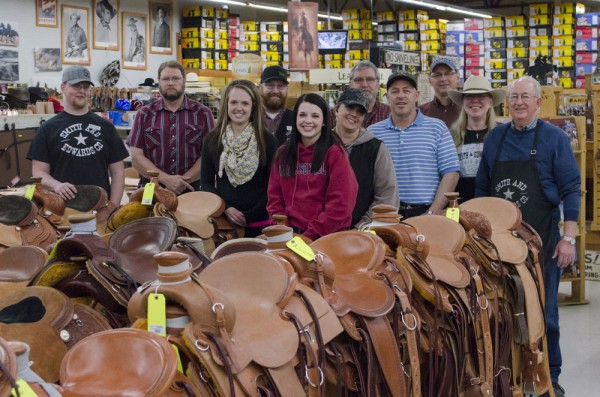
Tom, Dave, Sam, Marty, Jess, Dani, Steve, Kyle, Shaun, Kris, and Sherm


Often they are asked how to do certain things, and how to tie a honda is a common request. Tom, one of our fabulous craftsmen from our manufacturing department (yes, they design and manufacture a lot of the tack they sell, and they do it right here in Smith and Edwards!) agreed to show us how to tie a honda. It must be effective because people keep coming back for more! (click here to skip to a written step-by-step how-to)


Watch How to Tie a Honda

Step by Step Tutorial on How to Tie a Honda

Tying a sturdy honda is really a two step process, but it really is quick and easy. First you make a stopper knot, then you can make your honda.

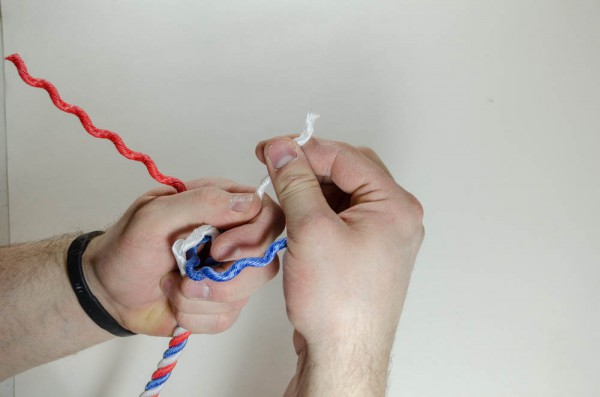
Begin by untying the strands in your rope about 6″ down and separate them. For our tutorial we’re using a 3 strand rope but you can easily do the same action with a 4 strand rope.

Separate the rope strands


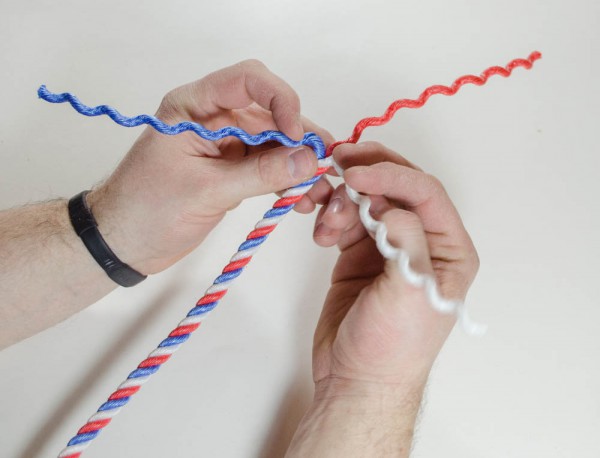
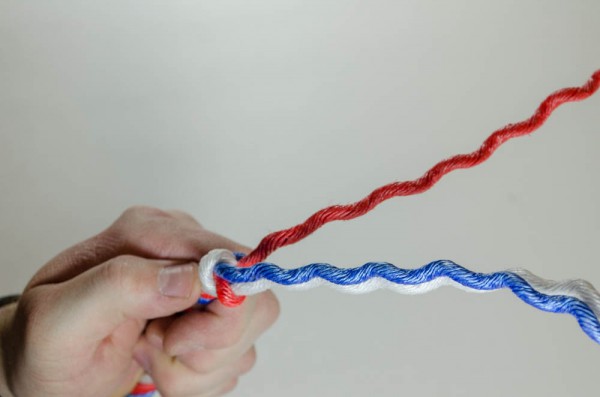
Take the middle back red strand and curve it to the left.

Curve to middle back strand to the left


Take the blue strand on the left and go over and then under the middle red strand you just curved to the left.

Over and under left strand


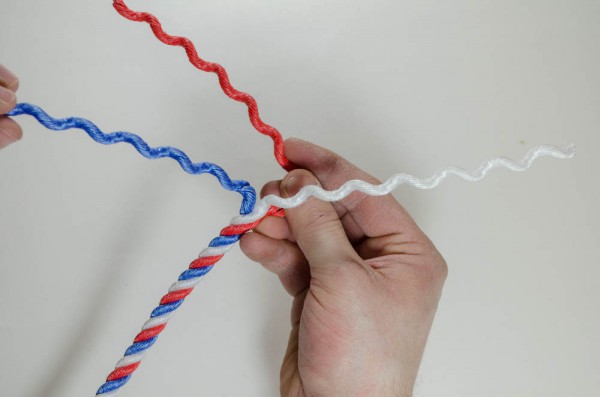
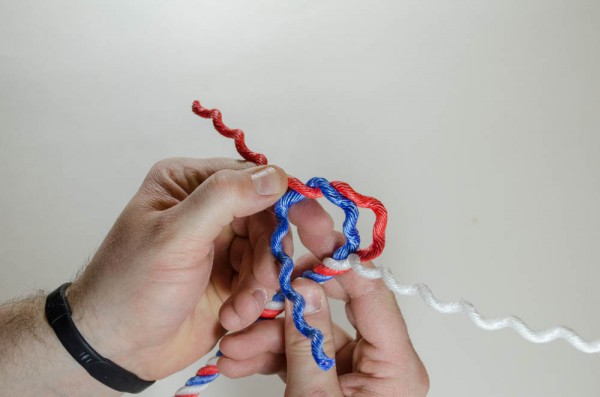
Now take the right white strand and do the same over and under action you as you just did on the previous blue strand.

Next over & under - part 1
2nd Over & Under - part 2


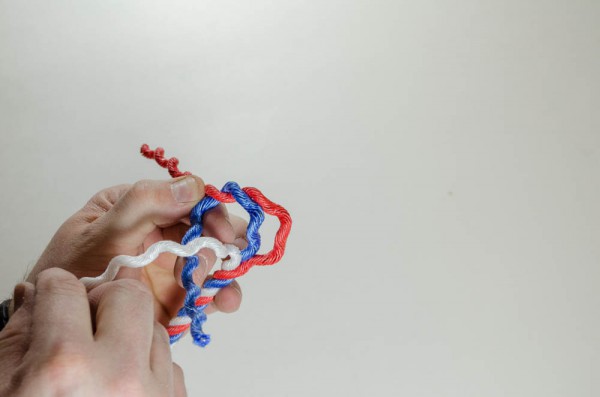
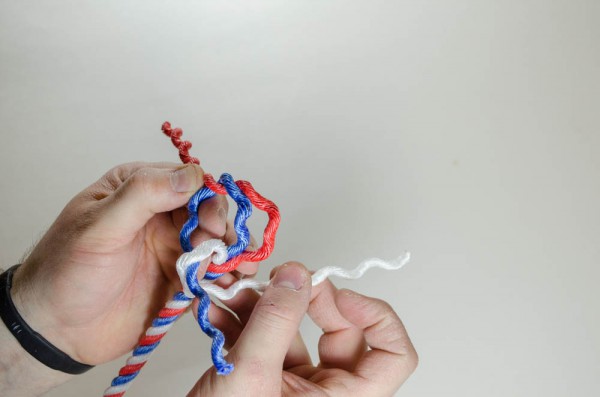
Grab the tip from this same white strand and insert it in the top loop you created with the first red middle strand.

Up through the loop


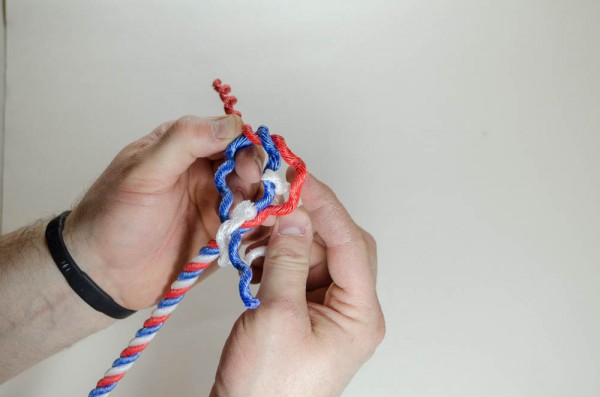
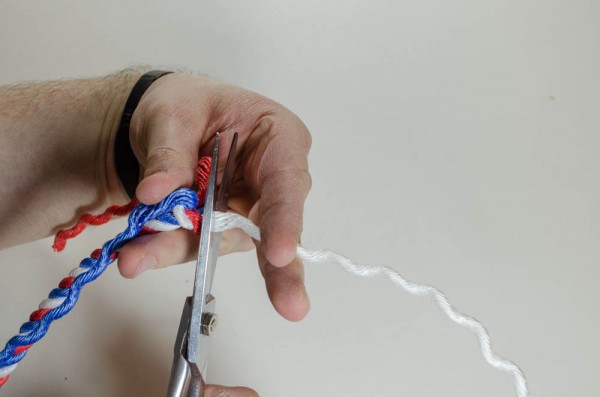
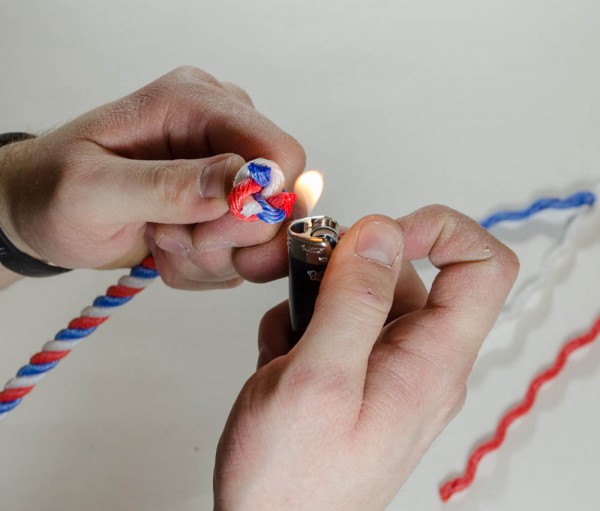
Pull the end of each strand, making a tight knot at the bottom. Cut and burn the ends to seal it.

Pull strands up
Tighten strands
Cut strands
Burn strands


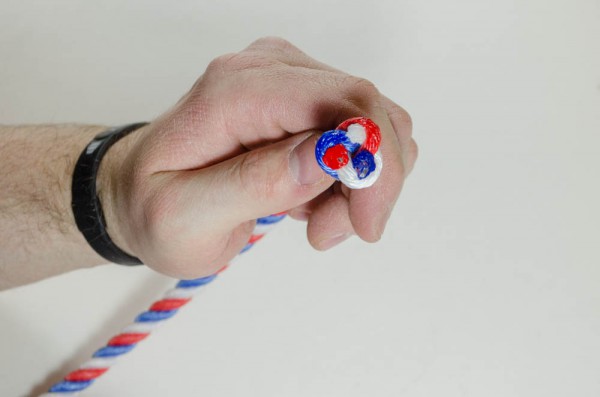
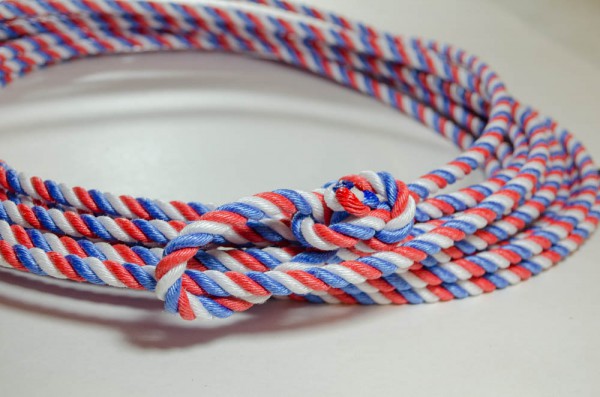
Now you’ve got your stopper knot ready for the next step. Look how great it turned out!

Finished Stopper Knot


Time to tie your Honda

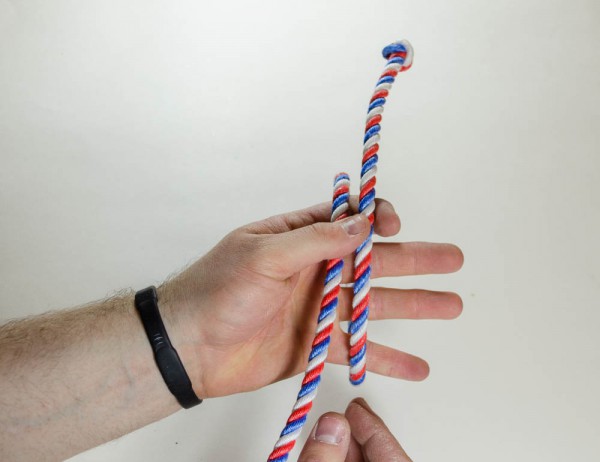
With about 18″ of rope, take the end that has your newly tied stopper knot. Working towards the right of your rope, loop it towards you til the knot faces away.

Loop end toward you til it faces away


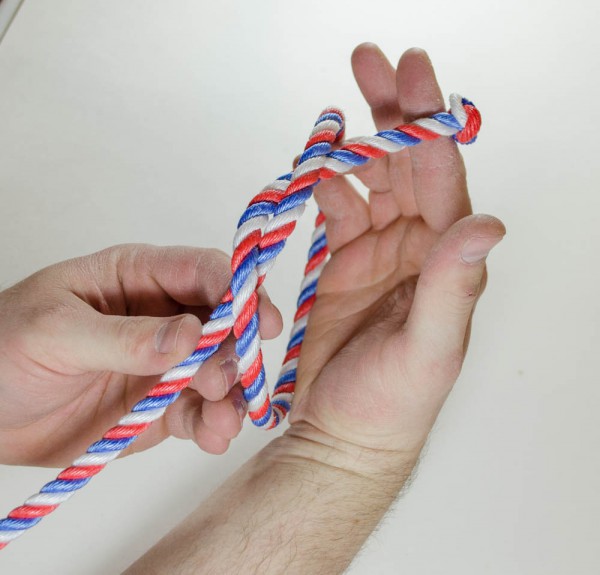
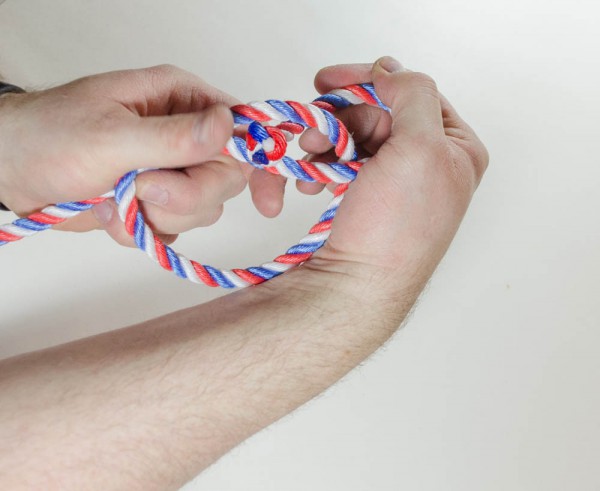
Grab the knot, take it to the left of the loop, then under and up, making an overhand knot.

Make an overhand knot


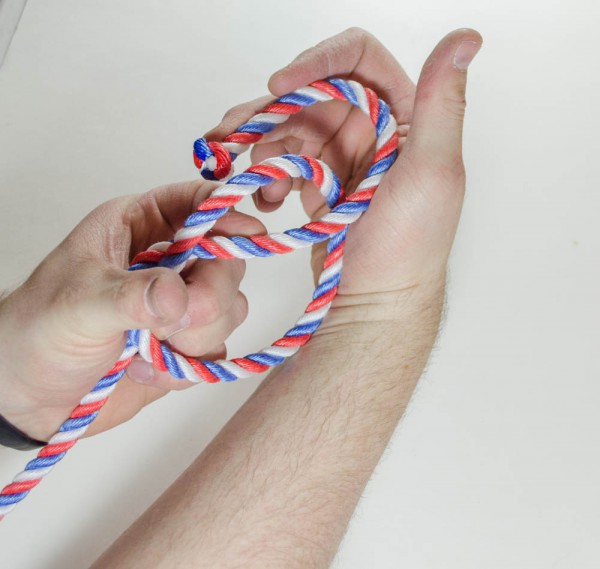
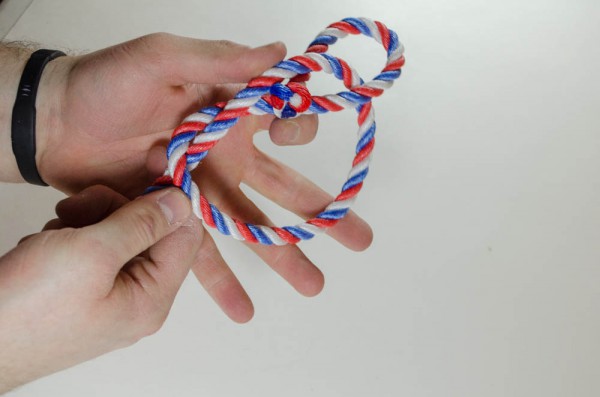
It kind of looks like a pretzel now. Take your knot back behind the top of the loop and tuck it in the top loop of the overhand knot.

Tuck in top loop
Tuck in top loop - part 2


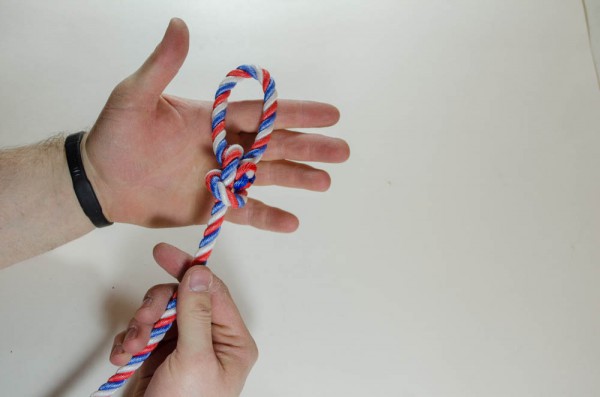
Make sure the upper loop you just made is the size you want and pull the bottom rope tight. Push the stopper knot up as you do this to keep it out of the way.

Pull bottom rope tight


Now you’ve learned how to tie a honda like a pro, just like Tom and the rest of the crew.

Finished Honda Knot
Honda with Rope


Hope you enjoyed the tutorial and feel confident in tying your own hondas. If you have a question or there is something you’d like to know more about, let us know. Tom, Marty, Dani and others are happy to share their skills with us!

Be the first to find out about newly added Western products, special offers just for our online friends, and more helpful tips of the trade by signing up for our emails today. Join your email list here!

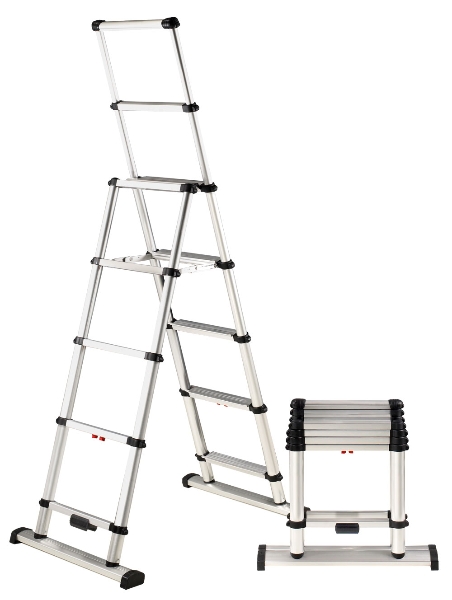
Telesteps' Extend Compact Ladder 10s

This Ladder’s Whatever Size You Need!

- posted by Rose Marion

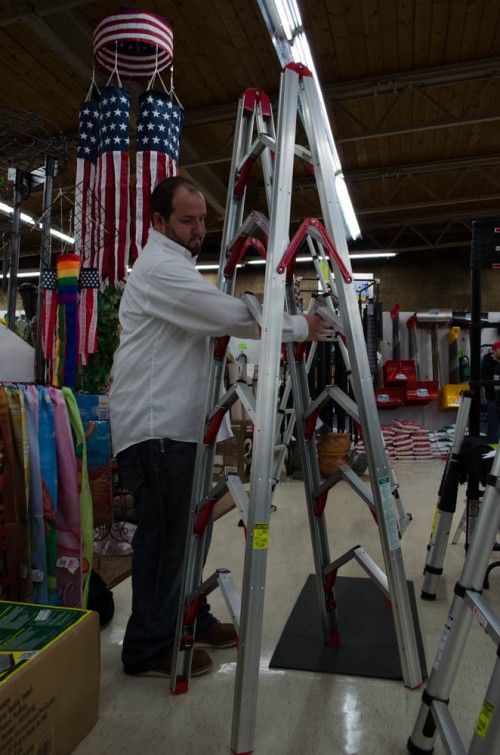
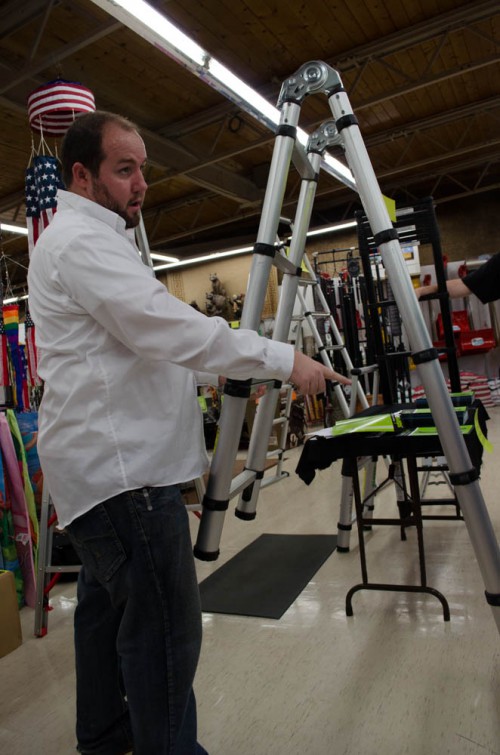
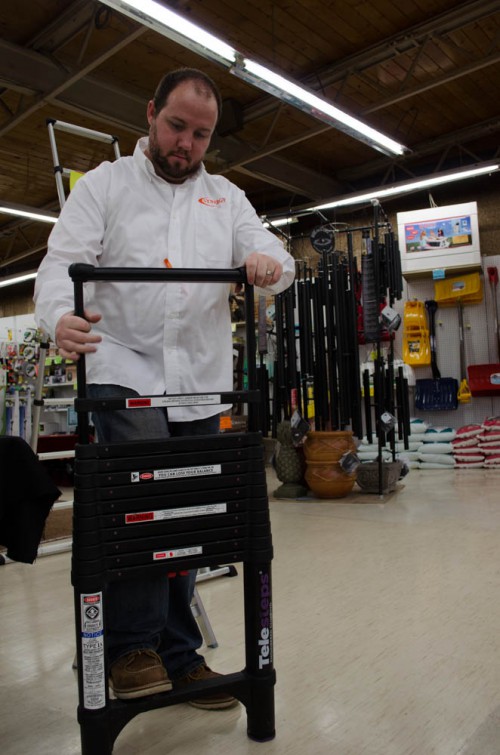
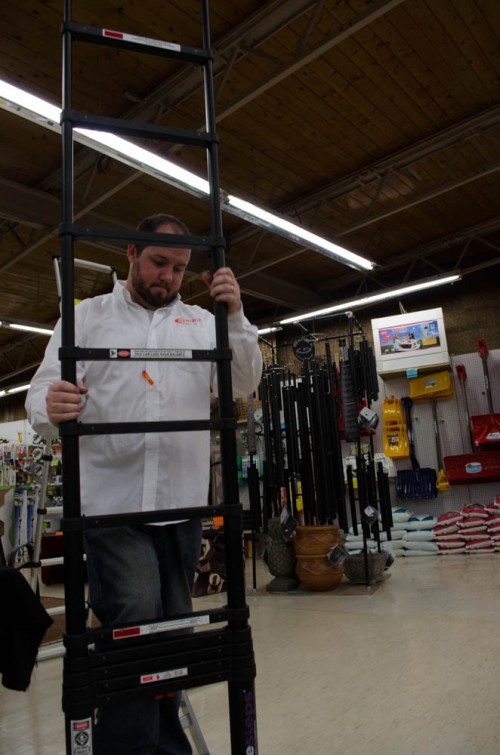
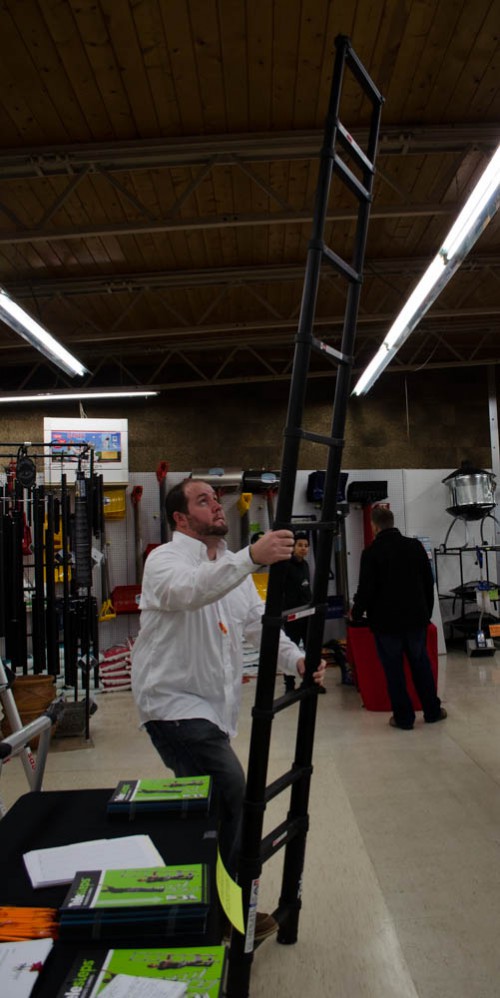
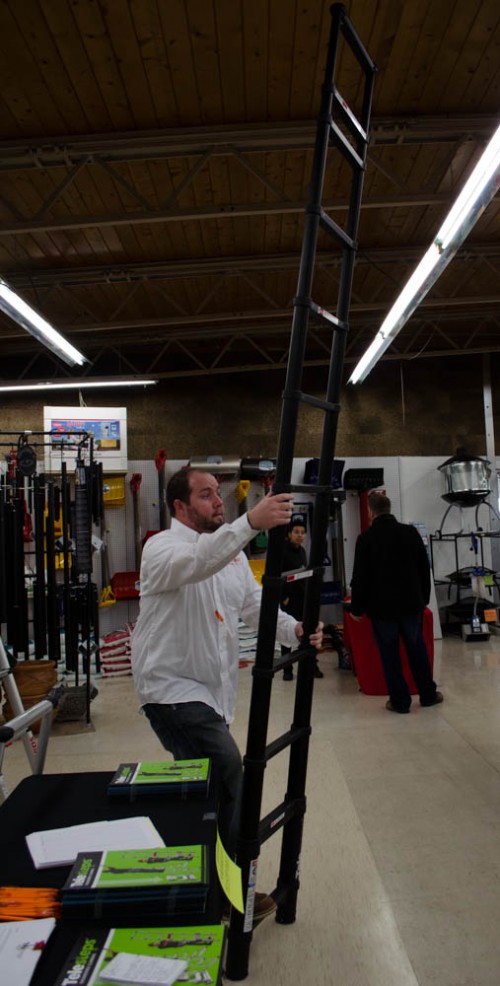
Telesteps' Extend Compact Ladder 10sSpencer from Telesteps came by before the Gun Auction in February to show off the cool ladders made by Telesteps. These are seriously cool ladders!
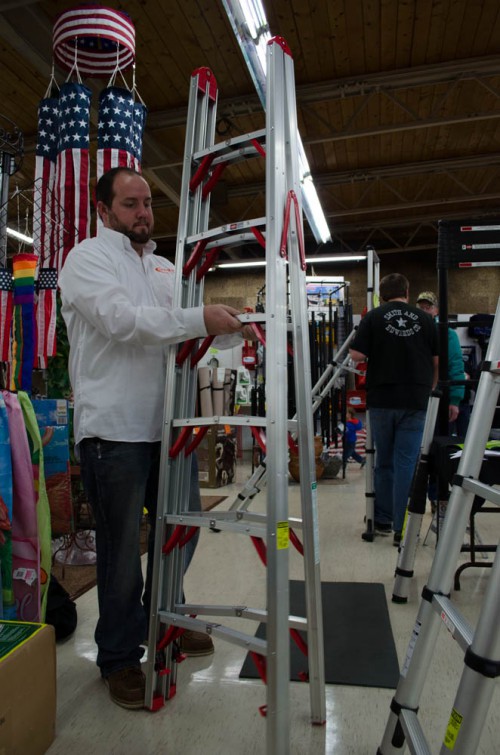
So what are the issues with regular ladders? They’re bulky, hard to store, hard to pack around. If you’re going camping, bringing a ladder would be nice but it takes up a ton of room. RVing, hunting, photography – and if you’re a home inspector, a contractor, or a farmer –hauling around a ladder isn’t that practical. But a ladder that can shrink up into just about a 2×3 foot space? Now that would be handy!

And that’s what these ladders are – handy.

Here’s a nifty ladder that folds down to be the size of a couple 2x4s:

Folding LadderFolding LadderFolded Ladder

And here’s a stepladder that you could set up in your kitchen – or if you need to, on two different surface heights:

Telescoping Ladder

Live in an apartment? This ladder will tuck away in a closet til next time a lightbulb needs changed.

Folded Ladder

The telescoping ladder retracts with just the press of a single button. There are other telescoping ladders, but you have to collapse each rung, one at a time. Not the case with Telesteps.

Now here’s the most interesting Telesteps ladder: the tactical ladder.

Military Tactical Ladder

Military Tactical LadderMilitary Tactical LadderMilitary Tactical LadderIt’s rugged and most importantly, non-reflective.

This is a Mil-Spec ladder: there are 2 of these per each Humvee in Iraq and Afghanistan.

These ladders aren’t super rigid;they have a lot of sway due to being retractable instead of a solid piece of aluminum. But that doesn’t mean you have to worry. Telesteps makes sure they meet the highest safety standards, including OSHA. If the military uses it, you can probably rest assured it’ll hold up for you too.

Telesteps are made of pure aluminum, not recycled, so you’re standing on fresh new materials that will last you for years.

So what’s so special about a ladder that folds up? Well, these ladders make it easy to store, carry, and use them. And for folks on the go – RVers, home inspectors, and more – that’s exactly what we need!

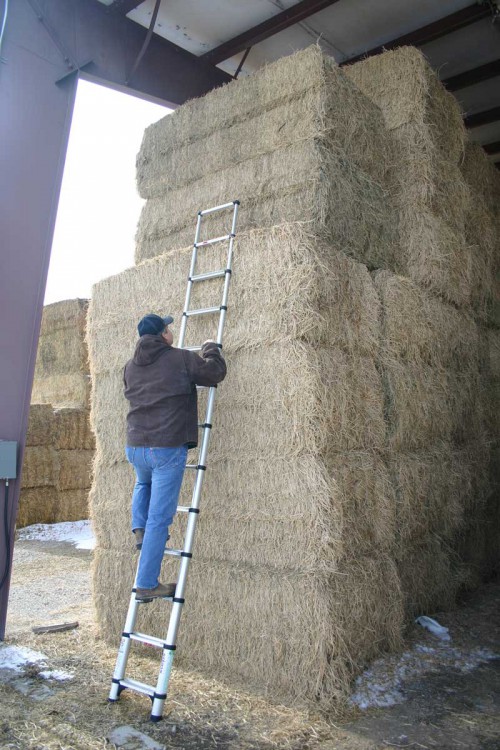
Telesteps ladder in a barn

Extend the ladder to the right height to get up to the hay you need…

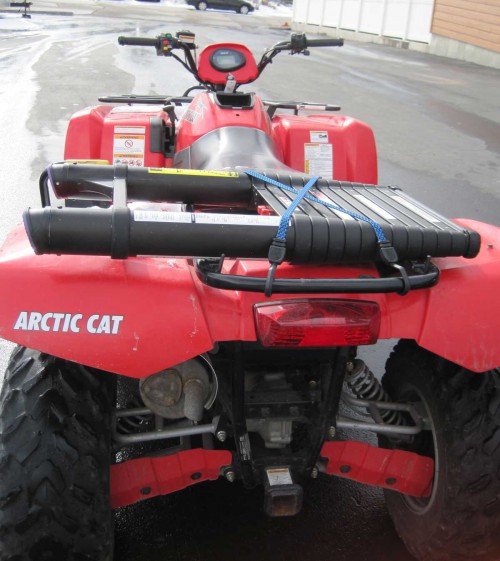
Telesteps ladder folded up on a four wheeler

Loaded and good to go!

See for Yourself

Curious? Check out Telesteps ladders on our website!
Check out Telesteps ladder at Smith and Edwards!