Tag Archives: housewares

Snap to Vent by Zigguraut

Brand Spotlight: Snap-to-Vent Dryer Connectors

- posted by Jerica Parker

What is the most frustrating thing about installing your dryer? For me, it’s all the hoses and attachments, and then, getting them to fit in the laundry room without crushing them.

Even more frustrating is how awkward it is to try to lean over your dryer with the hose clamp and screwdriver to install or clean the ventilation hose.

Luckily for you, and for me, Ziggurat Products came up with a solution to our problem. Snap-to-Vent connectors make this job quick and easy!

How the Snap-to-Vent system Works

When pushing your dryer back against the wall, sometimes the hose can be crushed and this prevents necessary ventilation. Both Snap-to-Vent’s products prevent against crushed dryer hoses and are super easy to install.

The best part about Ziggurat Products company is that it’s local, right here in Kaysville, Utah! Check out the Snap-to-Vent 90-Degree and Snap-to-Vent Straight connections on SmithandEdwards.com.

If your Clothes Dryer vents straight to the duct: Straight Connector

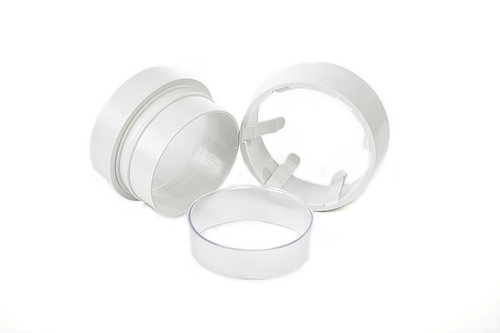
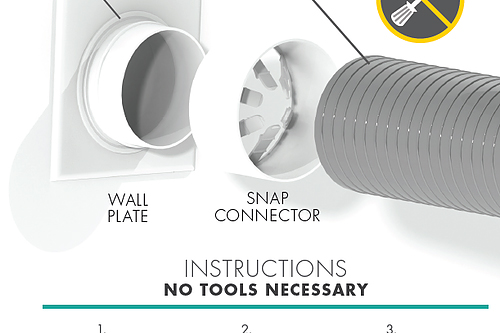
If your dryer duct and wall duct are relatively close together, you will want the Snap-to-Vent Straight design connector. This is an easy connection for installing your dryer, and if you ever need to take it back apart for maintenance or cleaning. Simply pre-connect Snap-to-Vent Straight before you go behind your dryer for installation. Place the snap connector over dryer hose with tines on the inside of the hose. Take the straight and place it so that the tines push against the hose holding the connector tight to the dryer hose. Take the seal ring and either put it around the duct or in the straight and press into the duct until it creates an air tight seal. Easy enough!

If your Clothes Dryer hose has to vent on another wall, use the 90° Elbow

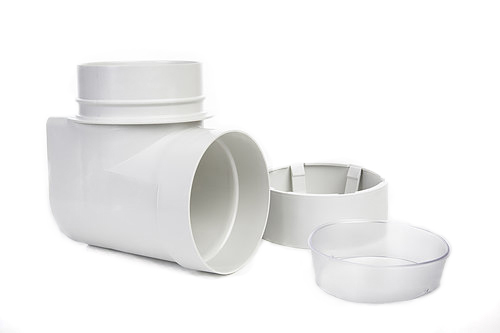
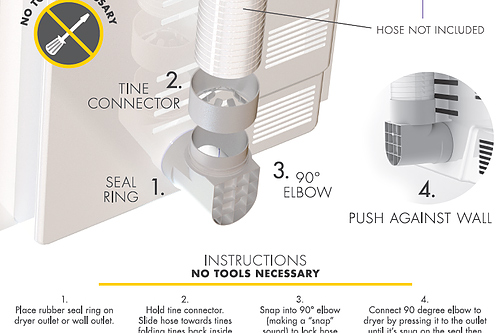
The Snap-to-Vent 90-degree Elbow connection helps to avoid smashing your hose by connecting the hose at a 90-degree angle to your dryer. It comes with easy instructions: Pre-assemble the hose to the snap connector and the snap connector into the 90-degree elbow and snap together. Take the seal ring and pre install onto dryer or wall duct and press the 90 elbow into the dryer duct or wall duct. And voila! The elbow connector can push right up against the wall and still keep your hose protected and working how it should.


Having a clean and clear vent reduces the risk of fires and improves the efficiency of your dryer. With no tools necessary and less time and confusion during installation, how could you not love Snap-to-Vent!

Pickling & Fermenting Crocks Frequently Asked Questions

Fermentation and Pickling Crocks Questions & Answers

- posted by EmmaLee Sessions

You’ve probably had fresh, homemade pickles at some point in your life – maybe even homemade sauerkraut or kimchi. You may have even tried your hand at home pickling and fermenting. Whether you’re an expert, a novice or somewhere in-between I would bet that you have a question or two about pickling crocks.

Right here we answer some frequently asked questions about these fragile, ceramic creations with help from industry experts at Ohio Stoneware.

We’ve carried these Ohio made stoneware pickling crocks for several years (see them online here!) here at Smith & Edwards. Throughout that time we’ve gotten a lot of questions from our customers about pickling crocks. Here are some of the most questions we’ve received. Answers to these questions were provided to us from the experts at Ohio Stoneware and the Utah State University Extension Office.
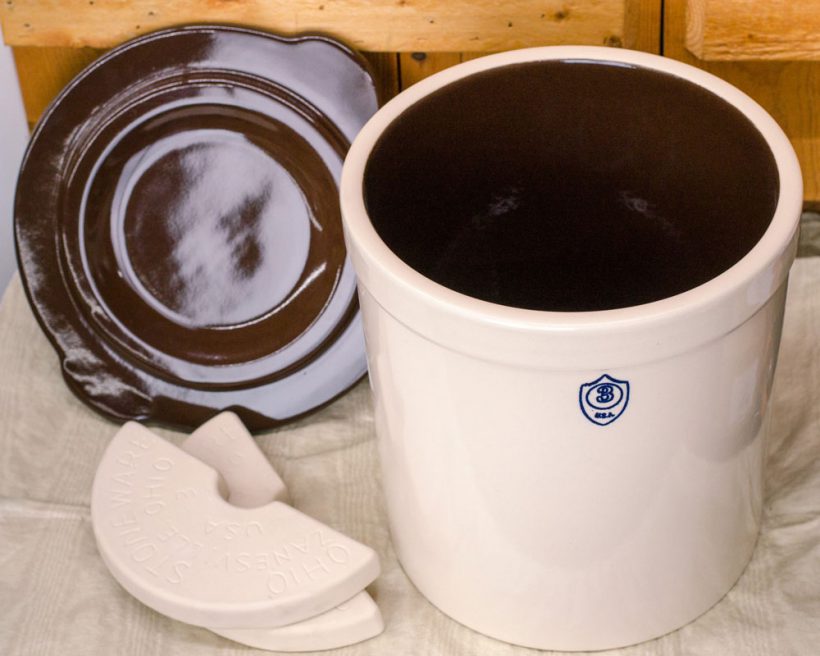
Three gallon pickling crock set: crock, lid, and weights

Have a pickling crock question you don’t see answered here? Leave a comment below and we’ll track down an answer for you!

Pickling Crock Questions about Getting Started

Q: What do I need to get started?

A: You need a pickling crock with a set of weights and a lid. Whether you buy a pickling or fermentation crock is up to you. There are many brands to choose from, but our favorite here at Smith and Edwards is the Ohio Stoneware crocks.

Once you have your basic kit assembled, all you need is a few of your favorite recipes. Then you’re ready to start making delicious, fresh pickles.

You can also try pickling other vegetables, or even try your hand at fermenting!

Find out more tips about getting started with pickling crocks, and a FREE recipe, here.

Q: Are crock lids and weights necessary, or are there “pickling hacks”?

A: These items are necessary. Pickling weights hold your produce under the brine. Pickling crock lids keep excess air & contaminants from reaching your pickles.

However, you can use some shortcuts. Instead of weights, you could use a plate weighted down with bricks. Also, if you have a plate large enough, you could use that as a lid.

Crock weights are designed & sized specifically for your individual crock, so I recommend them – but you can get by without them.
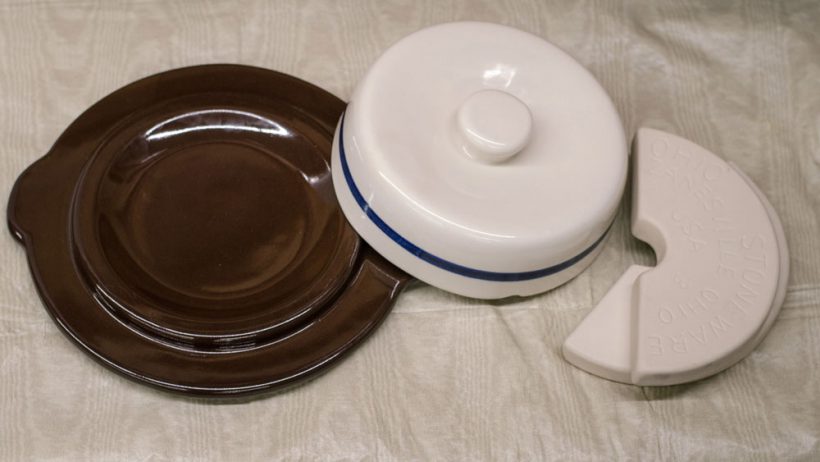
Pickling & Fermentation crock lids and weights

How do I care for my pickling crock?

It’s quite simple, really. Your crock needs only to be washed with soap and water. The goal is to get rid of anything that would cause bacteria to form in your crock. So a little bit of hot water and soap will do just the trick. Here are some more questions we get about cleaning pickling crocks.

Q: Should I wash my crock by hand, or in the dishwasher?

A: Most pickling crocks, like the Ohio Stoneware crocks, have been treated with a special glaze that has been specially formulated to withstand the power of your dishwasher. But – due to their sheer size and majesty, your pickling crocks might not fit in your dishwasher!

If your 1-gallon or 2-gallon pickling crock fits, you can rest easy knowing that you won’t hurt your crock by putting it in the dishwasher. But handwashing is a good bet.

Q: What type of scrubber is best?

A: Most scrubbers will work great with your crock. You’re not likely to ruin the glaze. Still, Ohio Stoneware recommends that you don’t use anything too abrasive. Steer clear of metal scrubbing tools.
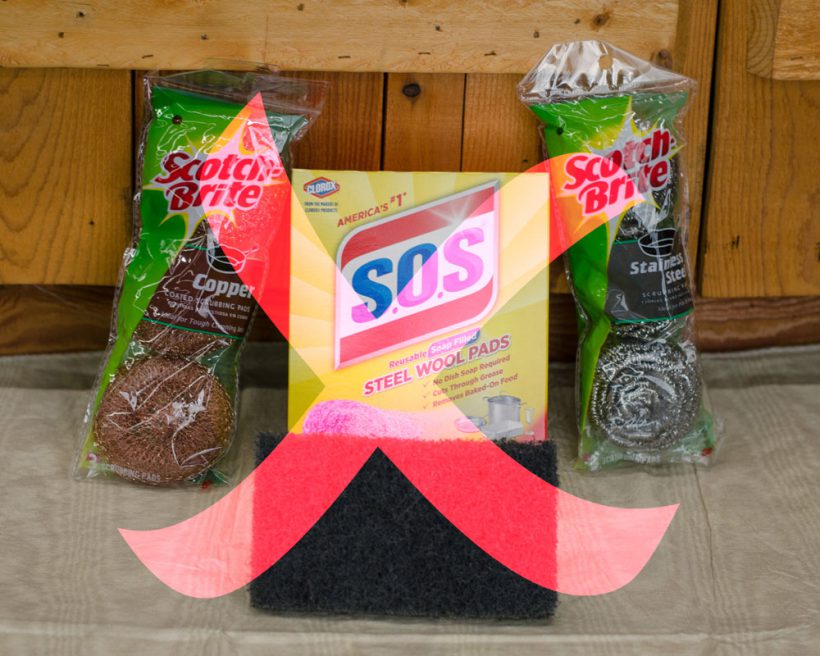
Don't use these abrasive cleaners on your ceramic pickling crock!

The traditional, little green scrubbing pads that you can find in most cleaning aisles (or on our center bargain tables here at Smith and Edwards) are the perfect tool for doing the job. Any other plastic-bristled scrubbers or foam sponges, even our favorite Scrub Daddy scrubbers, will work great on your pickling crocks!
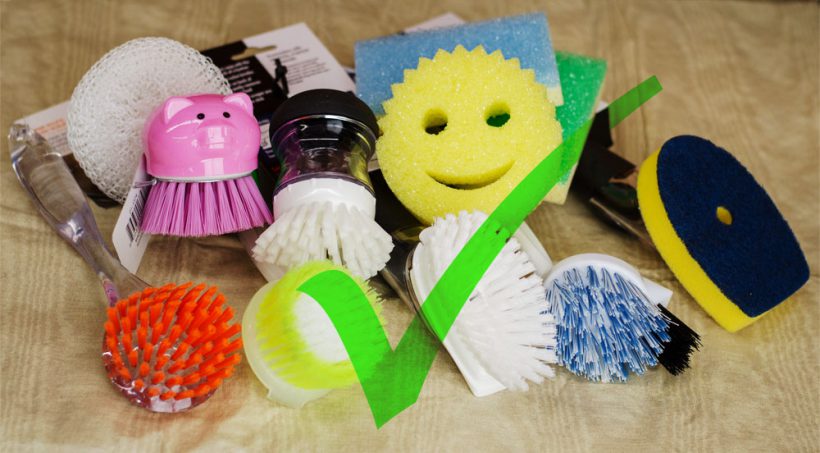
Use the Scrub Daddy or any foam, sponge, or plastic-bristle scrubbers on your pickling crocks

Q: Is it safe to pour scalding-hot water in my crock?

A: Your pickling crock has been coated with some kind of glaze and was heated, or fired, in a kiln. Temperatures inside of an industrial kiln, which is like a giant oven, can reach up to 2500°F. So, a little bit of scalding hot water isn’t going to hurt your crock.

Something I would suggest would be to avoid pouring boiling hot water into your crock when the crock is extremely cold.

Have you ever seen what happens to glass when it is super-heated and then cooled too quickly? You get really cool cracks in the glass making it look like crystal! That’s not something that you want to have happen to your pickling crock.

Q: Can I still use a cracked crock? How about if the glaze is cracked?

A: If the crack is deep enough that the clay of the crock is exposed, it is recommended that you invest in a new crock. It would be impossible to guarantee that an older crock was made with lead-free clay and health and safety should be your number one concern when pickling and fermenting.

However, if you notice that your glaze is cracked but the clay is not exposed, you should be okay to continue using your crock. Be sure and check with the manufacturer if you have questions about the composition of your crock.

Chips in the rim aren’t an issue at all.

More Pickling Crock Questions

Q: Does the color of the interior of my crock have any special meaning?

A: Pickling crocks have been manufactured in this fashion for many years now. That’s just the way it is! Your crock’s color won’t affect your produce in any way.
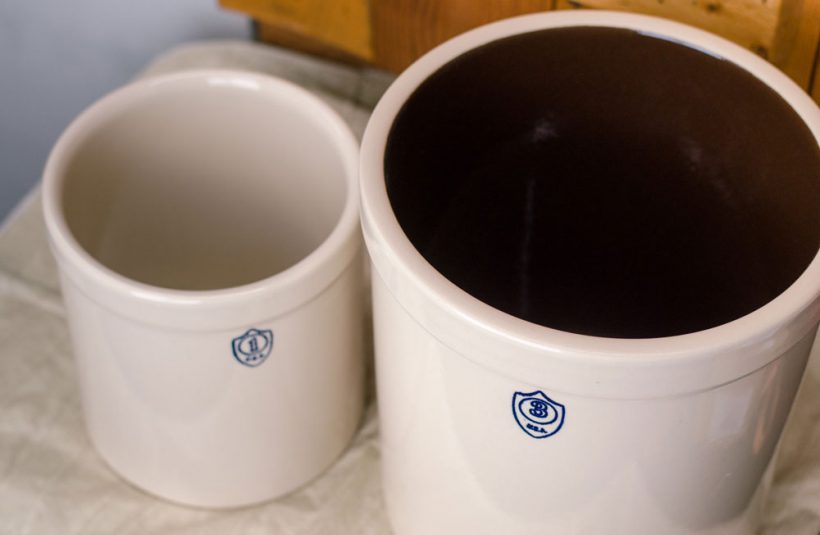
This one gallon pickling crock has a natural interior, while the three gallon crock has a chocolate-brown interior

This one gallon pickling crock has a natural interior, while the three gallon crock has a chocolate-brown interior

Q: Will salt seep through the sides of my crock?

A: Salt should not seep through your crock. If this is happening, the crock’s glaze or walls have been damaged in some way, and it is now time to invest in a new crock.

Also, the denser the clay and more vitrified a crock is, will affect this undesirable occurrence.

Q: Why is the rim of my crock unglazed?

A: There needs to be a seam between two different colors. This is known as a parting seam. The manufacturer removes the glaze from the rim, because it would just look unattractive. That is, again, how crocks are traditionally made.

Q: What is the difference between pickling crocks and fermentation crocks?

A: Trick question! These crocks are used for the same things, and really shouldn’t be named differently. You can pickle and ferment in either an open-top (pickling) crock or a water-seal (fermentation) crock. Let’s take a quick look at the Ohio Stoneware crocks.
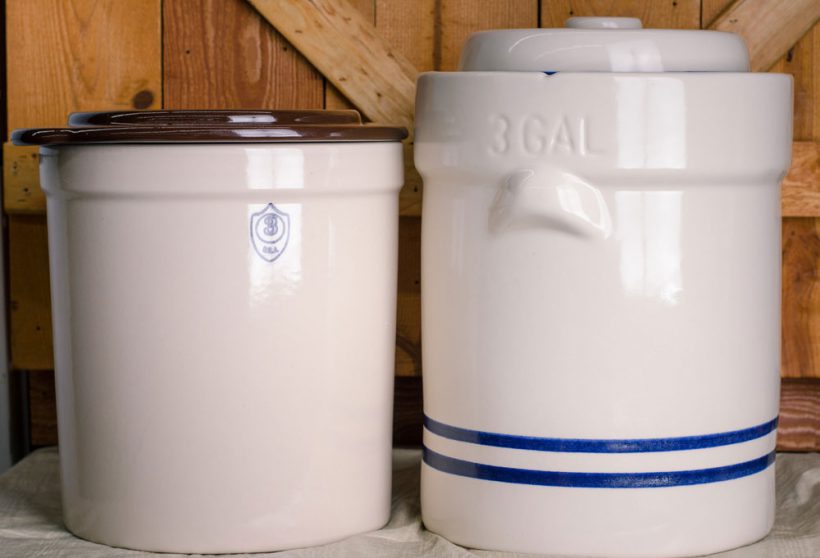
Three gallon pickling crock vs Three gallon fermentation crock

Here’s a side-by-side comparison: on the left is an open-top crock, and on the right, a water-seal crock. They’re commonly called a pickling crock (L) and a fermentation crock (R).

Open-top crocks made by Ohio Stoneware are sturdier and denser. This is because of the form that the crocks are made from. Ohio Stoneware presses these crocks in a metal mold with a hydraulic press.

The water-seal crock is a poured form, so it isn’t as dense. Also, the handles aren’t a functional difference – they are just decorative.

Whether you buy an open-top crock or a water-seal fermentation crock is really just dependent on your personal preferences.
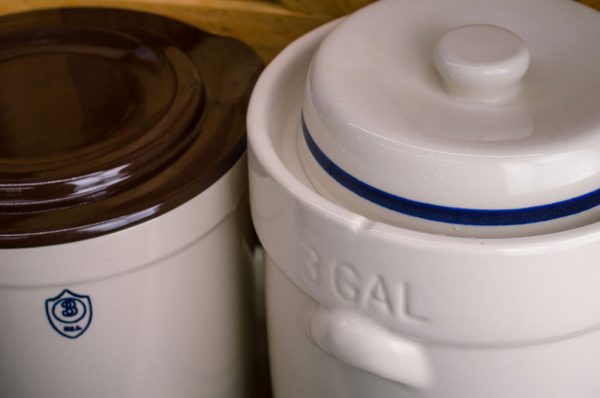
Here's a look at the "moat" in a fermentation crock, or water seal crock.Q: Why does this crock have a “moat” around the opening?

A: Europeans have traditionally used water-seal crocks in fermenting. Americans typically ferment in open-top crocks. There is generally more attention needed for the water-seal crocks, because you have to make sure that the moat stays full of water.

If the water in the moat evaporates, oxygen and other particles will be able to get into your brine solution. This can cause problems, including slimy and soft pickles, cloudy brine, bloom, or other bacteria growth.

You must also continuously check for bloom, which is the bubbles on top of the weights. You must skim the bloom off the brine every 2-3 days to ensure that your pickles turn out perfectly.

Questions about the Fermentation Process

Q: How do I know when my pickles & fermented foods are ready?

A: Follow your recipe, or even do some taste-testing. Really, that’s OK! Taste-testing helps you know how much longer to ferment or pickle.

Generally, the longer you pickle something, the stronger the taste. Just keep an eye on things.

Q: Can I ever re-use my brine? What about with pickled eggs?

A: No, you cannot. Even with pickled eggs! It is always best to start at the beginning for the best-tasting and safest pickles.

Q: What types of salt should I use? Are there different salts for different applications?

A: Use a pickling or canning salt. These salts are cleaner and have no additives, which can affect the quality of your brine and produce. In all of your pickling and canning, use a salt made specifically for these purposes.
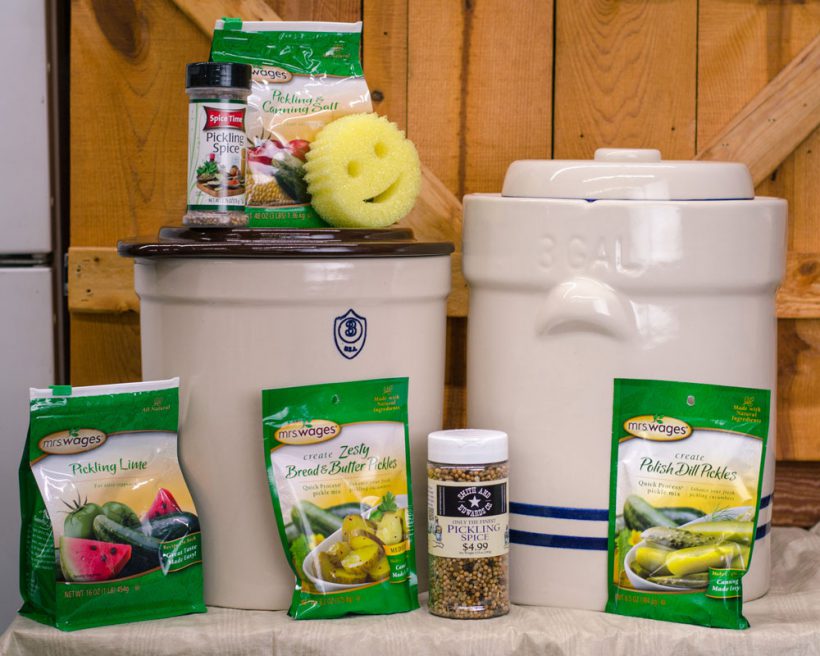
Everything you need for making pickles at home - you can find it all at Smith & Edwards!

Q: Do I have to be exact on the amount of salt and produce?

A: Yes. You need to go-to a good source for the ratio. Follow your recipe.

Q: What temperature do I need to keep my brine?

A: The ideal temperature range for pickling is between 68° F and 74° F. If you are not in that range, you can run into lots of problems:

If your solution is too hot, this can cause soft and slimy pickles. If your climate is fairly warm, then you need to pay more attention to your pickles. You may need to change out the brine more frequently and there is more “pickle-sitting” involved.

If your solution is too cold, it takes a longer time for the fermentation process to take place. This can mean cloudiness in your brine and a poorer-quality pickle.
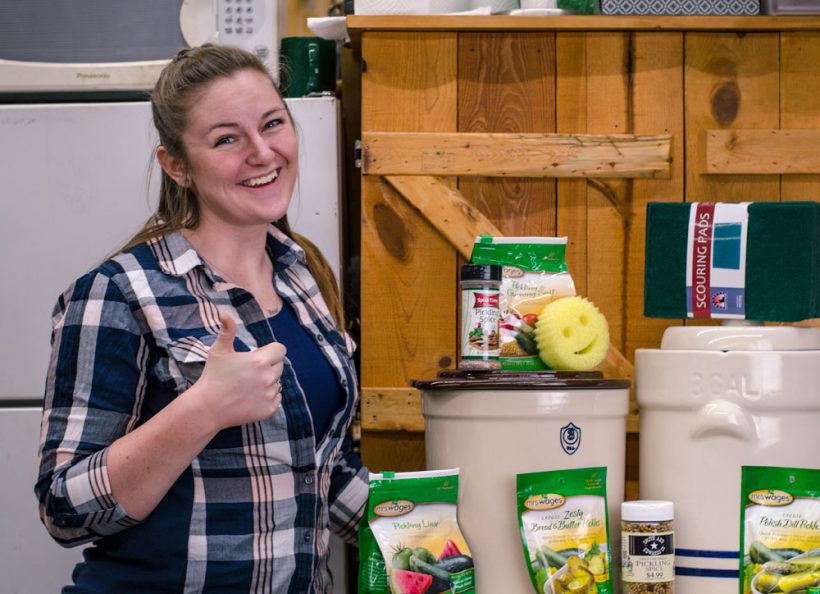
You'll be good to go with these pickling crock tips!

teresa-hunsaker-usu-extension

What’s next?

The best step is to either start or continue pickling!

Whether you’re a seasoned pickling veteran, or just starting out, we are sure you’ll have more questions. Just remember the best resources you have in your pickling adventures.

You can contact your manufacturer for any questions that you have regarding workmanship, materials, and care. Any additional questions you have about pickling and fermenting can be answered by contacting your local Extension office. The Utah State University Extension office is always happy to answer any questions you have about pickling and fermenting and many other types of food preservation and safety as well.

Call the local expert on all things canning and fermenting, Teresa Hunsaker with the USU Extension Service, at 801-399-8200. Or email her at teresa.hunsaker (at) usu.edu.

Remember to stay safe and informed for the best pickles and cleanest crocks in town. Happy pickling!
How to Freeze Corn

How to Freeze Corn – Plus Easy Corn-Cutting Method!
- posted by Jerica Parker

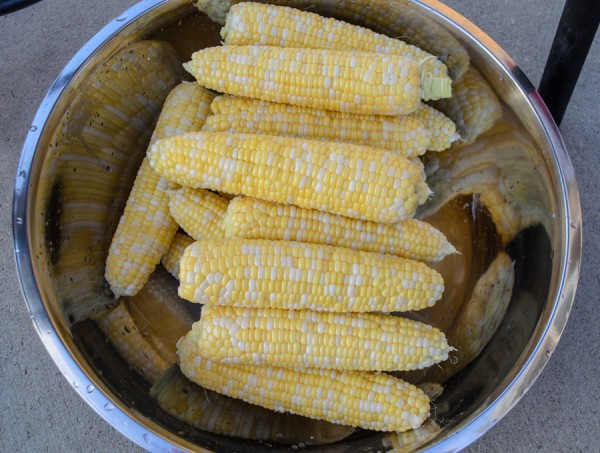
What do you do with all that left-over corn you made for dinner? Throw it out? Stick it in the fridge, forget about it, and then throw it out? Not anymore!

With this easy video & guide, you don’t need to let the words “canning” or “food storage” intimidate you. Melissa in our Housewares department will walk you through the steps.

Easy Frozen Corn Storage: Watch How!

Now, this is something I have done with my family since I was a little girl. We have our own garden and we love corn. So when it is corn season, we all get together to freeze our own corn for storage. It’s so simple and the corn comes out with that same fresh-from-the-garden taste.

How To Freeze Corn in 6 Steps

Here are some quick and easy steps for freezing your corn:

  1. Shuck the corn.
    • Shucking means to take off the husk and the silk hairs. As Melissa shows in the video, one easy method is to hold the corn between your knees and pull the husk toward your body.
      Shucked corn
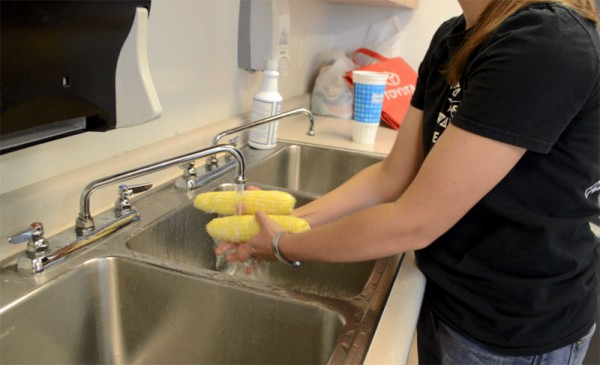
  2. Wash the ears of corn and remove any remaining silk.
    Washing corn before boiling
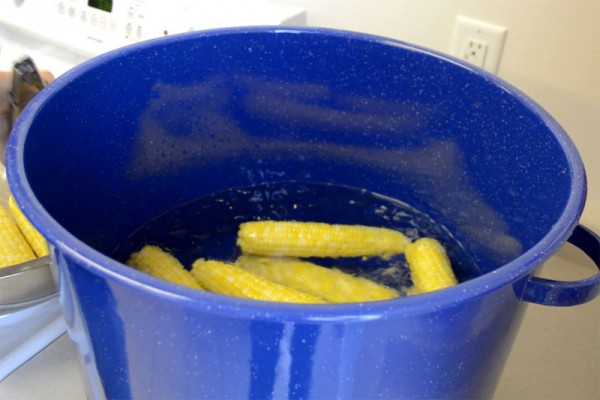
  3. Blanch (or boil) the corn in boiling water for about 6 minutes.
    • The reason behind blanching the corn, is to stop the enzymes that can make the corn taste bad later. Cooking it first helps preserve the flavor when you want to eat it later on.
  4. Place the corn in ice water (using a pair of tongs to protect your hands) to slightly cool them off, just until they’re cool enough to handle.Resting the corn in an ice bath
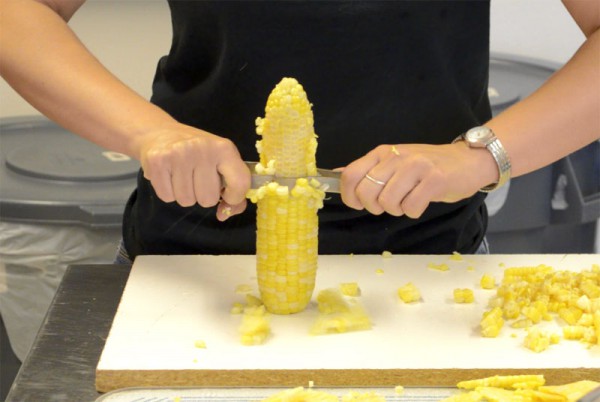
  5. Cut the corn off the cob.
    • This part is optional. If you like, you can freeze them whole, on-the-cob. After step 4, you would wrap them in plastic wrap and then put those in freezer bags to freeze. If you prefer cut corn then you can take a knife and cut the kernels off the cob to freeze. In my family, we have always cut the corn off. It’s your choice!
    • Editor’s Tip: To cut the corn off the cob, you can put them in the center of a Bundt pan. This will hold them as you cut off the corn and it will fall right into the pan. Or a simple board with nails pounded through (about 5″ apart) can hold the cob steady while you cut.
      To make a nailboard, simply take an extra shelf or spare board. Paint it, then hammer a 4" nail through it. Then you can simply set each ear of corn on the nail, and safely cut the corn.

      To make a nailboard, simply take an extra shelf or spare board. Paint it, then hammer a 4″ nail through it. Then you can simply set each ear of corn on the nail, and safely cut the corn.

  6. Now, simply scoop the kernels you just cut off into freezer bags.
    • You can put 1 1/2 to 2 cups in a bag, depending on how big you want your portion sizes to be when you eat them. When the bags are flattened to about 1/2 – 1 inch thick, you can stack them nicely in your freezer to make the best use of freezer space.

More Tips on the Freezing Process

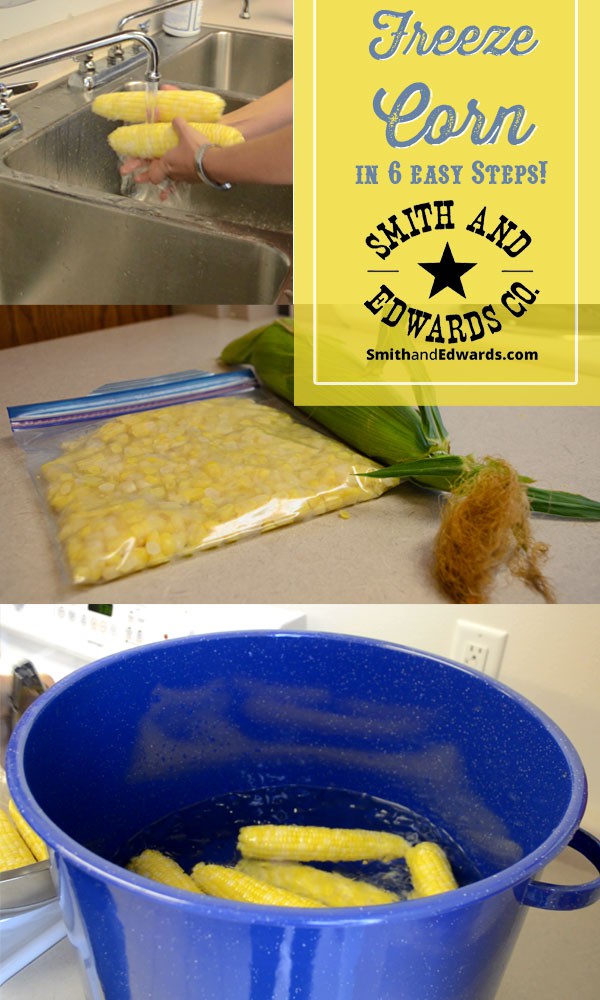
How to freeze corn in 6 easy steps!

  • 11 1/2 dozen large ears of corn should give you about 58 cups of corn to freeze.
  • Vickie, Kitchen Dept. Manager at Smith and Edwards, says to lay the bag with corn flat as you zip it up. When you have about an inch left to zip, squeeze the air out. “If it has air in it in the freezer, it is more likely to get freezer burn,” she says.
  • Melissa has another idea on how to get the air out. She says when you have the full bag, you can slowly lower it into a lot of water, just until it reaches the zipper line. The water on the outside of the bag helps push the water out and you can seal it while still partly in the water.
  • Don’t put too many bags in the freezer at once! If you put a lot of warm things in the freezer, it may begin to thaw out your other frozen foods. But if you put in just a few at a time until they’re frozen, they will freeze faster and won’t thaw any of your other food.

Now you have corn to eat for the next few months! It’s a great and easy way to start up your own food storage without the complicated recipes or big pressure cookers.

We would love to hear back from you! If this worked for you, or if you have any other tips or secrets to help others in starting their canning & food preserving, please leave a comment below.

If you liked this, you will LOVE our other frozen food storage tips! Make sure you check out How to Freeze Beets and How to Freeze Cherries.

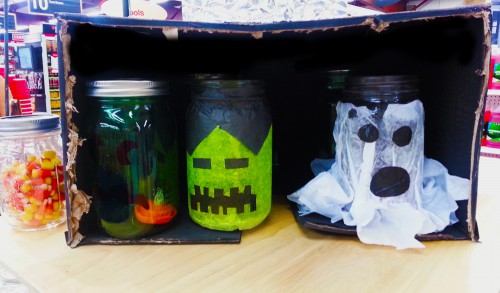
Use tissue paper to make fun faces on mason jars!

Fun Halloween Mason Jar Ideas!

- posted by Rose Marion

The people in our Housewares department are ALWAYS full of ideas! That’s why when I saw they are doing a weekly Mason jar idea I HAD to share it with you!

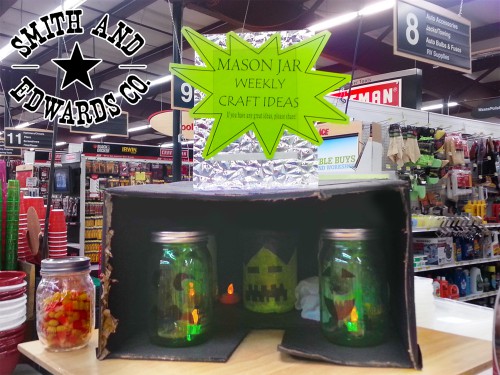
Halloween Mason Jar ideas: Jack O'Lantern Jars Use tissue paper to make fun faces on mason jars!
Place tea lights or battery-operated candles in mason jars for fun decorations. Use tissue paper to create fun Jack o’Lantern faces like ghosts and Frankenstein, then use Mod Podge or glue to glue them to mason jars!

They used a limited edition, green Mason jar to create these fun decorations, but you can use clear ones, too!

You can use Mod Podge or glue to attach tissue paper to the glass jars – OR, you can even use a Sharpie marker to draw on the glass. They glow better when you use tissue paper, we found!

Everyone in Housewares contributed to this Halloween mason jars idea, and Ashley and Melissa put them together.

Nice going, Melissa and Ashley!

Want more Mason Jar ideas?

Mason Jar gift ideas

There are a million and a half fun things to do with Mason jars BESIDES canning… if you’re looking for inspiration, check out Amy’s 7 Super Simple Mason Jar Crafts that Make Great Gifts. Doesn’t she have great ideas? I think it’s something to do with the fact that Amy was in HOUSEWARES before she came to the Web department! Hm…. I think Vickie‘s on to something in her Housewares department, if only she could bottle it…

Dyson Animal Complete vacuum meets confetti at Smith and Edwards

Dyson Vacuum Demo: Animal Complete DC41

- posted by Rose Marion

If you came in the store today, between 11:00-3:00, you could’ve gotten a great deal on Dyson Vacuums! We had special pricing on Dyson vacuums and you could even try out a Dyson yourself at our Dyson vacuum demo.

Want to hear about all our in-store demos and giveaway? LIKE us on Facebook, and sign up for In-Store Offers for our best deals at our store in Ogden, Utah!

Today we had Mike and Eugene from Dyson drop by Smith & Edwards to demonstrate the DC41 Animal Complete vacuum. This is a beast!

Plus, not only could you try the vacuum out, vacuuming up confetti, metal shavings, dust, and fluff, but we also had great deals on Dysons during the demo – saving you $200 or more on certain models!

Dyson DC41 Animal Complete Vacuum available at Smith & Edwards

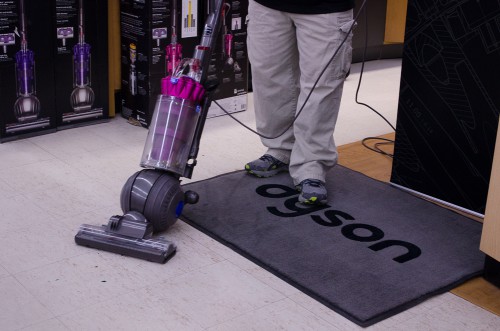
Dyson vacuums are amazing because they never lose suction! Just watch.

Uh oh….

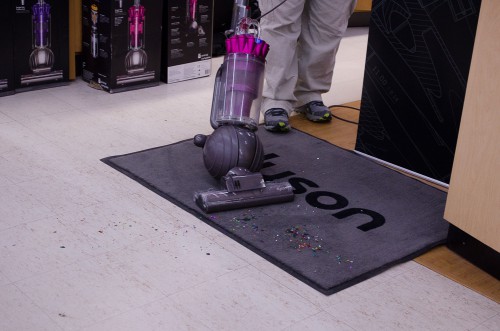
Time to break out the confetti...

Someone’s breaking out the confetti…!

By the way, check out the angle Mike’s getting thanks to the Dyson ball –

Dyson Animal Complete vacuum working on confetti

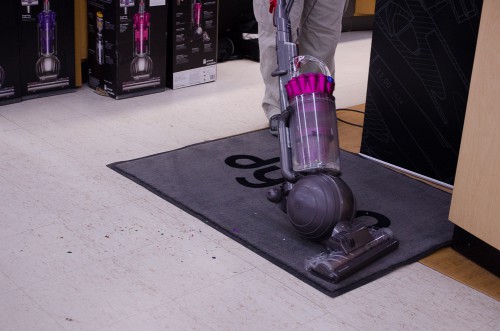
Vacuuming up the confetti

Works on carpet…

Vacuuming confetti on hard surfaces with DC41

Then because of the unique Dyson active base plate, you can switch to vacuuming on hard surfaces like tile without losing suction.

The Dyson active base plate on this vacuum self-adjusts to carpet and hard surfaces, so you won’t lose suction as you vacuum across your home.

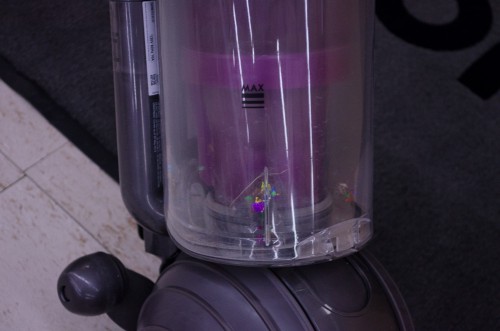
Confetti in Dyson canister at Smith and Edwards

Confetti in the Dyson DC41 canister

Excellent for Allergies and Pets

The Dyson Animal Complete is simple – there are no bags or filters to replace, and you can empty the canister in just a push of a button.

And if someone in your family has allergies – or you just have a lot of pets to clean up after – you’ll love how many allergen particles, pollen, and dust Dyson vacuums can capture. Plus, your Dyson vacuum will retain the dust it sucks up too, instead of venting it back into your rooms!

The Attachments Really Make this Vacuum Stand Out

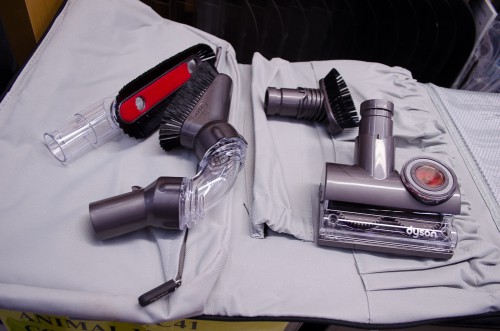
The Animal Complete DC41, the model Mike demonstrated, comes with a bunch of cool attachments in a case.

DC41 Dyson Animal Complete Vacuum comes with several attachments in a nice bag.If you or your family have long hair (like me) or lots of pets, you know the chore of cutting hair & fur out of the vacuum base. But check out this extension – it won’t get clogged:

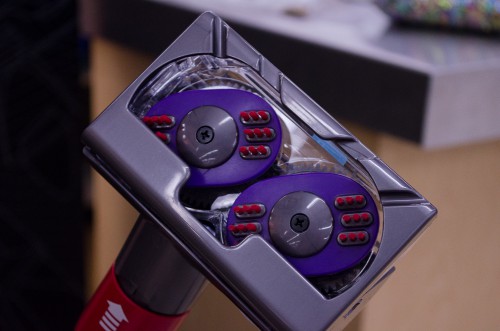
Tangle Free Hair Tool on Dyson Animal Complete

This tangle-free hair tool rotates in opposite directions, so instead of getting stuck, hair and string go…

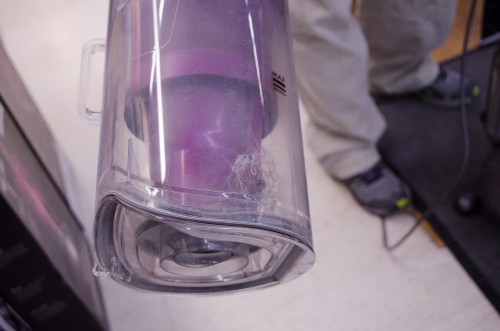
Hair didn't get tangled in the Dyson brush

…directly into the canister!


The wand extends to 16 feet, so you can clean your ceiling fans with your feet on the ground – no chairs or stools to climb on to dust your fans.

Use the angle brush to clean your ceiling fans! Demo'd at Smith and Edwards

Use the angle brush to clean your ceiling fans!

Dust with your Dyson vacuum head

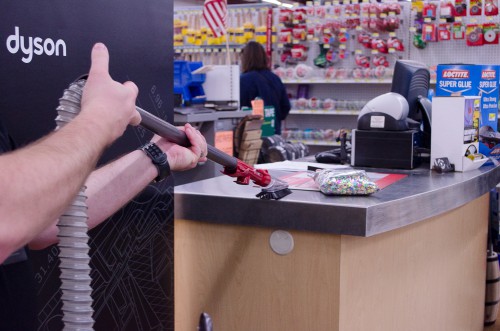
Use this extension to dust surfaces.

Dyson DC41 Animal Complete Crevice Tool

Crevice Tool


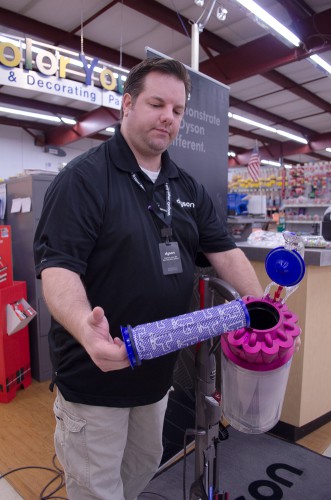
Dyson Animal Complete Vacuum's great internal filter for lifetime use

Great internal filter for lifetime use.

Like us, Dyson will give you great customer support

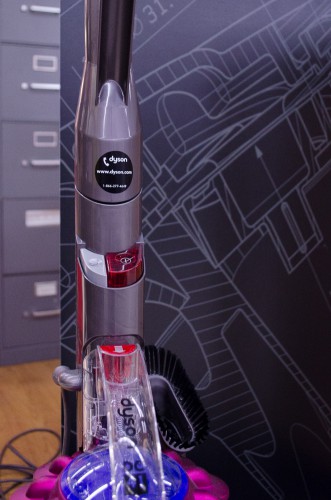
And one more thing about Dyson vacuums: They put a 1-800 number on the vacuum handle, and you can call about anything – whether your vacuum’s working great or needs some help. They’ll recommend the attachments you should use and how to best clean your home’s carpet and floors.

Plus, when you register your new vacuum, you can give them your email address and they’ll send you reminders on when to rinse your filter (the recommendation is to wash your filter every 3 months).

Dyson's number is on the vaccum handle.

Dyson’s 1-800 help number is on the vaccum handle.


Thanks Mike and Eugene for coming by and showing us the Dyson Animal Complete DC41! We’ve got a great selection of Dyson vacuums here for you to check out at Smith & Edwards. Come on out and see us just off I-15 at exit 351 and take home a new vacuum today.