Tag Archives: how to

How to tie a Double Diamond Knot

How to tie a Double Diamond Knot and Horse Packing Q&A

- posted by Rose Marion

We were privileged to have Travis Sparks come by and do a packing demo the other day. Hunting is a totally different experience with horses. One hunter told me his story about finally getting his deer right at the end of the day, and was dreading the hike back uphill to the truck. Luckily some horse packers saw him, came down, and helped him quarter & pack out the deer. He would have been out there way past sunset without their help!

Packing isn’t just about packing out quarters. Your mule or horse might have tent poles, a shovel, lawn chairs, your bedroll, coolers, cooking supplies, or feed on his back. When you throw in antlers into the mix, packing turns into a real art & skill developed through practice.

Travis is a member of the Back Country Horsemen of Utah & does a lot of packing himself. He gave us a detailed demonstration of the Double Diamond hitch, and answered several questions about packing.

Watch Horse Packing Tips & Knot How-To

I split Travis’s presentation into two videos for you. First, you can see exactly how to do the Double Diamond knot on our trusted cavalry horse. This is a great hitch for top packing. Then, sit back and listen to Travis’s question & answer session about packing elk antlers, using a pack scale to balance your load, using soft packs vs hard packs, and tightening a cinch.

Packing with a Double Diamond knot

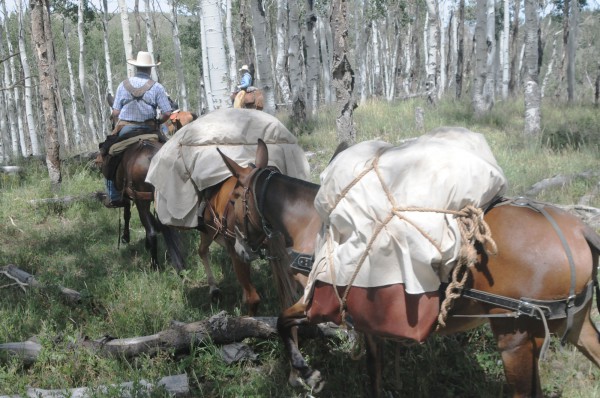
Packing with a Double Diamond knot. Thanks to Troy Higgs for this picture!

Watch: How to tie a Double Diamond Knot

Use a 45-foot rope to make this hitch, which starts out similar to the box hitch. Make sure and pull the rope tight.

Watch: Horse Packing for Hunting Q&A

Where to get those Pack Bags
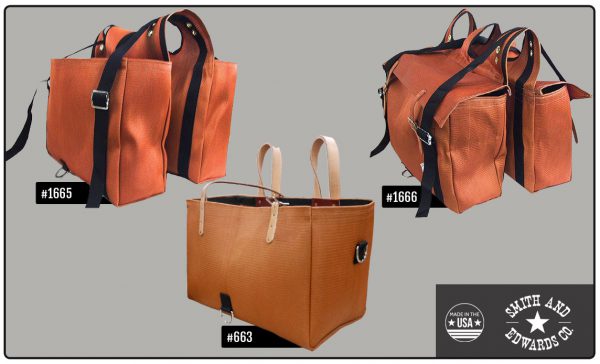
Smith & Edwards pack bags for hunting on horseback

We make the pack bags shown in Travis’s demo, these are the #663 designed for coolers. We also make a narrower bag without flaps, #1665, and #1666 with flaps.

Of course I’ve got to mention that we proudly make those bearcloth packs you saw in the video, and you can get them right here on our online store. Read about our Tack Workshop in our Ogden store.

Do you have questions about horse packing that Marty or Travis can answer for you? Let us know in the comments below!

Travis’s Tips for Packing

  • Check your cinch after moving your animal – always make sure it’s tight!
  • Your goal is to make everything into a single package that moves together, without a pivot point
  • Keep your horse safe from antlers: make sure the rack moves along with the pack bags. Try not using a stick or a branch to elevate the horns, because they don’t ride well.
  • Keep the center of gravity low
  • Keep in mind what will hit a branch first: your pack bags or antlers?
  • Don’t take shortcuts, don’t get in a hurry – pack it right.
  • Rule of thumb, pack 15% of an animal’s weight. So for a 1000 pound animal, aim for 150-160 pounds split over the two sides.
How to make a Boa Paracord Bracelet (also called Trilobite Bracelet)

How to make a Boa Paracord Bracelet

- posted by Rose Marion

While I was walking past the Rope Room the other day, our Hardware buyer, Blaine Taylor, called me over. “I have a surprise for you,” he said.

Next thing I knew, I found myself in a dark sideroom looking at a bundle of paracord that glowed in the dark!

Just a short time under an LED flashlight was all it took to activate the PARAGLOW white and light blue paracord Blaine just got in. “Wow!” I thought. “This would be so cool to turn into a bracelet for hiking!”

I like having reflective gear, especially as it starts to turn fall, so if I’m walking near twilight the cars can still see me.

A glow in the dark paracord bracelet would be GREAT!

“That’s not all,” Blaine told me. “I’ve got another new paracord. This orange paracord has a jute strand, for starting a fire, AND it’s got an 8lb test fishing line inside.”

You can find reflective & glow-in-the-dark paracord online here, and at the Rope Room in-store at Smith & Edwards. This is some neat stuff!

Light Blue Glow-in-the-Dark 550 Feet White Glow-in-the-Dark 550 Paracord - 100 Feet Neon Orange Fish & Fire 550 Paracord - 100 Feet
Light Blue Glow-in-the-Dark 550 Paracord – 100 Feet White Glow-in-the-Dark 550 Paracord – 100 Feet Neon Orange Fish & Fire 550 Paracord – 100 Feet

And the bracelet? Jerica in the Web Department helped me make it. Well, I found the bracelet and she figured how to make it! This is a Trilobite bracelet, aka ladder rack or boa paracord bracelet. Here’s how she made it!

Making the Paracord Bracelet

You’ll need:

  • About 85″ each of 2 colors of 550 paracord (6″ wrist)
    If you want a single color bracelet, use 170″ and skip step 1.
  • 5/8″ buckle
  • Lighter
  • Scissors

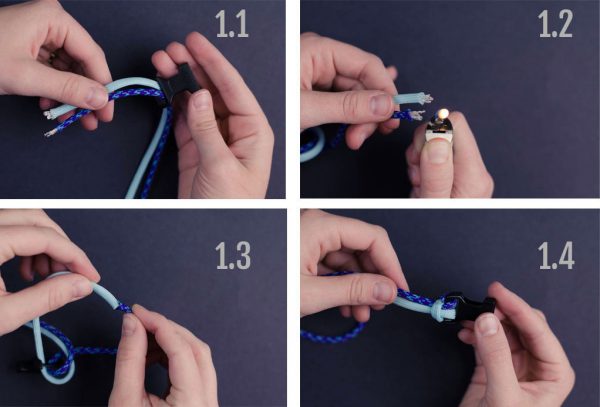
1. Thread the ends of your paracord into the receiving end of your buckle. Then, melt the ends together.

Make a lark’s head knot, hiding the seam of the thread so it doesn’t scratch your wrist.

Starting the boa weave bracelet

2. Put the paracord through the two openings in the other buckle. Measure the paracord around your wrist. Add 1/2″ and move the buckle to that point.

Measure the bracelet

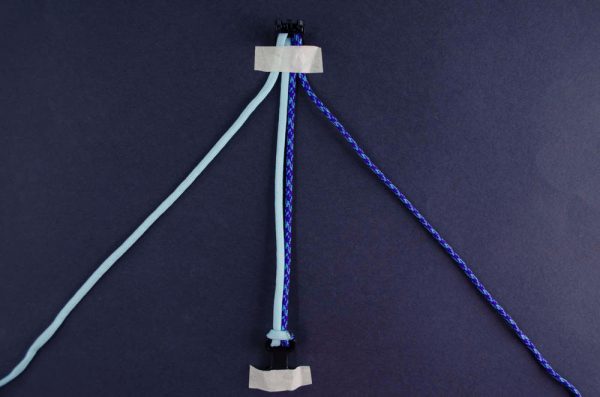
3. Tape the buckles to the table, with the 4 strand buckle at the top. You have 2 outer and 2 inner strands now.

Taping the bracelet to the table

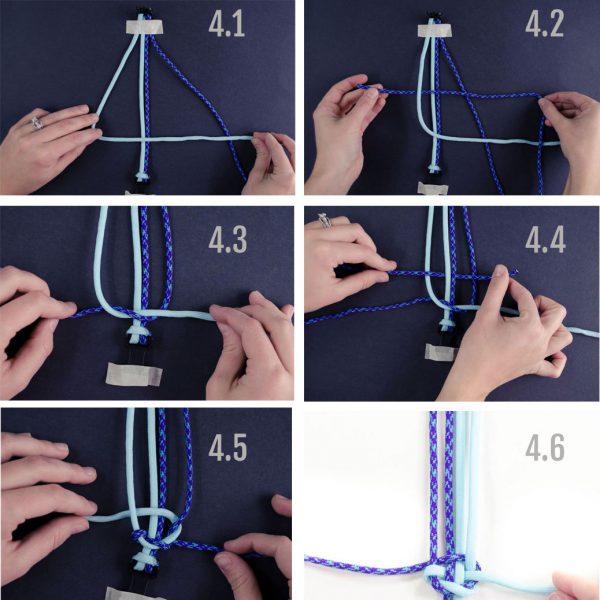
4. Make a 4 with the outer left strand, and hold it over all other strands. Bring the outer right strand over the 4 tail, over the inner strands, and under the 4. This will make a Granny knot over the bottom buckle.

Finishing the bracelet beginning knot

In the photo above, for the fourth picture, bring the strand you just wove with, over the outer left strand, under the inner strands, and over the outer right strand.

Then, take the outer right strand and weave it under the strand you just wove with, over the inner strands, and under the outer left strand.

Good job – you’ve finished the hardest part!

We made the bracelet twice, and flipped the colors the 2nd time. We apologize!

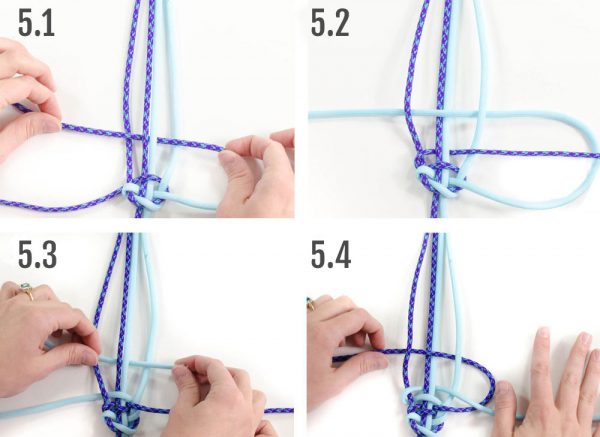
5. Now we’ll just weave to the top of the inner cords.

Weaving the Boa Bracelet

Take the left outer cord and weave it over the first inner cord, under the middle inner cords, and over the last inner cord.

Take the right outer cord and weave it under the last inner cord, over the middle inner cords, and under the first inner cord.

Repeat this process all the way up the bracelet!

6. Now and then, stop to adjust the snugness of the weave, so you can have a consistent & tight weave.

Finishing the Bracelet

Here’s how we finished the boa bracelet.

1. Push & tighten the weave. Then, loop the strands so that they are next to each other. Trim the paracord to be just long enough to grasp.

2. Take your lighter and melt the ends of the strands. Hold the ends together and press with flat nose pliers to seal them together.

Tip: Have a friend hold the lighter for you, so you can hold one strand in each hand, and melt them together!

Finished Boa or Trilobite Bracelet - that glows in the dark!

You’re done! Enjoy your bracelet!

Check out our HUGE collection of Paracord on SmithandEdwards.com

Want to make more Paracord Bracelets?

Looking for more Paracord Bracelet patterns? Here are some sites & channels we found that have GREAT tutorials!

How to make dried apricots & apricot freezer jam

How to Make Dried Apricots & Apricot Jam

- posted by Rose Marion

What do you do with a couple pounds of fresh Utah apricots?

Some of the best ways to preserve that fresh, tangy sweetness are dehydrating apricots and turning them into apricot freezer jam.

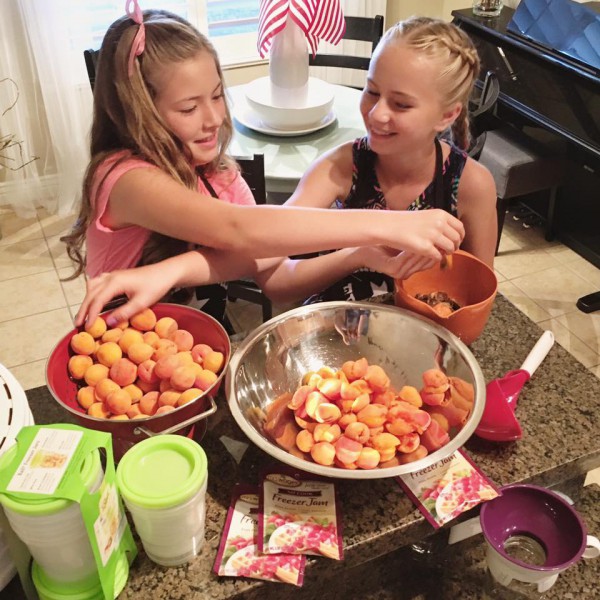
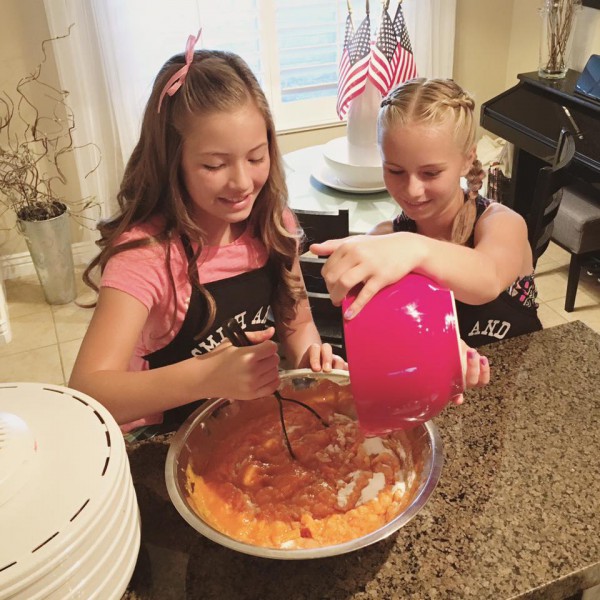
Maggie & Hannah are 10-year-old friends, cousins, and daughters of Smith & Edwards employees. They gave it a shot! Here’s how they did – and if they can do it, YOU & your kids can, too!

Maggie & Hannah about to make apricot jam and dehydrated apricots

Making Dried Apricots

You’ll need:

  1. Wash and dry the apricots. Then, cut the apricots in half. Lastly, separate the halves, and pull out the pit.
    Dehydrating Apricots: Pitting
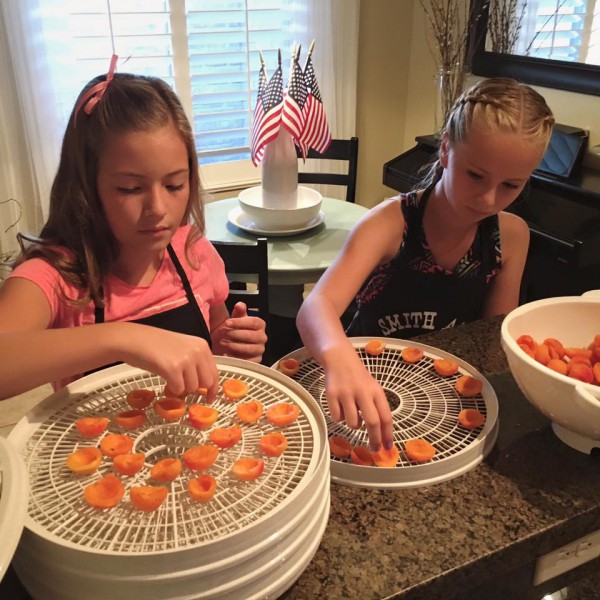
  2. Now arrange the apricots on your dehydrator screens. You can actually place them closer together than this, because they’ll shrink as they dry.
    Dehydrating apricots: placing the halves on the dehydrator screen
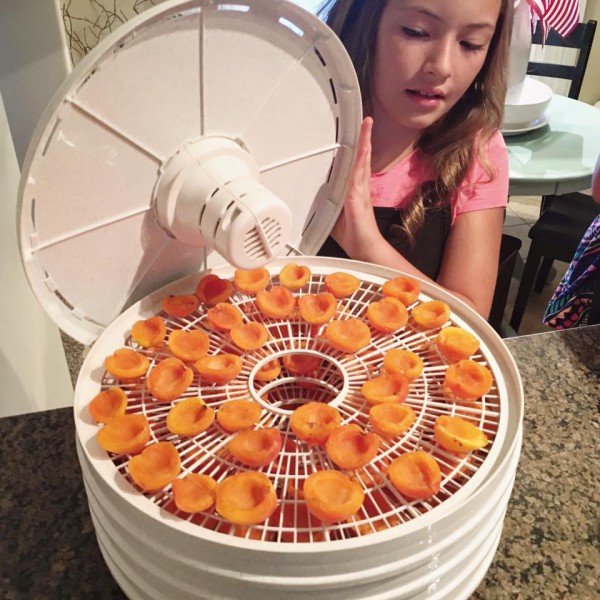
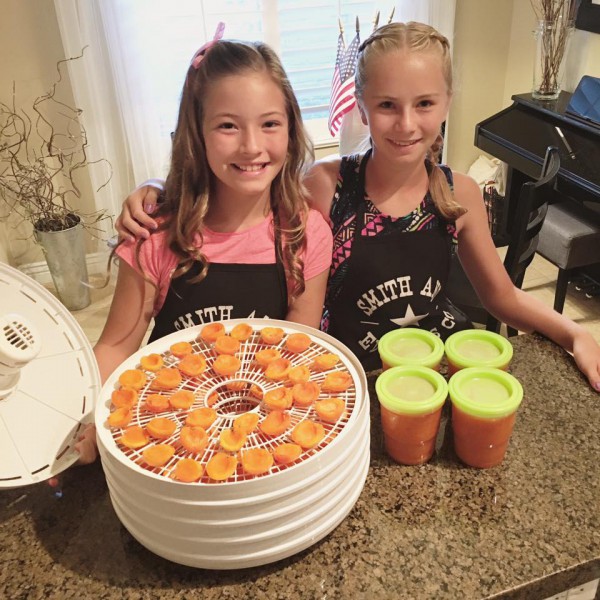
  3. Let them dry according to your dehydrator’s instructions. This batch only took Maggie & Hannah about 1 hour.
    Maggie making dried apricots

Making Apricot Freezer Jam

We used:

  1. Cut and discard the apricot pits, then mash the apricots.
    Making apricot freezer jam: mashing the apricots
  2. Add sugar, lemon juice, and the Freezer Jam fruit pectin, according to the package directions.
    Making apricot freezer jam: adding sugar and lemon juice
    Making apricot freezer jam: adding pectin
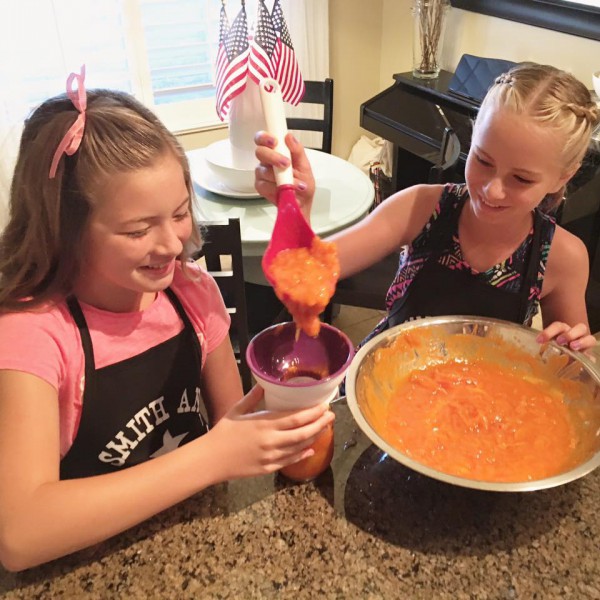
  3. Stir, then ladle the apricot jam into freezer jam jars.
    Making apricot freezer jam: ladling into freezer jars
  4. This apricot freezer jam will keep in the fridge up to 3 weeks, or in the freezer up to a year!
    Maggie & Hannah making dehydrated apricots & freezer jamTheir grandmother has a secret about adding crushed pineapple to the recipe. Try it out and see what you like!

Your Turn!

What’s happening in your kitchen? We love to see pictures of what you’re making! Leave a comment, tag us on Facebook or Instagram, or send us an email.

How to Freeze Beets

How to Freeze Beets

- posted by Rose Marion

Beets are a yummy vegetable packed with nutrients like manganese, potassium, copper, magnesium, vitamin C, iron, and vitamin B6. They’re a delicious Utah summer crop, and you can freeze beets to enjoy them year-round.

Our produce experts Vickie Maughan, our Housewares manager, and Jean from Pettingill’s Fruit Farm, teamed up to freeze beets last week and here’s how they did it.

You’ll need:

Directions: How to Freeze Beets

  1. Put on your gloves!
  2. Wash the fresh beets and cut of the beet greens, leaving 1″ of beet green stems. Don’t remove the tails or beet green stems, because if you cut them off, the beets will bleed out and lose their color.
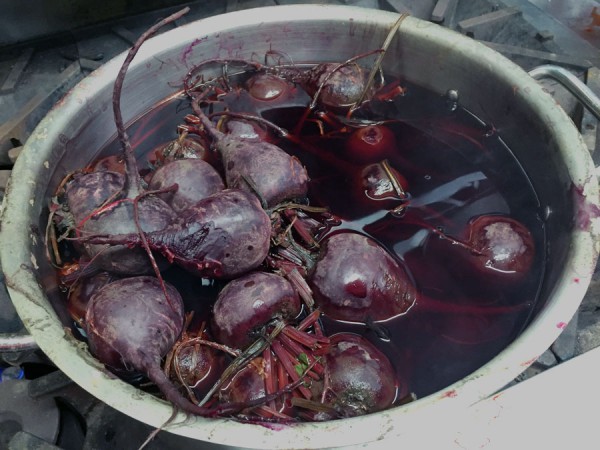
  3. Boil the beets in a pot of water until tender. Then, set aside and let them cool off.

    Boiling the beets with their stems & tails on will keep the rich purple-red color from bleeding out!

    Boiling the beets with their stems & tails on will keep the rich purple-red color from bleeding out!

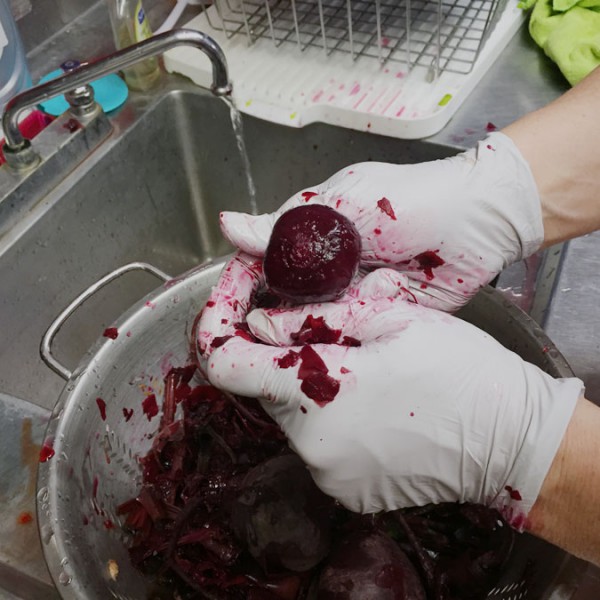
  4. Peel the beets. You don’t need a tool: you can massage the beet skin, tail, & beet green stems and they’ll fall off the beet in your fingers.
    Rinsing and peeling the beets
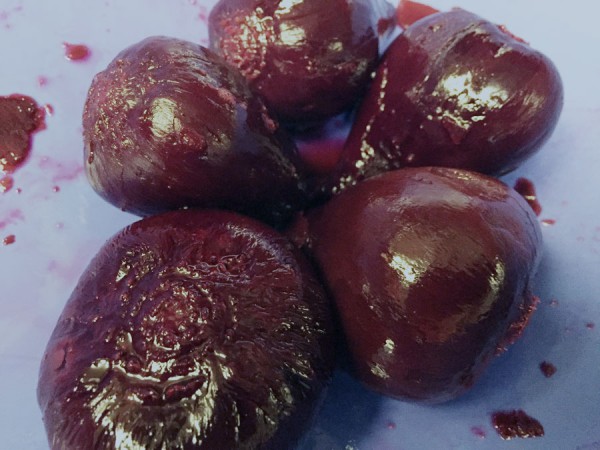
    Whole peeled beets, ready to slice and freeze
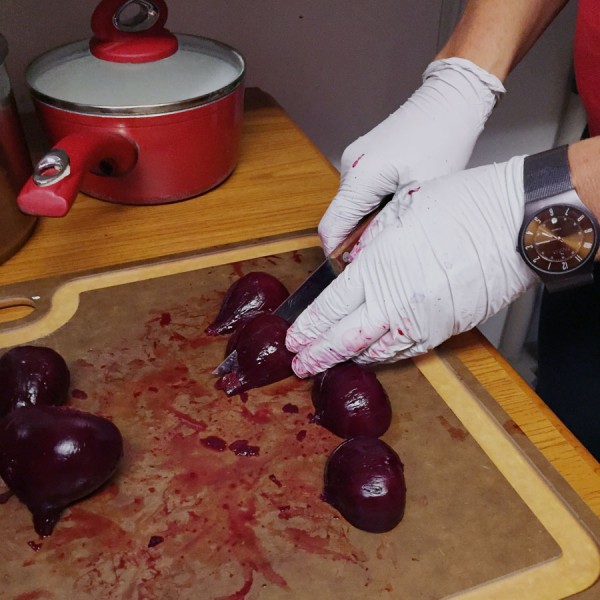
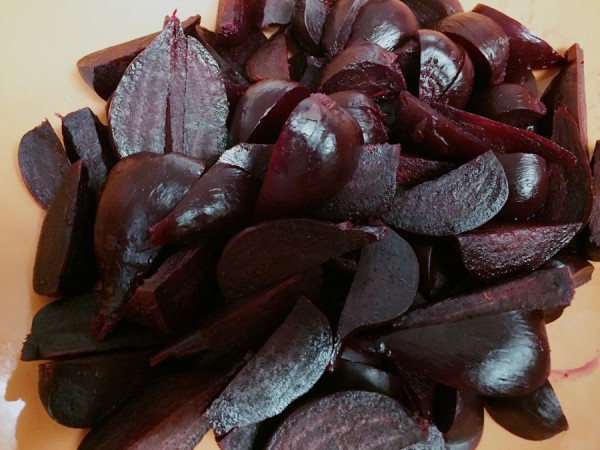
  5. Slice, dice, cube, quarter, or halve the beets any way you’d like. We love mandolins for slicing vegetables!
    Slicing peeled beets
    Chopped beets ready to freeze
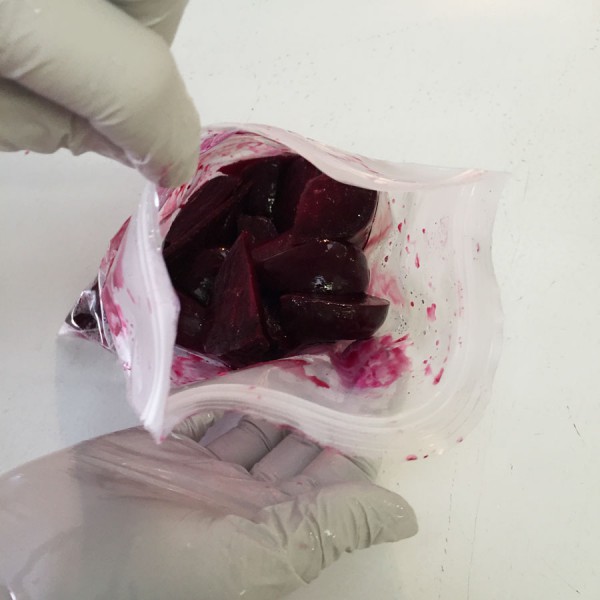
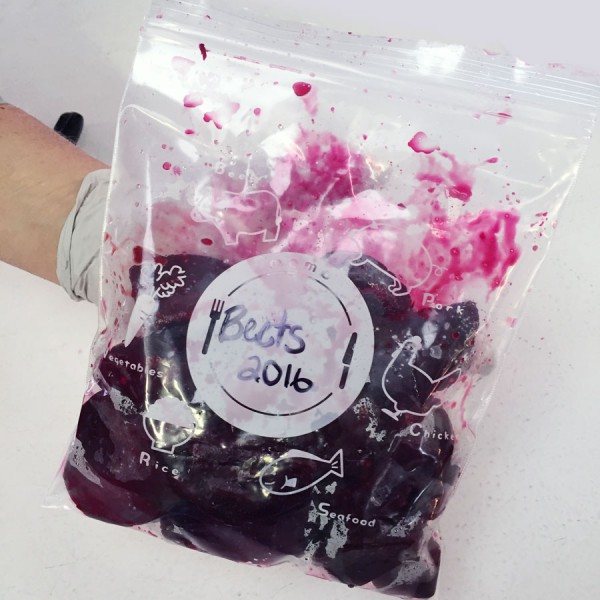
  6. Put in a freezer Ziploc baggie with as many servings as you’ll want.
    Putting fresh cooked beets in freezer bags
    You can freeze them individually like cherries (view our How to Freeze Cherries guide), or if your family loves beets, you can freeze them all together.
    Beets ready to freeze
    Tip: Flatten the bag when you put it in the freezer so they stack nicely and will thaw evenly.

This winter, you can take the bag out to enjoy garden-fresh beets at the peak of their flavor. Microwave or lightly simmer them in a covered pan with butter, when your family’s ready to eat!

If you liked this, you will LOVE our other frozen food storage tips! Make sure you check out How to Freeze Cherries and How to Freeze Corn.

Tips on team roping from our Dummy Ropin' champions!

How to Rope (Video): Team Ropin’ Tips

- posted by Rose Marion

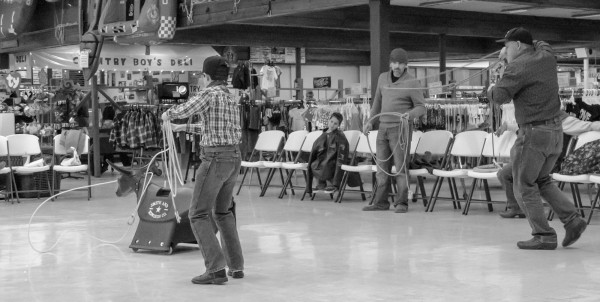
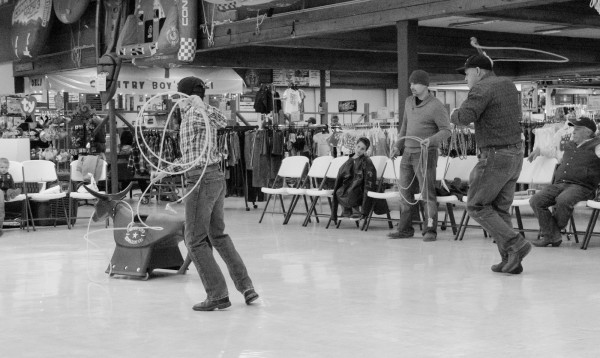
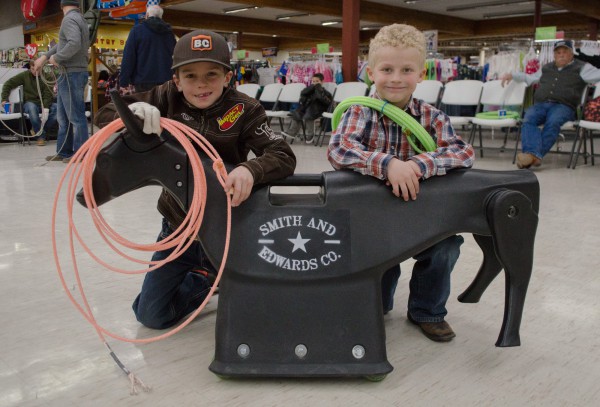
Kwade Kosoff and Pace & Wells Thompson stayed after the 2nd Annual Dummy Ropin’ here at Smith & Edwards to show us some dummy ropin’ runs and give tips on how to head & heel rope.

Head & Heel Ropin’ Tips from Kwade & Kyle Kosoff

Dummy ropin’ is a ton of fun, whether you’re a team roper or a backyard roper. Kyle provided commentary on tips & what to watch for.

dummy-ropin-kyle-kwade-kosoff
dummy-ropin-kyle-kwade-kosoff (1)

Start practicing after school or work and you’ll be a pro roper in no time. Then you can come show us your stuff in our next dummy ropin’ tournament!

These champions walked away with a Classic rope bag from Equibrand. Thanks to Equibrand, Cactus Ropes, & Lonestar Ropes for providing ropes & prizes!

Dummy Ropin' first round winners!

Pace and Braxton, Round I dummy ropin’ winners!

Dummy Ropin' second round winners

Cinch and Stone, Round II winners!

What you need to know to Start Ropin’

Roping Terms & What they Mean

Spoke:
The amount of rope in your loop from the honda to your grip on the rope.
Slack:
The loose part of the rope. You have to pull the slack to pull the rope tight.
Dally:
Securing the rope to your saddlehorn, in Team Roping when riding a horse. If you’re not on a horse, still practice pulling your slack and pulling your hands up!
Tip:
Part of the loop, the point of the rope, furthest away from your hand.
Heading:
One player catching the calf dummy around the horns or the neck. Kyle’s Tip: Aim at the left horn when you rope the head.
Heeling:
The second player catching the calf dummy around the rear ankles. Kyle’s Tip: Aim at the left hock (ankle).
Honda:
The bit of rope that loops & knots to allow for a loop in your rope. Learn how to tie a honda from Tom. See Marty show how to put on a plastic speedburner.
Lay:
How stiff or soft your rope is. Heelers want a stiffer rope that will hold open longer (to get under the hooves). Heading ropes are softer.

How we Dummy Rope at Smith & Edwards – & you can in your backyard!

You need 3 people: a header, a heeler, and someone to push the dummy.

The header checks in with his heeler, and nods to the person pushing the dummy when he’s ready.

The header runs after the dummy and catches the horns or neck. Then, the header pulls the dummy straight, to the left, giving the heeler a good opportunity to get the rope under and around the dummy’s back legs. Pull the rope tight (dally the slack), and you’ve got it!

How to Score

We timed each run, from the moment the dummy moves forward, with a stopwatch. We stop the timer when the dummy is both headed & heeled.

It has to be a legal head catch: both horns, half a head (1 horn), or around the neck. We added a 5 second penalty if only caught one heel.

Come Give it a Try!

Ready to rope, too? Come in to our Western department and pick up your rope & dallies. Or, click over to Shop for Roping Supplies on our website. We’ll get you what you need!

Check out Roping gear on our website!

Six Steps to Home-Canned Applesauce!

How to Can Applesauce in 6 Easy Steps!

- posted by Jerica Parker

Fall is here! The leaves are falling, the wind is cooler, and it’s time to get ready for winter. One of my favorite ways is by storing all the delicious food we have enjoyed in the summer, so we can have it in the winter as well.

Vickie Maughan, our canning and housewares department manager, shared with us her great recipe for making canned applesauce at home. And we want to share it with you!

The perk of this recipe, is you can eat it right away, storing leftovers in the fridge – and you can also can the applesauce to enjoy in the winter. Her tips and tricks are right here in 6 easy steps:

How to Can Applesauce

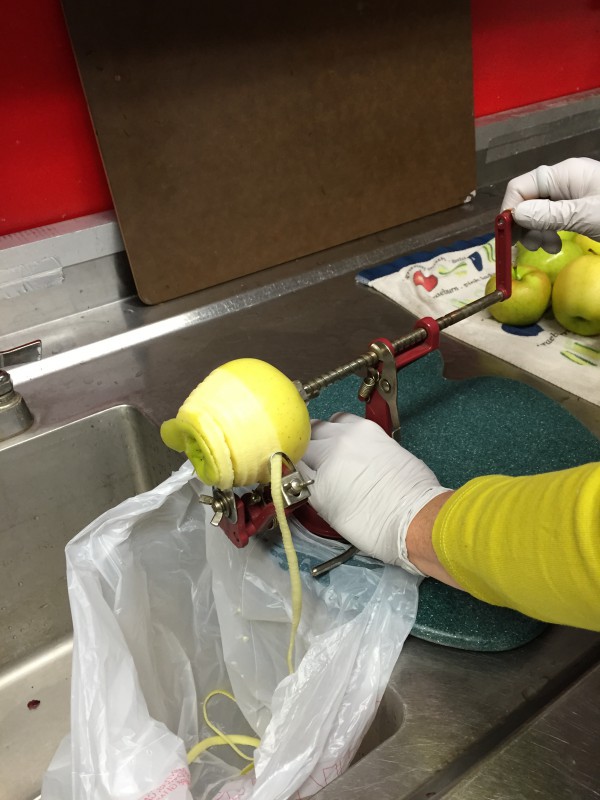
  1. Start by washing your apples. Peel them, and then slice them. Vickie used a peeler machine to take off the peel and slice them. Get your own peeler here!
    IMG_2032
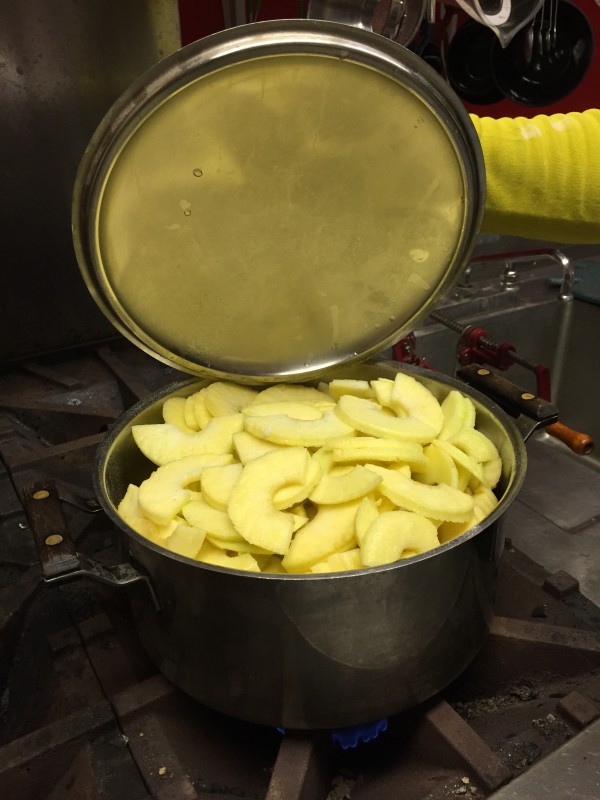
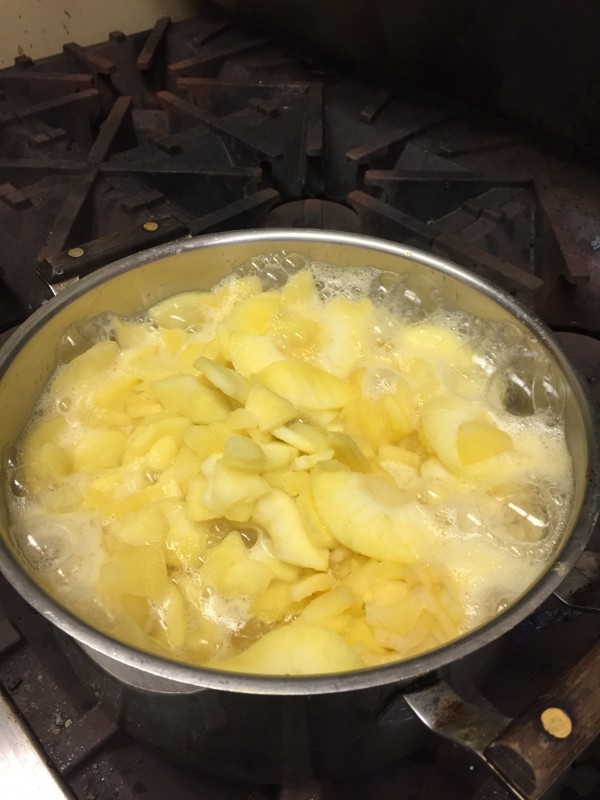
  2. Cook the apples in 3/4 cup of water on medium heat. When they reach a boil, lower the heat and steam them until the apples are tender.
    IMG_2036
    IMG_2039
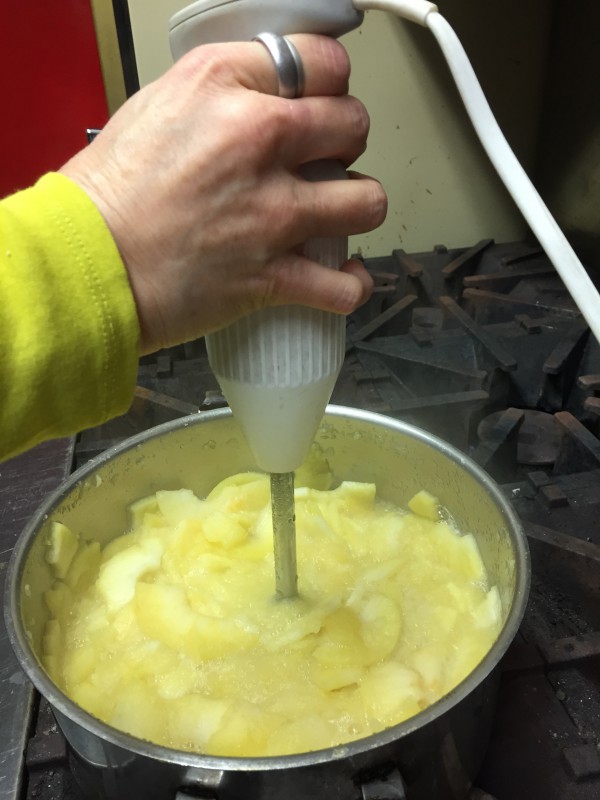
  3. Then, using an immersion blender, blend up the apples until it reaches your desired consistency of applesauce.
    IMG_2042

If you want to enjoy it right away, finish up by sweetening and seasoning however you like it. If you would like to continue to can and store for food storage, continue with the next steps.

  1. When you have reached desired consistency, sweeten and season to how you like.
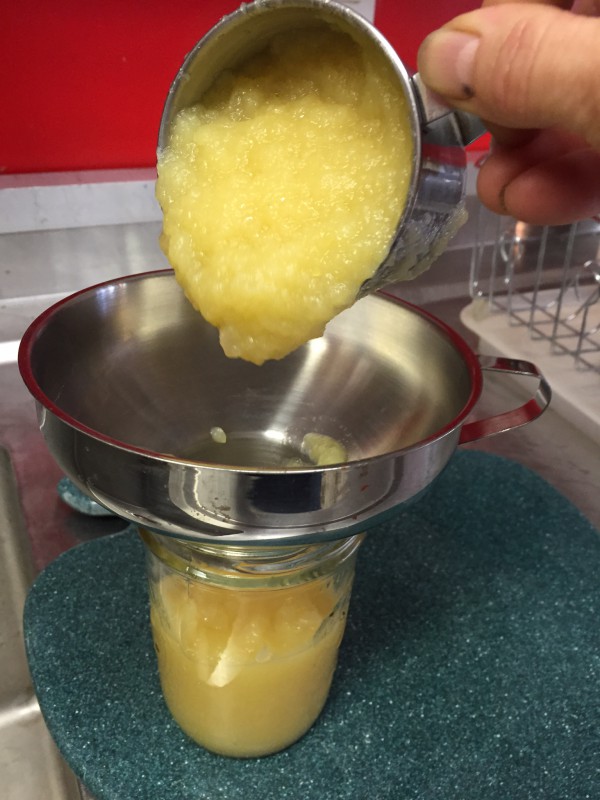
  2. Next, fill the jars. Using a funnel is so helpful for easy cleanup! Wipe clean to avoid problems with sealing the lids.
    IMG_0436.JPG
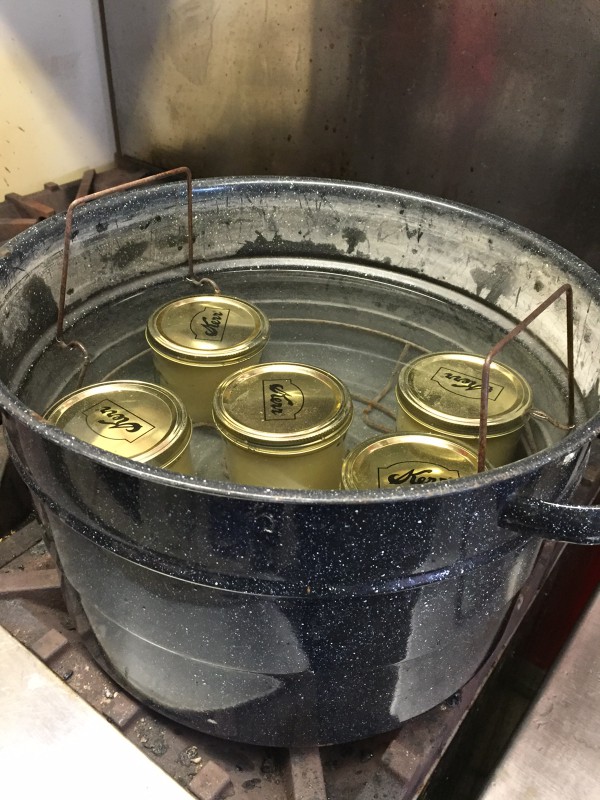
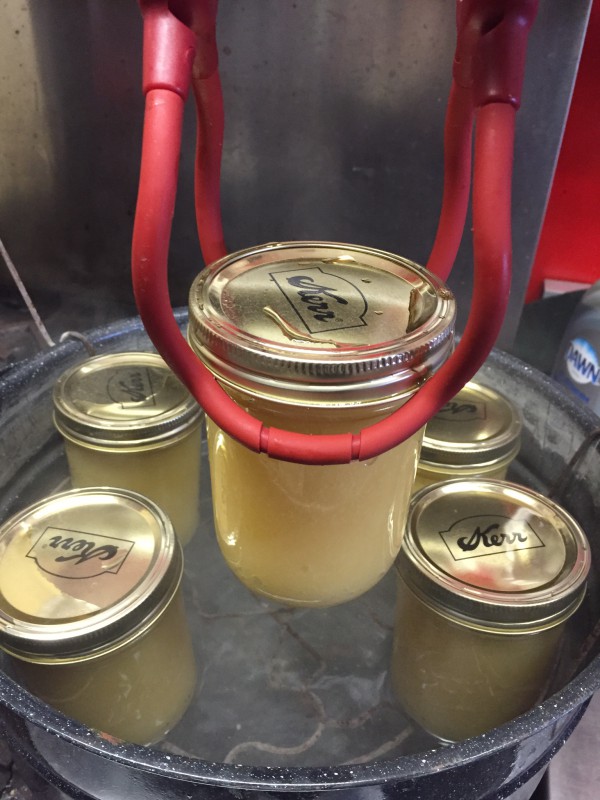
  3. Tighten lids and place jars in pot with water just above the level of the jars. Bring to a boil for 20 minutes. Careful! When you take out the jars, they will be very hot. Use a good jar lifter to protect your hands.
    IMG_0440.JPG
    IMG_0444.JPG

And voilà! Delicious applesauce to enjoy and share with your family and friends.

But you better hurry! You have just under 2 weeks left in apple season to get your apples for delicious applesauce. Stop at Pettingill’s and get your apples soon! They are closing for the season on Halloween, October 31.

Make sure to like Pettingill’s Fruit Farm on Facebook, and then take a peek at when we stopped in to Pettingill’s in August.

Explore Canning & Dehydrating supplies at Smith & Edwards!

How to install a Mule Hide Horn Wrap

How to wrap a Mule Hide Horn Wrap

- posted by Rose Marion
Elk herd on Highway 89 - photo by Rose Marion

The elk herd over on Highway 89 definitely exists. Check out those earrings!

Everyone knows about the elk herd over on Highway 89, north of Pettingill’s and just across the freeway from us. Smith & Edwards, you may not realize, has been raising a mule herd for decades.

I wouldn’t tell you a tall tale! These mules have been here in the yard since we started making tack back in 1979. We feed them corn cobs, pemmican bites, leftover MREs, all kinds of things.

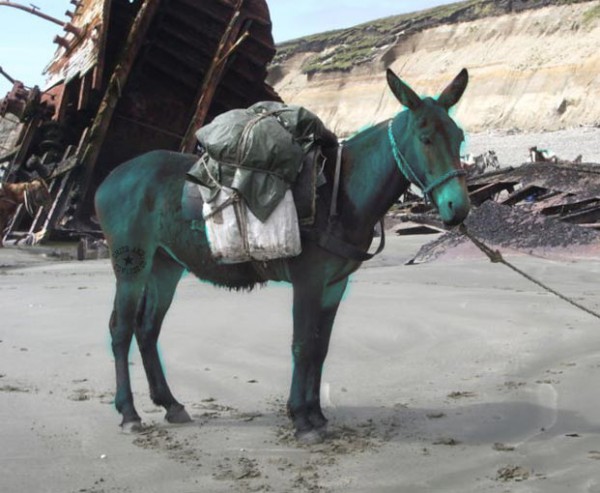
That turns them a little blue, just like the mule hide. (Eeyore is a distant bloodline member).

Some times we bring these mules packing with us. They’re great for elk quarters as well as bringing all types of fishing gear when we go out to Willard Bay!

Blue Mule - originally by Dario Urruty via Wikipedia and edited by Rose Marion

Anyway, the reason we have Utah’s biggest blue mule herd is to keep up with demand for mule hide horn wraps. And the first question we get from buckaroos and ranch hands is, what’s the best way to install a mule hide wrap?

So, Marty made this video to see exactly how it’s done. Check out his saddle string tip!

Why use a Mule Hide Horn Wrap?

Wrapping your saddle horn with a strip of mule hide will protect it, but that’s just one benefit. Having this strip on your horn will act the opposite of a rubber dally: instead of gripping your rope, the mule hide practically turns to glass and allows you to feed the rope.

So how do you wrap a saddle horn with mule hide?

First, nail the end of the wrap to the bottom of your saddle. Then, bring the wrap up and over the swells. Here’s Marty’s tip: take your saddle strings and lay them under the wrap.

Then, wrap the mule hide around your horn, making sure to get the swells on your last loop. The last step of the wrap is pulling the end of the wrap underneath your first wrap, using Marty’s saddle string trick.

Then, you can use an old shovel handle with a strip of leather to smooth & tighten the wrap, getting rid of any bubbles.
Did you know? The blue color comes from the chrome tan process for these leather strips.
Get your mule hide horn wrap here. That’s just one item, though… We’ve got tons more saddle accessories, pack bags, grooming & show equipment, and country gifts here!
How to shape a Palm Leaf Cowboy Hat

3 Ways to Shape a Palm Leaf Hat

- posted by Rose Marion

Need some shade at the rodeo or playing after work? Our Western guy Marty can show you how to shape a palm leaf hat today in a Gus, Brick Top, & Buckaroo style.

He shapes these cowboy hats here at the store with a steamer, and you can shape yours with just a bucket of water at home – watch how!

Cowboy Hat Styles

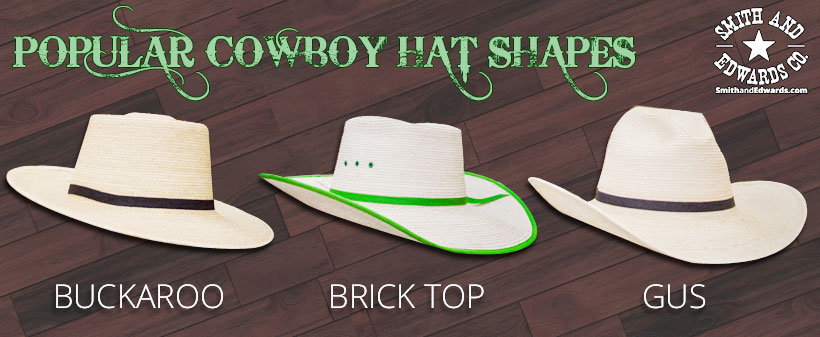
In the Buckaroo style, you’ll have a smooth bowl-shaped indent in the crown, round all the way around. Use a bowl or a ball to get this shape. Then you can raise the middle of the indent over another round shape, like a smaller ball, from the inside. You can also shape a nice lip in the top of the crown. The Buckaroo typically has a pretty flat brim, too.

This is the style of hat that Tom wore for his Trek outfit – he shaped it himself!

A Brick Top hat means you have four corners in the brim of the hat, and an even indent.
Buckaroo, Brick Top, and Gus styles you can shape your next hat with!
The most common styles of hat Marty sees is a Cattleman’s crown and a Gus. The Cattleman is like the hat Marty’s wearing: two dents running from front to back. The Gus is just like the Cattleman’s, but the dents are only in the front of the hat.

How to Shape Your Hat at Home

To do this at home, fill a bucket with water. You can use cold water and let it soak a while, or lukewarm will speed it up a bit.

Start with the crown and use your fingers and thumbs to start the shape.

Move to the brim and shape your brim.

Now let it dry. You’re all done!

Get a Hat of your Own

Get your own palm leaf hat from Smith & Edwards! We carry a HUGE selection of Sunbody hats, which is our favorite brand of palm leaf hat. These hats are Guatemalan-made and hold their shape nice after you shape them. They come in lots of adult sizes as well as kids’ sizes.

Get your own Sunbody hat at Smith & Edwards!

Come in to Smith & Edwards in Farr West and we’ll shape one up for you, too!

Smith & Edwards shows you how to put a speed burner on your rope!

How to Put a Speed Burner on a Rope

- posted by Rose Marion

A plastic speed burner will protect your honda while ropin.

We get asked how to put a speed burner on a rope pretty often – so here’s a 2-minute video showing you how to do it at home! Speedburners are so quick to put on & easy to use.

How to put a Speedburner on Your Rope

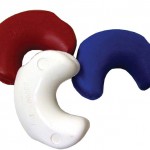
Red, White, and Blue plastic speedburners

Speed Burners come in different colors!

Like Marty showed, all you need is your speedburner, your rope with a honda (click here to see how to tie a honda), and a microwave with a cup of water. Some wide pliers will do the job – Marty uses a handy pair of channel locks.

Looking for Ropin’ Gear?

Get your speed burners, breakaways, & rawhide hondas here.
Click here to shop Ranch Ropes.
And Cowboy Toy ropin’ dummies let your rope in your living room, day or night & make a GREAT gift! Click to choose your ropin’ dummy toy color.

What do YOU want to see?

What questions do you have for us to answer in a video? Leave a comment below or email help@smithandedwards.com. Marty loves making videos for you!

Learn how to use a Sewing Awl with Smith & Edwards!

How to Use a Sewing Awl (Video)

- posted by Rose Marion

Awls are some of the handiest tools in a leather repair kit. A sewing awl can stitch up a leather bag, sew a canvas satchel, or even help you repair upholstery.

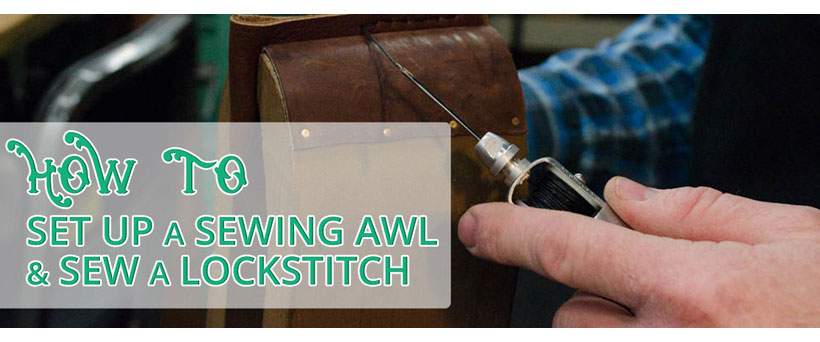
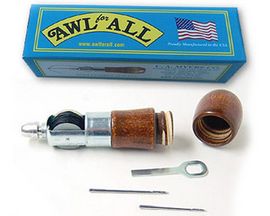
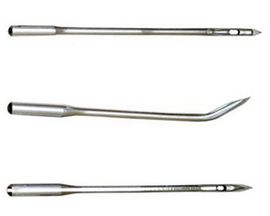
In this video, Marty, our Western Dept guy, shows you how to load a needle in the “Awl for All” sewing awl, get the thread ready, and begin sewing a basic lockstitch.

And now you know how to use a sewing awl!

What would you make with this tool? Leave a comment & let us know.

What leather working videos would you like to see us make? Let us know in the comments below. If you liked this video, please help us out by Tweeting about it or sharing on Facebook.

Get the tools:

Myers Sewing Awl
Myers’ Awl for All Sewing Awl (made in USA)
Leather Sewing Tools
Shop Leather Working Supplies
See all Leather Working Supplies

Thanks for watching!
Click to check out more Western riding gear and accessories at Smith & Edwards!