How to make a Boa Paracord Bracelet (also called Trilobite Bracelet)

How to make a Boa Paracord Bracelet

- posted by Rose Marion

While I was walking past the Rope Room the other day, our Hardware buyer, Blaine Taylor, called me over. “I have a surprise for you,” he said.

Next thing I knew, I found myself in a dark sideroom looking at a bundle of paracord that glowed in the dark!

Just a short time under an LED flashlight was all it took to activate the PARAGLOW white and light blue paracord Blaine just got in. “Wow!” I thought. “This would be so cool to turn into a bracelet for hiking!”

I like having reflective gear, especially as it starts to turn fall, so if I’m walking near twilight the cars can still see me.

A glow in the dark paracord bracelet would be GREAT!

“That’s not all,” Blaine told me. “I’ve got another new paracord. This orange paracord has a jute strand, for starting a fire, AND it’s got an 8lb test fishing line inside.”

You can find reflective & glow-in-the-dark paracord online here, and at the Rope Room in-store at Smith & Edwards. This is some neat stuff!

Light Blue Glow-in-the-Dark 550 Feet White Glow-in-the-Dark 550 Paracord - 100 Feet Neon Orange Fish & Fire 550 Paracord - 100 Feet
Light Blue Glow-in-the-Dark 550 Paracord – 100 Feet White Glow-in-the-Dark 550 Paracord – 100 Feet Neon Orange Fish & Fire 550 Paracord – 100 Feet

And the bracelet? Jerica in the Web Department helped me make it. Well, I found the bracelet and she figured how to make it! This is a Trilobite bracelet, aka ladder rack or boa paracord bracelet. Here’s how she made it!

Making the Paracord Bracelet

You’ll need:

  • About 85″ each of 2 colors of 550 paracord (6″ wrist)
    If you want a single color bracelet, use 170″ and skip step 1.
  • 5/8″ buckle
  • Lighter
  • Scissors

1. Thread the ends of your paracord into the receiving end of your buckle. Then, melt the ends together.

Make a lark’s head knot, hiding the seam of the thread so it doesn’t scratch your wrist.

Starting the boa weave bracelet

2. Put the paracord through the two openings in the other buckle. Measure the paracord around your wrist. Add 1/2″ and move the buckle to that point.

Measure the bracelet

3. Tape the buckles to the table, with the 4 strand buckle at the top. You have 2 outer and 2 inner strands now.

Taping the bracelet to the table

4. Make a 4 with the outer left strand, and hold it over all other strands. Bring the outer right strand over the 4 tail, over the inner strands, and under the 4. This will make a Granny knot over the bottom buckle.

Finishing the bracelet beginning knot

In the photo above, for the fourth picture, bring the strand you just wove with, over the outer left strand, under the inner strands, and over the outer right strand.

Then, take the outer right strand and weave it under the strand you just wove with, over the inner strands, and under the outer left strand.

Good job – you’ve finished the hardest part!

We made the bracelet twice, and flipped the colors the 2nd time. We apologize!

5. Now we’ll just weave to the top of the inner cords.

Weaving the Boa Bracelet

Take the left outer cord and weave it over the first inner cord, under the middle inner cords, and over the last inner cord.

Take the right outer cord and weave it under the last inner cord, over the middle inner cords, and under the first inner cord.

Repeat this process all the way up the bracelet!

6. Now and then, stop to adjust the snugness of the weave, so you can have a consistent & tight weave.

Finishing the Bracelet

Here’s how we finished the boa bracelet.

1. Push & tighten the weave. Then, loop the strands so that they are next to each other. Trim the paracord to be just long enough to grasp.

2. Take your lighter and melt the ends of the strands. Hold the ends together and press with flat nose pliers to seal them together.

Tip: Have a friend hold the lighter for you, so you can hold one strand in each hand, and melt them together!

Finished Boa or Trilobite Bracelet - that glows in the dark!

You’re done! Enjoy your bracelet!

Check out our HUGE collection of Paracord on SmithandEdwards.com

Want to make more Paracord Bracelets?

Looking for more Paracord Bracelet patterns? Here are some sites & channels we found that have GREAT tutorials!

Make your own DIY Bucket Washing Machine with Smith & Edwards - watch Melissa's video!

How to Make your own Laundry Bucket Washer (video)

- posted by Rose Marion

Muck-covered overalls? Horse leg wraps? Greasy shop rags? There’s no way those are going in the nice front-loading washing machine.

Here’s a neat way to turn 5-gallon buckets into a shop washing machine that keeps the mucky things out of the clothing laundry. We saw this on Pinterest and HAD to try it out!

Plus, you can also keep this on hand for emergencies: the Zombie Apocalypse or when the power goes out.

Thanks to Melissa in our Housewares department for showing us how to do it, and Marty for cleaning the leg boots!

Tip: Did you just buy a new pair of dark-wash denim jeans? Add a cup of vinegar and don’t add soap. Then, add your new jeans and let them sit overnight. This will help set the dye, and you won’t get as much indigo rub-off on the rest of your laundry!

Make your own DIY Laundry Bucket at Home

You’ll need these supplies:

Directions:

  1. Drill holes in one of the buckets, both the bottom and 1/3 to 1/2 of the way up the sides.
  2. Drill a hole in the lid with a 2″ hole saw. Then, insert the bushing.
  3. Now drill 1/2″ holes in the rubber plunger.
  4. You’re done!
Take your Kid's Halloween Costume to the Next Level

A Fun Way to Take Your Kids’ Halloween Costume to the Next Level

- posted by Jerica Parker

BANG! PEW PEW!! ARRGG!

Yep… it’s that time of year again. Kids running around dressed up, pretending they’re pirates or cowboys with their imaginary swords and guns. Well, let’s make their game of pretend a reality! No… not with REAL swords or guns… but here at Smith and Edwards we have Wooden Toy Swords and Rubber Band Guns that your kids will just love!

Some kids enjoying the rubber band shooting gallery at our Fall Kickoff

Kolt and Tynisha enjoying the rubber band shooting gallery at our Fall Kickoff

Kids dream of having their own gun or sword as a part of their Halloween get-up: from pirates to soldiers to their favorite comic book character. Yes – all the wooden guns feature the orange plastic safety tip!

The best part is that you can decorate these wooden toys however you like! It’s all part of the fun to let your kids paint, color, and design their own personalized swords or shields. And when you do, send us in photos of your creations! We would love to see them :)

Check out all our different models of Wooden Swords, Shields, and Rubber Band Guns.

Playing with wooden guns

The jeep in the surplus department has seen some serious fights!


So make your child’s Halloween costume complete this year with cute additions such as these wooden toys. Even if it’s not Halloween, these are great gifts for your child to play their heart out anytime.

Smith and Edwards employees Chris and Kevin show us that you are never too old for pretend.

Smith and Edwards employees Chris and Kevin show us that you are never too old for pretend

Looking for more creative ideas for this Halloween? Melissa and Ashley, part of the team here at Smith and Edwards, has awesome ideas on Halloween Mason Jar Decorations.

Click here to explore all our wooden toy swords and rubber band guns

Explore all our wooden toy swords and rubber band guns!

Make a Bandana Dress for your little girl in this fun sewing tutorial!

How to Make a Bandana Dress for your Little Girl

- posted by Amy Griffiths

Isn’t she cute? It’s so simple: a t-shirt and two bandanas, and you’ve got a brand-new outfit for your little girl! This is a fun sewing tutorial and you’ll be hooked on making these for your toddler. There’s a lot of room for her to grow in a dress like this!

Abby in her camo bandana dress

For Smith & Edwards, I HAD to make my little girl a Realtree camo dress!

You’ll need:

  • 1 storebought tee
  • 2 bandannas (same or different!)
  • Sewing machine, scissors, ruler, and chalk pencil or sewing marker

How to make a Bandana Dress

  1. Measure the width of the bottom of the tee.
    Measure the width of your tee shirt.
    Now, use this formula: Multiply the width by 2 and add 1.5".
    For my tee, I took 12.75 x 2 = 25.5. Add 1.5 = 27".
  2. Now, fold your bandana in half to make a triangle, and fold in half again.
    Fold your bandana in half to make a triangle.

  3. Take your number from step 1 and divide by 6.28 (this is pi times 2, for those playing along at home.)
    For me this means 27 / 6.28 = 4.29" (I used 4.25")
  4. Place one end of your ruler on the corner of the bandana, and mark along the bandanas at the mark you found in step 3 – for me, that’s 4.25". Make sure and make several marks, then join a line with a chalk pencil.

    Measure your length
    And mark where to cut your bandana

  5. Cut along the line you made. Unfold, and you’ll have a perfect circle cut in the middle of your bandana.

    Cut along your mark

  6. Repeat step 4 & 5 on your second bandanas.
  7. Now, lay one bandana on top of the other, and offset so you can see all eight points. Pin together.

    Unfold the cut bandanas, and layer on top to show eight points.

  8. On your sewing machine, use a large stitch to baste your bandanas together (about 1/4") .

    And unfold your bandana

  9. Slip your tee in the opening you’ve made.
    Slip your tee inside the bandana skirt
  10. This part may seem a little tricky! You don’t want to join the edge of the bandanas with the very bottom of the tee: bring it up an inch, so you don’t see the hemmed seam of the tee.
    Make sure the tee hem is below the edge of the bandana skirt!
    Make sure right sides are together, and pin tee to bandanas.
    Pin the bandanas to the tee
    I do this by folding the bandana in half, as well as the tee, and pin. Fold that half in half and pin together. Keep doing this until you’ve got about 8-12 pins in.
  11. Now, sew it together. Tip: Your tee is smaller than your bandana cutout, so just make sure you stretch your tee as you sew.
    Sew the bandana skirt to the tee
  12. Unfold your dress, and you’re done!
Add an embellishment made from the circles you cut!

Add an embellishment made from the circles you cut!

With the leftover fabric from the bandana holes, you can embellish your dress: Cut out a heart and use iron on fusing like Stick ‘N Hold or Wonder-Under – or, make a handmade flower! It’s all up to you!

Bandana skirt dress with flower embellishment
Get your bandanas online at Smith & Edwards online: Get a Realtre AP Camo Bandana or traditional bandanas to make your own bandana dress!

Love this Sewing Project? Pin it!

Pin how to sew a Bandana Dress to your crafty board!

A Sweet Teacher's Gift idea

A Sweet Teacher’s Gift Idea

- posted by Rose Marion

Teachers don’t get enough credit! And as we reach the end of the school year, we want to do something for them…. that isn’t ANOTHER apple-decorated knick-knack.

Sara here at Smith & Edwards came up with the sweetest idea for her son & daughter’s teachers.

How to Make this Sweet Teacher’s Gift

You only need 3 items to make this sweet gift that your child’s teacher will surely appreciate:

Strawberry teacher gifts for the ender of the year

What a sweet teacher’s gift idea!

So simple, but so thoughtful. When you get to the end of the school year, it’s all about keeping it simple. And your teacher will love it.

Love the tags Sara used? She turned them into a free printable that you can download!

Click here to download the printable (299kb). It has 4 tags & directions. Thanks, Sara!

Love it? Pin it!Teacher gift idea: Strawberries & Strawberry Gem Huller


Learn how to use a Sewing Awl with Smith & Edwards!

How to Use a Sewing Awl (Video)

- posted by Rose Marion

Awls are some of the handiest tools in a leather repair kit. A sewing awl can stitch up a leather bag, sew a canvas satchel, or even help you repair upholstery.

In this video, Marty, our Western Dept guy, shows you how to load a needle in the “Awl for All” sewing awl, get the thread ready, and begin sewing a basic lockstitch.

And now you know how to use a sewing awl!

What would you make with this tool? Leave a comment & let us know.

What leather working videos would you like to see us make? Let us know in the comments below. If you liked this video, please help us out by Tweeting about it or sharing on Facebook.

Get the tools:

Myers Sewing Awl
Myers’ Awl for All Sewing Awl (made in USA)
Leather Sewing Tools
Shop Leather Working Supplies
See all Leather Working Supplies

Thanks for watching!
Click to check out more Western riding gear and accessories at Smith & Edwards!

Valentine Tulle Crafty Blogger Challenge

Crafty Bloggers’ Valentine Tulle Challenge!

- posted by Amy Griffiths

For many of us, we get just about as excited for Valentine’s Day as we do for Christmas. It’s not so much about the gifts as it is about decorating! Reds, Whites, and Pinks, oh my!

I found some incredible ladies who love it just as much as I do. I call them the crafty bloggers because they are so talented and have their own darling blogs in which they share their ideas and creations with others.

The Challenge

Here’s what I told them: We’ll give each of you 3 rolls of tulle (pink, red, and white of course) and you can be as creative as you want with it. You can use other items but the tulle should be a main supply/focal point used. The trick is to see the fun ways you can use tulle for Valentine’s Day or decorating.

I’ve been so excited to see what they’ve come up with! Ready for the unveiling? Let’s check them out!

The Reveal

Valentine Bunting made of Tulle

Click the image to get step-by-step instructions on how to make a tulle valentine bunting of your own!


Next we’ve got Staci from The Potters-Place.
Valentine's Dinner at Home

Click on the image to find out what she did to create this look.


Last but not least we’ve got Natalie from The Creative Mom.
Valentine Wreath

Click on the image to get a tutorial on how you can make a wreath like this one.


Nice job ladies! Thank you so much for taking the Crafty Blogger’s Valentine Tulle Challenge. I feel even more inspired to get out the tulle and start crafting!

Your Turn

So what about you? What do you think about these projects? Are there any that you want to try? Let me know in the comments below. Send pictures if you try something on your own. I’d love to show them off on our brag board!

You can check out my Valentine’s Project Idea here to find out how to make this fun, quick, and easy tulle ornament. You get step-by-step instructions that will hopefully help inspire your creative juices to flow as well as the great ideas above.
Valentine's Ornament made of Tulle

If you would like to be a part of our next bloggers’ challenge, leave a comment below. Happy crafting!

Easy Valentine Sweetheart Ornament

Easy Valentine’s Craft Idea

- posted by Amy Griffiths

Finished Valentine Photo OrnamentFebruary is right around the corner and you know what that means….Valentine’s Day! I’m a sucker for Valentine’s Day. It’s not so much the presents as it is the colors, decorating, and celebrating those I love.

To share my love for the season I’m going to share an easy Valentine’s craft idea. It’s made with one of my favorite supplies to use…..tulle! It’s so versatile, never loses its shape, and the colors are so vibrant! Adults and kids alike will have fun making these. They are fabulous for 4-H craft projects as well as many other youth groups activities.

Back in December I gave you a peek at this tulle project idea, but in honor of those sweet ones in our lives you now get a step-by-step tutorial. This one is designed for Valentines but it’s a terrific project anytime of year by just mixing up the colors.

Supplies you need:

Supplies for Valentine Craft Project


To begin this project you need to cut:
Eight 6″ pieces of Silver Gray, Flamingo Pink, Pink, and White
Six 6″ pieces of Fuchsia
One 12″ piece of Fuchsia

Measuring the tulle


Let’s get started!

The first thing you’ll want to do is make a loop with one of your 6″ pieces of tulle. Place it outside the ring and thread your ends over the ring, through the loop, and pull. This knot is also known as a Larks Head Knot.

Making a loop

Pulling Ends Through the Loop

Finished Knot


Continue making knots in the pattern of colors you want to use.

Pattern of Finished Knots


I like to make the hanging loop after I’ve tied about half of the knots on the ring. You make this by tying both ends in double knots over the ring. The knot will look different than the others but it blends in beautifully when it’s all done.
Tying the Hanging Loop
Finished Hook Loop


Tie more lark head knots in between your double knots, just like you were doing in the beginning. Continue to follow your original color pattern.

Continuing the color pattern


Finish tying until all your tulle is used and your ring is completely covered. They should fit nice and snug so you can no longer see the ring.

Ring is full of knots


Now is the time that I cut out my picture to place in the ornament. It needs to be about 2.5″ in diameter. You can fasten the photo to the center of your lid with a scrapbooking adhesive, but I prefer without.

Before I insert my picture I like to pull all the knots forward, towards the top of the ring. Then I insert the picture from the back end, pushing the lid in behind it for a nice backing. Not a big deal, but I like the look better when it’s done.

How to Cut Your Picture


You’re almost done! Now all you need to do is “fluff” your tulle. For each knot I pull the ends of the tulle in opposite directions til you are happy with the overall look.

Fluffing Your Ornament


Now that’s a Valentine to be proud of!

Finished Picture of Valentine Craft Project


Now what?

Now that you’ve found a source of inspiration for a project of your own, check out our tulle here for a bigger selection of regular and glitter tulle that will make your projects pop with color. Then send us pictures of your finished projects to info@smithandedwards.com so we can show them off!

Come play with us on Pinterest! Follow us to get more creative ideas and be sure to pin this image so your friends can get inspired too. Share the love this Valentine’s Day!
Valentine's Sweetheart Tulle Ornament

Hugs & Kisses!

7 Mason Jar Gift Ideas

7 Super Simple Mason Jar Crafts that Make Great Gifts

- posted by Amy Griffiths

It’s 10:00 pm and your child tells you she needs a teacher gift for school in the morning. What do you do? You start your daily chores and realize it’s your friend’s birthday, but you don’t have time or money to go to the store. What now?

With 5 kids and a busy schedule, these and many more scenarios like them seem to be what makes my world go round.

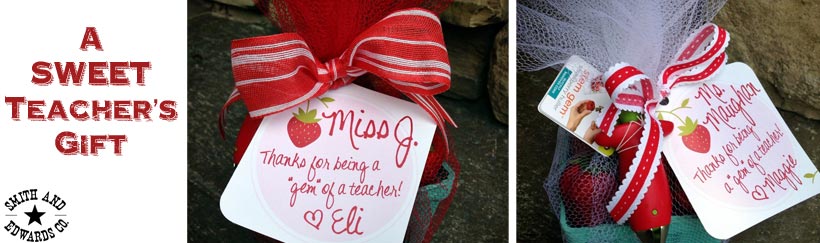
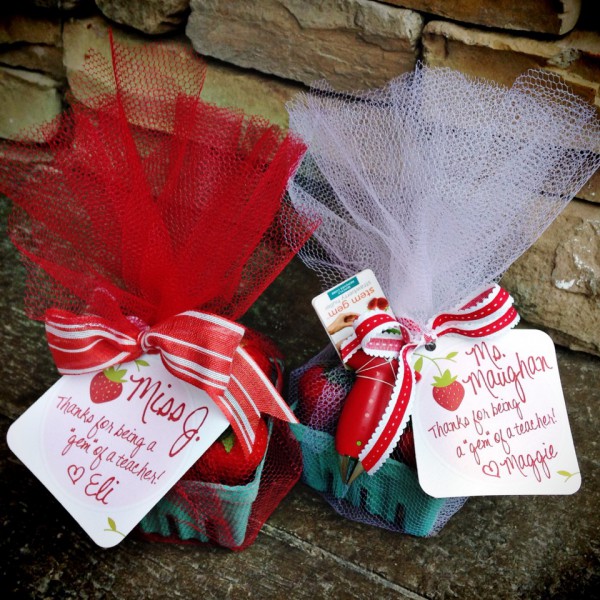
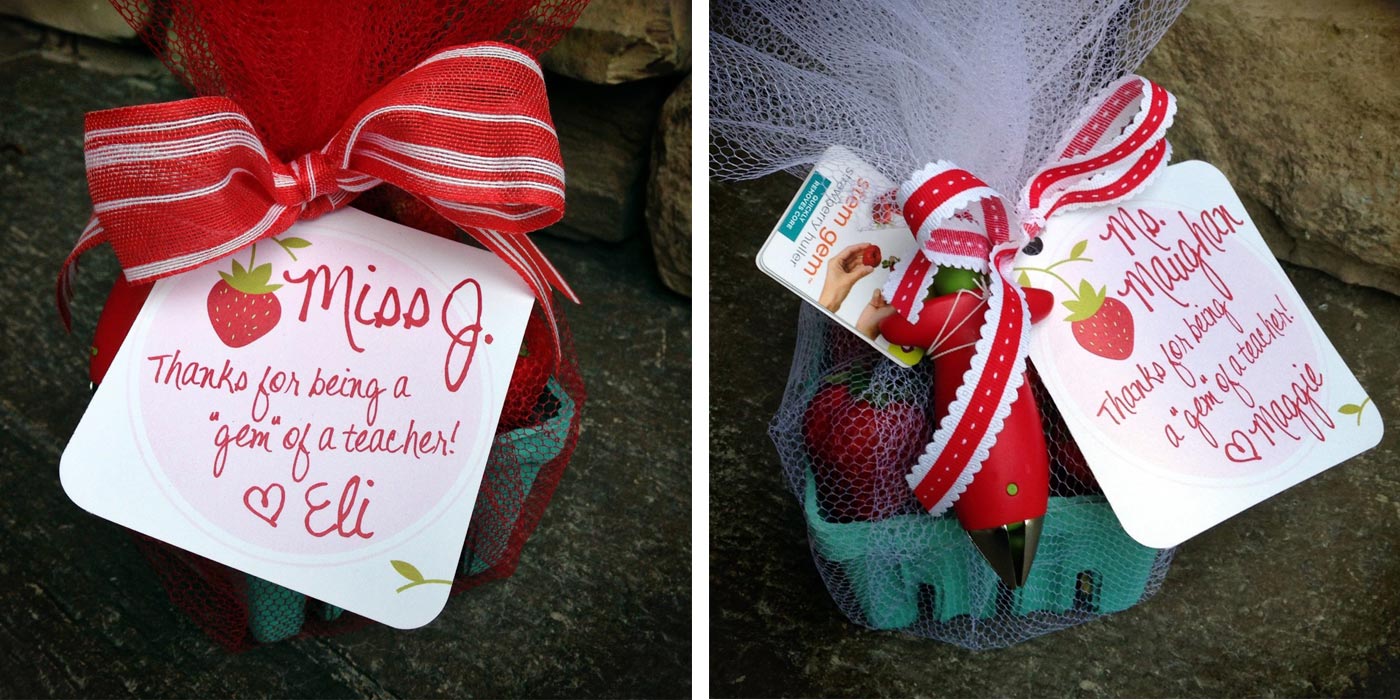
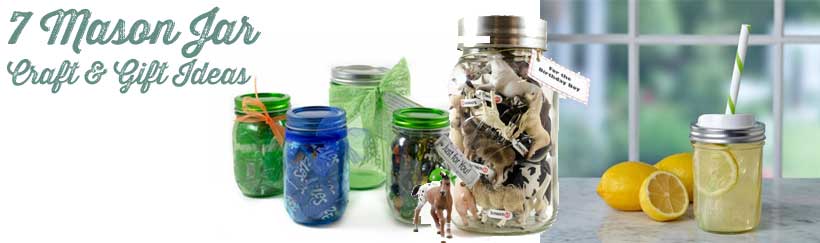
Here are 7 easy tried and true mason jar crafts that are not only simple to make, but are kid friendly, inexpensive, can be done in a jiffy, and are sure to bring smiles to the ones receiving them.
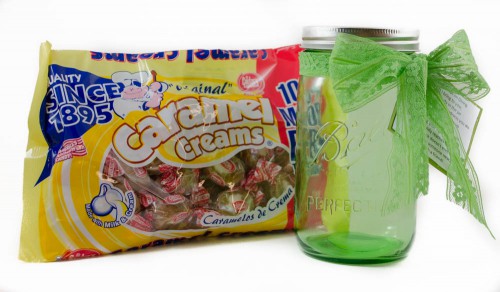
1. Candy Jars

Mason Jar candy jars gift idea

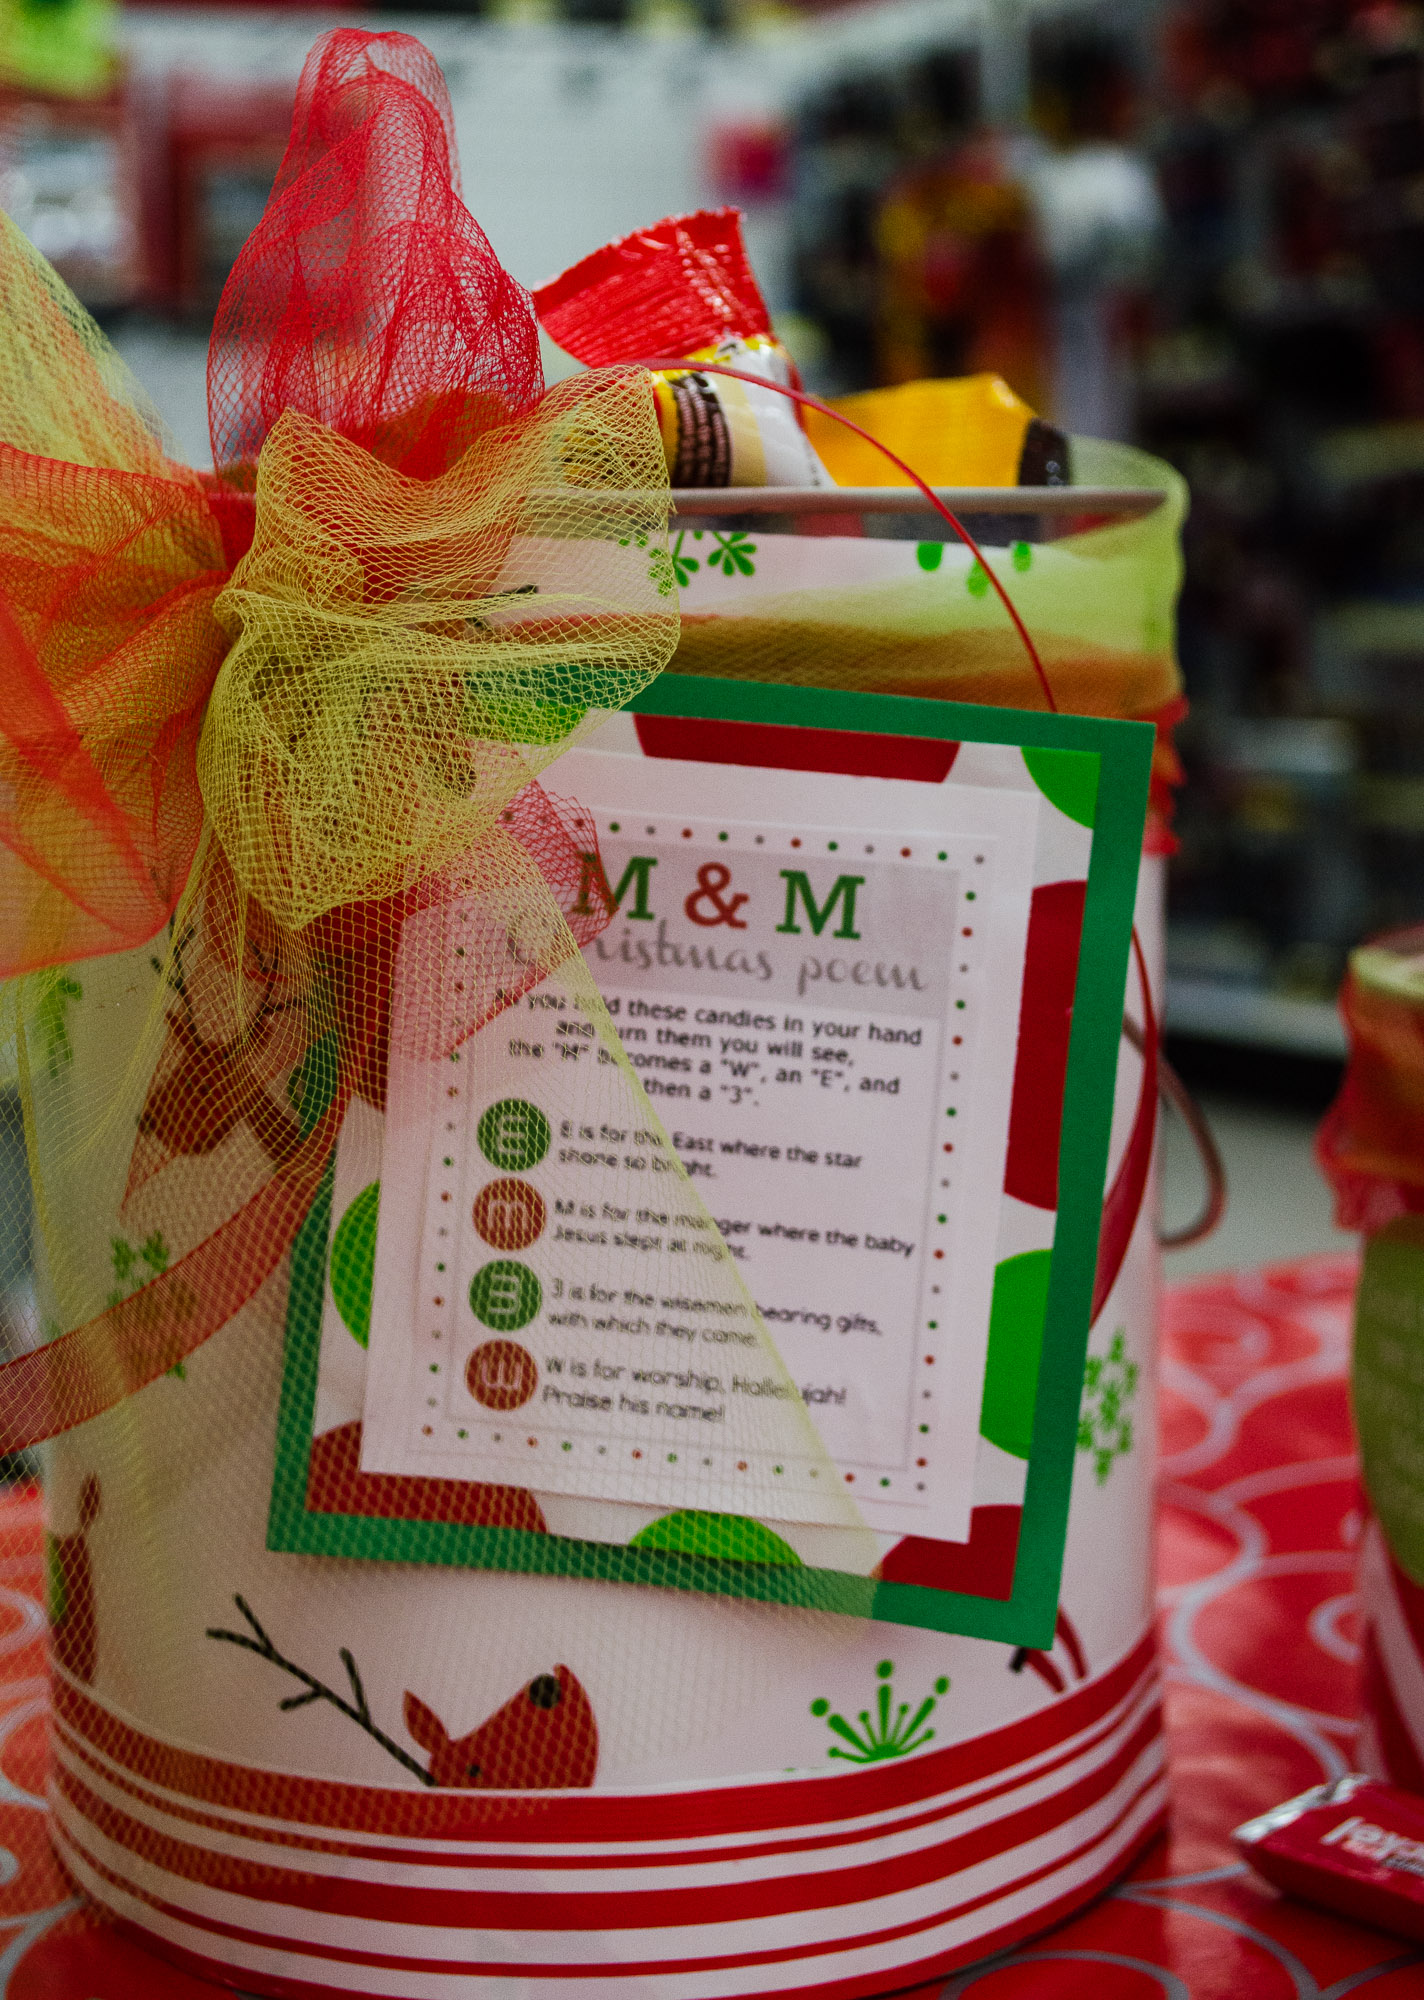
This one is as versatile as the friends you give them to. Keep them simple with a favorite treat you know they like or go elaborate by layering them by color.We used Lemon Heads, Laffy Taffy, Zotz, and Bit O’ Honey. They work beautifully with unwrapped candy like M&Ms or Skittles!

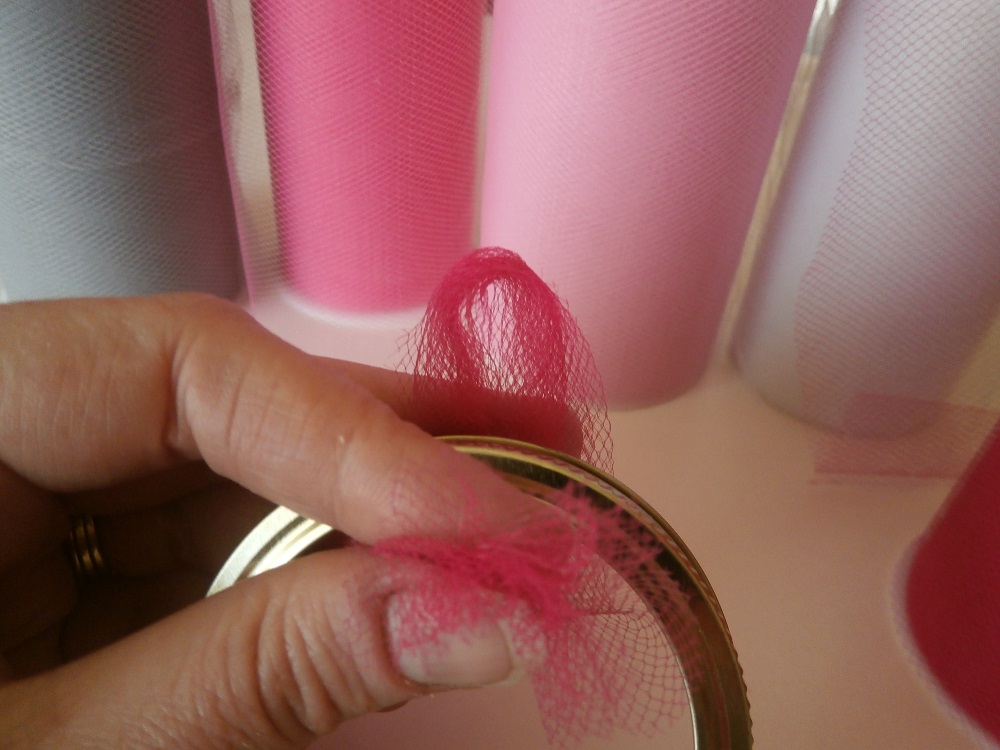
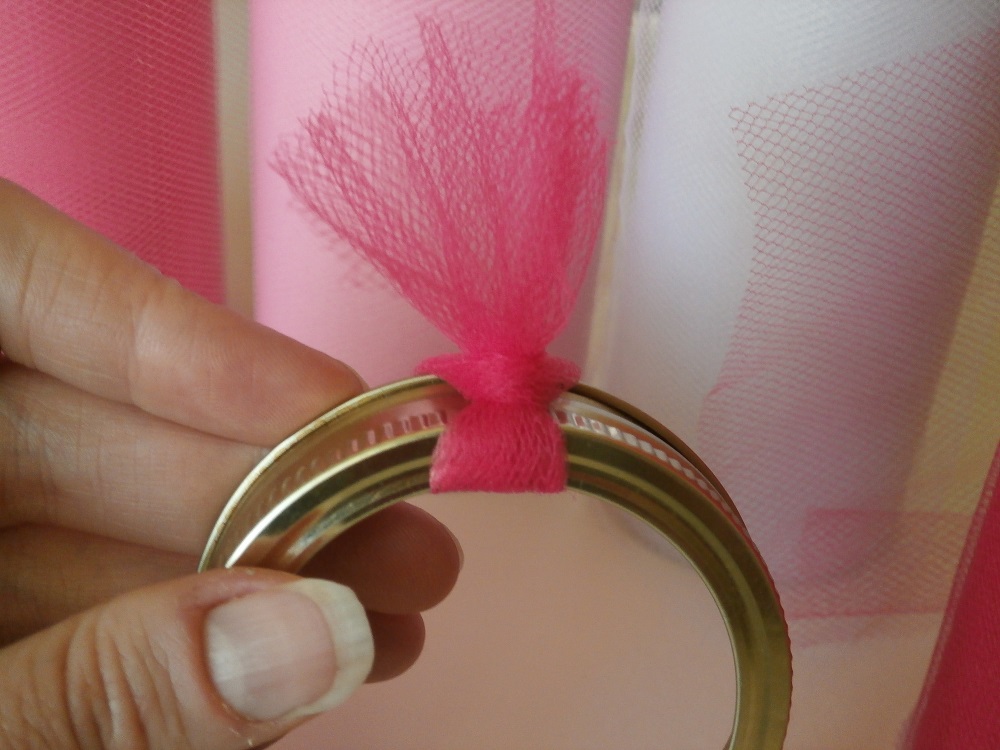
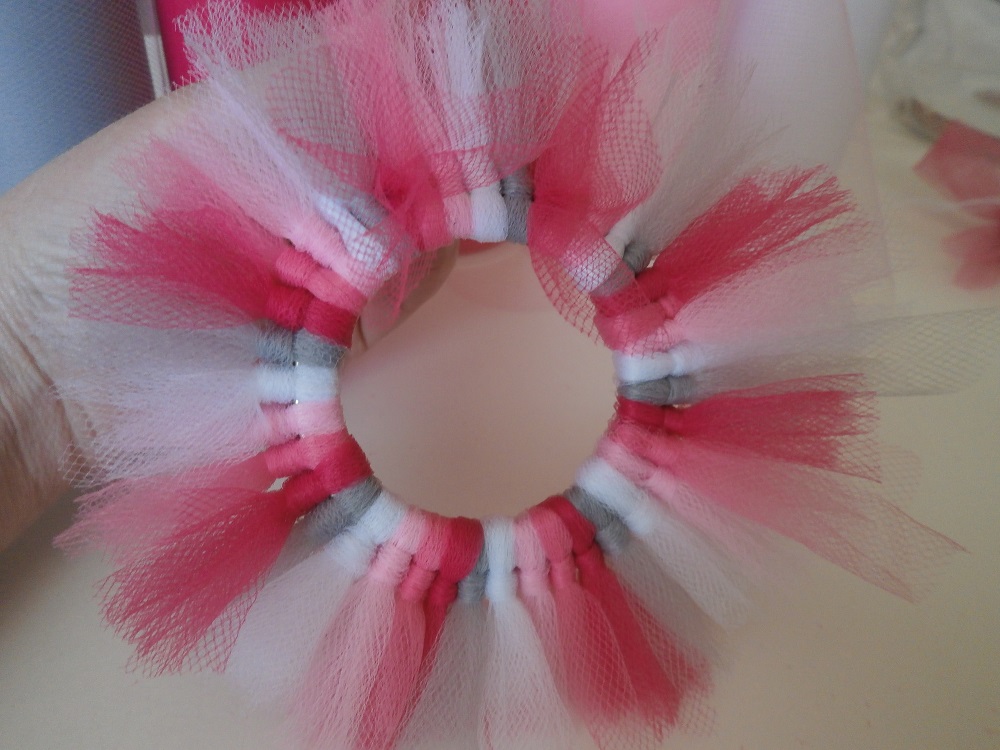
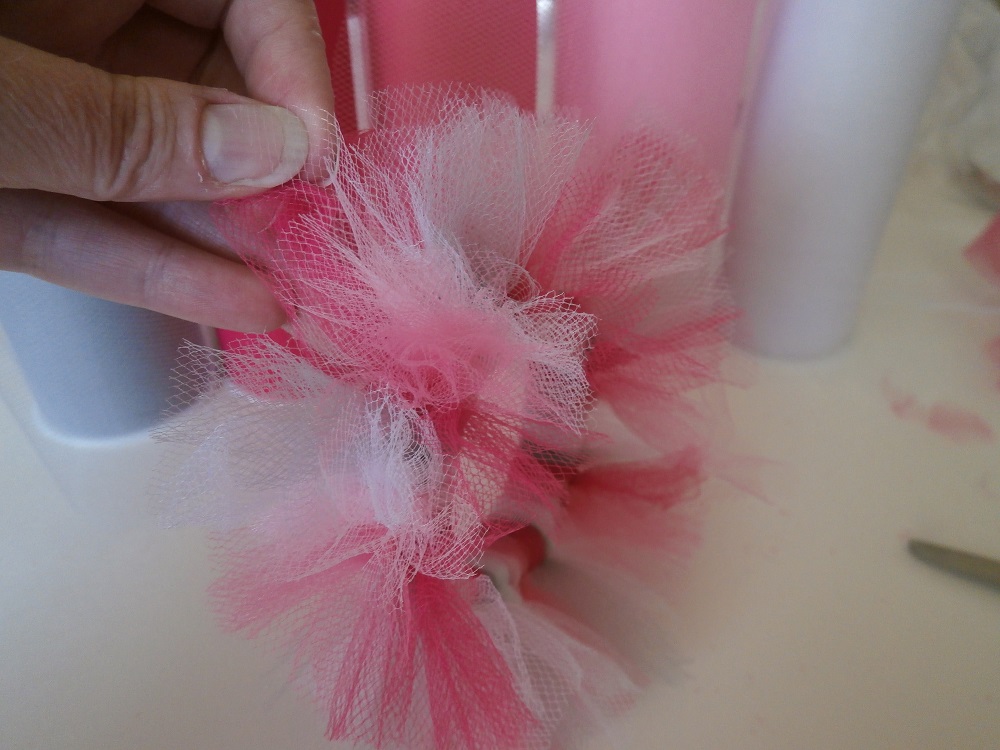
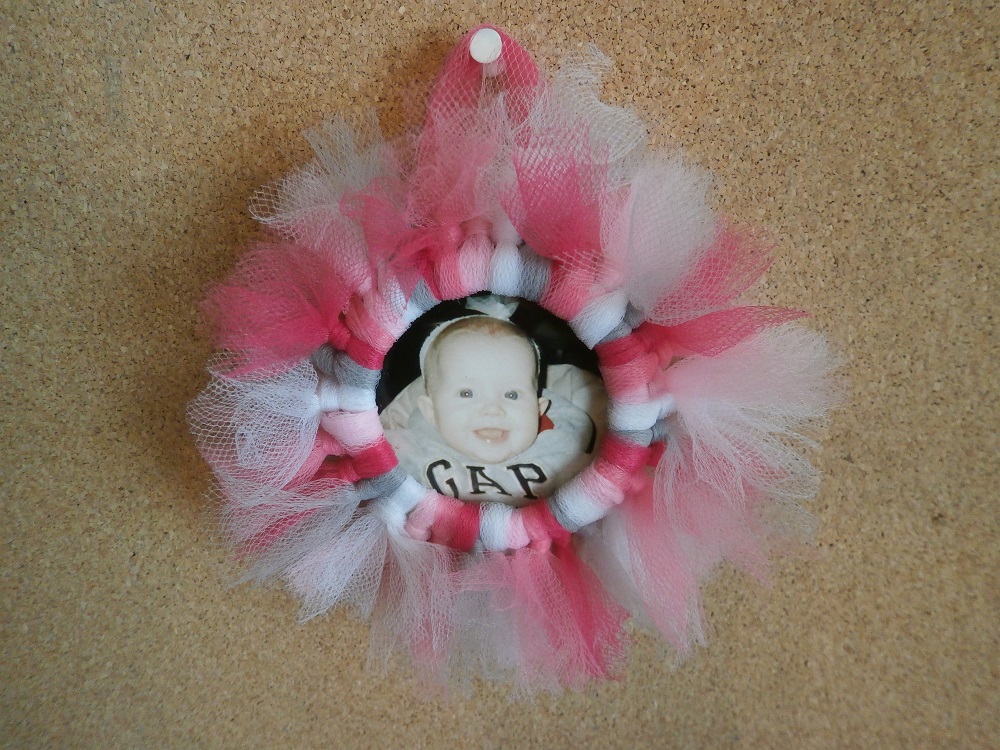
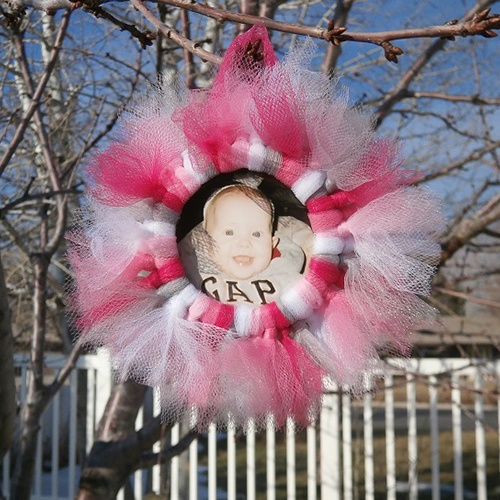
You can finish it off simple and let the candy do the talking, or for the more artistic type, deck it out with ribbons, tulle, flowers, a homemade gift tag – whatever works for you. The sky’s the limit on these mason jar gifts!
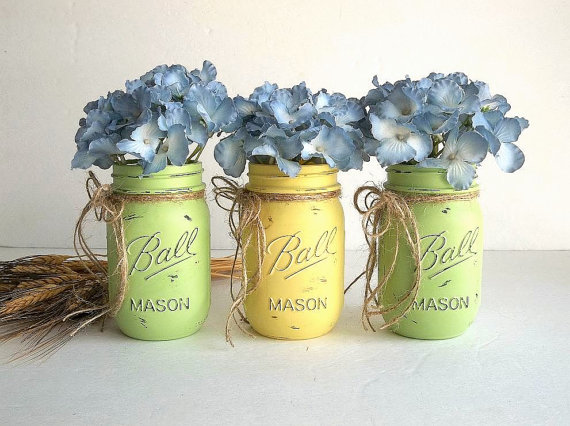
2. Painted Vases

Painted mason jar vases

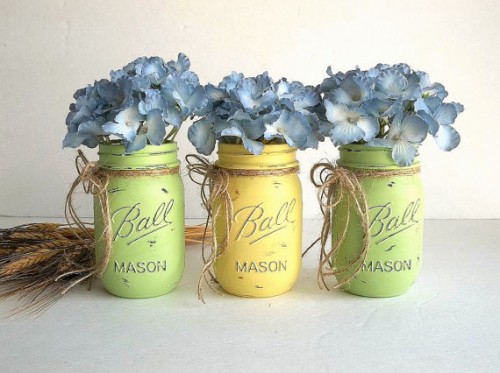
Painted mason jar vases are all the rage right now. There is something so warming about a nostalgic piece of America, and I love the way these were done with a vintage touch. They are great for flowers, kitchen utensils, pen organizers, or a rainy day money fund.

Since you are making them yourself you can pick out the perfect color for your special friend (after you’ve made one for yourself, of course!)

Image courtesy of Jana from Hydrangea Hill Vintage on Etsy
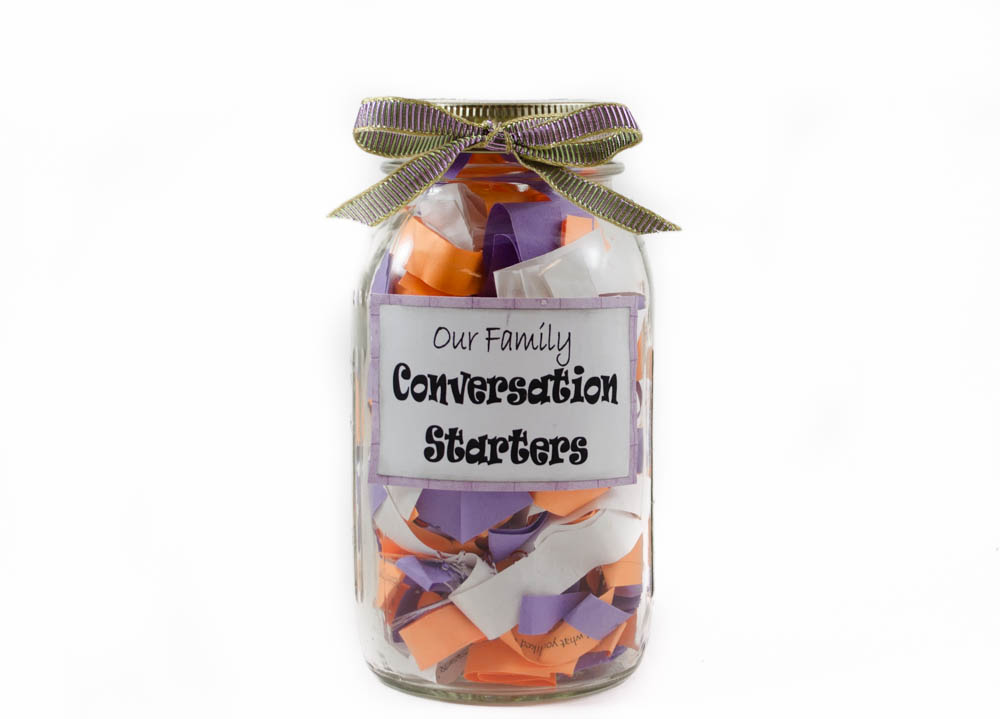
3. Conversation Jar

Mason jar conversation starters gift

Want to encourage a more meaningful family time? These mason jar crafts aren’t only fun to make but can make such a difference for the one you are giving it to. You simply cut a bunch of questions in strips, fold them up, and put them in the jar. They are meant to encourage conversation and get to know each other a little better.

Questions may include, “If you were given $100 to spend today, what would you buy with it?” or “Name the best birthday gift you were ever given.” Don’t start to panic, I’ve made it easy on you. Here’s a link to a great site that has done all the work for you so you can just print and copy. I’m sure you’ve got some great ideas too, so feel free to add some of your own.

Some other fun themes to customize this jar idea would be: Couples questions (great wedding gift!), family history questions to ask grandma & grandpa, a teacher’s jar to use in her classroom, dinner party questions, or holiday related questions/activities.

Use your imagination or stick to the script; either way, they are going to love it!

4. The Mega Mason Jar Statement Piece

Mason Jar vase

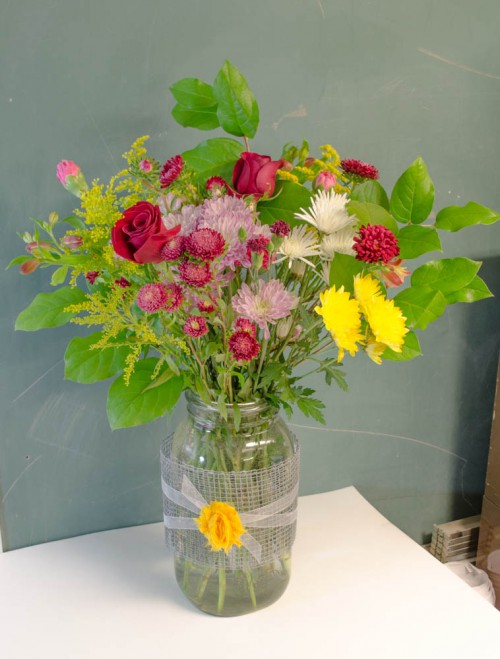
This is absolutely adorable with decoration or without. If you have a friend who loves canning, she’s going to go crazy over this extra large, 1 gallon mason jar (No, you can’t actually preserve in this jar, it’s just awesome!)

Okay, okay, so you will have to go to the store to pick this one up, but once you have it you’ll be glad you do!

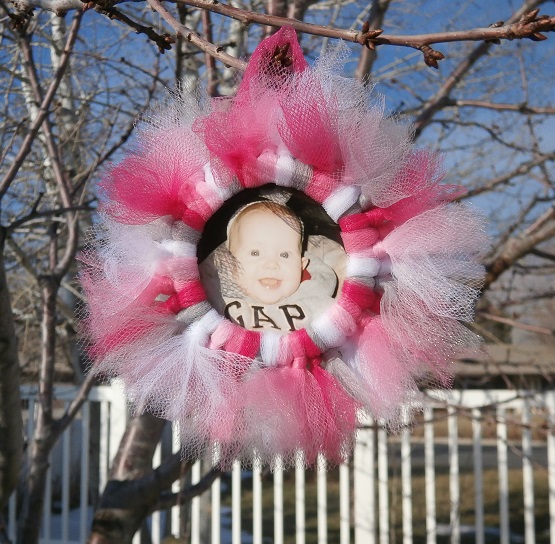
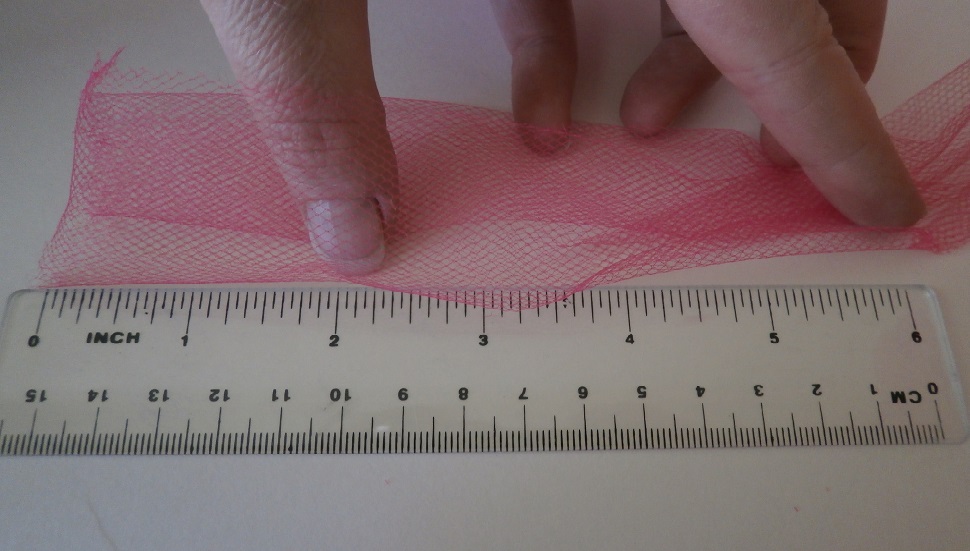
For the image shown we wrapped 5.25″ mesh wire fabric we got out of the giant junk playground that is the Smith & Edwards surplus yard to give it a more vintage, rustic look. We added a bit of ribbon and a fabric flower and……voila! A statement piece worthy of attention.

Use it for flowers, fruit, favorite knick-knacks, or just let it stand alone. It really speaks for itself.

5. Toys for Boys

Give your son Lego in a mason jar! Gifts for Boys in a mason jar! Farm animals in a mason jar gift idea
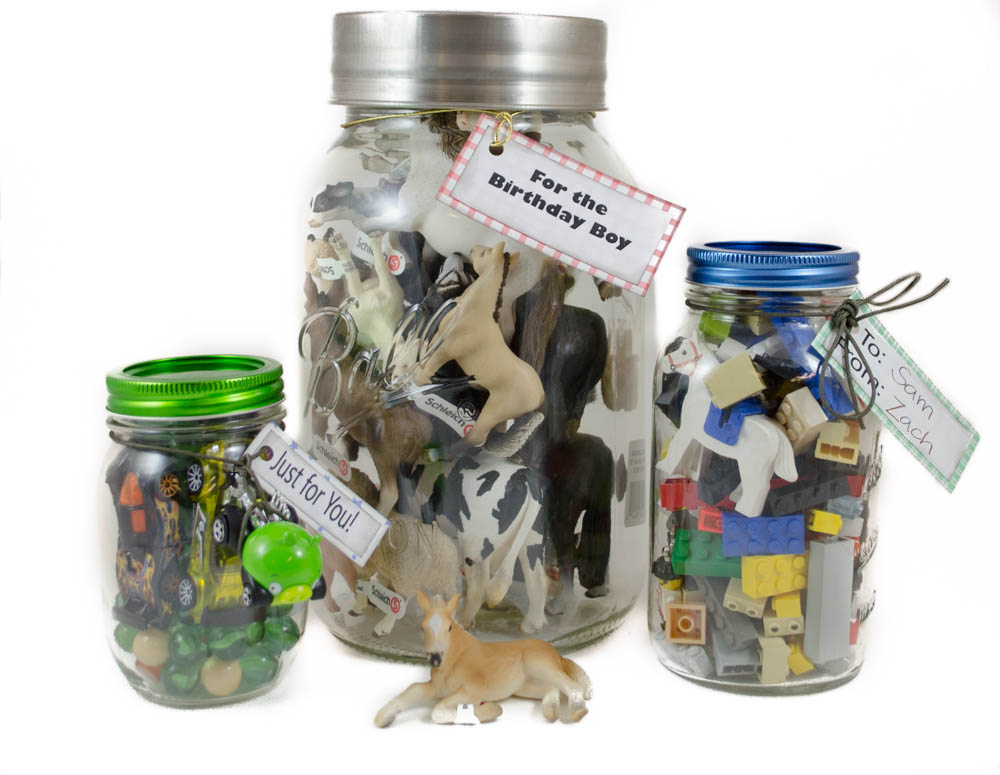
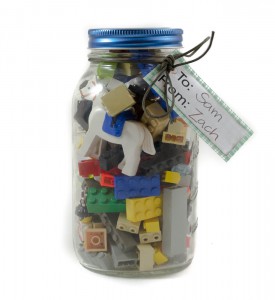
A jar full of building block toys, such as Legos®. 
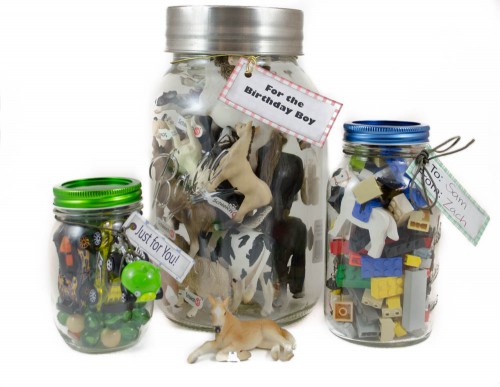
A set of jars stuffed with boy-related toys. 
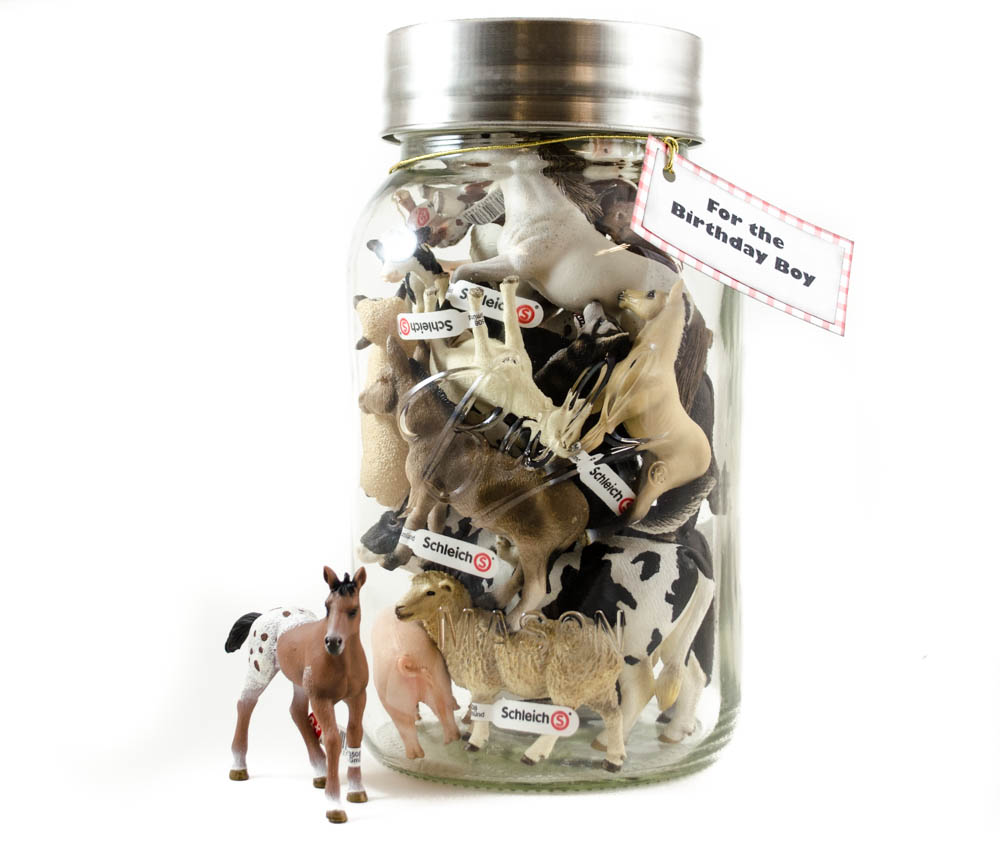
A gallon size decorative jar stuffed with Schleich® toys.

If you’re like me, it’s easy to whip up something for a girl – ribbons, flowers, glitter and sparkles and you’re good to go! Boy gifts I’ve always struggled with, especially when you want to make something with a little added personal touch.

Here are some ideas I actually got from my sister. She made some darling jars with Hot Wheels in them for a boutique.

People were crazy for them, and they were the first ones gone. She was asked if she would make some more, so I guess it’s not just me looking for boy ideas!

With 2 boys of my own, you can’t go wrong with Legos, marbles, and cars.

For the mega mason jar, it’s fun to create a theme they love and here we used farm animals from Schleich®. I can picture a cool jar full of batman or dinosaur items too, can you?

6. The Gift that Keeps on Giving

Good Deeds jar

Someone help me, I’m a dreamer. I can’t help myself, I always have been! I believe we can make a difference in the lives of those around us one small act at a time.

That being said, I love the idea of this jar. It’s to encourage looking beyond yourself and seeing what you can do for someone else. It’s a great way to teach kids to be aware of those around them and reminds us to reach out where we can.

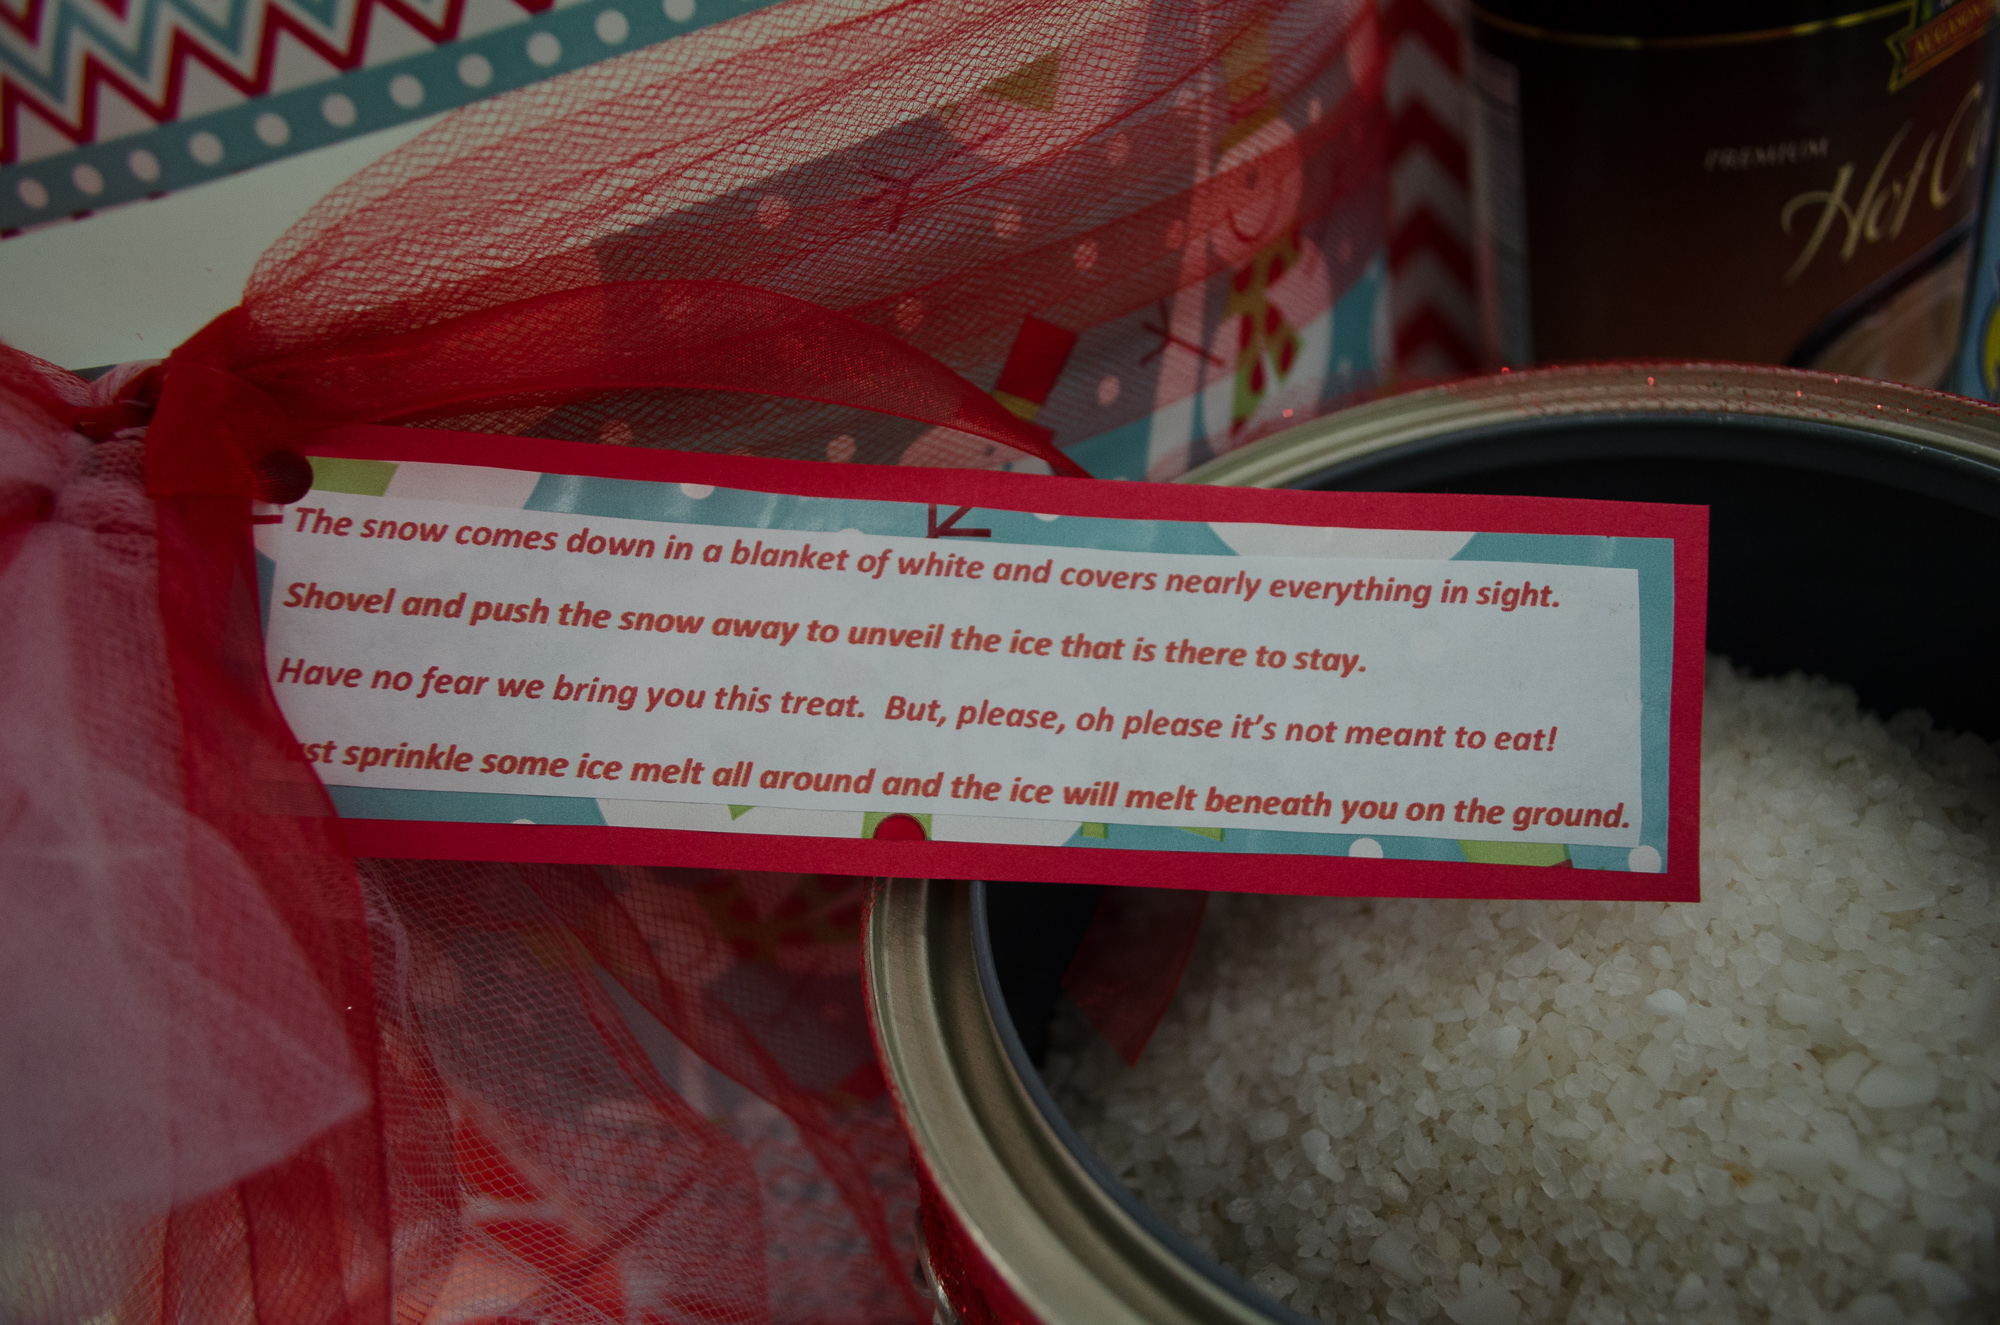
Here is what the poem says:

The Gift that Keeps on Giving

Is the gift I bring to you;

Just put a candy in the jar

For each random act of kindness you do.

Watch the jar start filling up

One small act at a time,

What a difference you can make

By letting your light shine.

When the candy reaches the top

Your service doesn’t end,

Pass the jar to someone new;

Share it with a friend!

Each time the recipient of the jar does a random act of kindness he/she puts a piece of candy in the jar. Watch your treats stack up as you are helping others. But it doesn’t stop there, after they fill their jar they can share it with another!

It’s the little things – a simple smile, dropping by to check on a neighbor, helping the lady with 5 little kids pick up the bag she just dropped, or giving some change to the guy in front of you who is short $1.78 for his groceries. Simple things that soften hearts, brighten days, and even give hope. This is a gift that benefits everyone!

7. Mason Jar Drinking Cup with Straw

Mason Jar Sip and Straw Lids

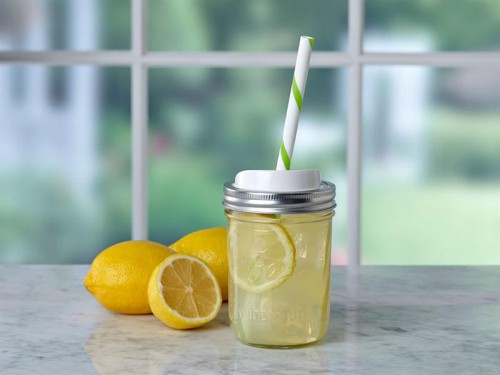
Since we’ve been talking about simple mason jar crafts, I just couldn’t resist showing you this cute idea. Ball® recently came out with lids and straws that fit perfectly on the canning jars that make drinking more like a fun activity than a basic need (you can find them here with our canning lids). This is such a fun gift idea!

Just open package, wash before you use, pop on clean mason jar, and you’ve got an easy gift that is ready to go. If you are giving it immediately, fill it with cold lemonade, add some ice and lemons, and really get bonus points!

Take a Peek: Limited-Edition Green and Blue Mason Jars

Curious about the gorgeous blue and green jars and lids throughout this post? Talk about taking your mason jars to the next level!

Blue and Green limited edition mason jars

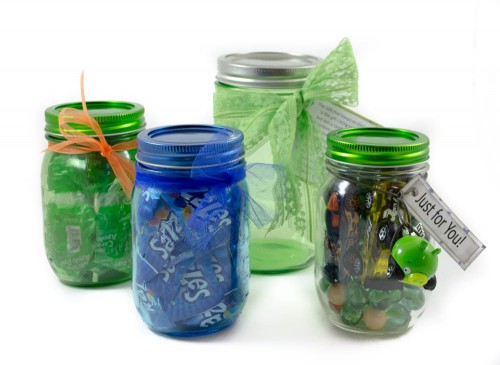
Ball® is making limited edition, period-inspired colored jars and lids in classic blue and green, just like they made 100 years ago! The quality and structure is the same as their awesome canning jars we use now, but with a fabulous vintage flair. (Find them with our canning jars here)

Blue came out in 2013, green in 2014, and a final new color will be unveiled in 2015. Since they are limited editions, grab them while you can find them because they’re not going to be available forever!

Can’t you just imagine how fun your next canning projects could be in these heritage-style mason jars? Perfect for a little added touch to your gift giving – especially at Christmas!

Show us what you make!

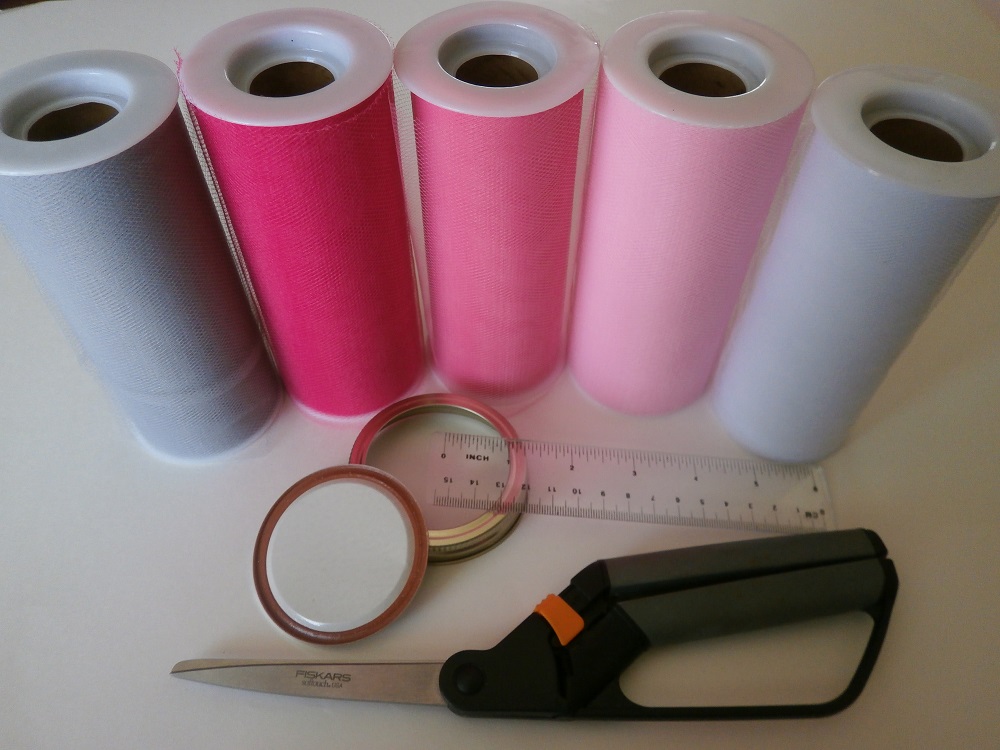
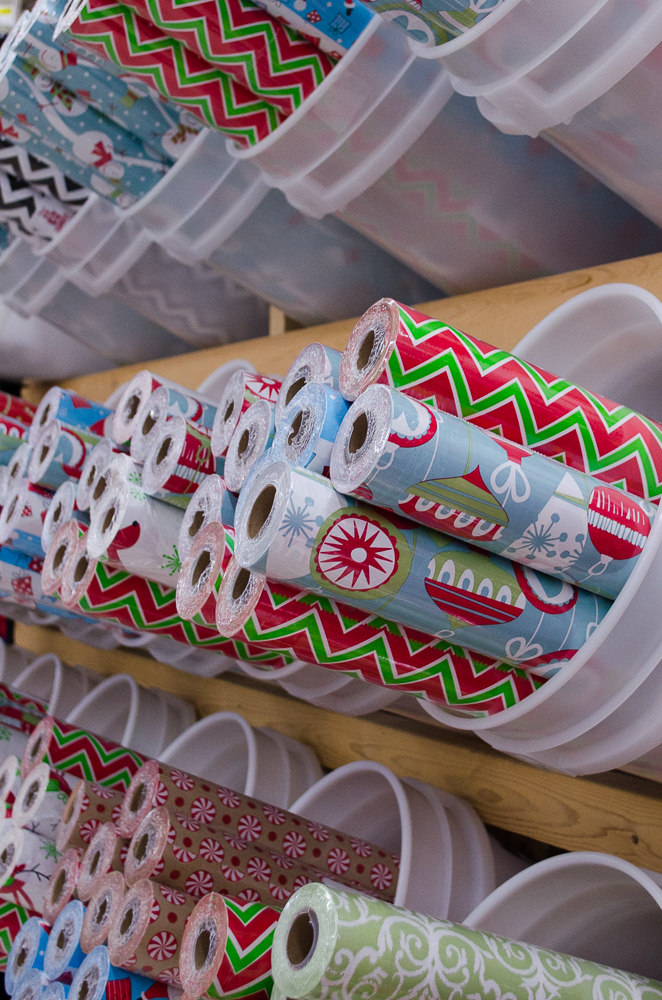
I hope these ideas inspire some creative thoughts and give you some hope next time you’re in a jam (no pun intended!) You’ll find the supplies – jars, candy, toys, ribbon & tulle – all at Smith and Edwards. If you have any questions about any of the products shown let us know and we’ll be happy to help any way we can.

We’d also love to see the mason jar gifts you’ve made, so feel free to share (and you may even be spotlighted on a future blog!)

Pin these Mason Jar Gift Ideas for Later!


Seven Mason Jar Gift Ideas on SmithandEdwards.com

Whether you have a passion for canning or just a beginner, feel free to explore our great selection of canning jars, tools, and equipment that will make your food preservation easier than ever.

Be sure to check out our helpful canning tips, too. I learned a lot from reading that blog post!

Fun neighbor gift ideas

Amazing Holiday Gift Wrap Ideas from All Wrapped Up!

- posted by Rose Marion

Today we had an amazing demonstration in-store: Leslie Sackett and Bonnie Hohman from All Wrapped Up, a Layton-based wrapping paper company, stopped in for a couple hours to give us great ideas on Christmas gifts for kids and neighbors – and great ways to decorate those gifts, too!

 gift wrap demo at Smith & Edwards

Bonnie and Leslie sharing holiday gift wrap ideas today at Smith & Edwards! Check out the green polka-dot gift: sodas because you’re “Soda-lighted” to be neighbors! :)

I was blown away by how many cool ideas Leslie and Bonnie had – and these weren’t outrageous, hard-to-find gifts. These are fun, everyday items that people love to get as gifts – but Leslie and Bonnie made them look like a million bucks!

Leslie and Bonnie know all about wrapping amazing gifts because they’ve built an entire business around making gifts look great with premium wrapping paper!

Take a look:

Holiday Gift Wrap Ideas from Bonnie & Leslie:

Smith & Edwards Holiday Gift Ideas: Hot Chocolate and Pamper Yourself

On the left, give the gift of hot chocolate! A mug (these shown are from the popular “That’s All” line), hot cocoa mix, marshmallows, and you could even add candy canes!
I’ll show you a close-up of the middle fudge can – keep reading!
At far right, “Wishing you Warm & Cozy Toes this Winter” has a theme of pamper-yourself goodies. What great holiday gift ideas for neighbors, teachers, and friends!

I love this 5-gallon “game night” bucket that’s wrapped in Santa wrapping paper – it’s perfect for neighbors as well as kids! You can even add cards and your kids’ favorite games, like Sorry!, in the bucket. Perfect for young kids as well as kids who are just starting their own family themselves.

Holiday gift wrap ideas at Smith & Edwards

All you need is a 5-gallon bucket, your kids’ or your neighbors’ favorite candy, and some tulle and wrapping paper, for a great holiday gift idea!

Bonnie and Leslie are really creative, so they found some poems to attach to the gifts that are fun – you can print them out on white paper and glue them to scrapbook paper or matching wrapping paper for a really charming look.

Fudge holiday gift ideas at Smith & Edwards

This poem explains that they ran out of time to make fudge – so here are all the fixins to make their own fudge themselves! (click to view larger)


Paint Can M&M Poem Gift Ideas

Cute M&M’s candy gift idea made with M&Ms, a poem, wrapping paper, tulle… and is that a paint can?

Yep- those are real paint cans! Use Bonnie and Leslie’s idea – you can buy never-used, brand-new paint cans here at Smith & Edwards and here on SmithandEdwards.com.

Bonnie told me, So many people will wrap their gifts in a box. But how neat is it to put your gifts in a paint can? It’s a really unique idea they’ll remember!

To make a paint-can gift, simply collect the paint cans you’ll need at Smith & Edwards, then cut the wrapping paper you’ll need to cover the outside. Tape the wrapping paper in place, wrap with tulle, and before you make the bow, slide on a hole-punched poem for a cute note that shows your neighbor how much you care!


Oh, and I’ve got to show you my favorite “neighbor gift idea”:

Neighbor gift Ice Melt at Smith and Edwards

Give your neighbors the gift of ice-free steps and driveway! Use a 5-gallon bucket or a paint can to hold the ice melt, and tie on one of our aluminum scoops, and you’re set!

Ice Melt Poem - Gift Wrap Ideas at Smith & Edwards

Here’s the poem you could use to explain your thoughtful gift of Ice Melt!

What you’ll need to make an Ice Melt Gift:

  • 5-Gallon Bucket or new Paint Can
  • Ice Melt (we have 8-pound jars and 20-pound bags as low as $6.99)
  • Aluminum scoop
  • All Wrapped Up wrapping paper – now available online!
  • Tulle
  • Poem

Heck, they might snowblow your sidewalk if they like your gifts – so why not?

What Makes “All Wrapped Up” Special?

Bonnie and Leslie created All Wrapped Up out of their desire for attractive gift wrap that came in large quantities – not just in precut sheets – and was also high-quality.

This paper is thick – this is really nice paper that won’t tear around the corners of boxes – so even if your gifts get mailed cross-country, they’ll look as good as when you wrapped them! They come in rolls of 150 square feet. And the designs are all custom creations.

Plus, the wrapping paper is created right here in the USA. And All Wrapped Up’s wrapping paper is completely recyclable, made using water-soluble inks: having a “green” wrapping paper that was also well-designed and durable was important to Leslie and Bonnie.

Trust me, once you try this wrapping paper, you won’t want to go back to the other stuff!

And they might not want me telling you this, but Smith & Edwards has the BEST prices on All Wrapped Up® wrapping paper in Utah!

Thanks, Leslie and Bonnie, for a great demo today – hope to have you back soon!

Leslie and Bonnie from All Wrapped Up, Layton, UtahWatch for them Tuesday, November 19 on Studio 5… and I’m sure we’ll be running some promotions on their top-notch wrapping paper soon!

Get FREE Wrapping Paper!

Of course, who wouldn’t love a big basket of gift wrap supplies? That’s what you can get through our Facebook page:

All Wrapped Up Gift Wrap Giveaway Smith & Edwards

Click the picture to go to Facebook and enter the Giveaway! (ends next week)

Come Get Your Wrapping Paper at Smith & Edwards

Come on in to Smith & Edwards to get your hands on these great wrapping paper designs. (MV, our Sporting Goods manager, would like me to remind you that we have plenty of gifts here at Smith & Edwards, too… but that’s another post!)

We’re located at 3936 N Highway 126 in Farr West, Utah. Come see us this week!

Where’s the goods?

Come in the front door and look to your left: you’ll see Leslie and Bonnie’s great Christmas wrapping paper in baskets right at the door. (Look how much paper comes in each roll! No more running out on Christmas Eve!)

Christmas wrapping paper made by Layton, Utah company All Wrapped Up - Smith and Edwards

Then, keep going down that main aisle until you find yourself in Housewares, where you’ll find those aluminum scoops, tulle, and everyday wrapping paper that’s great for birthdays and more.

You’ll be right next to the Paint counter then, and you can pick up the 5-gallon buckets or new paint cans you need to package your ice melt or candy gifts.

(Where else can you find all these great-quality products in 1 place than Smith & Edwards?)

See you soon!