Klondike with snow-capped trees and mountains - photo courtesy Richard Broadbent

Your Klondike Gear List

- posted by EmmaLee Sessions

It’s time to turn our sights towards one of the most exciting “holidays” known in the Boy Scouting community. Having grown up in a family of Eagle Scouts, I heard about Klondike all my life, but for obvious reasons wasn’t allowed to attend. So, I teamed up with my dad, Scott Woodland, and Smith & Edwards employee Dennis Rasmussen to learn a little more about this exciting campout and how to prepare for it.

Klondike is the place where boys become men, or so we have been told, and prove their ability to survive through some of Mother Nature’s harshest conditions. We wanted to take a minute to talk about the basic essentials that your youth are going to need for Klondike this year, and to be better prepared for the years to come.

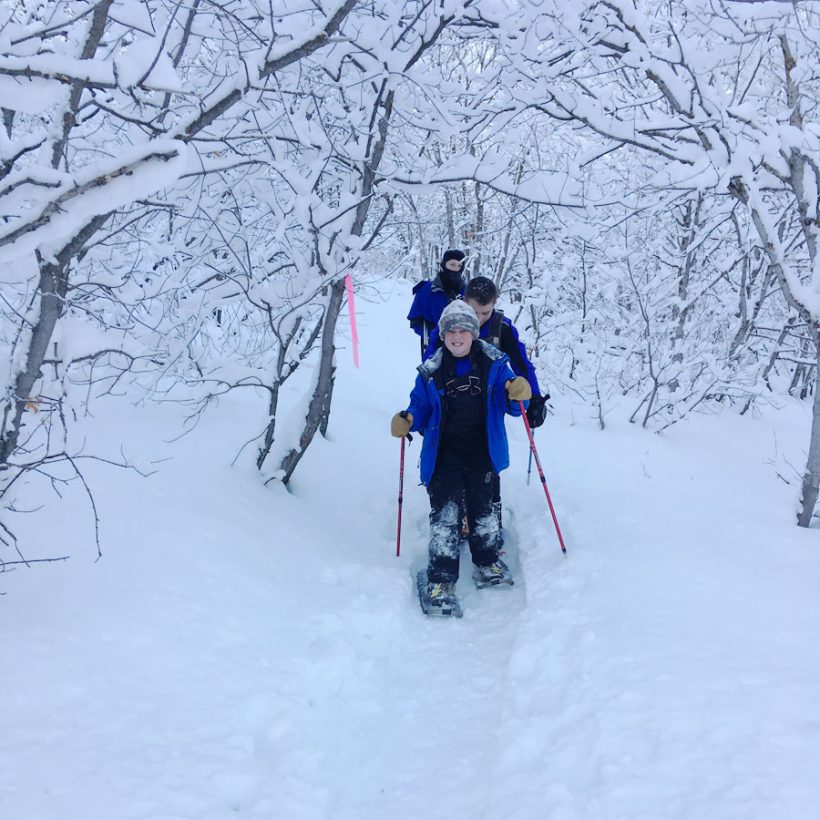
Scouts of Troop #494 snowshoeing at Klondike. Photo courtesy Richard Broadbent

Scouts of Troop #494 snowshoeing at Klondike. Photo courtesy Richard Broadbent

Warm Clothing for Klondike

The clothing that your boys will need to take on this adventure will make or break their excursion. From bottom to top, it’s important to be covered properly. Dennis Rasmussen was extremely helpful in this area of expertise.

Socks

It’s important to wear two layers of socks while hiking and camping. Look for boot sock liners that are made of either polypropylene or polyester. These fabrics wick moisture and sweat away from the body, keeping you dry and warm. This will also help prevent against blisters on your feet.

Wool is the best material for your boot socks. If your feet do end up getting wet, wool will still hold your body heat and keep you warm, unlike other materials that can actually pull heat away from your body.

Take a look at the men’s merino wool hiking socks here!

Footwear

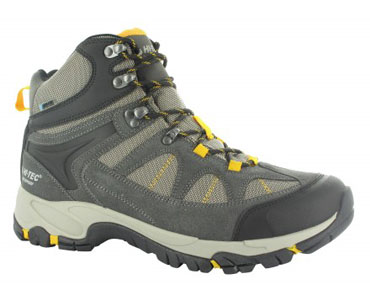
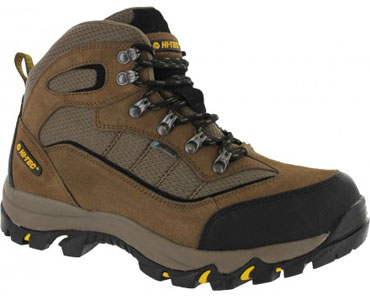
You will need to invest in a good pair of waterproof hiking boots. If you can keep your feet dry and warm, you will have a greater chance of keeping your body warm too.

The men’s Hi-Tec boot styles, Altitude Lite i (52103), and the Skamania (52122 regular and 52122W wide) are excellent waterproof choices.

(Hi-Tec’s women’s Hi-Tec boot styles, 9022 and 22040 are excellent equivalents for women in winter)

Editor’s Note: The shoe styles listed above may be discontinued in the future. If the links above do not work then we invite you to see the active styles of men’s and women’s hiking boots on our retail site.
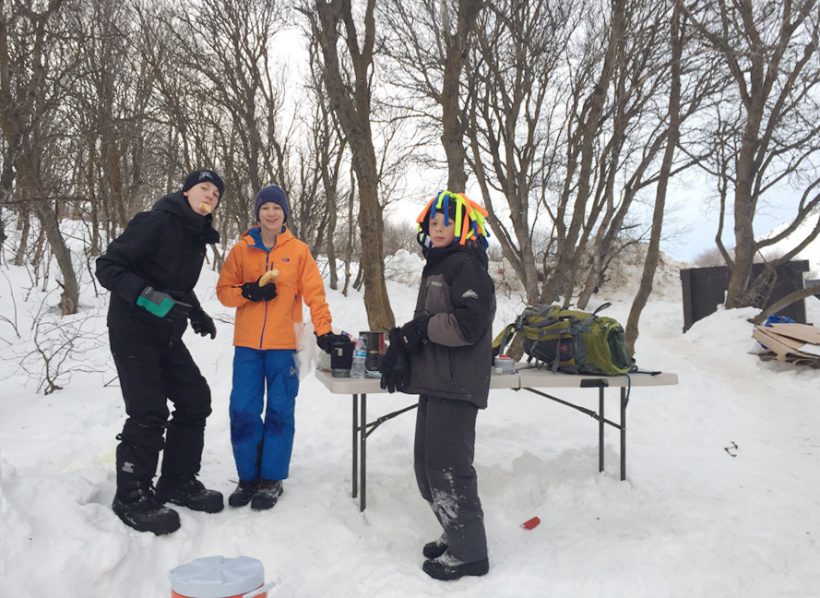
Klondike scouts with snow pants and snow boots - courtesy Richard Broadbent

These Troop #494 scouts are warm in hats, snow pants, coats, and snow boots while they break for food! – photo courtesy Richard Broadbent

Base Layers

It’s essential to choose the right material. Look for “long johns” made out of polypropylene or polyester. DO NOT wear cotton fabrics as a base-layer. Unlike polyester or polypropylene, cotton absorbs moisture and holds it close to your skin. This will lower your temperature and increase your risk of hypothermia. Thermax is also another perfect material to use as an insulating layer.

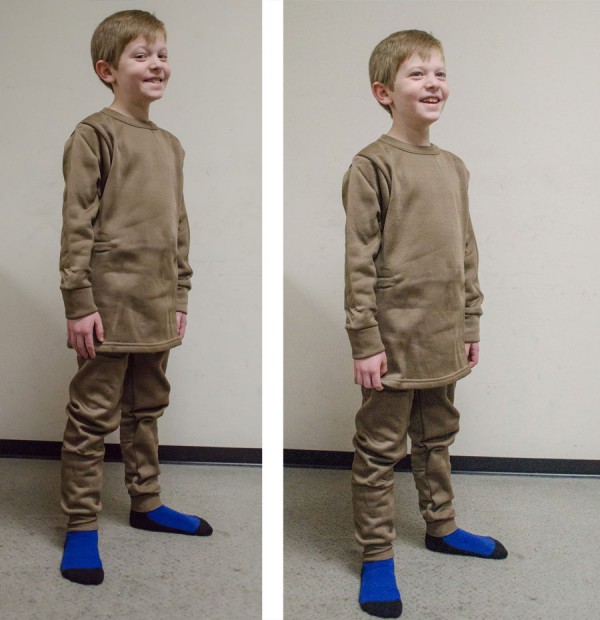
Take a look at our Carhartt, Columbia, and Under Armour men’s thermals and women’s thermals! These youth thermals in our army surplus department are great too, for smaller children.

Boys' polypropelene thermals at Smith & Edwards to keep him warm!

Shirts & Pants

Clothing items are best when made out of synthetic materials, unless you have wool. Synthetic fabrics dry quicker and are not as heavy as wool or cotton when wet. They will also continue to wick moisture away from your body. Dennis strongly suggested materials other than cotton, but said, “cotton can be worn, but should be kept at least two layers away from your skin.”

Coats & Outerwear

Have a lightweight and warm insulator level. Fleece is a great choice because it is not heavy and it retains body heat really well. Look for thin fleece jackets to keep bulk to a minimum under your winter coat and rain gear. Be sure to have a waterproof exterior layer to protect against rain and snow. If you can stay dry, then you’ll stay warm easier.

Hats & Gloves

Keep your head and hands warm and protected. Look for water-resistant and insulated gloves to keep your hands dry and warm. Any kind of polyester/wool blend is perfect because it will wick moisture away and still keep you warm if you do get wet.

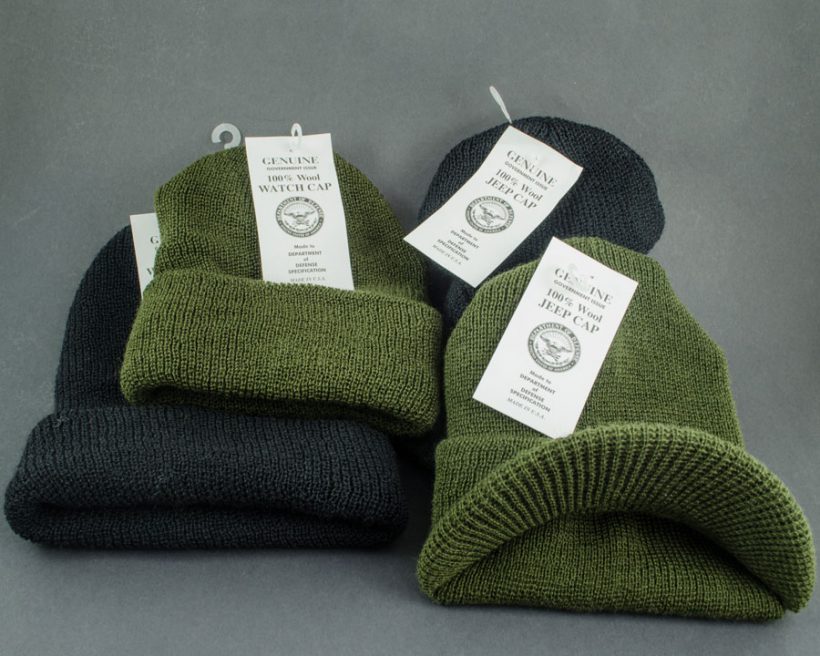
Wool Army hats at Smith and Edwards

Come in to our store to check out the wool and polyester hats in our surplus department and the variety of winter gloves we carry. Or see a small variety of balaclavas and winter hats on our website.
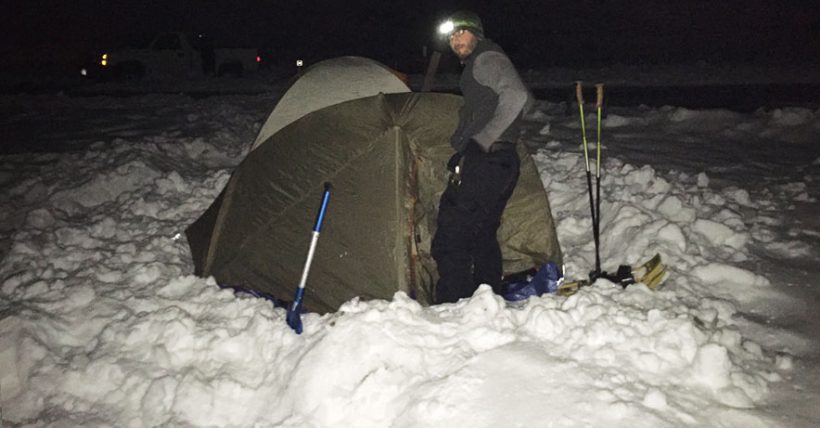
Klondike scoutmaster setting up tent - Photo courtesy Chris Ward

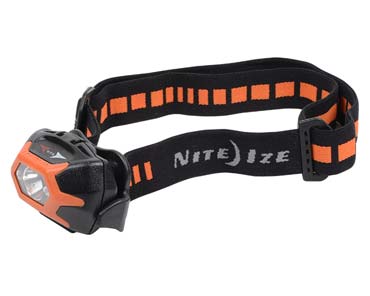
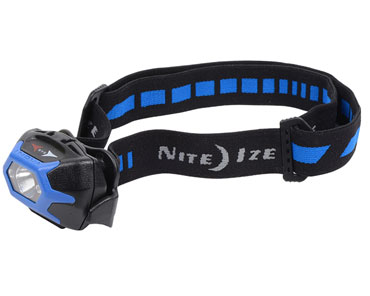
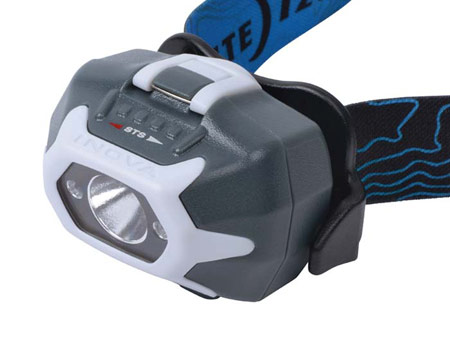
Scoutmasters need gear for Klondike, too! A headlamp will let you work with your hands while you light the path. Photo courtesy Chris Ward.

Gear & Essentials for Klondike

In order to best live by the Scout Motto, “Be Prepared”, you need to have the proper clothing and gear. Some of our favorite gear that would work great for your Klondike experience and other outdoor camping and hiking trips include headlamps, survival kits, and backpacks.

Scott Woodland, former Trek Director at K-M High Adventure Base in Montana, put together a gear list with additional guidance and commentary. Download the Klondike Gear Guide here! (55kb PDF)

Keep in mind that each Klondike has a theme and there may be additional equipment you need. Mr. Woodland simply went over your essentials and wanted to remind everyone, “Don’t forget your survival guide!”

Prepare well and know how to use your equipment properly. If you do these things then you will never find yourself ill-prepared for Mother Nature’s harshest conditions. Good luck and happy camping!

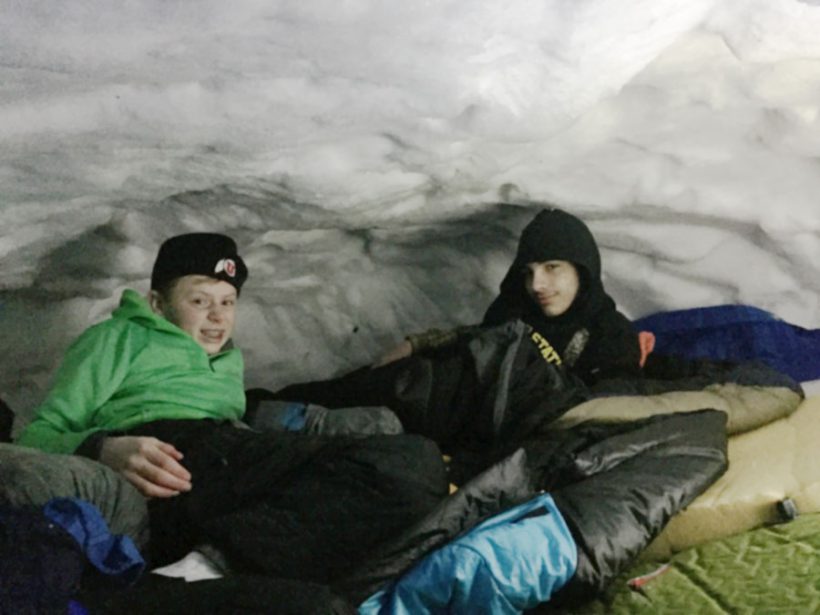
Scouts of troop #494 in their ice cave at Klondike - photo courtesy Richard Broadbent

Scouts of troop #494 in their ice cave at Klondike – photo courtesy Richard Broadbent

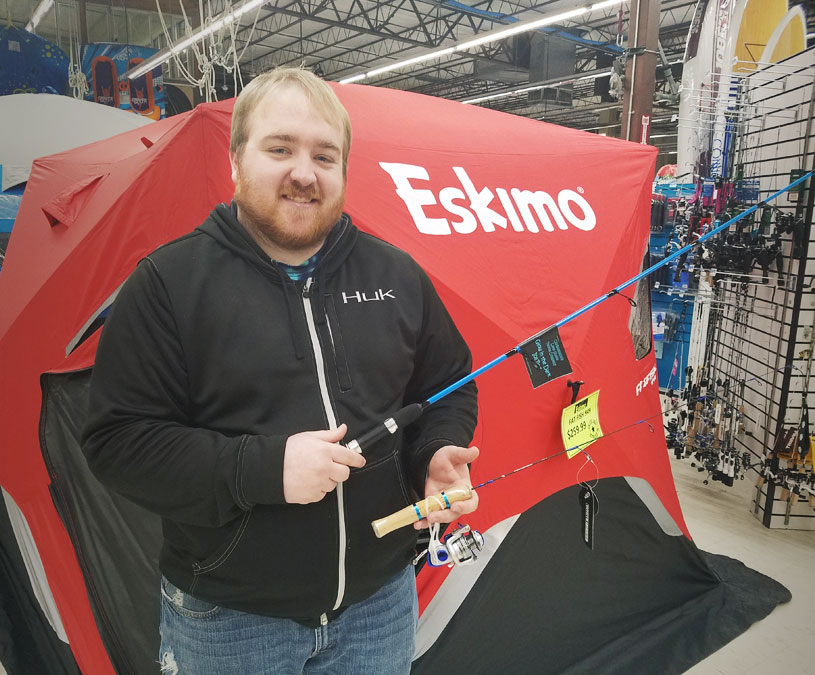
Chris's new-in-2017 Utah ice fishing gear picks at Smith & Edwards

Chris’s Ice Fishing Picks for 2017: What’s New, & What’s Back!

- posted by Chris Jacobson

Hey guys, so I don’t know if you have noticed but it’s getting really cold outside lately! That means a lot of our favorite fishing holes are covered in ice. [Read my top 5 tips to get ready for Ice Fishing!]

I have even heard of some of my favorite spots back where I grew up in northern Utah having 12in of ice, and that was before the most recent cold snap. I am not one that likes very thin ice so having about 5-6 inches of ice gets me excited to get out a try some fishing!
To help combat the ice and the cold, I have put together some of my favorite new ice fishing items that I am excited to get out and try. By new, I mean either newly-released this year or a brand that we just started carrying in the store. Check it out:

Chris’s Auger of Choice

Let’s start in augers. It seems like to me that the new rage in augers is either electric or propane instead of gas. There is a lot of reasons they have become more popular. They are quieter, lighter, and don’t have the stinky exhaust that the gas augers do.

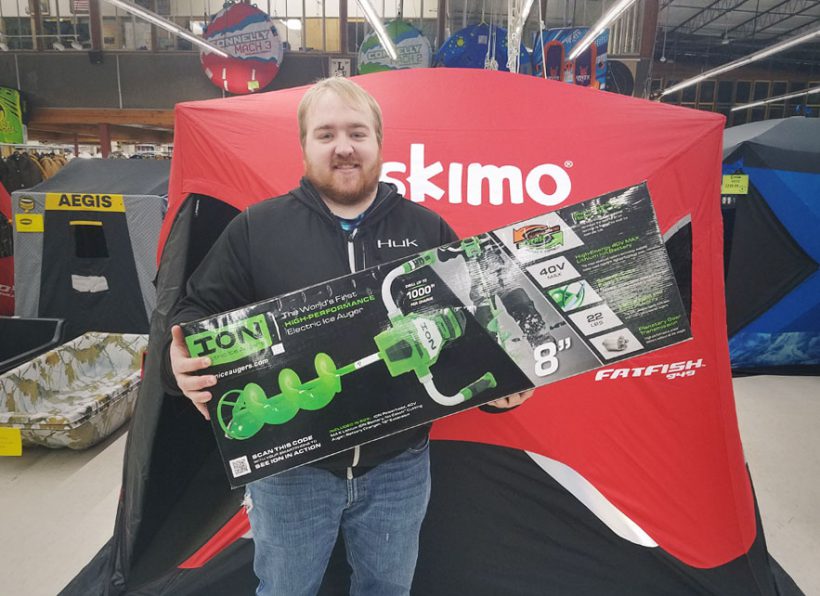
Chris recommends this powerful ION Electric Ice Fishing Auger...My pick for an electric auger is the ION 8 inch electric auger. Two of the coolest things about this auger is that it has a reverse option and that it only weighs 22 pounds!

This is one of the lightest augers that I have seen! No more packing or dragging that heavy auger across the ice!

Probably one of the biggest questions I had, and others have had, was: Won’t the battery die in the cold really fast?

The answer to that is, NO! The lithium ion battery will cut through 1,000 inches of ice! I don’t know about you but I don’t cut that much ice in a trip. This auger will do everything that you need it to.

Ice Fishing Shelters

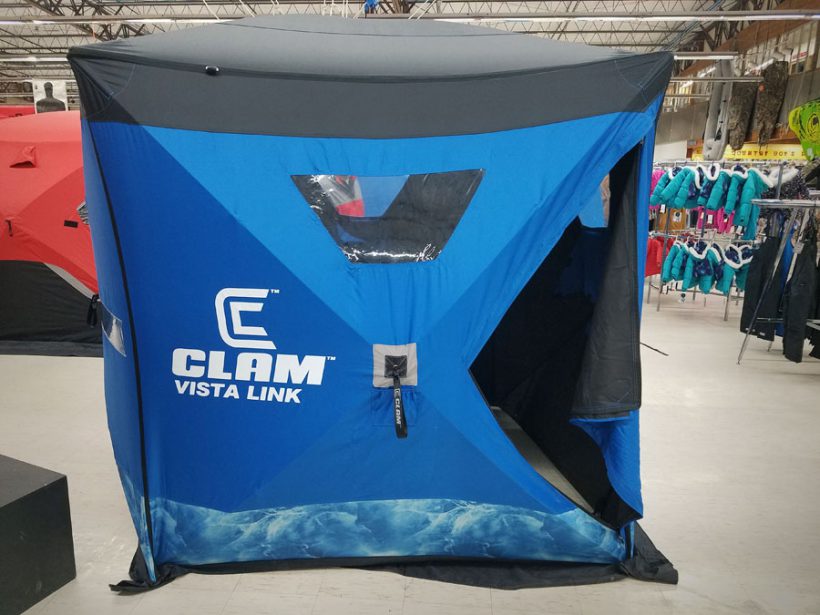
As far as shelters go, we carry Clam and Eskimo brands and they both have great things about each one! It really is hard to pick one or the other. This much I can tell you, they both are selling really well right now and a shelter is almost always something you need to take when you go ice fishing! Our best seller is probably the Clam Six Pack 1660 right now!
Clam Ice Fishing Tents at Smith & Edwards

Back by Popular Demand: Swedish Pimples

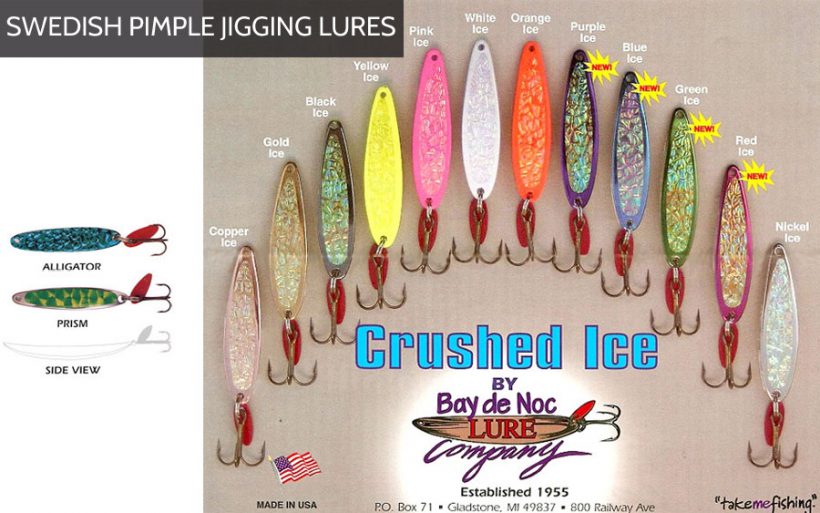
We used to carry Swedish Pimple lures, and interest died down. Now people want them back, and so I’ve added them to our ice department!

Swedish Pimple LuresThere are 2 ways I see people using the Swedish Pimples.

One way is just as a lure on its own, putting the bait on the Swedish Pimple hook.

A different way, which seems more effective, is to use the Swedish pimple to attract the fish in. Then, run a line down from the Swedish pimple to a Ratfinkee or a Ratso, and the fish will smell the bait on that.

Try it out for yourself and let me know what works!

Ice Fishing Rod Brands to Watch

I have two fishing rod companies that I think are doing great things! The first one is a local company that many of you have heard of. Christenson Lake Shore Tackle of Manila, Utah has come out with some new ice fishing rods that are tailored to the local Utah fishing market. One of which is a 40″ Lake trout rod. They also come in some cool colors, too!

The next company is 13 Fishing. They were one of the biggest new booths at ICAST last July and they have rods for almost everything. They have ice rods, casting rods, and spinning rods. All of which we will be carrying but their ice rods have done really well and look really good! Check them out and see for yourself!

New Ice Fishing Rods at Smith & Edwards: 13 Fishing & Christensen Lakeshore Tackle!

These are just a few of the new things that I am excited about. There is so many new things out there that it is almost impossible to list them all!

I would love to hear the brands or equipment that you just can’t go fishing without!

CarryMeGear Holsters

Brand Spotlight: CarryMeGear Holsters – made in Utah!

- posted by EmmaLee Sessions

Small of Back CarryMeGear holster for her Glock

Look out, Utah! There is a new brand of gun holsters in the state and they are exclusively at Smith and Edwards. We know you are going to love them.

CarryMeGear is owned and operated by Smith and Edwards’ own Mike Vause, right here in Ogden, UT. Mike is the Sporting Goods manager here and we are super excited to be carrying his handmade gun holsters!

Mike has spent most of his professional career in the shooting sports industry. For years, he has been looking for something new to bring to this growing market.

“I have owned and tried many holster styles and brands,” he explained, “and decided to take some elements that I like and incorporate them into my thoughts and needs. I woke up one morning and said, ‘Let’s do this!'”

After a lot of work, trial and error, collaboration and help from his good friends, the first CarryMeGear Inside-the-Waistband (IWB) holster came to be.

Why Carry with Kydex?

Carry Me Gear holsters are made out of Kydex, which is a thermal plastic designed for heating and shaping for custom fit. Kydex is lightweight and durable, lasting longer than other materials.

Why is Kydex superior? It is thinner and easier to conceal, and it is sweat and weather resistant. You no longer have to wait for your holster to dry out, making these the perfect holsters for backpacking and hiking.

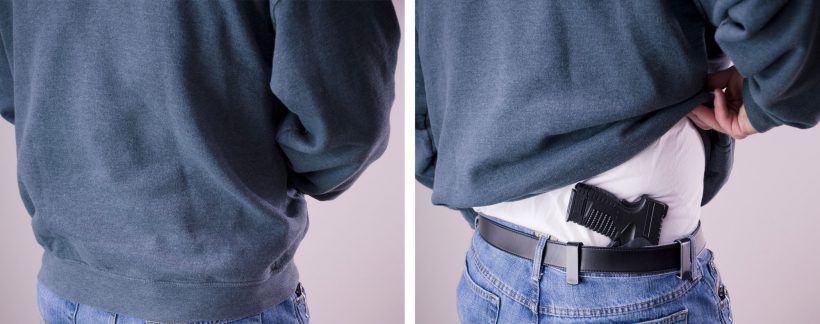
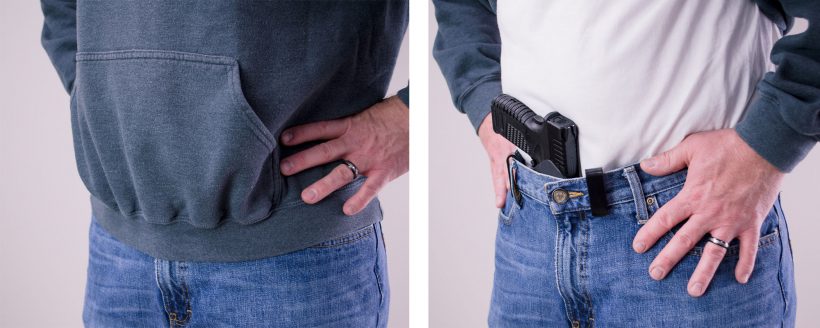
This Springfield XDS doesn't print with the CarryMeGear holster in kidney position.

This Springfield XDS doesn’t print with the CarryMeGear holster in kidney position.

Mike Vause, designer of CarryMeGear holstersWhat sets CarryMeGear Apart?

When asked what sets CarryMeGear apart from brands we carry, Mike said, “The difference is adjustability of attachment and fit to the body. It spreads the load over a larger area than single attachment designs, and is sleeker than other 2-point, soft-back styles.”

Still, the greatest things that set these holsters apart are: 1) they are handmade right in Ogden, so you’ll be supporting a local business, and 2) they are about $10 less expensive than other great brands!

Additionally, each CarryMeGear holster is hand-fitted to a mold of the exact model of gun, and hand-sanded for snag-free carry.

We asked one of our buyers, Chris Jacobson, why he was so excited about the new CarryMeGear gun holsters. “These holsters are handmade locally in Ogden, UT and are fitted to your exact gun,” he said. “The Inside-the-Waistband holster is surprisingly comfy. I personally own one and really enjoy using it.”

iwb-carrymegear-springfield-xds-appendix-carry-holster

IWB holsters are especially popular because you can adjust to use your choice of strong side, kidney, or appendix carry. CarryMeGear holsters are even more comfortable because they are easily adjustable to fit every body shape and size.

The holster’s forward and backward cant, or angle, can be adjusted. In addition, tension on the firearm itself can be increased or decreased. Screws and bushings also allow the holster to move closer to or away from the body.

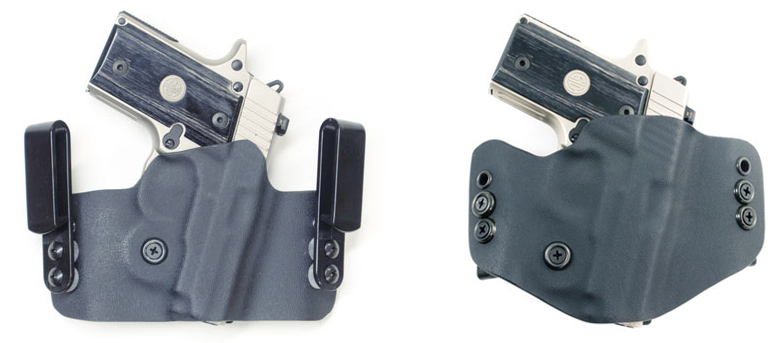
IWB & OWB CarryMeGear Holsters

A Sig P238 is secure in an Inside-the-Waistband, left, or Outside-the-Waistband, right, CarryMeGear holster.

Outside the Box: OWB & Small-of-Back Carry

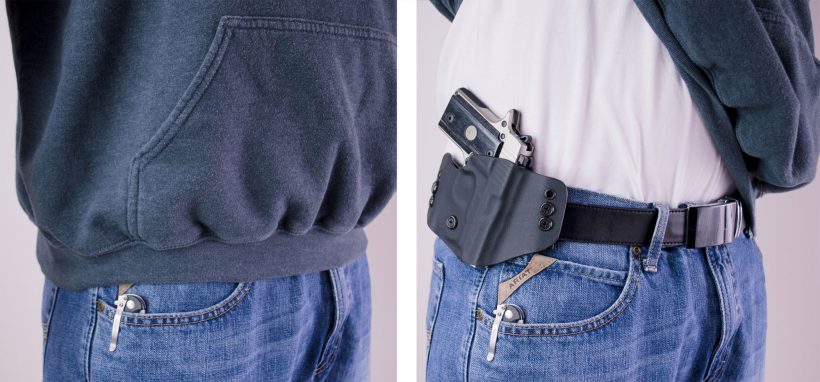
CarryMeGear also makes Outside-the-Waistband (OWB) holsters for strong side carry. Smith & Edwards carries these OWB holsters for several models of semiautomatic handguns, as well as a Smith and Wesson J-frame Revolver model.

OWB Sig P238 CarryMeGear handmade holster

This Sig P238 disappears completely in the CarryMeGear OWB holster.

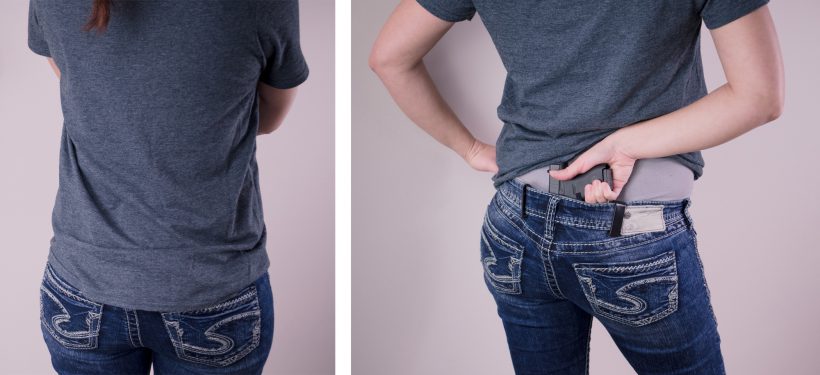
Mike is also very aware of the needs of his customers, and is open to additional feedback and insights. Mike began working on Small-Of-Back holsters due to requests from women shooters.

The small of the back design allows ladies to carry while maintaining a natural hip silhouette. “We are designing, thinking, and testing more designs and products,” he told me. “A Small-Of-Back (SOB) holster has been tested and approved by some of our Smith and Edwards concealed carry permit holders.”

This Small of Back CarryMeGear Holster conceals her Glock perfectly!

This Small of Back CarryMeGear Holster conceals her Glock perfectly!

Look for the small-of-back holsters, magazine pouches, and even more styles of holsters from CarryMeGear at Smith & Edwards soon!

Get Yours at Smith & Edwards and on our Website

We know that you will love the CarryMeGear holsters, whether you are a CCP holder or looking for a good range holster. We love the CarryMeGear holsters and recommend them to everyone. You’ll wonder how you ever lived without one!

Talk to one of our experts and try them today at Smith and Edwards. You can also find our selection of handgun holsters here on SmithandEdwards.com.

How to tie a Double Diamond Knot

How to tie a Double Diamond Knot and Horse Packing Q&A

- posted by Rose Marion

We were privileged to have Travis Sparks come by and do a packing demo the other day. Hunting is a totally different experience with horses. One hunter told me his story about finally getting his deer right at the end of the day, and was dreading the hike back uphill to the truck. Luckily some horse packers saw him, came down, and helped him quarter & pack out the deer. He would have been out there way past sunset without their help!

Packing isn’t just about packing out quarters. Your mule or horse might have tent poles, a shovel, lawn chairs, your bedroll, coolers, cooking supplies, or feed on his back. When you throw in antlers into the mix, packing turns into a real art & skill developed through practice.

Travis is a member of the Back Country Horsemen of Utah & does a lot of packing himself. He gave us a detailed demonstration of the Double Diamond hitch, and answered several questions about packing.

Watch Horse Packing Tips & Knot How-To

I split Travis’s presentation into two videos for you. First, you can see exactly how to do the Double Diamond knot on our trusted cavalry horse. This is a great hitch for top packing. Then, sit back and listen to Travis’s question & answer session about packing elk antlers, using a pack scale to balance your load, using soft packs vs hard packs, and tightening a cinch.

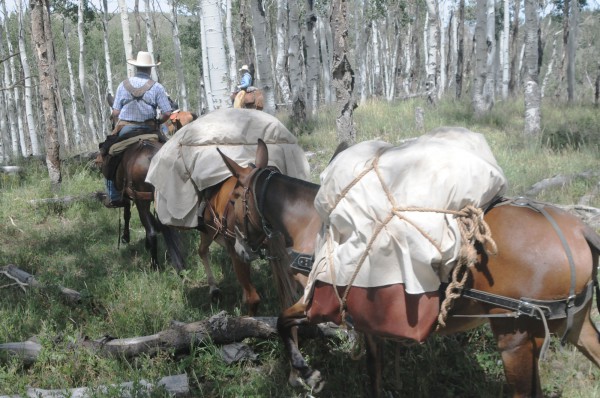
Packing with a Double Diamond knot

Packing with a Double Diamond knot. Thanks to Troy Higgs for this picture!

Watch: How to tie a Double Diamond Knot

Use a 45-foot rope to make this hitch, which starts out similar to the box hitch. Make sure and pull the rope tight.

Watch: Horse Packing for Hunting Q&A

Where to get those Pack Bags

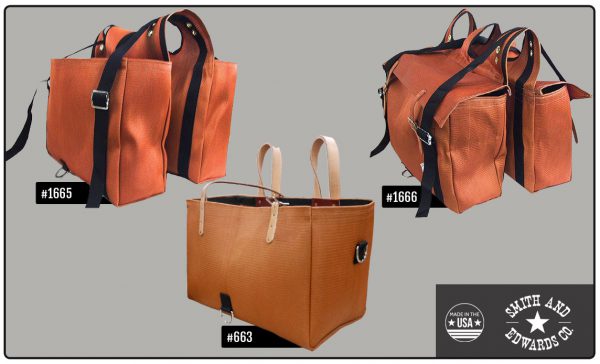
Smith & Edwards pack bags for hunting on horseback

We make the pack bags shown in Travis’s demo, these are the #663 designed for coolers. We also make a narrower bag without flaps, #1665, and #1666 with flaps.

Of course I’ve got to mention that we proudly make those bearcloth packs you saw in the video, and you can get them right here on our online store. Read about our Tack Workshop in our Ogden store.

Do you have questions about horse packing that Marty or Travis can answer for you? Let us know in the comments below!

Travis’s Tips for Packing

  • Check your cinch after moving your animal – always make sure it’s tight!
  • Your goal is to make everything into a single package that moves together, without a pivot point
  • Keep your horse safe from antlers: make sure the rack moves along with the pack bags. Try not using a stick or a branch to elevate the horns, because they don’t ride well.
  • Keep the center of gravity low
  • Keep in mind what will hit a branch first: your pack bags or antlers?
  • Don’t take shortcuts, don’t get in a hurry – pack it right.
  • Rule of thumb, pack 15% of an animal’s weight. So for a 1000 pound animal, aim for 150-160 pounds split over the two sides.
Smith and Edwards profiles Yellowstone gloves out of Idaho Fall, ID

Brand Spotlight: Yellowstone Leather Products for 40 Years Runnin’

- posted by EmmaLee Sessions

We here at Smith and Edwards have often wondered, “What makes a good, leather work glove?” The folks at Yellowstone Leather Products have been showing us what a good quality work glove looks like for the past 47 years, and we couldn’t be more excited about it!

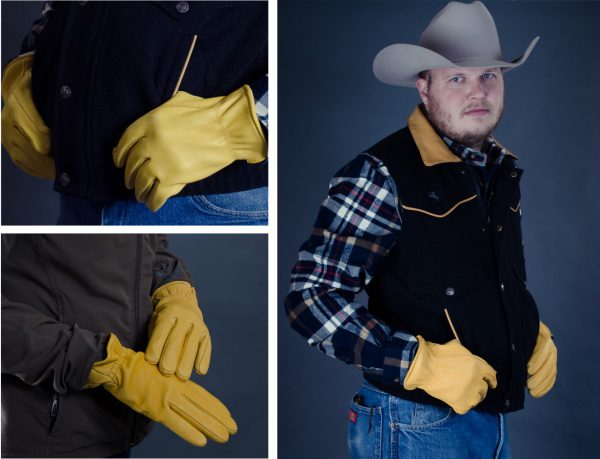
Kevin modeling our Yellowstone elkskin and deerskin gloves.

Kevin, from our hardware department, modeling our Yellowstone elkskin and deerskin gloves.

Yellowstone Leather Products is an Idaho-based business that opened in 1960. In 1969, now owner, Boyd Zollinger bought the company and went to work marketing and distributing American made work gloves. Zollinger said, “I was back east for school and was looking for a way to get back to Idaho,” where he was originally from. “My family and I looked at this company that was for sale and we thought, ‘we could work with that.'” That’s exactly what they have been doing now for the last 47 years.

Smith & Edwards has had a long partnership with Boyd and Yellowstone, reaching back to 1969:

“We found their quality is far superior to any other glove we carry,” said Jim Smith, president of Smith & Edwards, an Ogden, Utah, retailer that has stocked Yellowstone Gloves for more than 35 years. “Most people who buy Yellowstone know they are quality gloves that will last longer than two or three other pairs they could buy cheaper.”
Article from 2010 by Clark Corbin with the Idaho Falls Post Register

What makes Yellowstone Leather work gloves different?

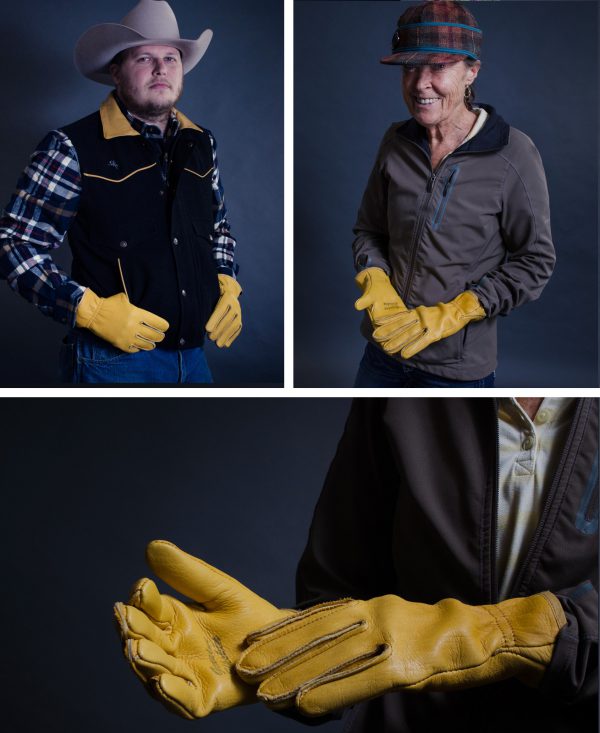
The patented pattern of Yellowstone work gloves is really, what sets them apart from other work gloves. All of the premium leather gloves made at their warehouse in Idaho Falls feature both a seamless palm and back, making these work gloves form fitting. They fit tighter to your hand, Zollinger said, thus making it more like working with your bare hands, but with the protection necessary for even the toughest jobs.

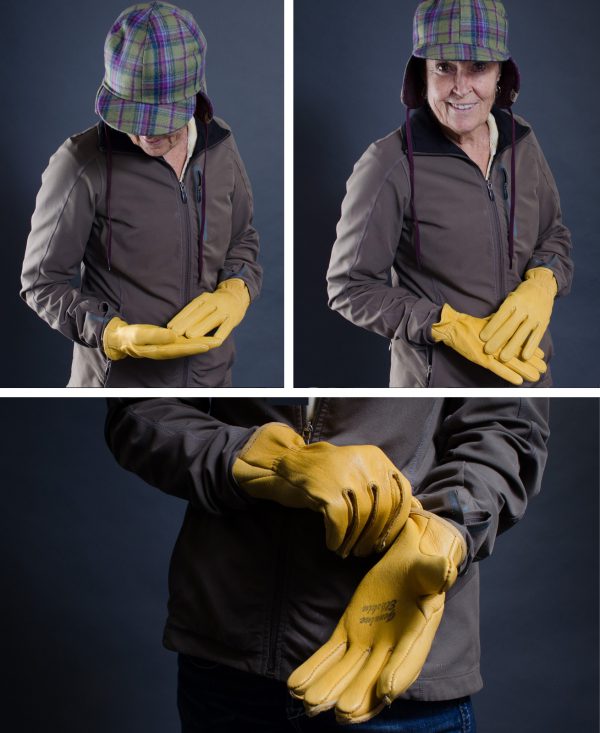
Jean modeling our Yellowstone elkskin and deerskin gloves.

Jean, one of our managers, modeling our Yellowstone elkskin and deerskin gloves. Jean manages the gloves department as well as our famous candy section!

Talking about premium leather, these gloves are made from some of the finest, hand selected elk, deer, and goatskin in the western United States. When asked about the difference in materials, Smith and Edwards’ own Jean Dimick said, “Elkskin and deerskin last longer than traditional cowhide gloves. They won’t get hard and brittle if they get wet.” You can enjoy soft, supple gloves no matter what.

What projects can I use my Yellowstone Leather work gloves for?

These deer and elkskin gloves can be used for any job, big or small, tough or easy. Elkskin is a heavier leather than deerskin and are best for heavy-duty jobs, such as fencing and other ranch work and construction. Deerskin gloves are more pliable and comfortable, and better for easy jobs.

Kevin and Jean modeling our Yellowstone elkskin and deerskin gloves.

Smith and Edwards own Kevin and Jean modeling our Yellowstone elkskin and deerskin gloves.

We would rave about these gloves all day if we could. So come on in and find out for yourself what makes these work gloves so special. We know you’ll fall in love with the Idaho-based, made in USA, leather work gloves that we have come to love and depend on too. Yellowstone Leather also distributes a high quality, imported brand of leather work gloves called Rocky Mountain Gloves.

What they wore:

Kevin:

102216412LTLL Carhartt Hubbard Classic Plaid Button Up Shirt

MNVBLKL Wyoming Traders Black Nevada Vest

428-1738 Bailey Stampede Silver Wool Felt Hat

Kevin wears a size 9 in the Yellowstone Premium Leather work gloves and an XL in the Rocky Mountain gloves.

Jean (the buyer):

5039-75K-7 Stormy Kromer Button Up Partridge Plaid Hat (brown plaid)

5067-40P-SM Stormy Kromer Aurora Snowdrift Cap (green plaid)

Jean wears a size 8 in the Yellowstone Premium Leather work gloves.Shop Yellowstone gloves on SmithandEdwards.com.

How to make a Boa Paracord Bracelet (also called Trilobite Bracelet)

How to make a Boa Paracord Bracelet

- posted by Rose Marion

While I was walking past the Rope Room the other day, our Hardware buyer, Blaine Taylor, called me over. “I have a surprise for you,” he said.

Next thing I knew, I found myself in a dark sideroom looking at a bundle of paracord that glowed in the dark!

Just a short time under an LED flashlight was all it took to activate the PARAGLOW white and light blue paracord Blaine just got in. “Wow!” I thought. “This would be so cool to turn into a bracelet for hiking!”

I like having reflective gear, especially as it starts to turn fall, so if I’m walking near twilight the cars can still see me.

A glow in the dark paracord bracelet would be GREAT!

“That’s not all,” Blaine told me. “I’ve got another new paracord. This orange paracord has a jute strand, for starting a fire, AND it’s got an 8lb test fishing line inside.”

You can find reflective & glow-in-the-dark paracord online here, and at the Rope Room in-store at Smith & Edwards. This is some neat stuff!

Light Blue Glow-in-the-Dark 550 Feet White Glow-in-the-Dark 550 Paracord - 100 Feet Neon Orange Fish & Fire 550 Paracord - 100 Feet
Light Blue Glow-in-the-Dark 550 Paracord – 100 Feet White Glow-in-the-Dark 550 Paracord – 100 Feet Neon Orange Fish & Fire 550 Paracord – 100 Feet

And the bracelet? Jerica in the Web Department helped me make it. Well, I found the bracelet and she figured how to make it! This is a Trilobite bracelet, aka ladder rack or boa paracord bracelet. Here’s how she made it!

Making the Paracord Bracelet

You’ll need:

  • About 85″ each of 2 colors of 550 paracord (6″ wrist)
    If you want a single color bracelet, use 170″ and skip step 1.
  • 5/8″ buckle
  • Lighter
  • Scissors

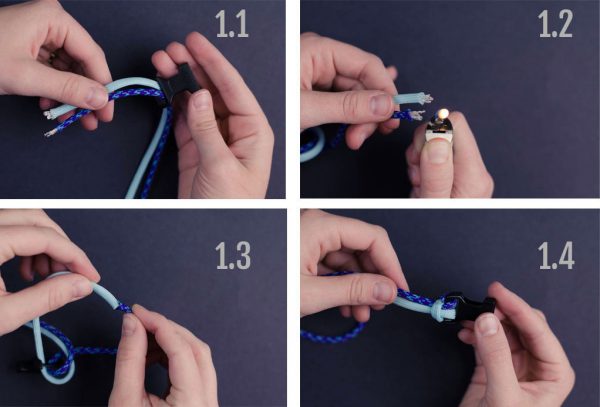
1. Thread the ends of your paracord into the receiving end of your buckle. Then, melt the ends together.

Make a lark’s head knot, hiding the seam of the thread so it doesn’t scratch your wrist.

Starting the boa weave bracelet

2. Put the paracord through the two openings in the other buckle. Measure the paracord around your wrist. Add 1/2″ and move the buckle to that point.

Measure the bracelet

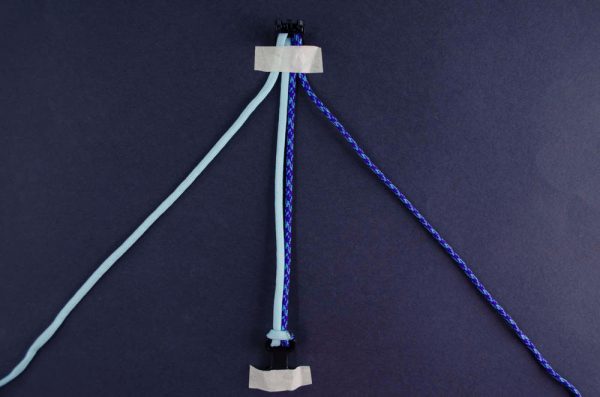
3. Tape the buckles to the table, with the 4 strand buckle at the top. You have 2 outer and 2 inner strands now.

Taping the bracelet to the table

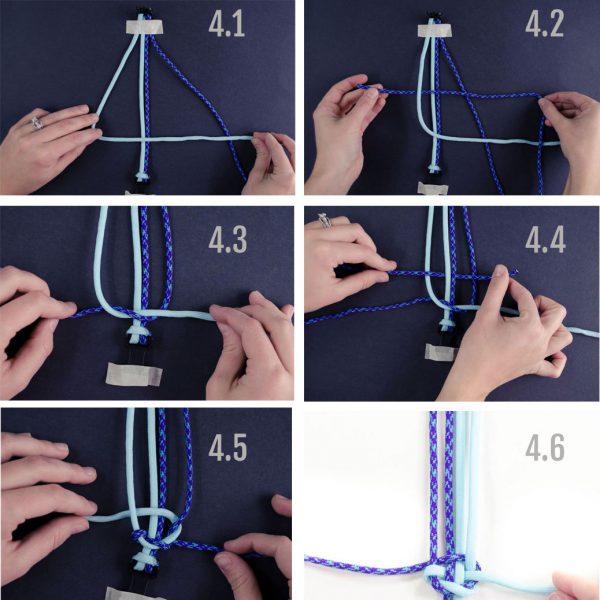
4. Make a 4 with the outer left strand, and hold it over all other strands. Bring the outer right strand over the 4 tail, over the inner strands, and under the 4. This will make a Granny knot over the bottom buckle.

Finishing the bracelet beginning knot

In the photo above, for the fourth picture, bring the strand you just wove with, over the outer left strand, under the inner strands, and over the outer right strand.

Then, take the outer right strand and weave it under the strand you just wove with, over the inner strands, and under the outer left strand.

Good job – you’ve finished the hardest part!

We made the bracelet twice, and flipped the colors the 2nd time. We apologize!

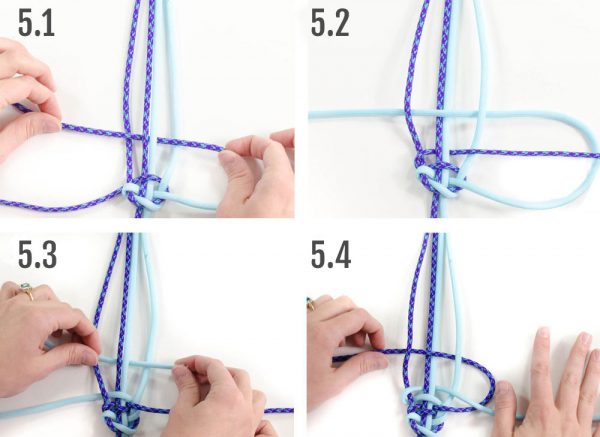
5. Now we’ll just weave to the top of the inner cords.

Weaving the Boa Bracelet

Take the left outer cord and weave it over the first inner cord, under the middle inner cords, and over the last inner cord.

Take the right outer cord and weave it under the last inner cord, over the middle inner cords, and under the first inner cord.

Repeat this process all the way up the bracelet!

6. Now and then, stop to adjust the snugness of the weave, so you can have a consistent & tight weave.

Finishing the Bracelet

Here’s how we finished the boa bracelet.

1. Push & tighten the weave. Then, loop the strands so that they are next to each other. Trim the paracord to be just long enough to grasp.

2. Take your lighter and melt the ends of the strands. Hold the ends together and press with flat nose pliers to seal them together.

Tip: Have a friend hold the lighter for you, so you can hold one strand in each hand, and melt them together!

Finished Boa or Trilobite Bracelet - that glows in the dark!

You’re done! Enjoy your bracelet!

Check out our HUGE collection of Paracord on SmithandEdwards.com

Want to make more Paracord Bracelets?

Looking for more Paracord Bracelet patterns? Here are some sites & channels we found that have GREAT tutorials!

How to make dried apricots & apricot freezer jam

How to Make Dried Apricots & Apricot Jam

- posted by Rose Marion

What do you do with a couple pounds of fresh Utah apricots?

Some of the best ways to preserve that fresh, tangy sweetness are dehydrating apricots and turning them into apricot freezer jam.

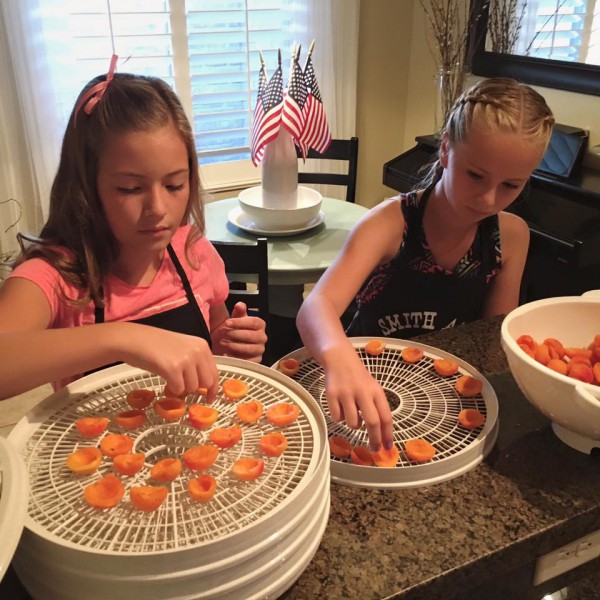
Maggie & Hannah are 10-year-old friends, cousins, and daughters of Smith & Edwards employees. They gave it a shot! Here’s how they did – and if they can do it, YOU & your kids can, too!

Maggie & Hannah about to make apricot jam and dehydrated apricots

Making Dried Apricots

You’ll need:

  1. Wash and dry the apricots. Then, cut the apricots in half. Lastly, separate the halves, and pull out the pit.
    Dehydrating Apricots: Pitting
  2. Now arrange the apricots on your dehydrator screens. You can actually place them closer together than this, because they’ll shrink as they dry.
    Dehydrating apricots: placing the halves on the dehydrator screen
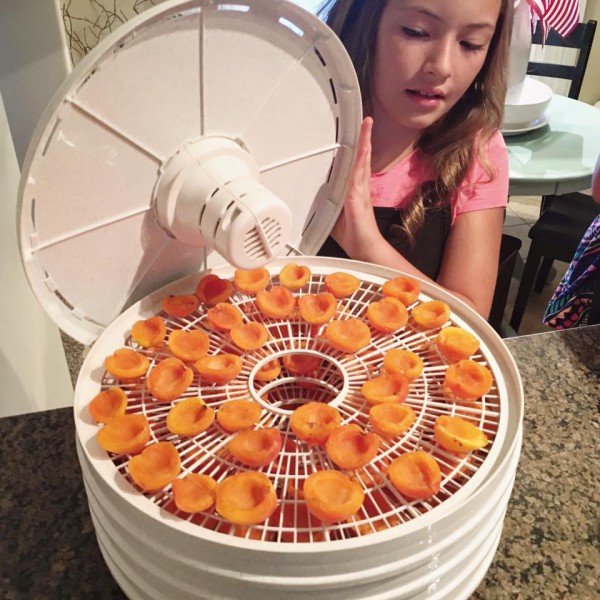
  3. Let them dry according to your dehydrator’s instructions. This batch only took Maggie & Hannah about 1 hour.
    Maggie making dried apricots

Making Apricot Freezer Jam

We used:

  1. Cut and discard the apricot pits, then mash the apricots.
    Making apricot freezer jam: mashing the apricots
  2. Add sugar, lemon juice, and the Freezer Jam fruit pectin, according to the package directions.
    Making apricot freezer jam: adding sugar and lemon juice
    Making apricot freezer jam: adding pectin
  3. Stir, then ladle the apricot jam into freezer jam jars.
    Making apricot freezer jam: ladling into freezer jars
  4. This apricot freezer jam will keep in the fridge up to 3 weeks, or in the freezer up to a year!
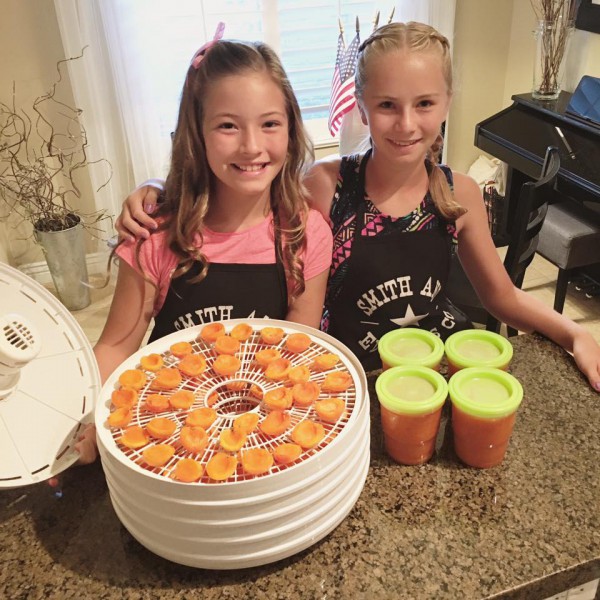
    Maggie & Hannah making dehydrated apricots & freezer jamTheir grandmother has a secret about adding crushed pineapple to the recipe. Try it out and see what you like!

Your Turn!

What’s happening in your kitchen? We love to see pictures of what you’re making! Leave a comment, tag us on Facebook or Instagram, or send us an email.
How to Freeze Beets

How to Freeze Beets

- posted by Rose Marion

Beets are a yummy vegetable packed with nutrients like manganese, potassium, copper, magnesium, vitamin C, iron, and vitamin B6. They’re a delicious Utah summer crop, and you can freeze beets to enjoy them year-round.

Our produce experts Vickie Maughan, our Housewares manager, and Jean from Pettingill’s Fruit Farm, teamed up to freeze beets last week and here’s how they did it.

You’ll need:

Directions: How to Freeze Beets

  1. Put on your gloves!
  2. Wash the fresh beets and cut of the beet greens, leaving 1″ of beet green stems. Don’t remove the tails or beet green stems, because if you cut them off, the beets will bleed out and lose their color.
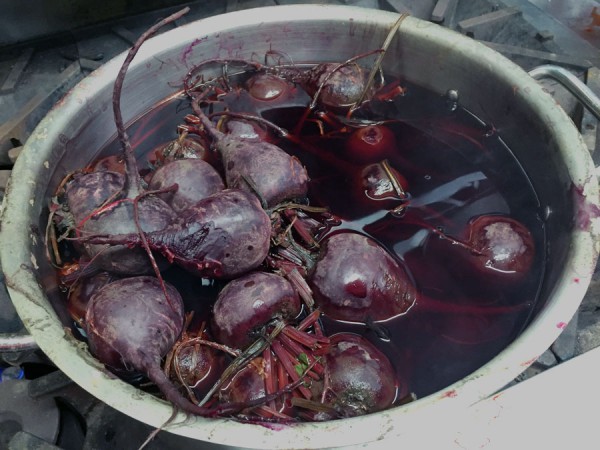
  3. Boil the beets in a pot of water until tender. Then, set aside and let them cool off.

    Boiling the beets with their stems & tails on will keep the rich purple-red color from bleeding out!

    Boiling the beets with their stems & tails on will keep the rich purple-red color from bleeding out!

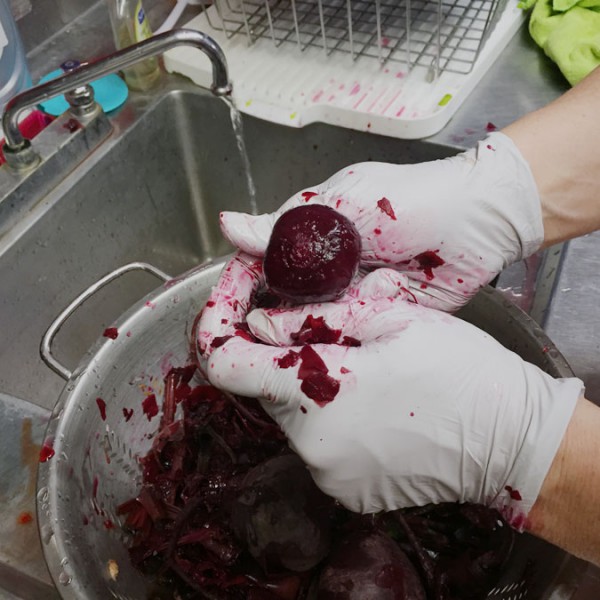
  4. Peel the beets. You don’t need a tool: you can massage the beet skin, tail, & beet green stems and they’ll fall off the beet in your fingers.
    Rinsing and peeling the beets
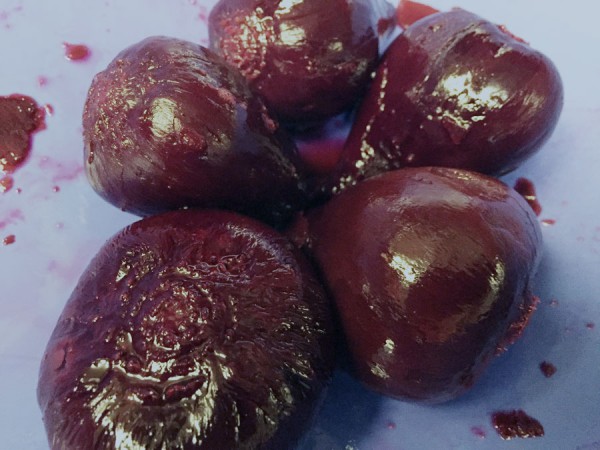
    Whole peeled beets, ready to slice and freeze
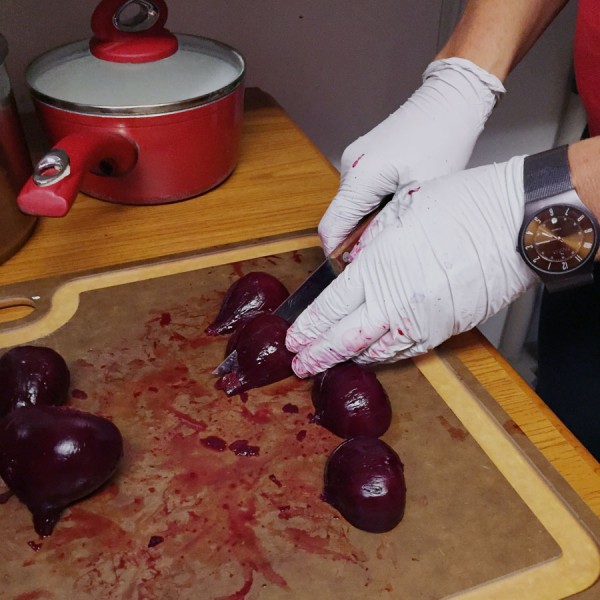
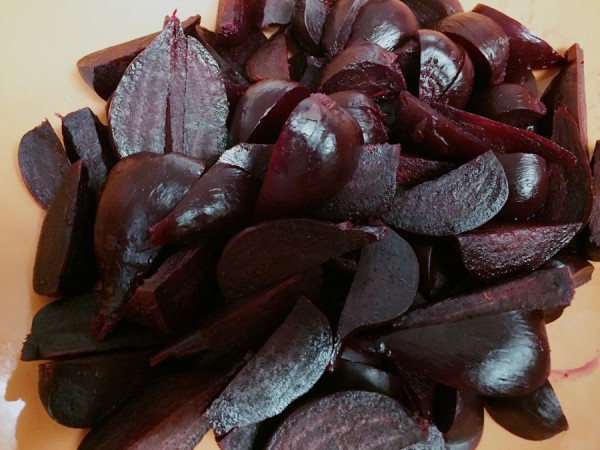
  5. Slice, dice, cube, quarter, or halve the beets any way you’d like. We love mandolins for slicing vegetables!
    Slicing peeled beets
    Chopped beets ready to freeze
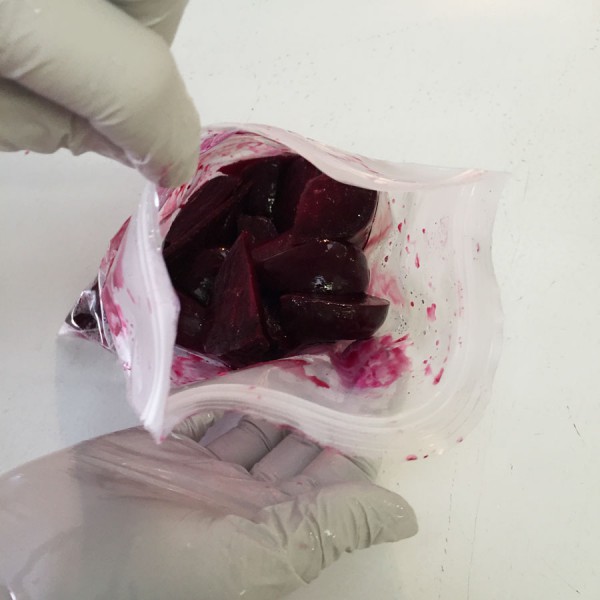
  6. Put in a freezer Ziploc baggie with as many servings as you’ll want.
    Putting fresh cooked beets in freezer bags
    You can freeze them individually like cherries (view our How to Freeze Cherries guide), or if your family loves beets, you can freeze them all together.
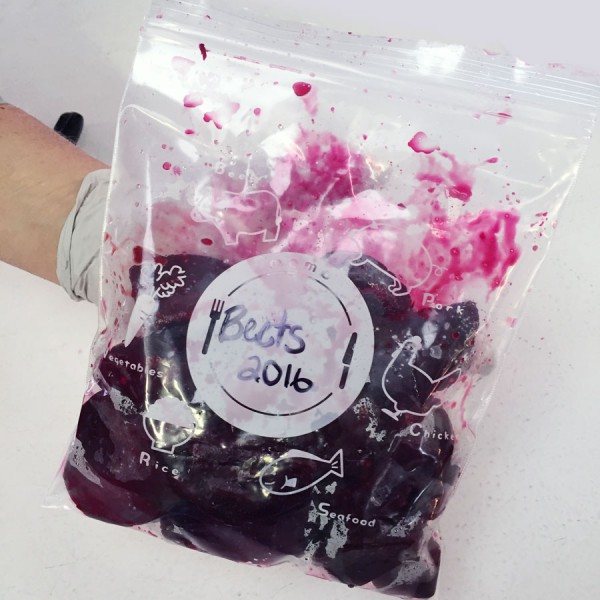
    Beets ready to freeze
    Tip: Flatten the bag when you put it in the freezer so they stack nicely and will thaw evenly.

This winter, you can take the bag out to enjoy garden-fresh beets at the peak of their flavor. Microwave or lightly simmer them in a covered pan with butter, when your family’s ready to eat!

If you liked this, you will LOVE our other frozen food storage tips! Make sure you check out How to Freeze Cherries and How to Freeze Corn.

Lauren Clark's summer 2016 adventure

Lauren’s Summer Adventure: Exploring Oregon

- posted by Rose Marion

Lauren Clark wrote in with her Summer Adventure:

Adventure is in the eye of the beholder. There are many adventures around every corner. An adventure can be as simple as a picnic with the family, to something more complex, such as a vacation or a new living location. We can choose whether what we are going through is an “adventure” or something else.

This summer, my adventure included spending time with my family while in Oregon USA. We were able to go on a family trip for the first time in 3 or 4 years. It was great to reminisce about old times and build new memories together. We were able to see some beautiful sights and enjoy the surroundings of nature.

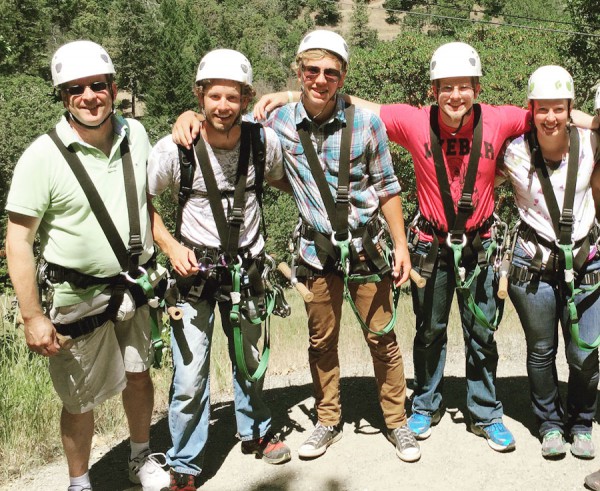
We were able to go zip lining.
Ziplining in Oregon - Lauren's Summer Adventure
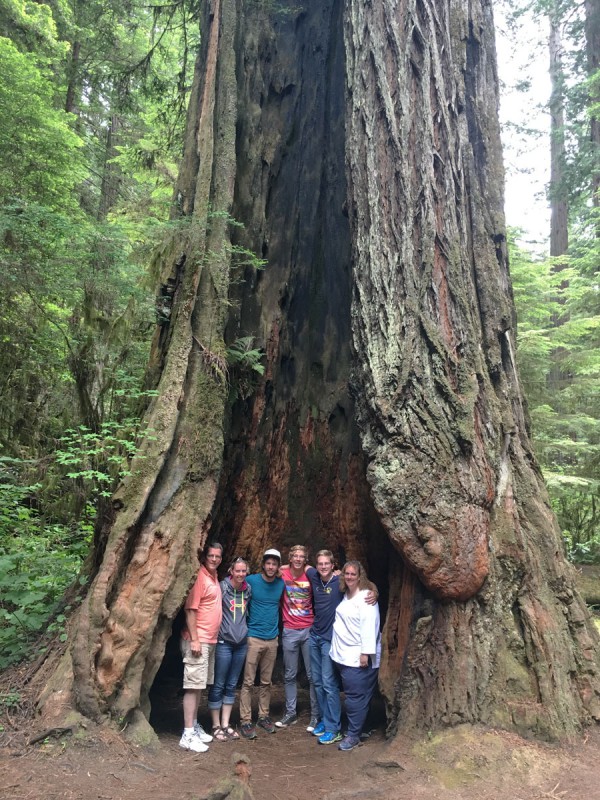
I loved walking along the beach for miles and miles. It was amazing to see the vibrant green color, and the enormous size of the Redwood Trees.
Lauren's family in the Redwoods

The highlight of this adventure was finally being able to see Crater Lake. It was a beautiful sight that will not soon be forgotten.
Lauren at Crater Lake

Everything from seeing these beautiful sights, to having our car overheat and the AC not work, made this trip the perfect Summer Adventure.

This Oregon adventure was a well timed event, because just as life seemed to be getting settled, it threw us another adventure.

No matter where life takes us, we have to embrace the adventure. I am so happy that I got this time with my family and was able to make those memories that will last a lifetime.

How to freeze cherries

How to Freeze Cherries

- posted by Rose Marion

Here in northern Utah we’re lucky to get large yields of cherries in late June & early July! While there’s no end to what you can do with fresh cherries – cobbler being my favorite! – freezing cherries is a wonderful use for these short-seasoned juicy treats!

Freezing cherries will let you taste that sweetness even in January. Plus, you can use these for your shakes & smoothies.

Vickie, our Housewares manager, and Jean from Pettingill’s Fruit Farm, got together to show me how to freeze my own cherries. Take a look!

You’ll need:

Directions: How to Freeze Cherries

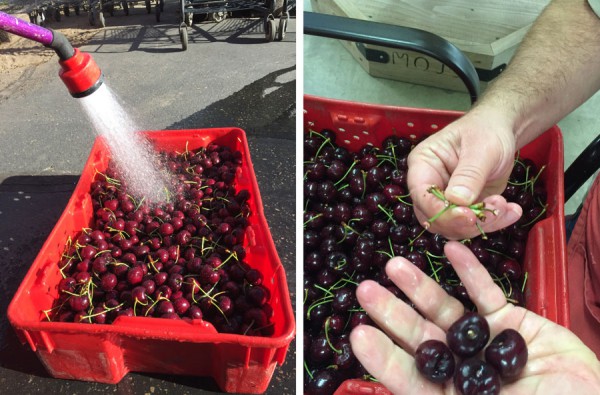
  1. Wash the cherries and remove their stems. Tip: use a colander!
    Washing cherries and removing the stems
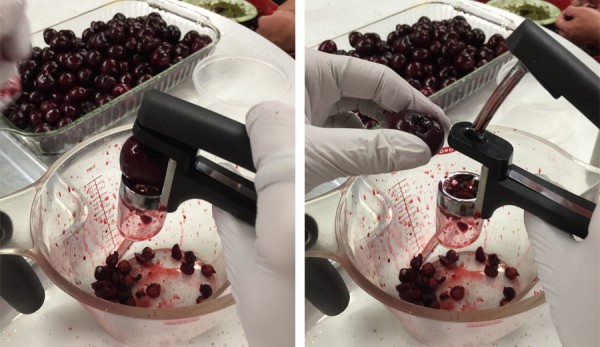
  2. Pit the cherries. Jean & Vickie like using a handheld cherry pitter and collecting the pits in an extra jar or measuring cup.
    Pitting cherries with a cherry pitter - and GLOVES!
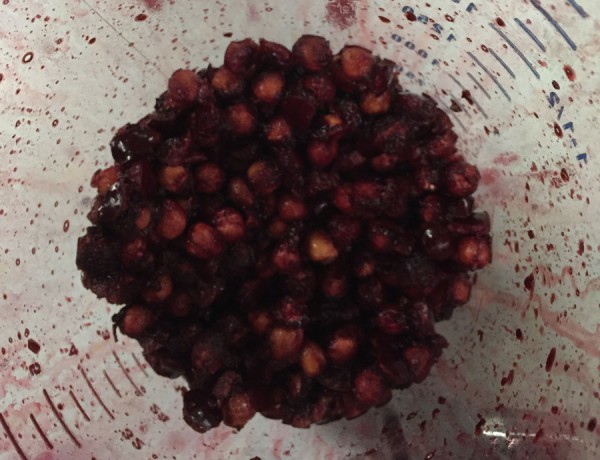
    Cherry pits go in an extra jar!
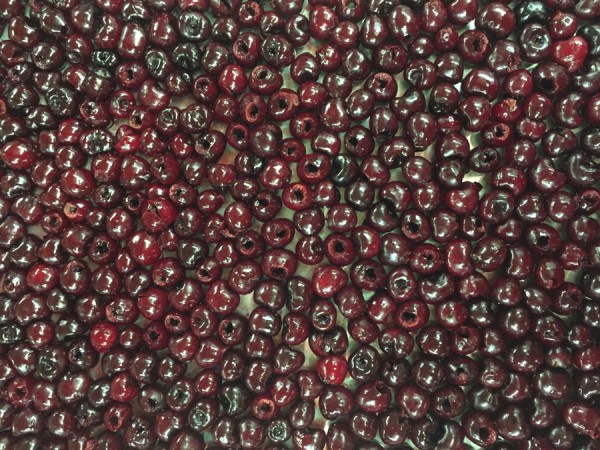
  3. Place the pitted cherries on the cookie sheet.
    Cherries on the cookie sheet, ready to freeze
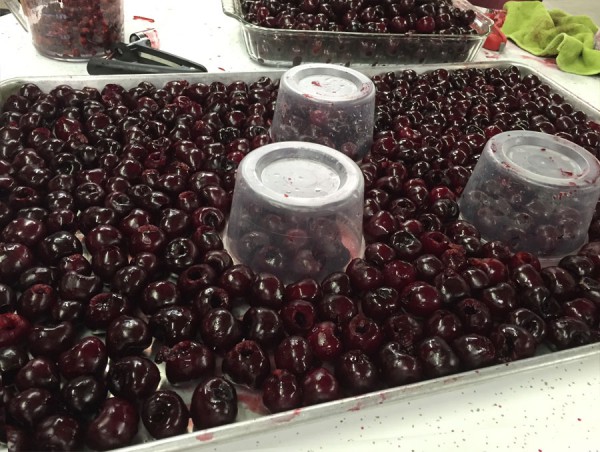
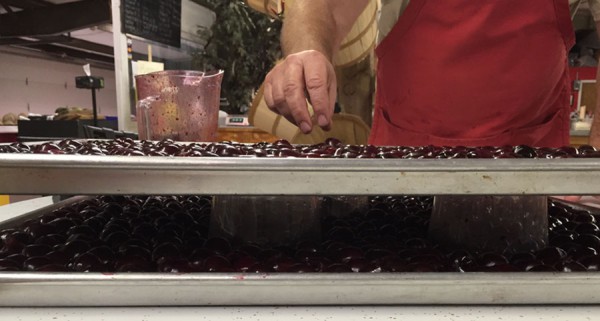
  4. Secret Tip: Double decker your cherries! Place short drink cups or tupperware on the cookie sheet and place it in the freezer. Then, fill another cookie sheet with cherries and place it on top of the cups to freeze twice as many cherries!
    getting-ready-to-freeze-cherries freezing-cherries-in-layers
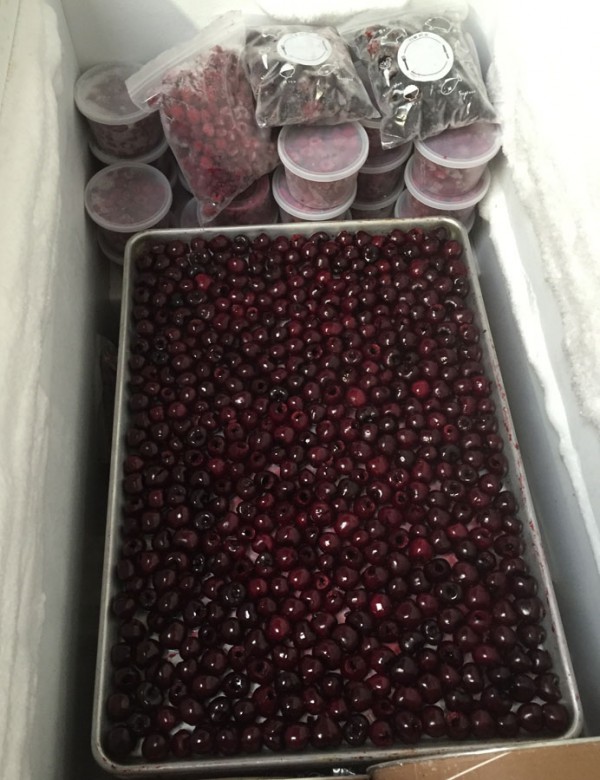
  5. Let the cherries freeze overnight.

    Freezing cherries in a chest freezer

    A chest freezer is GREAT for freezing cherries…

  6. The next day, take a spatula and release the bottoms of the cherries from the cookie sheet.
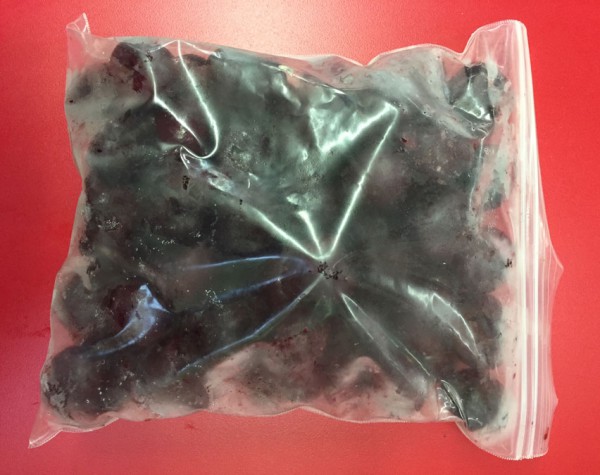
  7. Gather the cherries and place them in freezer Ziploc bags. Quart, gallon – your choice!
    Frozen & bagged cherries

Questions we get asked about Freezing Cherries

Q: Is it messy?

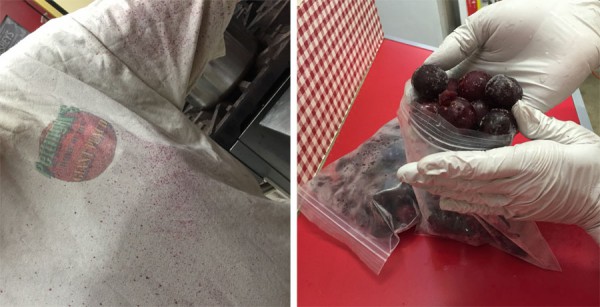
YES! Wear surgical gloves so it doesn’t stain your hands, and wear a work shirt.

Cherry pitting stains & gloves

Pitting cherries is messy business! Wear gloves.

Q: Why not freeze them in bags from the get-go?

By freezing them individually first, they don’t get stuck to each other. Then after you put them in the bag, they break apart easily.

Q: What can you do with frozen cherries?

Vickie LOVES to make smoothies with frozen cherries. YUM!

Eat these fresh-picked as a treat when the snow’s flying in January, just like you were eating it fresh in July!!

Do you have more questions for us? Leave a comment & let us know!


If you liked this, you will LOVE our other frozen food storage tips! Make sure you check out How to Freeze Beets and How to Freeze Corn.

Looking for more food preserving, dehydrating, or canning supplies? Shop our canning supplies on the online store!