How to tie a Double Diamond Knot

How to tie a Double Diamond Knot and Horse Packing Q&A

- posted by Rose Marion

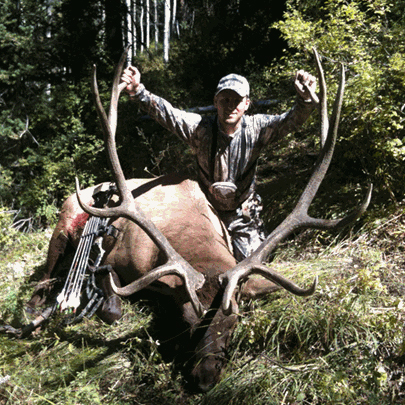
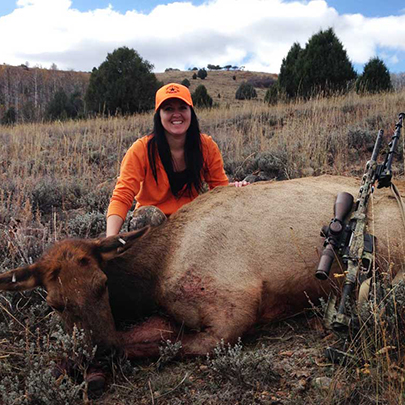
We were privileged to have Travis Sparks come by and do a packing demo the other day. Hunting is a totally different experience with horses. One hunter told me his story about finally getting his deer right at the end of the day, and was dreading the hike back uphill to the truck. Luckily some horse packers saw him, came down, and helped him quarter & pack out the deer. He would have been out there way past sunset without their help!

Packing isn’t just about packing out quarters. Your mule or horse might have tent poles, a shovel, lawn chairs, your bedroll, coolers, cooking supplies, or feed on his back. When you throw in antlers into the mix, packing turns into a real art & skill developed through practice.

Travis is a member of the Back Country Horsemen of Utah & does a lot of packing himself. He gave us a detailed demonstration of the Double Diamond hitch, and answered several questions about packing.

Watch Horse Packing Tips & Knot How-To

I split Travis’s presentation into two videos for you. First, you can see exactly how to do the Double Diamond knot on our trusted cavalry horse. This is a great hitch for top packing. Then, sit back and listen to Travis’s question & answer session about packing elk antlers, using a pack scale to balance your load, using soft packs vs hard packs, and tightening a cinch.

Packing with a Double Diamond knot

Packing with a Double Diamond knot. Thanks to Troy Higgs for this picture!

Watch: How to tie a Double Diamond Knot

Use a 45-foot rope to make this hitch, which starts out similar to the box hitch. Make sure and pull the rope tight.

Watch: Horse Packing for Hunting Q&A

Where to get those Pack Bags

Smith & Edwards pack bags for hunting on horseback

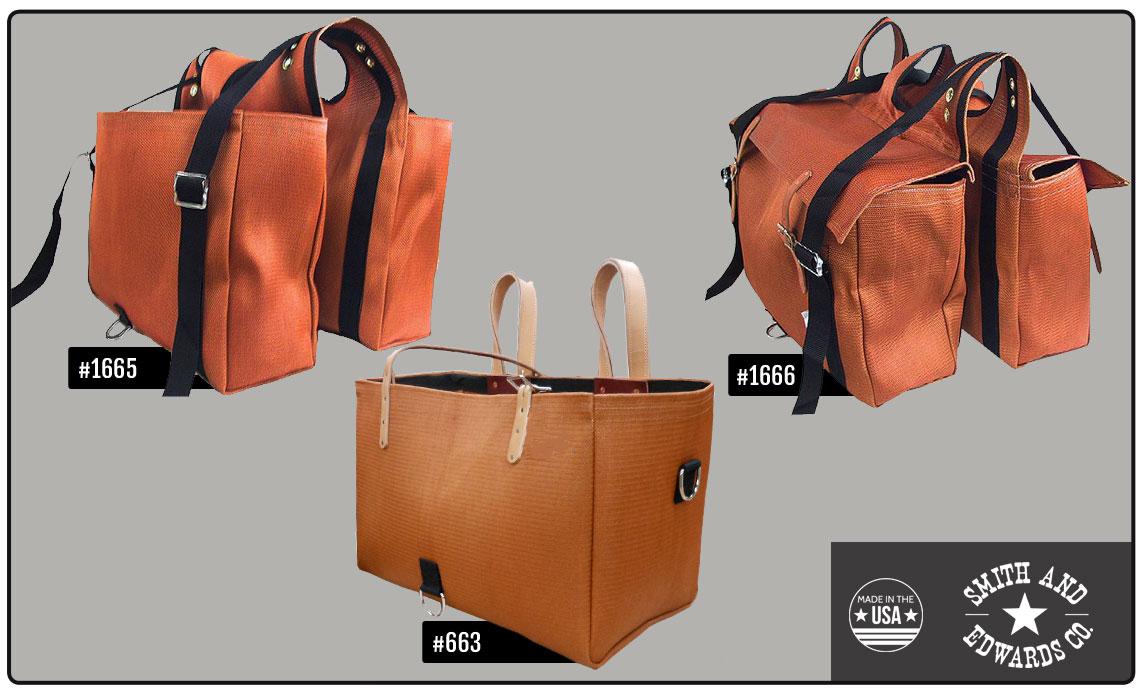
We make the pack bags shown in Travis’s demo, these are the #663 designed for coolers. We also make a narrower bag without flaps, #1665, and #1666 with flaps.

Of course I’ve got to mention that we proudly make those bearcloth packs you saw in the video, and you can get them right here on our online store. Read about our Tack Workshop in our Ogden store.

Do you have questions about horse packing that Marty or Travis can answer for you? Let us know in the comments below!

Travis’s Tips for Packing

  • Check your cinch after moving your animal – always make sure it’s tight!
  • Your goal is to make everything into a single package that moves together, without a pivot point
  • Keep your horse safe from antlers: make sure the rack moves along with the pack bags. Try not using a stick or a branch to elevate the horns, because they don’t ride well.
  • Keep the center of gravity low
  • Keep in mind what will hit a branch first: your pack bags or antlers?
  • Don’t take shortcuts, don’t get in a hurry – pack it right.
  • Rule of thumb, pack 15% of an animal’s weight. So for a 1000 pound animal, aim for 150-160 pounds split over the two sides.
Smith and Edwards profiles Yellowstone gloves out of Idaho Fall, ID

Brand Spotlight: Yellowstone Leather Products for 40 Years Runnin’

- posted by EmmaLee Sessions

We here at Smith and Edwards have often wondered, “What makes a good, leather work glove?” The folks at Yellowstone Leather Products have been showing us what a good quality work glove looks like for the past 47 years, and we couldn’t be more excited about it!

Kevin modeling our Yellowstone elkskin and deerskin gloves.

Kevin, from our hardware department, modeling our Yellowstone elkskin and deerskin gloves.

Yellowstone Leather Products is an Idaho-based business that opened in 1960. In 1969, now owner, Boyd Zollinger bought the company and went to work marketing and distributing American made work gloves. Zollinger said, “I was back east for school and was looking for a way to get back to Idaho,” where he was originally from. “My family and I looked at this company that was for sale and we thought, ‘we could work with that.'” That’s exactly what they have been doing now for the last 47 years.

Smith & Edwards has had a long partnership with Boyd and Yellowstone, reaching back to 1969:

“We found their quality is far superior to any other glove we carry,” said Jim Smith, president of Smith & Edwards, an Ogden, Utah, retailer that has stocked Yellowstone Gloves for more than 35 years. “Most people who buy Yellowstone know they are quality gloves that will last longer than two or three other pairs they could buy cheaper.”
Article from 2010 by Clark Corbin with the Idaho Falls Post Register

What makes Yellowstone Leather work gloves different?

The patented pattern of Yellowstone work gloves is really, what sets them apart from other work gloves. All of the premium leather gloves made at their warehouse in Idaho Falls feature both a seamless palm and back, making these work gloves form fitting. They fit tighter to your hand, Zollinger said, thus making it more like working with your bare hands, but with the protection necessary for even the toughest jobs.

Jean modeling our Yellowstone elkskin and deerskin gloves.

Jean, one of our managers, modeling our Yellowstone elkskin and deerskin gloves. Jean manages the gloves department as well as our famous candy section!

Talking about premium leather, these gloves are made from some of the finest, hand selected elk, deer, and goatskin in the western United States. When asked about the difference in materials, Smith and Edwards’ own Jean Dimick said, “Elkskin and deerskin last longer than traditional cowhide gloves. They won’t get hard and brittle if they get wet.” You can enjoy soft, supple gloves no matter what.

What projects can I use my Yellowstone Leather work gloves for?

These deer and elkskin gloves can be used for any job, big or small, tough or easy. Elkskin is a heavier leather than deerskin and are best for heavy-duty jobs, such as fencing and other ranch work and construction. Deerskin gloves are more pliable and comfortable, and better for easy jobs.

Kevin and Jean modeling our Yellowstone elkskin and deerskin gloves.

Smith and Edwards own Kevin and Jean modeling our Yellowstone elkskin and deerskin gloves.

We would rave about these gloves all day if we could. So come on in and find out for yourself what makes these work gloves so special. We know you’ll fall in love with the Idaho-based, made in USA, leather work gloves that we have come to love and depend on too. Yellowstone Leather also distributes a high quality, imported brand of leather work gloves called Rocky Mountain Gloves.

What they wore:

Kevin:

102216412LTLL Carhartt Hubbard Classic Plaid Button Up Shirt

MNVBLKL Wyoming Traders Black Nevada Vest

428-1738 Bailey Stampede Silver Wool Felt Hat

Kevin wears a size 9 in the Yellowstone Premium Leather work gloves and an XL in the Rocky Mountain gloves.

Jean (the buyer):

5039-75K-7 Stormy Kromer Button Up Partridge Plaid Hat (brown plaid)

5067-40P-SM Stormy Kromer Aurora Snowdrift Cap (green plaid)

Jean wears a size 8 in the Yellowstone Premium Leather work gloves.Shop Yellowstone gloves on SmithandEdwards.com.

How to make a Boa Paracord Bracelet (also called Trilobite Bracelet)

How to make a Boa Paracord Bracelet

- posted by Rose Marion

While I was walking past the Rope Room the other day, our Hardware buyer, Blaine Taylor, called me over. “I have a surprise for you,” he said.

Next thing I knew, I found myself in a dark sideroom looking at a bundle of paracord that glowed in the dark!

Just a short time under an LED flashlight was all it took to activate the PARAGLOW white and light blue paracord Blaine just got in. “Wow!” I thought. “This would be so cool to turn into a bracelet for hiking!”

I like having reflective gear, especially as it starts to turn fall, so if I’m walking near twilight the cars can still see me.

A glow in the dark paracord bracelet would be GREAT!

“That’s not all,” Blaine told me. “I’ve got another new paracord. This orange paracord has a jute strand, for starting a fire, AND it’s got an 8lb test fishing line inside.”

You can find reflective & glow-in-the-dark paracord online here, and at the Rope Room in-store at Smith & Edwards. This is some neat stuff!

Light Blue Glow-in-the-Dark 550 Feet White Glow-in-the-Dark 550 Paracord - 100 Feet Neon Orange Fish & Fire 550 Paracord - 100 Feet
Light Blue Glow-in-the-Dark 550 Paracord – 100 Feet White Glow-in-the-Dark 550 Paracord – 100 Feet Neon Orange Fish & Fire 550 Paracord – 100 Feet

And the bracelet? Jerica in the Web Department helped me make it. Well, I found the bracelet and she figured how to make it! This is a Trilobite bracelet, aka ladder rack or boa paracord bracelet. Here’s how she made it!

Making the Paracord Bracelet

You’ll need:

  • About 85″ each of 2 colors of 550 paracord (6″ wrist)
    If you want a single color bracelet, use 170″ and skip step 1.
  • 5/8″ buckle
  • Lighter
  • Scissors

1. Thread the ends of your paracord into the receiving end of your buckle. Then, melt the ends together.

Make a lark’s head knot, hiding the seam of the thread so it doesn’t scratch your wrist.

Starting the boa weave bracelet

2. Put the paracord through the two openings in the other buckle. Measure the paracord around your wrist. Add 1/2″ and move the buckle to that point.

Measure the bracelet

3. Tape the buckles to the table, with the 4 strand buckle at the top. You have 2 outer and 2 inner strands now.

Taping the bracelet to the table

4. Make a 4 with the outer left strand, and hold it over all other strands. Bring the outer right strand over the 4 tail, over the inner strands, and under the 4. This will make a Granny knot over the bottom buckle.

Finishing the bracelet beginning knot

In the photo above, for the fourth picture, bring the strand you just wove with, over the outer left strand, under the inner strands, and over the outer right strand.

Then, take the outer right strand and weave it under the strand you just wove with, over the inner strands, and under the outer left strand.

Good job – you’ve finished the hardest part!

We made the bracelet twice, and flipped the colors the 2nd time. We apologize!

5. Now we’ll just weave to the top of the inner cords.

Weaving the Boa Bracelet

Take the left outer cord and weave it over the first inner cord, under the middle inner cords, and over the last inner cord.

Take the right outer cord and weave it under the last inner cord, over the middle inner cords, and under the first inner cord.

Repeat this process all the way up the bracelet!

6. Now and then, stop to adjust the snugness of the weave, so you can have a consistent & tight weave.

Finishing the Bracelet

Here’s how we finished the boa bracelet.

1. Push & tighten the weave. Then, loop the strands so that they are next to each other. Trim the paracord to be just long enough to grasp.

2. Take your lighter and melt the ends of the strands. Hold the ends together and press with flat nose pliers to seal them together.

Tip: Have a friend hold the lighter for you, so you can hold one strand in each hand, and melt them together!

Finished Boa or Trilobite Bracelet - that glows in the dark!

You’re done! Enjoy your bracelet!

Check out our HUGE collection of Paracord on SmithandEdwards.com

Want to make more Paracord Bracelets?

Looking for more Paracord Bracelet patterns? Here are some sites & channels we found that have GREAT tutorials!

How to make dried apricots & apricot freezer jam

How to Make Dried Apricots & Apricot Jam

- posted by Rose Marion

What do you do with a couple pounds of fresh Utah apricots?

Some of the best ways to preserve that fresh, tangy sweetness are dehydrating apricots and turning them into apricot freezer jam.

Maggie & Hannah are 10-year-old friends, cousins, and daughters of Smith & Edwards employees. They gave it a shot! Here’s how they did – and if they can do it, YOU & your kids can, too!

Maggie & Hannah about to make apricot jam and dehydrated apricots

Making Dried Apricots

You’ll need:

  1. Wash and dry the apricots. Then, cut the apricots in half. Lastly, separate the halves, and pull out the pit.
    Dehydrating Apricots: Pitting
  2. Now arrange the apricots on your dehydrator screens. You can actually place them closer together than this, because they’ll shrink as they dry.
    Dehydrating apricots: placing the halves on the dehydrator screen
  3. Let them dry according to your dehydrator’s instructions. This batch only took Maggie & Hannah about 1 hour.
    Maggie making dried apricots

Making Apricot Freezer Jam

We used:

  1. Cut and discard the apricot pits, then mash the apricots.
    Making apricot freezer jam: mashing the apricots
  2. Add sugar, lemon juice, and the Freezer Jam fruit pectin, according to the package directions.
    Making apricot freezer jam: adding sugar and lemon juice
    Making apricot freezer jam: adding pectin
  3. Stir, then ladle the apricot jam into freezer jam jars.
    Making apricot freezer jam: ladling into freezer jars
  4. This apricot freezer jam will keep in the fridge up to 3 weeks, or in the freezer up to a year!
    Maggie & Hannah making dehydrated apricots & freezer jamTheir grandmother has a secret about adding crushed pineapple to the recipe. Try it out and see what you like!

Your Turn!

What’s happening in your kitchen? We love to see pictures of what you’re making! Leave a comment, tag us on Facebook or Instagram, or send us an email.

How to Freeze Beets

How to Freeze Beets

- posted by Rose Marion

Beets are a yummy vegetable packed with nutrients like manganese, potassium, copper, magnesium, vitamin C, iron, and vitamin B6. They’re a delicious Utah summer crop, and you can freeze beets to enjoy them year-round.

Our produce experts Vickie Maughan, our Housewares manager, and Jean from Pettingill’s Fruit Farm, teamed up to freeze beets last week and here’s how they did it.

You’ll need:

Directions: How to Freeze Beets

  1. Put on your gloves!
  2. Wash the fresh beets and cut of the beet greens, leaving 1″ of beet green stems. Don’t remove the tails or beet green stems, because if you cut them off, the beets will bleed out and lose their color.
  3. Boil the beets in a pot of water until tender. Then, set aside and let them cool off.

    Boiling the beets with their stems & tails on will keep the rich purple-red color from bleeding out!

    Boiling the beets with their stems & tails on will keep the rich purple-red color from bleeding out!

  4. Peel the beets. You don’t need a tool: you can massage the beet skin, tail, & beet green stems and they’ll fall off the beet in your fingers.
    Rinsing and peeling the beets
    Whole peeled beets, ready to slice and freeze
  5. Slice, dice, cube, quarter, or halve the beets any way you’d like. We love mandolins for slicing vegetables!
    Slicing peeled beets
    Chopped beets ready to freeze
  6. Put in a freezer Ziploc baggie with as many servings as you’ll want.
    Putting fresh cooked beets in freezer bags
    You can freeze them individually like cherries (view our How to Freeze Cherries guide), or if your family loves beets, you can freeze them all together.
    Beets ready to freeze
    Tip: Flatten the bag when you put it in the freezer so they stack nicely and will thaw evenly.

This winter, you can take the bag out to enjoy garden-fresh beets at the peak of their flavor. Microwave or lightly simmer them in a covered pan with butter, when your family’s ready to eat!

If you liked this, you will LOVE our other frozen food storage tips! Make sure you check out How to Freeze Cherries and How to Freeze Corn.

Lauren Clark's summer 2016 adventure

Lauren’s Summer Adventure: Exploring Oregon

- posted by Rose Marion

Lauren Clark wrote in with her Summer Adventure:

Adventure is in the eye of the beholder. There are many adventures around every corner. An adventure can be as simple as a picnic with the family, to something more complex, such as a vacation or a new living location. We can choose whether what we are going through is an “adventure” or something else.

This summer, my adventure included spending time with my family while in Oregon USA. We were able to go on a family trip for the first time in 3 or 4 years. It was great to reminisce about old times and build new memories together. We were able to see some beautiful sights and enjoy the surroundings of nature.

We were able to go zip lining.
Ziplining in Oregon - Lauren's Summer Adventure
I loved walking along the beach for miles and miles. It was amazing to see the vibrant green color, and the enormous size of the Redwood Trees.
Lauren's family in the Redwoods

The highlight of this adventure was finally being able to see Crater Lake. It was a beautiful sight that will not soon be forgotten.
Lauren at Crater Lake

Everything from seeing these beautiful sights, to having our car overheat and the AC not work, made this trip the perfect Summer Adventure.

This Oregon adventure was a well timed event, because just as life seemed to be getting settled, it threw us another adventure.

No matter where life takes us, we have to embrace the adventure. I am so happy that I got this time with my family and was able to make those memories that will last a lifetime.

How to freeze cherries

How to Freeze Cherries

- posted by Rose Marion

Here in northern Utah we’re lucky to get large yields of cherries in late June & early July! While there’s no end to what you can do with fresh cherries – cobbler being my favorite! – freezing cherries is a wonderful use for these short-seasoned juicy treats!

Freezing cherries will let you taste that sweetness even in January. Plus, you can use these for your shakes & smoothies.

Vickie, our Housewares manager, and Jean from Pettingill’s Fruit Farm, got together to show me how to freeze my own cherries. Take a look!

You’ll need:

Directions: How to Freeze Cherries

  1. Wash the cherries and remove their stems. Tip: use a colander!
    Washing cherries and removing the stems
  2. Pit the cherries. Jean & Vickie like using a handheld cherry pitter and collecting the pits in an extra jar or measuring cup.
    Pitting cherries with a cherry pitter - and GLOVES!
    Cherry pits go in an extra jar!
  3. Place the pitted cherries on the cookie sheet.
    Cherries on the cookie sheet, ready to freeze
  4. Secret Tip: Double decker your cherries! Place short drink cups or tupperware on the cookie sheet and place it in the freezer. Then, fill another cookie sheet with cherries and place it on top of the cups to freeze twice as many cherries!
    getting-ready-to-freeze-cherries freezing-cherries-in-layers
  5. Let the cherries freeze overnight.

    Freezing cherries in a chest freezer

    A chest freezer is GREAT for freezing cherries…

  6. The next day, take a spatula and release the bottoms of the cherries from the cookie sheet.
  7. Gather the cherries and place them in freezer Ziploc bags. Quart, gallon – your choice!
    Frozen & bagged cherries

Questions we get asked about Freezing Cherries

Q: Is it messy?

YES! Wear surgical gloves so it doesn’t stain your hands, and wear a work shirt.

Cherry pitting stains & gloves

Pitting cherries is messy business! Wear gloves.

Q: Why not freeze them in bags from the get-go?

By freezing them individually first, they don’t get stuck to each other. Then after you put them in the bag, they break apart easily.

Q: What can you do with frozen cherries?

Vickie LOVES to make smoothies with frozen cherries. YUM!

Eat these fresh-picked as a treat when the snow’s flying in January, just like you were eating it fresh in July!!

Do you have more questions for us? Leave a comment & let us know!


If you liked this, you will LOVE our other frozen food storage tips! Make sure you check out How to Freeze Beets and How to Freeze Corn.

Looking for more food preserving, dehydrating, or canning supplies? Shop our canning supplies on the online store!

John's leaf blower tips for spring troubleshooting

John’s 4 Stihl Leaf Blower Tips

- posted by Jerica Parker

After a long, cold winter, it’s time to clean up. Planting new flowers, mowing the lawn – all the little things to make your yard beautiful again. It’s the time of year to break out all our lawn care equipment again.

As people are preparing for the summer, we often get questions about troubles getting all the tools tools to start up after long, cold winter storage.

Tool Troubleshooting: 4 Leaf Blower Tips

Many people are ready to use their gas powered leaf blowers, but it can be hard to get them started after winter. John, part of our team in the Lawn & Garden department, has thought of 4 possible solutions for this:

  1. Stale fuel. Fuel doesn’t last forever. If it doesn’t get used, it can get old and stop functioning how it’s supposed to. Try refilling with clean, fresh fuel. Check out the best EPA-compliant fuel cans we’ve found.
    Try adding fresh fuel to your blower!
  2. Spark plugs. This is a very common solution for blowers not starting. Check your spark plugs, and if any of them have build-up, it’s time for a replacement.
    Check your spark plugs on your leaf blower!
  3. Air filter. Check that your air filter is clean and not plugged up. If not, you know it’s time for a change.
    Check your leaf blower's air filter
  4. Fuel filter. Not as common, but equally a potential solution. Check that your fuel filter isn’t clogged up. If that’s the case, replace it with a new filter.
    Check that your leaf blower's fuel filter isn't clogged!

Note: Not all models of Stihl Gas Powered Leaf Blowers are the same. Check for your Stihl® model manual here.

John and the Stihl leaf blowers at Smith & Edwards

Thanks for the leaf blower tips, John!

Thanks John! These are his best tips, and if these don’t work, you can consult your blower model’s manual for more advice here at stihlusa.com.

Photos by Rose Marion.

Make your own DIY Bucket Washing Machine with Smith & Edwards - watch Melissa's video!

How to Make your own Laundry Bucket Washer (video)

- posted by Rose Marion

Muck-covered overalls? Horse leg wraps? Greasy shop rags? There’s no way those are going in the nice front-loading washing machine.

Here’s a neat way to turn 5-gallon buckets into a shop washing machine that keeps the mucky things out of the clothing laundry. We saw this on Pinterest and HAD to try it out!

Plus, you can also keep this on hand for emergencies: the Zombie Apocalypse or when the power goes out.

Thanks to Melissa in our Housewares department for showing us how to do it, and Marty for cleaning the leg boots!

Tip: Did you just buy a new pair of dark-wash denim jeans? Add a cup of vinegar and don’t add soap. Then, add your new jeans and let them sit overnight. This will help set the dye, and you won’t get as much indigo rub-off on the rest of your laundry!

Make your own DIY Laundry Bucket at Home

You’ll need these supplies:

Directions:

  1. Drill holes in one of the buckets, both the bottom and 1/3 to 1/2 of the way up the sides.
  2. Drill a hole in the lid with a 2″ hole saw. Then, insert the bushing.
  3. Now drill 1/2″ holes in the rubber plunger.
  4. You’re done!
About Cox Honeyland found at Smith and Edwards

Brand Spotlight: Cox Honeyland – Why We LOVE Honey

- posted by Jerica Parker

The Cox family has been in the honey business for over 100 years.

Henderson and Marion Cox started in the bee industry in St. George, Utah. Since then, the family has carried the tradition of bee keeping and honey production, and in 1989, Cox Honeyland opened for business. Now, the fourth generation of family is running the business in Logan, Utah, with more things than just honey, including lotions and other food items.

Here at Smith & Edwards, we have proudly carried Cox Honeyland for the past 20 years.

Honey has so many benefits!

Besides being all natural, healthy, yummy and sweet, it makes a great food storage item!

On top of that, there are other cosmetic uses that not many know about.

What’s even better? Finding honey that is harvested locally!

Cox Honeyland 12-ounce Honey Bear

Why is local honey better?

We love the local Cache County honey from Cox Honeyland.

Have you ever had honey that tastes or looks a little different than other jars? Honey bees fly as much as 55,000 miles within a 5 mile radius, all the while collecting nectar from flowers. The nectar gathered from a specific region will give the honey produced a slightly different taste and color. Cox Honeyland honey has three different honey varieties: Clover-alfalfa (lighter color and mild taste), Cache Valley (darker with more flavor), and Mountain Snowberry (mountain wildflower flavor).

So wherever you get your honey from, it will be slightly different than honey from another place.

Fight those allergies!

A benefit of getting local honey is that it is said to help boost immunity for seasonal allergies. Naturally made, honey is healthy for you.

Tip: Have a sore throat? Mix honey with a spoonful of lemon juice in a mug filled with steaming hot water to soothe your throat and relieve congestion.

Pure and Healthy

You can tell honey is pure when it crystalizes. That means that there are no preservatives added to the honey. The great thing is that honey never expires! (Which makes it great as a food storage item!) When it does crystalize, simply place the jar in a pan of warmed water and it will soften back to its smooth texture.

What else?

Honey is great for various different uses, some can be surprising! As a natural sweetener, honey makes a great substitute in recipes for sugar. Using this replacement in some recipes reduces up to half of the sugar a recipHoney massage bars made by Cox Honeyville e calls for.

Cox Honeyland has recipes using honey – View them here!

Honey also has cosmetic benefits. “My dad would have us wash our faces with crystalized honey as kids. When honey crystalizes, it makes a great natural exfoliator”, Maleesa with Cox Honeyland told me. You can also use the beeswax to make your own lip balms, lotions, massage bars, and more.

Now that you know why we love honey so much, it’s time to get your own! Whether it’s for your food storage, cosmetic benefits, or just to enjoy now, local honey is the best!

Shop Local Honey on SmithandEdwards.com