How to Freeze Corn

How to Freeze Corn – Plus Easy Corn-Cutting Method!

- posted by Jerica Parker

What do you do with all that left-over corn you made for dinner? Throw it out? Stick it in the fridge, forget about it, and then throw it out? Not anymore!

With this easy video & guide, you don’t need to let the words “canning” or “food storage” intimidate you. Melissa in our Housewares department will walk you through the steps.

Easy Frozen Corn Storage: Watch How!

Now, this is something I have done with my family since I was a little girl. We have our own garden and we love corn. So when it is corn season, we all get together to freeze our own corn for storage. It’s so simple and the corn comes out with that same fresh-from-the-garden taste.

How To Freeze Corn in 6 Steps

Here are some quick and easy steps for freezing your corn:
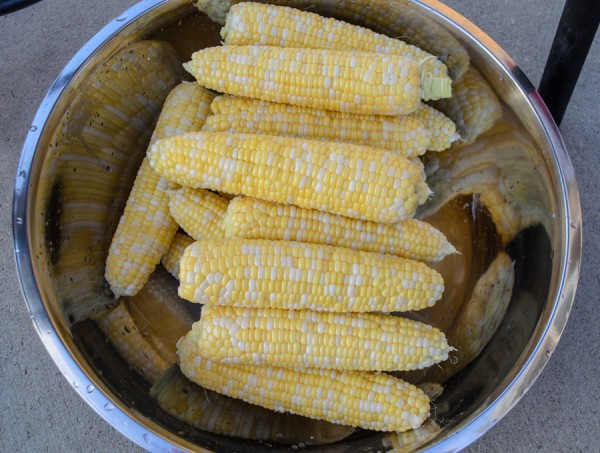
  1. Shuck the corn.
    • Shucking means to take off the husk and the silk hairs. As Melissa shows in the video, one easy method is to hold the corn between your knees and pull the husk toward your body.
      Shucked corn
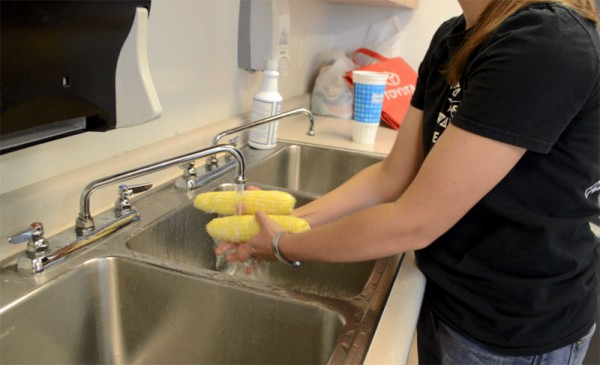
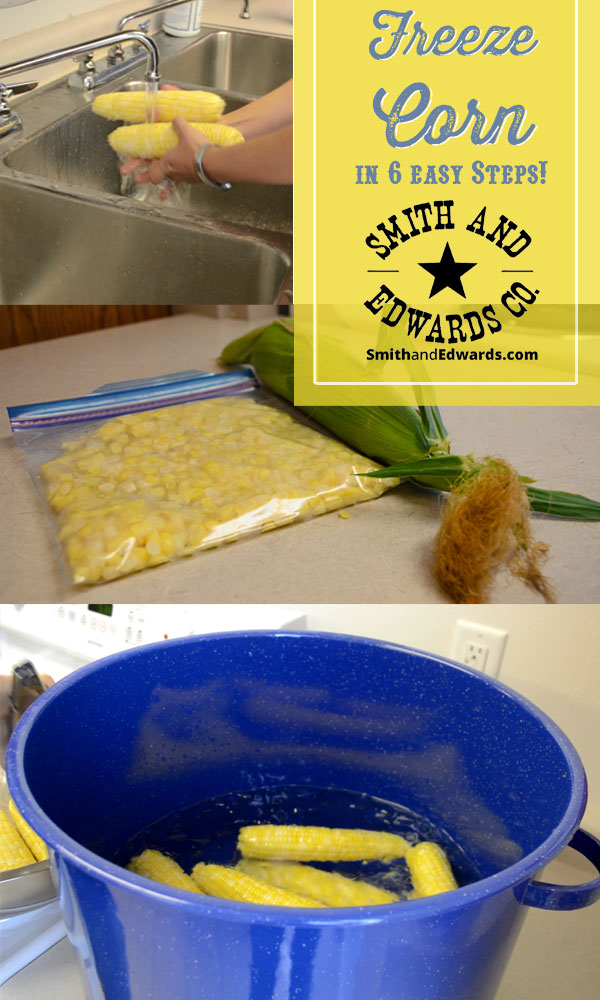
  2. Wash the ears of corn and remove any remaining silk.
    Washing corn before boiling
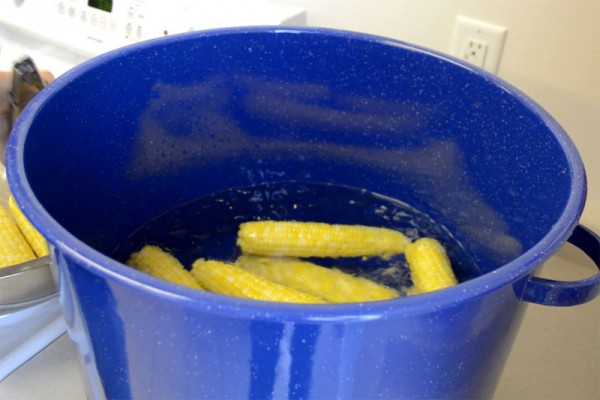
  3. Blanch (or boil) the corn in boiling water for about 6 minutes.
    • The reason behind blanching the corn, is to stop the enzymes that can make the corn taste bad later. Cooking it first helps preserve the flavor when you want to eat it later on.
  4. Place the corn in ice water (using a pair of tongs to protect your hands) to slightly cool them off, just until they’re cool enough to handle.Resting the corn in an ice bath
  5. Cut the corn off the cob.
    • This part is optional. If you like, you can freeze them whole, on-the-cob. After step 4, you would wrap them in plastic wrap and then put those in freezer bags to freeze. If you prefer cut corn then you can take a knife and cut the kernels off the cob to freeze. In my family, we have always cut the corn off. It’s your choice!
    • Editor’s Tip: To cut the corn off the cob, you can put them in the center of a Bundt pan. This will hold them as you cut off the corn and it will fall right into the pan. Or a simple board with nails pounded through (about 5″ apart) can hold the cob steady while you cut.
      To make a nailboard, simply take an extra shelf or spare board. Paint it, then hammer a 4" nail through it. Then you can simply set each ear of corn on the nail, and safely cut the corn.

      To make a nailboard, simply take an extra shelf or spare board. Paint it, then hammer a 4″ nail through it. Then you can simply set each ear of corn on the nail, and safely cut the corn.

  6. Now, simply scoop the kernels you just cut off into freezer bags.
    • You can put 1 1/2 to 2 cups in a bag, depending on how big you want your portion sizes to be when you eat them. When the bags are flattened to about 1/2 – 1 inch thick, you can stack them nicely in your freezer to make the best use of freezer space.

More Tips on the Freezing Process

How to freeze corn in 6 easy steps!

  • 11 1/2 dozen large ears of corn should give you about 58 cups of corn to freeze.
  • Vickie, Kitchen Dept. Manager at Smith and Edwards, says to lay the bag with corn flat as you zip it up. When you have about an inch left to zip, squeeze the air out. “If it has air in it in the freezer, it is more likely to get freezer burn,” she says.
  • Melissa has another idea on how to get the air out. She says when you have the full bag, you can slowly lower it into a lot of water, just until it reaches the zipper line. The water on the outside of the bag helps push the water out and you can seal it while still partly in the water.
  • Don’t put too many bags in the freezer at once! If you put a lot of warm things in the freezer, it may begin to thaw out your other frozen foods. But if you put in just a few at a time until they’re frozen, they will freeze faster and won’t thaw any of your other food.

Now you have corn to eat for the next few months! It’s a great and easy way to start up your own food storage without the complicated recipes or big pressure cookers.

We would love to hear back from you! If this worked for you, or if you have any other tips or secrets to help others in starting their canning & food preserving, please leave a comment below.

If you liked this, you will LOVE our other frozen food storage tips! Make sure you check out How to Freeze Beets and How to Freeze Cherries.

Get pain relief on your Uinta hike - the Uintas are the most beautiful place in all of Utah!

How to Save Your Legs & Back When Hiking the Uintas

- posted by Jerica Parker
Mike Vause in the Uintas

If Mike didn’t have a department to manage, he’d be in the Uintas the entire summer. This meadow’s about 6 miles in, at the fork between Ostler Lake and Amethyst Lake.

With summer at its peak, there’s still time to get your hiking trip in. The Uinta Mountains are the best Utah has to offer with all its water sources, beautiful skies, breathtaking views, and amazing stars at night.

When you’re out on the tree line taking in the beauty of the mountains, streams, and landscape, you want to be in your best shape – not wincing as you step, rubbing your back, or counting the steps back to camp. You want to enjoy your hiking or backpacking trip – every step of the way!

Not everyone is as avid of a hiker as Mike Vause, Smith and Edwards camping manager. But if you are looking into picking it up, here are some great places and helpful tips that can help you get started.

Uinta Hiking Tips & Must-See Trails

Only a couple hours from Ogden, the Uinta Mountains are great because they have trails for the beginner as well as the experienced hikers.

Some good ones to get started are any of the lower trails near the highways. But if you are looking for longer hikes, maybe a bit tougher, Mike says his favorite is the Henry’s Fork trailhead. He says, that’s the best approach to reach the highest peak in Utah: King’s Peak.

King's Peak, the highest point in Utah

King’s Peak, the highest point in Utah

But in either case, be prepared for a change in weather. “Always expect rain, even if you don’t expect it,” Mike says.

How about a family adventure? Any of the trailheads from Mirror Lake Highway could be great for the family. The Bald Mountain trail is good, too. Although it can be a bit tough for the little ones, Mike said his 10-year-old son made it.

Stay Pain-Free on your Hike

Now, as a new hiker, or any hiker in general, getting ambitious and overdoing it happens. Here are some good things to take on your trip, whichever hiker you are.

Bring the medicine that works for you

When getting too ambitious, you may pay for it with aching legs and back. In relation to an experience he had, Mike says that there is nothing like Advil during the day and Tylenol PM at night.

Elete Electrolytes save your legs

Elete Electrolytes add electolytes to your water or your drink, to help you replenish & hydrate!

One of the other products recently put to the test is Elete. On his last hike, Mike took it along to try it. Before his hike, he mixed it with his drink as an electrolyte replacement. As well as after exerting himself at higher altitudes, he said it helped him to sleep better that night instead of losing sleep over aching legs.

A big reason legs hurt on a hiking trip is you may be drinking water, but the hydration doesn’t reach every muscle needing it. Elete rehydrates better than water alone – even better than Gatorade! Mike mentioned how it saved his legs on that trip.

Amish Origins – USA-made joint & muscle relief

The last tip we have is about a handy pain relief cream called Amish Origins. This cream helps tremendously when sore.

Whether you’re an athlete or a hiker, it gives that much needed jump start when suffering from sore legs or back. Mike tried it after a vacation and it worked wonders and took away the soreness so he could get back to work!

Amish Origins combines four essential oils for pain relief for all types of aches & soreness!

Plan Your Uinta Trip

Ready to get out there? Check out the Forest Service’s guides for ideas and trails. AllTrails also has great information and reviews & tips from hikers!

And, make sure to check out Mike’s must-have gear for the Uintas, which includes some breathtaking shots of the Uintas! (We’d love to see your pictures, too!)

More about Amish Origins!

The Amish Origins recipe combines 4 essential oils (Pine, Wintergreen, Camphor, and Eucalyptus) was discovered by a member of the Amish community in Ohio.

This product stays true to the original recipe and has expanded to many products to help sore muscles, joints, and even rashes & dry skin – and it’s still made in USA.

Smith And Edwards Visits Tony Lama

- posted by Regan Taylor

This July, our President of Smith and Edwards, Craig Smith, and our boot department manager, Evan Gibson, were invited on a trip to El Paso, Texas to visit the Tony Lama factory.

The above video is of a man nailing and pegging the shank of a boot. Notice where he’s pulling the nails out of; HIS MOUTH! Who would of thought someone could make handling a mouth-full of nails look so easy.

Look at all those boots!

Look at all those boots!

Craig and Evan learned quite a bit about the process it takes to make these boots while visiting the factory. Did you know that it takes about 136 steps and 100 people just to finish one pair of Tony Lama’s? That’s way more than I could have ever imagined!

That's one LONG snake!

That’s one LONG snake!

Tony Lama has a section for their “exotic leather’s” they use which have snake, lizard, alligator and even ostrich skins. You can see the snake skins hanging here along their fixtures.

Each person at the factory has their own job and task that must be done quickly AND efficiently in order for the boots to be finished on time and uphold quality standards. Evan and Craig both noticed how the Tony Lama workers all act in sync as a team to get the job done right. It was clear that all these workers took pride in their work AND enjoyed what they were doing.

What’s a Boot Jack?

A boot jack is a tool we like to use to keep the backs of our boots looking brand new. Place your heel in the horseshoe shape, place the opposite foot on the angled surface of the boot jack, and pull up on the first boot. Voila! Your boot has now been removed without any accidental scuffing along the heel. Pick up yours today!

Luci Lantern

Backpacking Stories: Illuminating Rainy Chapters with a Little LED

- posted by Mike Vause
Mike Vause, Smith & Edwards

Mike Vause, Camping manager

My Grandpa used to say: “Too much of anything is not good.”

Is it possible to have too much gear? Too many gadgets?

I do love new stuff, but when I am in my backpacker mindset, some stuff just gets left behind. Most backpackers love convenience and comfort, but have to be choosy when it comes to weight.

For years, having a pack under 40 pounds was my goal. As I am no longer 20, my goal has changed to the low 30’s for pack weight for a 4 day or so hike.

Since I have, through the years, carried a lot of weight to get my young children into the backcountry (they are all full grown now), I try to take advantage of the payback opportunity as much as possible. If I can’t convince one of my sons to carry it, I usually leave it home.

Lightbulb Moment

Luci Solar Lantern

The Solar-Rechargeable Luci Lantern – squishes down flat, diffuses light like a charm. You know, you really should have one of these in your pack.

On this last Uinta backcountry adventure, I found an item that I just had to try out. The Luci Inflatable Solar Lantern has been selling by the hundreds in my department.

I honestly didn’t get how, but its success made me think that I was missing out.

I bought one at the last minute (along with about $200 worth of last-minute necessities) and left the solar lantern on my dashboard to charge that afternoon. My pack was in that low 30# range, so I threw it in my pack.

Two of the nights were cold, rainy, and early-in nights. Reading was a great escape to pass the time.

The LED lights were perfect in the tent and the inflatable feature diffused the light output to perfection. It was awesome. The Luci was light enough to perch in the gear loft and do its job.

In the morning, I left it outside the tent and headed out to fish. The afternoon rains soaked it, but it still recharged without a problem and was ready for the next chapter of nighttime reading.
Luci Lantern hangs easily in a tent

The Luci promotes itself as an inflatable light – and the fact that its plastic lining diffuses light in the tent is a big plus. But the more important factor for me was that this item, nearly the size of your typical lantern, collapses down smaller than the book I packed – now that’s nifty.

Waterproof, lightweight, rechargeable, and affordable. It’s worth a look.

Get yours online at SmithandEdwards.com here or come see it here at the store off the I-15 Willard Bay turnoff.

Check out our Camping and Hiking gear - click here!

What You Didn’t Know About 4-H

- posted by Regan Taylor

When you think “Weber County 4-H,” what comes to mind? If you’re anything like me, you probably only picture lamb and other livestock showing and competitions.

Well, you aren’t completely wrong. The livestock and horse programs are a big chunk of what 4-H has to offer – Click here to read about showing livestock with 4-H!

BUT, what you more than likely didn’t know is that 4-H has SO many more amazing programs!

Variety of Programs in 4-H

Do you and your child love to cook? Try the food preparation and preservation project. Interested in learning more about photography? Gardening? Rocketry? Sewing? The list of what kinds of groups Weber County 4-H has to offer goes on and on. The best part is that it’s for youth in 3rd-12th grade and their friends or families. It’s an awesome way for youth to learn helpful life long skills and to get involved with others in their community.

4-H Reaches Far Across Communities

4-H is in all 50 states – plus over 50 other countries! Why? The success it has in each community of course! It’s all about empowering youth to reach their full potential and encouraging them to broaden their experiences and knowledge through activities that peek their interest.

Clubs and programs are added based on the communities interest and demand – so if you have an idea and it’s not already a club or program yet, it very well could be in the future!

Types of Clubs

So what existing clubs are there? Well, as I said, the list goes on and on. But here are a few that caught my attention:

  • Crime and Spy Science Clubs: Investigate and analyze using spy kits, messages, fingerprints and DNA.
  • Paper Crafts Clubs: Learn all about scrapbooks, cards, journals, origami, grow cards, and paper mache.
  • Shooting Sports: This is a recently added club! Learn about equipment, trap shooting, archery, how to use a shotgun AND a handgun.

Shooting-sports-4-h-blog

Shooting-sports-4-h-blog-2

  • Cake Decorating Clubs: Teaches you how to create and bake a beautiful cake; from frosting, decorating, and the proper display of the cake. (Fun!)
  • Fitness and Healthy Snack Clubs: The importance of fitness and it’s effect it has on your health should be taught as early as possible. This class teaches you about cardio, balance, strength, measuring food intake as well as choosing the right foods and setting goals through healthy living activities.
  • Theater Arts: With this club you or your child will be able to use their imagination, body and voice to express their character. This club covers everything from dynamics to acting styles, and even auditions!
  • Horse Program: It doesn’t matter if you have access to a horse or not, if you’re interested in learning the science of equine care and management, this is the program for you! Activities can include anything from educational (and fun!) club meetings to trail rides, horse shows and service projects.

horse-program-2

  • Robotics Clubs: Do you love to take things apart and put them back together to see how they work? From what makes robots move to how they turn, this class shows you how to do just that; learn the basics of the world of robotics. Maybe even build one yourself!
  • Sewing: Let your future tailor shine through with this fun class that teaches you how to choose the right sewing tools and even how to use a sewing machine. Make a pillowcase, a skirt or pair of shorts, or even a doll skirt.
  • Craft Beading Club: Bubble beads, wooden beads, bedazzling…. oh my! The possibilities of what you’ll be able to make are endless!
  • Dog Clubs: Why pay for a trainer to get your rowdy puppy in check when you can learn how to yourself?! This club covers barking basics, “sit and stay”, “get down” and “figure 8” commands.
  • Photography: From composition, shooting and editing, you’ll be taking beautiful pictures that tell a story.
  • Spa and Relaxation Clubs: Body butter, zen garden, lip balm, foot scrub, candles and yoga; all the relaxing ingredients you need to create a perfect spa oasis!
Alicia Teuscher with USU Extension - Weber County 4-H

Alicia Teuscher with USU Extension – Weber County 4-H

“I would like parents and youth to know 4-H has something to offer EVERYONE! Farm or urban environment, 4-H has a project that will interest you and will encourage personal development. Some of our project areas include beekeeping, livestock, art projects, knitting, public speaking, record keeping, fashion and talent shows, livestock and horse judging teams…the list goes on and on!” – Alicia Teuscher, 4-H Educator with Weber County Extension Office

To get a full list of what Utah 4-H currently has to offer you or your family, please click here.

Let’s all Learn, Grow and Build Together as a Community!

With all of these amazing “hands-on” clubs, there’s no way you won’t be able to find something that fits you or your child’s personality! It’s all about finding what you’re good at, what you love doing, or what you want to learn how to do; and then taking that skill to the next level with a productive “learning by doing” approach.

4-H allows for individuality and personal success. It teaches leadership skills, the importance of citizenship and giving back to your community.

To become a member, leader or volunteer for Utah 4-H please contact the Weber County Extension office at 801-399-8209 (or your county’s extension office).

You can also visit their website at utah4h.org

Is your son or daughter in 4-H, or did you participate growing up? Leave a comment telling us what club you were a part of and why you loved about participating in 4-H!


How to use a Pickling Crock

How to use a Pickling Crock: the Art & Science

- posted by Rose Marion
Teresa with USU Extension service

Teresa with USU Extension service helped answer some common fermenting & pickling questions for us!

When people think of pickles, large quart jars of olive-colored pickles come to mind. But there’s another way to make pickles that takes a lot less heat, a lot more time, and some say, yields a lot tastier results:

Fermenting Pickles and Vegetables

When you make pickles in a traditional pickling crock, in some ways it’s much less work: simply prepare your pickles, load them in the crock according to the recipe, and give them a few weeks.

This yields crisp, crunchy, delicious pickles!

And you can make sauerkraut and more fermented dishes the same way.

Our favorite brand of stoneware pickling crocks are the Ohio Stoneware line (click to shop), which is make in the USA in Zanesville, Ohio. And when you order yours from Smith & Edwards, we guarantee they arrive in perfect condition!

We carry lids, weights and pickling crocks in a huge range of sizes, as well as the very-popular 3-gallon fermentation set.

What size Pickling Crock do I need?

The US Department of Agriculture recommends a 1 gallon container for each 5 pounds of fresh vegetables. So a 5-gallon stone crock is an ideal size for fermenting about 25 pounds of fresh cabbage or cucumbers, according to the USDA Complete Guide to Home Canning.

Cucumbers and cabbage must be kept 1-2 inches under brine while fermenting, so weights can be instrumental.

Make sure to wash your crock, weights, and lid with hot soapy water, and rinse them well with very hot water, before adding your vegetables.

Ohio Stoneware crocks at Smith & Edwards

You can get a pickling crock for any size project – from one to five gallons – and the weights & lids to match.

Why & How to use a Pickling Crock

We were lucky to have Teresa Hunsaker from the USU Extension Service here at Smith & Edwards this summer to check pressure canner lids, as well as give tips on the fermenting process. Fermenting is only growing in popularity as people return to the traditional method, as well as gain interest in probiotics and the health benefits of fermented foods for the digestive system.

Read on for common fermenting mistakes, how to process your vegetables after fermenting them, and a fermented Dill Pickle Recipe!

Pickling Crock Common Mistakes

One of the common problems Teresa sees has to do with salt: especially people not using enough salt.

Salt is hugely important with shredded vegetables and pickles: otherwise, the brine goes scummy and your lovely batch of pickles or sauerkraut is lost. It’s so important to use the right salt ratio!

Use your standard pickling salt: you can use both iodized and noniodized table salt. Noncaking materials added to table salts may make your brine cloudy. USDA advises against flake salt because it varies in density. Reduced-sodium salts may be used in quick pickle recipes; this may give your pickles a slightly different taste than expected. But, reduced-sodium salt is not recommended for fermented pickles.

Layer your vegetables, then salt, then vegetables, then salt: this is especially important with cabbage.

Another mistake Teresa sees is not having your crock at the right temperature. Some people will store their pickles in the basement as they ferment, or in a room that gets too hot.

The temperature should be between 68-74 degrees. That’s because if it’s too hot, it will process too fast and produce scummy brine. Too cold, and the process will take too long.

The traditional way to make kimchi is actually to bury the fermentation pot in the ground, to keep the temperature constant!

Fermenting is both an art and a science!

How Long does Fermenting Take?

The length of time needed for your batch of pickles or sauerkraut depends on your recipe. It takes about 3 weeks for sauerkraut, and there’s a good recipe out there for 21-day pickles.

Follow your recipe exactly, including changing out the brine: with the 21-day pickles, you need to change the brine every few days.

OK, they’re done… Now what?

You can can your sauerkraut or pickles after they’re done: just process them. For sweet pickles, it just takes 15 minutes; for whole dills, about 25 minutes does the trick at this altitude.
Or, you can waterbath them – check your local recommendations and keep them under 185°.

But you don’t HAVE to can them at all. Your crock pickles can hold in the fridge for weeks!

Ohio Stoneware Fermentation Crock

This 3-gallon fermentation crock features a channel for the lid to rest in, and comes with matching weights.

What’s the difference between pickling crocks and fermentation crocks?

Either style works well.

The fermentation style is designed for keeping the vegetables down better, and it features vents. You do want some air circulation to temper the temperature.

Dill Pickles Recipe for Pickling Crocks

Use the following quantities for each gallon capacity of your container.

  • 4 lbs of 4-inch pickling cucumbers
  • 2 tbsp dill seed or 4 to 5 heads fresh or dry dill weed
  • 1/2 cup salt
  • 1/4 cup vinegar (5%)
  • 8 cups water and one of more of the following ingredients:
    • 2 cloves garlic (optional)
    • 2 dried red peppers (optional)
    • 2 tsp whole mixed pickling spices (optional)

Procedure: Wash cucumbers. Cut 1/16 inch slice off blossom end and discard. Leave 1/4-inch of stem attached. Place half of dill and spices on bottom of a clean, suitable container. Add cucumbers, remaining dill, and spices. Dissolve salt in vinegar and water and pour over cucumbers. Add suitable cover and weight. Store where temperature is between 70° and 75° F for about 3 to 4 weeks while fermenting. Temperatures of 55° to 65° F are acceptable, but the fermentation will take 5 to 6 weeks. Avoid temperatures above 80° F, or pickles will become too soft during fermentation. Fermenting pickles cure slowly. Check the container several times a week and promptly remove surface scum or mold. Caution: If the pickles become soft, slimy, or develop a disagreeable odor, discard them. Fully fermented pickles may be stored in the original container for about 4 to 6 months, provided they are refrigerated and surface scum and molds are removed regularly. Canning fully fermented pickles is a better way to store them. To can them, pour the brine into a pan, heat slowly to a boil, and simmer 5 minutes. Filter brine through paper coffee filters to reduce cloudiness, if desired. Fill hot jar with pickles and hot brine, leaving 1/2 inch headspace. Remove air bubbles and adjust headspace if needed. Wipe rims of jars with a dampened clean paper towel. Adjust lids and process as below, or use the low temperature pasteurization treatment.

– recipe from USDA’s Complete Guide to Home Canning, Guide 6: Fermented Foods and Pickled Vegetables

Want to learn how to make sauerkraut in a fermentation crock? Enter your email address to get access to a free printable Fermented Sauerkraut recipe!

Explore Pickling Crocks…

Smith & Edwards Pickling Crocks

Thanks for helping us help Primary Children's!

Thanks for helping us help Primary Children’s!

- posted by Rose Marion

Since Jim Smith started this program at Smith & Edwards in 1996, each year starting around Thanksgiving, Smith & Edwards asks every customer if they’d donate to Primary Children’s Medical Center — our local children’s hospital in Salt Lake City and part of the Children’s Miracle Network.

Every one of our cashiers has a personal story they can tell of a customer who gave greatly to this important center.

And your donations have a HUGE impact on children & their parents as they go through a difficult time in their lives. Children like Parker – an All-Star! (Read more about Parker here!)

Not only do your donations benefit Primary Children’s – they inspire others. As a Utah Ace Hardware member, we have the opportunity to serve dinner to families whose children are in treatment at Primary Children’s.

Our team was set to take dinner from Bella’s down to the parents at the hospital one night – but when we went to pay, Bella’s Fresh Mexican Grill offered to donate the meal.

Serving Primary Children’s really is an opportunity for us as a store to give to those in need – and it started with one man’s inspiration.

“If you’re not helping the kids, you’re not doing what you should be doing. ” – Jim Smith.

Last year alone, Smith & Edwards raised $33,089 for Primary Children’s. Your donations really add up!
Receiving artwork from Primary Children's in 2015

Primary Children's Painting by Robyn Braeken

We were honored to accept this painting by Robyn Braeken, age 6, who benefited from care at Primary Children’s Hospital. What amazing talent Robyn has! The painting is Mommy Kitty, Baby Kitty.

Jim Smith, president of Smith & Edwards from the 1960s to the 2010s, knew the importance of supporting our local children in need. The Smith family has benefited from the skilled medical care available at Primary Children’s, as have many of the families of employees here at the store.

Jim also made it his mission to support the community’s contribution: to this day, for each dollar you donate to Primary Children’s at Smith & Edwards, the Smith Family matches that donation.

Since the program started in 1996, Smith & Edwards has sent over $490,000 to Primary Children’s – nearly half a million dollars. This entire donation benefits the kids: none of it is sent to administrative expenses!

“As long as the Smith family’s involved with the store, Primary Children’s will be a priority for us.” – Misti Smith Kosoff

We are able to continue donating to Primary Children’s through our partnership with Ace Hardware. In July 2015, representatives from Ace Hardware and Children’s Miracle Network came to congratulate our cashiers – and we received a trophy marking Smith & Edwards the Western Region Champion store affiliated with the Ace Foundation.
Ace representatives and Smith & Edwards staff with the Ace Foundation trophy

We couldn’t help Primary Children’s without your help. So thank you for your donations, and when you come in to Smith & Edwards during the Christmas season, please say YES when you’re asked to donate. Your donation makes a BIG difference!

Help your kids gain confidence - sign them up for 4-H Livestock showing!

4-H Helps Kids Build Confidence through Showing Livestock

- posted by Rebecca Adams
Alicia Teuscher with USU Extension - Weber County 4-H

Alicia Teuscher with USU Extension – Weber County 4-H

I had the pleasure of talking with Alicia Teuscher, an Extension Educator with the Utah State University 4-H Program. The Weber County 4-H program has many different departments, but the main program that people think of when working with 4-H programs is the livestock department.

Beginning with Clover Bud, at age 5 to 8 children can participate in some activities at a basic level. There are livestock showing opportunities for Clover Buds, which helps participants build confidence in themselves as they move to the 4-H club when they reach 8 years old.

From Clover Buds, youth work their way up to the state level as they become involved in 4-H programs in high school. 4-H members can become an officer at state level and even participate in national conferences as well.

As you build confidence in showing your livestock, you build confidence in yourself and become more responsible. Building a skill level always takes time and patience, but the reward of being able to show your hard work is what makes the livestock department so important.

How Your Kids Benefit from Showing Livestock

As you build your confidence in showing your livestock, you build confidence in yourself. Alicia told me, “4-H and doing the demonstrations that I did, and going to conferences and being a state officer, helped me to overcome my difficulty of public speaking and the ability to show my livestock with confidence.”

Kennedy Douglas walking her hog

Kennedy Douglas with her hog. Kennedy won Reserve Senior Class Showmanship at the Weber County Fair – congrats Kennedy!


One of the big benefits of doing livestock is learning to take care of animals. There’s so much you can learn as far as grooming, feeding, fitting – and having the proper shelter as well.

There is a lot of responsibility with raising livestock, because you clean up after them and make sure that their habitat is taken care of & uncluttered so your animal stays safe. As you gain confidence, you learn how to train your animal.

Wells Thompson walking his hog

Wells Thompson walking his hog. Wells raised the Grand Champion hog at the Cache County fair last year!

Training is important and taking the time to prepare and show your animal. Being able to lead the animal, set up the legs, and keep the animal between you and the judge at all times are key elements to showing your livestock. Tip: Keeping eye contact with the judge is very important to showmanship.

Getting Ready for the Show

Preparing your animals for the show takes a lot of time. A child works with their animal for months before the show: weighing and charting, walking, and grooming their animal as it grows. Luckily, there’s a lot of support and resources to guide 4-H members with their steer, lamb, or hog. Then in the summer, it’s time to get ready for the big event.

Fitting, as it is called, requires you to shear your livestock right before a show. You’ll also trim the hooves and wash them with specific soap that is safe for them. You learn how to scrub and wash your animal; for example, in between the hooves and under their belly and legs. You can also learn how to shear your animal: this is an important skill because shears are sharp, and the animal can be cut easily.

Pace Thompson grooming his hog

Pace Thompson with his hog

There are many different animals that are a part of livestock showing. Steers, lambs, and hogs are a few that are presented and auctioned off during these shows. “When looking for an animal for the fair you want to look at their health: that they have good feet and legs, the width and length of the animal, and their breed character.”

“The biggest thing is to practice, so it becomes second nature. With lambs you use a halter that helps them to be able to lead and set up for a show,” Alicia advised.

With hogs, you don’t use a halter – rather, a leading stick that helps them to follow your lead. With steers you use a halter as well as a leading stick to help them with posture and form. “It takes a lot of time and patience to train the livestock. They spend a lot of their summer training these animals for the shows.”

Gavin Douglas and his steer

Gavin Douglas and his steer (and showmanship buckle!)

How your kids can get started

Getting into the program is simple! There are offices you can call to get involved in, and even as an adult you can sign up as a volunteer. If you have several children interested, you can sign up as a family group. There are so many different resources and clinics that help you become involved and learn more about your livestock and the proper ways to show and train your livestock.

If you are in Weber County, reach out to Alicia’s office at 801-399-8206 or WeberCounty4-H.org to get your son or daughter involved. You can also find Utah State University Extension on Facebook!

Weber County Junior Livestoc 4-H and FFA Youth need YOU!

How to shape a Palm Leaf Cowboy Hat

3 Ways to Shape a Palm Leaf Hat

- posted by Rose Marion

Need some shade at the rodeo or playing after work? Our Western guy Marty can show you how to shape a palm leaf hat today in a Gus, Brick Top, & Buckaroo style.

He shapes these cowboy hats here at the store with a steamer, and you can shape yours with just a bucket of water at home – watch how!

Cowboy Hat Styles

In the Buckaroo style, you’ll have a smooth bowl-shaped indent in the crown, round all the way around. Use a bowl or a ball to get this shape. Then you can raise the middle of the indent over another round shape, like a smaller ball, from the inside. You can also shape a nice lip in the top of the crown. The Buckaroo typically has a pretty flat brim, too.

This is the style of hat that Tom wore for his Trek outfit – he shaped it himself!

A Brick Top hat means you have four corners in the brim of the hat, and an even indent.
Buckaroo, Brick Top, and Gus styles you can shape your next hat with!
The most common styles of hat Marty sees is a Cattleman’s crown and a Gus. The Cattleman is like the hat Marty’s wearing: two dents running from front to back. The Gus is just like the Cattleman’s, but the dents are only in the front of the hat.

How to Shape Your Hat at Home

To do this at home, fill a bucket with water. You can use cold water and let it soak a while, or lukewarm will speed it up a bit.

Start with the crown and use your fingers and thumbs to start the shape.

Move to the brim and shape your brim.

Now let it dry. You’re all done!

Get a Hat of your Own

Get your own palm leaf hat from Smith & Edwards! We carry a HUGE selection of Sunbody hats, which is our favorite brand of palm leaf hat. These hats are Guatemalan-made and hold their shape nice after you shape them. They come in lots of adult sizes as well as kids’ sizes.

Get your own Sunbody hat at Smith & Edwards!

Come in to Smith & Edwards in Farr West and we’ll shape one up for you, too!

The Tradition of Ogden Pioneer Days

- posted by Regan Taylor

Utah’s founding is a story of 148 pioneers trekking over 1,000 miles across the country and finally arriving to the Salt Lake Valley on July 24th, 1847. By 1869, some 70,000 or so more pioneers made this long, strenuous trip to our beautiful state of Utah.

In the summer of 1934, Mayor Harmon W. Peery started what’s known as “Ogden Pioneer Days”. This was how he wanted to celebrate and remember Utah’s pioneer ancestors and heritage.

The Ogden Pioneer Days has definitely been a tradition that has stuck; every year, the Ogden Pioneer Stadium puts on a rodeo and other special events, such as a parade and western festival, that attracts many people. Today, it’s known to be among the top 5 best large outdoor rodeos by the Professional Rodeo Cowboy’s Association (PRCA).

Jim Smith And The Ogden Pioneer Days

Jim Smith, son of Smith and Edwards Bert Smith, was President of Smith and Edwards since the 60’s, and an ardent supporter of the rodeo lifestyle. To understand Jim and Paula Smith’s total involvement with the Ogden Pioneer Days tradition, I talked with Jim’s close friend and Executive Administrator of Ogden Pioneer Days, Jackie Belnap.

Jim Smith

Jim Smith

Jackie recalled Jim becoming a part of the Ogden Pioneer Day’s Heritage Foundation Board some 10 or so years ago. But she says his active involvement really had been going on for somewhere between 35-45 years before. He was there to sponsor or support in ANY way he could.

Jackie said it was almost like every time the board thought to ask the Smith family for help, that they had already had it in their minds to help anyway. In other words, he didn’t have to be asked; Jim jumped in with both feet because of the passion he had for the Ogden Pioneer Days and community. And Paula was always right there with him, supporting in anyway she could too.

One moment that stood out to Jackie was when Ogden Pioneer Days had their volunteer appreciation party. Jackie had asked if Jim would be willing to give out a couple free gifts to some of these volunteers for their involvement and help with the Ogden Pioneer Days activities. Expecting just a couple free gifts, like they had agreed to, Jackie was stunned when she came to Smith and Edwards to pick them up. Jim had filled up an entire pick-up truck full of gifts for these volunteers who had taken time out of their day to help out. All 300 volunteers received a gift that night.

Of course, he did more than just support financially. Jim did all he could because he truly cared about all these people and what the Ogden Pioneer Days stands for. Jackie told me: “We would sometimes refer to him as our water boy. He was always making sure the cowboys had their cold water ready and that the coolers were always filled. There was literally no end to his support.”
Paula and Tenlee Smith

“Dad and Mom enjoy rodeo and the lifestyle. Dad competed in rodeo when he was younger and they raised all of us kids to love it too. Dad enjoyed his involvement with Ogden Pioneer Days. One of his main concerns was making sure the needs of the contestants were met. Mom has also helped out by volunteering in the contestant hospitality tent. She has always been everyone’s mom. This time of year the rodeo athletes spend a lot of time on the road. Its nice for them to feel like they have a place where they can refuel and recharge.

Dad always believed fully in giving back to the community and service. The Ogden Pioneer Heritage Foundation is one of the many boards he served on. He always felt like the store (Smith and Edwards) was blessed and that we are lucky to have the success that we do. It was his way of giving back. They are a great example of service before self.” -Misti Kosoff, daughter of Jim and Paula Smith

Jim Smith passed away in March, 2013. But his presence and support for our community is still deeply rooted. After he passed, the Jim Smith Memorial Scholarship was created. This is a $1,000 scholarship for high school seniors involved with rodeo, 4-H or FFA. All around Ogden at special rodeo events or fairs, you’re more than likely going to see a Smith and Edwards sponsor sign.

There was no limit to how much support Jim and Paula had for our community. This year, Jim and Paula Smith are being honored as Grand Marshalls for the Ogden Pioneer Days 2015 celebration. To learn more click here.

Grand Marshalls of 2015 Horse n Hitch Parade

Paula and the Smith family ride as Grand Marshalls in the Horse N Hitch parade on Washington

If you’ve thought about going but have never lived the crazy fun of the Ogden Pioneer Days, I highly recommend you try it this year. The events have been going on for about a week or so, but there’s still time to get in on all the action!

Events You Don’t Want To Miss

July 19th, at Ogden Pioneer Stadium at 8 a.m.:

  • Slack Breakfast and Timed Slack Event.

July 20th at Golden Spike Arena at 2 p.m.:

  • Miss Rodeo Utah Horsemanship Competition: Come out and support your favorite rodeo gal!

July 20th, at Ogden Pioneer Stadium at 6:30:

  • Pre-Rodeo and PRCA Rodeo: “Standard Examiner Family Night”.

July 21st, at Ogden Pioneer Stadium at 6:30:

  • Pre-Rodeo and PRCA Rodeo: “Patriot Night”.

July 22nd, at Ogden Pioneer Stadium at 6:30:

  • Pre-Rodeo and PRCA Rodeo: “National Day of American Cowboy” theme.

July 23rd, at Ogden Pioneer Stadium at 6:30:

  • Pre-Rodeo and PRCA Rodeo: “Tough enough to wear pink” night. Come at 6 p.m. to check out the Miss Rodeo Utah Freestyle Horsemanship Competition.

July 24th, THE BIG DAY!!

  • 9 a.m. on Washington Boulevard: Kick off the 24th of July with a Parade down the streets of Ogden. 20th street to 30th street.
  • 6 p.m.: Pre-Rodeo
  • 7:30 p.m.: PRCA Rodeo
  • 8:30 p.m.: Coronation of 2015 Miss Rodeo Utah
  • After the Miss Rodeo Utah is crowned, don’t forget to stay and watch the display of fireworks.

Pre-Rodeo Events Include:

  • Mutton Bustin’
  • Junior Posse Jamboree
  • Wild Cow Milking
  • Musical Chairs
  • Hide Racing

To get more details on registration and each event, visit the Ogden Pioneer Days website by clicking here.

We’re a stop on the Charm Trail, get your Smith & Edwards star charm at our Western department counter!

kZMFiBHB5mUzni1xQg0b_ezKFeWHoIdB5Q0A_g93XdqB2t7L5JJzh86c2xgxNtq7IGo56FTpDb0Gs0Eo3JH9Z8rWXCSnmO1Ts0yVGzoqSNApPaD_uhYDwxyTpIhSbcelKOpmat0VnMIFK7O7llCynw=s0-d-e1-ft

Smith & Edwards Wrangler Rebates for Ogden Pioneer Days